10
The Eyezone P070-5TL supports up to 9 division buttons and 29 patterns.
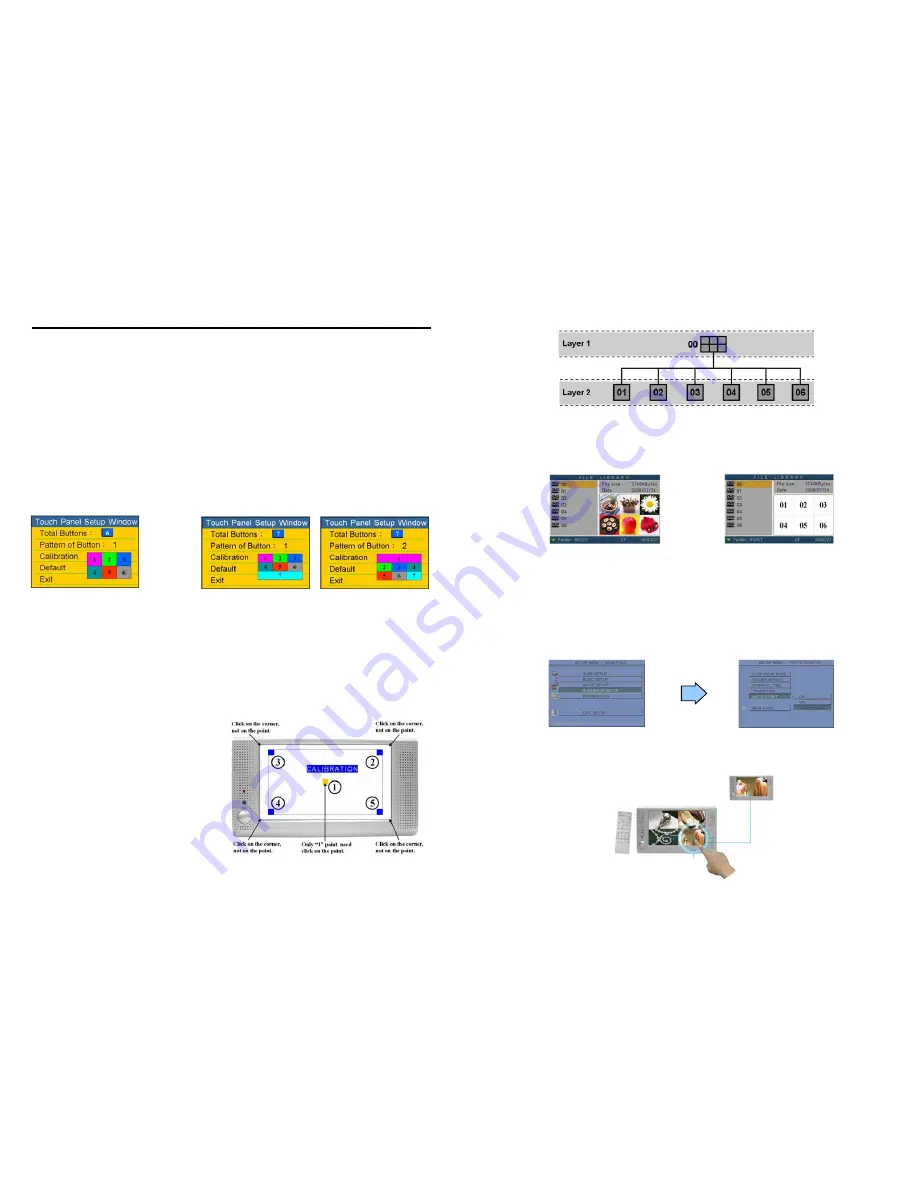
8.1 TOUCH PANEL SETUP WINDOW
Press the “CARD SELECTION” button on remote control to open the “Touch Panel Setup
Window”.
Total Buttons:
To set the quantity of division buttons ( 1
~
9 ).
Pattern of Button:
To set the arranged mode of division buttons. Use the
◄
、
►
buttons to
select the arranged mode, and the small window of arranged mode will be changed.
Calibration:
To adjust the coordinate of the touch screen.
Default:
Reset to the original (factory) setting.
Exit:
To quit the “Touch Panel Setup Window”.
6 Division Buttons Version 7 Division Buttons Version (different arranged mode)
8.2 SCREEN CALIBRATION
NOTE
:
The device has already been calibrated from the factory. Calibration only needed to be
performed if the screen inaccuracy is noticed.
Step 1
:
Press the “CARD SELECTION” button on remote control, and select the item “Calibration”
and press “ENTER” button to open the “CALIBRATION” window.
Step 2
:
There are five calibration points
displayed, touch (click) and hold on the center
of calibration point “1” or the corner of the
display area (calibration points “2
~
5”) until
the next calibration point changes the color
from blue to yellow.
Step 3
:
Finish the calibration steps from point
“1
~
5” twice, then the “CALIBRATION OK”
will appear on the screen. The calibration
window will now exit.
8. TOUCH SCREEN FUNCTION
11
8.3 SETTINGS REFERENCE
(Ex. 6 Division Buttons Version)
Step 1:
Create a default file which show the 6 division buttons (layer 1), and name the file
“00_xxx.xxx”.
Step 2:
Create 6 demo files which show the 1 division button (layer 2), and name the files
“01
_
xxx.xxx” ~ “06
_
xxx.xxx”. (The file 01
~
06 will be arranged in the order as shown below.)
Step 3:
Copy all the files (include 1 default file and 6 demo files) to the memory card.
Step 4:
Press the “CARD SELECTION” button to open the “Touch Panel Setup Window”, and
select 6 division buttons. Select the “Exit” item, and press the “ENTER” button on the remote
control to quit the window.
8.4 PLAY A FILE ON THE TOUCH SCREEN
Make sure the “TOUCH PANEL” function is enabled first.
“SLIDESHOW SETUP”
→
“AUTO START”
→
“TOUCH PANEL”
Play File
:
Touch the button area to play the corresponding file.
Stop File
:
Touch the screen anywhere to stop the playing file. The P070-5TL will play the
default file (00) automatically..


