22
Step 11: Select the file you want to play, and press “ENTER” or “PLAY” button on the remote control to
play the file.
NOTE: If the media files shared from PC are not listed on screen, restart your PC.
8.4 DOWNLOAD / UPLOAD MEDIA FILES
Method 1: Connect by IE Browser
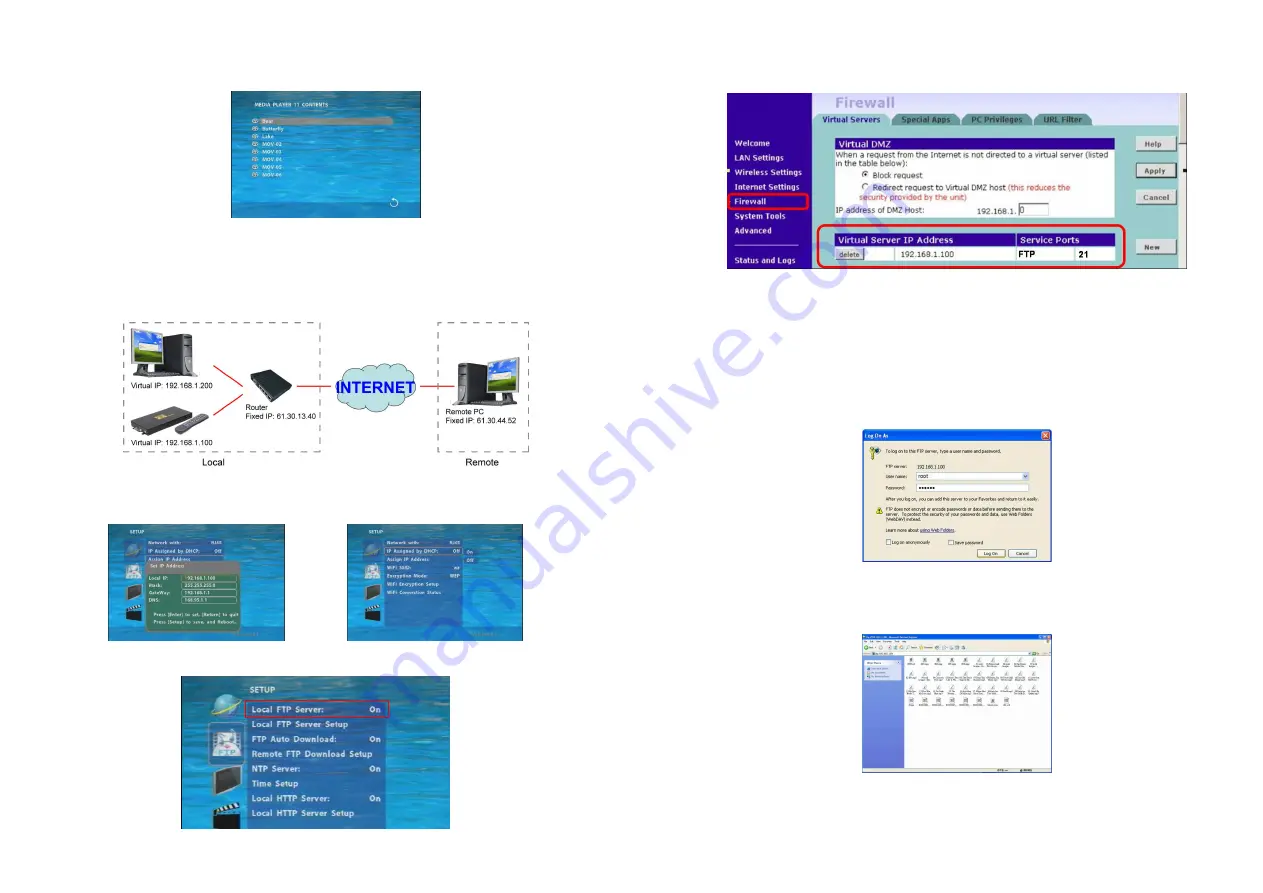
Step 1: Confirm the “IP Assigned by DHCP” has been disabled, then enter the “Network Setup” item,
and type IP Address (example. 192.168.1.100), Mask and Gateway for the B1080P-6 (refer to 7.1).
Step 2: Confirm the “Local FTP Server” function has been enabled (refer to 7.1).
23
Step 3: Please setup your router or firewall, and open a port 21 for the Eyezone B1080P-6. The
following figure is an example, please refer to your user’s manual of router for opening ports.
Step 4: Start IE on PC and type the FTP site or IP:
In the local PC, please type “ftp://192.168.1.100”.
In the remote PC, please type “ftp://61.30.13.40:21”.
Step 5: Then type the “User Name” and “Password” and click “Log On” to log on to the Eyezone
B1080P-6 Server. (Default User Name: root Default Password: admin)
Step 6: After logging on, all the media files in the CF card on the Eyezone B1080P-6 will be listed. You
can download and upload the media files between CF card and your PC.
NOTE: After file being download/ upload will stop playing. After downloading files, the Eyezone
B1080P-6 will display the movie files automatically.


