


Quick Operation Guide of Network Video Recorder
Menu Operation
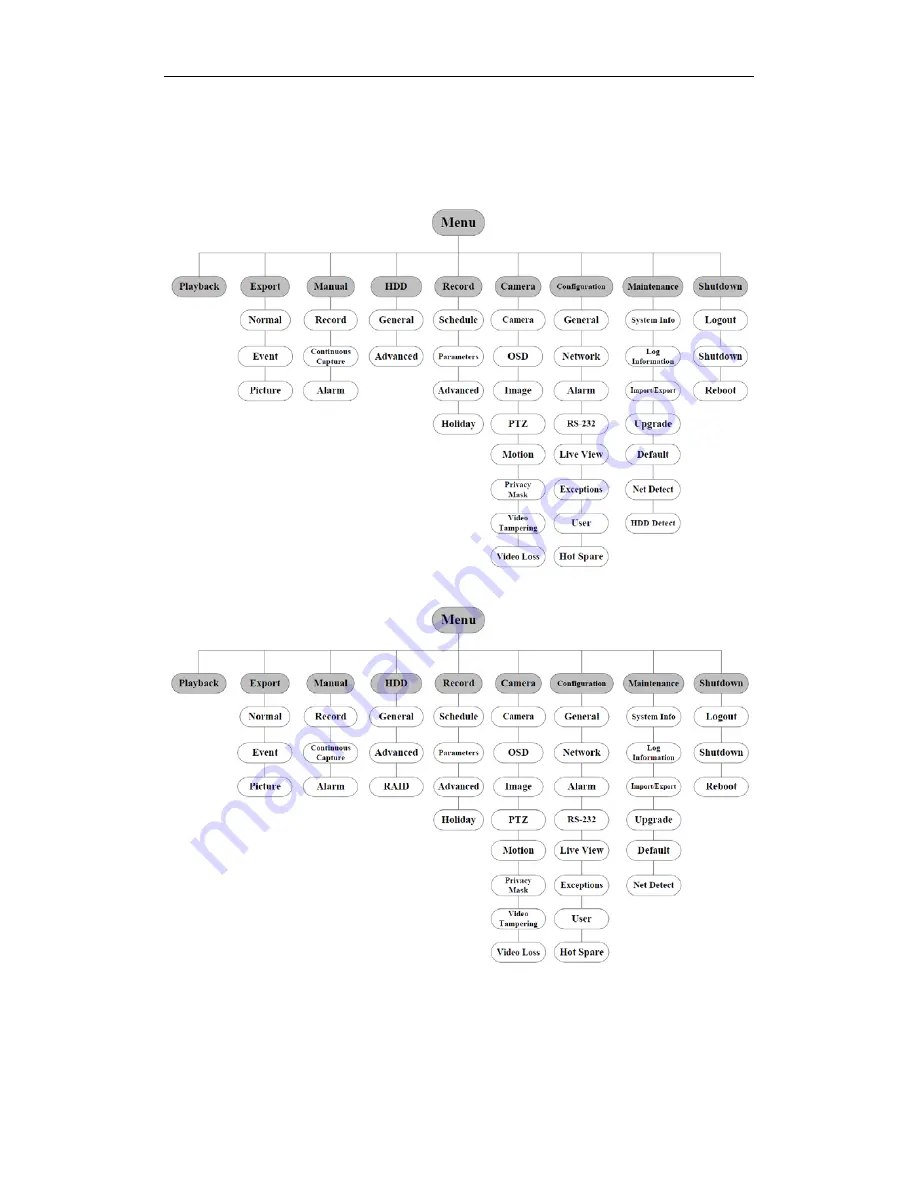
Menu Structure
The menu structure of the HNR50P6 Series NVR:
The menu structure of the HNRT00 Series NVR:
Startup and Shutdown
Proper startup and shutdown procedures are crucial to expanding the life of the NVR.
To start your NVR:
1.
Check the power supply is plugged into an electrical outlet. It is HIGHLY recommended that an
23


