U
SER
’
S
M
ANUAL
H.264
R
EAL
T
IME
DVR
14
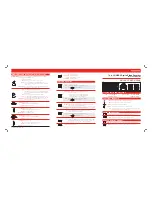
⑦
Tighten the screws with HDD and main unit.
⑧
Close the top cover and assemble with screw.
B.
Hard disk replacement
First turn of the power of the device and then unplug the power.
①
Loosen the screw on the left, right and rear side of the product.
②
Separate the cover of the main unit.
③
After removing all of power/SATA cable connected to hard disk, please
separate hard disk from the body.
④
In the reverse order of removing the hard disk, assemble the new hard disk.
⑤
After replacing the hard disk, turn on the power of the device.
⑥
Reference
-
Each SATA cable must be connected to the connecting port precisely.
-
Do not vertically put the hard disk in upright position or put other objects on
top of the hard disk.
-
When connecting/disconnecting the hard disk, do not use a motored tool.
-
Refer to the following when adding/replacing the hard disk.