ShareLink Pro 500 • Installation
4
Installation
This section covers the following:
•
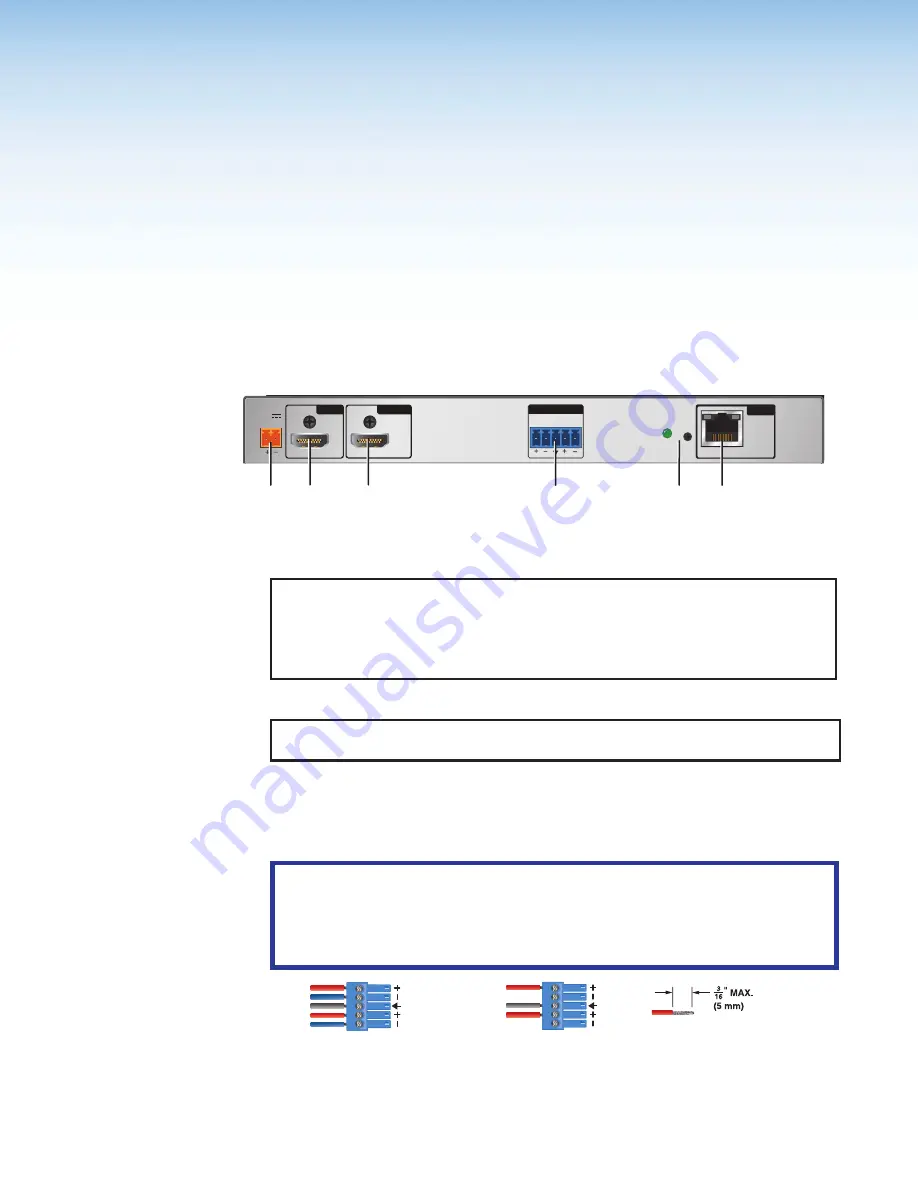
Rear Panel Features and Cabling
•
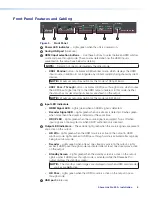
Front Panel Features and Cabling
•
Rear Panel Features and Cabling
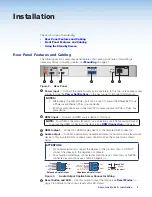
The following section covers rear panel features and cabling procedures. If mounting is
necessary before connecting cables, see
on page 47.
RESET
PoE
POWER
12V
1.7A MAX
HDMI
HDMI
L
AUDIO
R
OUTPUT
LAN
INPUT
OUTPUT
+
A
A
B
B
C
C
D
D
E
E
F
F
Figure 2.
Rear Panel
A
Power input
— Connect the power supply (sold separately) to this two-pole captive screw
on the next page for important information).
NOTES:
•
Alternatively, the LAN A/PoE+ port can be used to power the ShareLink Pro via
a Power over Ethernet (PoE+) source device.
•
If both power options are connected (12 V power supply and PoE+), PoE+ has
precedence.
B
HDMI input
— Connect an HDMI source device to this input.
NOTE:
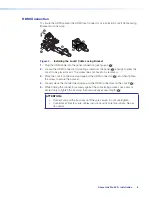
For HDMI connections (B and C), use an Extron LockIt Cable Lacing Bracket
to secure the HDMI connector to the device (see
on page 6).
C
HDMI output
— Connect an HDMI display device to this female HDMI connector.
D
Audio output
— Connect a balanced or unbalanced stereo (or dual mono) line level audio
device to this 5-pole 3.5 mm captive screw connector. Wire the connector as shown
below.
ATTENTION:
•
For unbalanced audio, connect the sleeves to the ground contact. DO NOT
connect the sleeves to the negative (–) contacts.
•
Pour l’audio asymétrique, connectez les manchons au contact au sol. Ne PAS
connecter les manchons aux contacts négatifs (–).
Balanced Audio Output
Unbalanced Audio Output
Do not tin the wires!
Left
Tip
Sleeve(s)
NO Ground Here
NO Ground Here
Tip
Right
Tip
Sleeve(s)
Ring
Ring
Tip
Left
Right
Figure 3.
Audio Output Captive Screw Connector Wiring
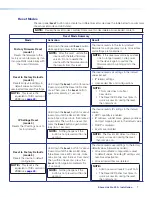
E
Reset button and LED
— Use this button to reset the device (see
page 7 for details on the various resets and LED states).
Содержание ShareLink Pro 500
Страница 2: ......
Страница 7: ...ShareLink Pro 500 Contents vii...


