4
Retractor SM • Installation Guide (Continued)
Installation
CAUTION:
•
Do not operate a Retractor until it is installed.
•
Retraction should be a slow, controlled motion.
•
Keep hands away from moving parts.
ATTENTION :
•
Ne vous servez pas d’un rétracteur avant qu’il soit
installé.
•
La rétraction doit être un mouvement lent et contrôlé.
•
N’approchez pas vos mains des parties en
mouvement.
The enclosure must be installed and properly configured before
beginning the retraction system installation.
1.
Follow the enclosure installation instructions for new
installations or prepare an existing enclosure installation to
mount the Retractor modules.
2.
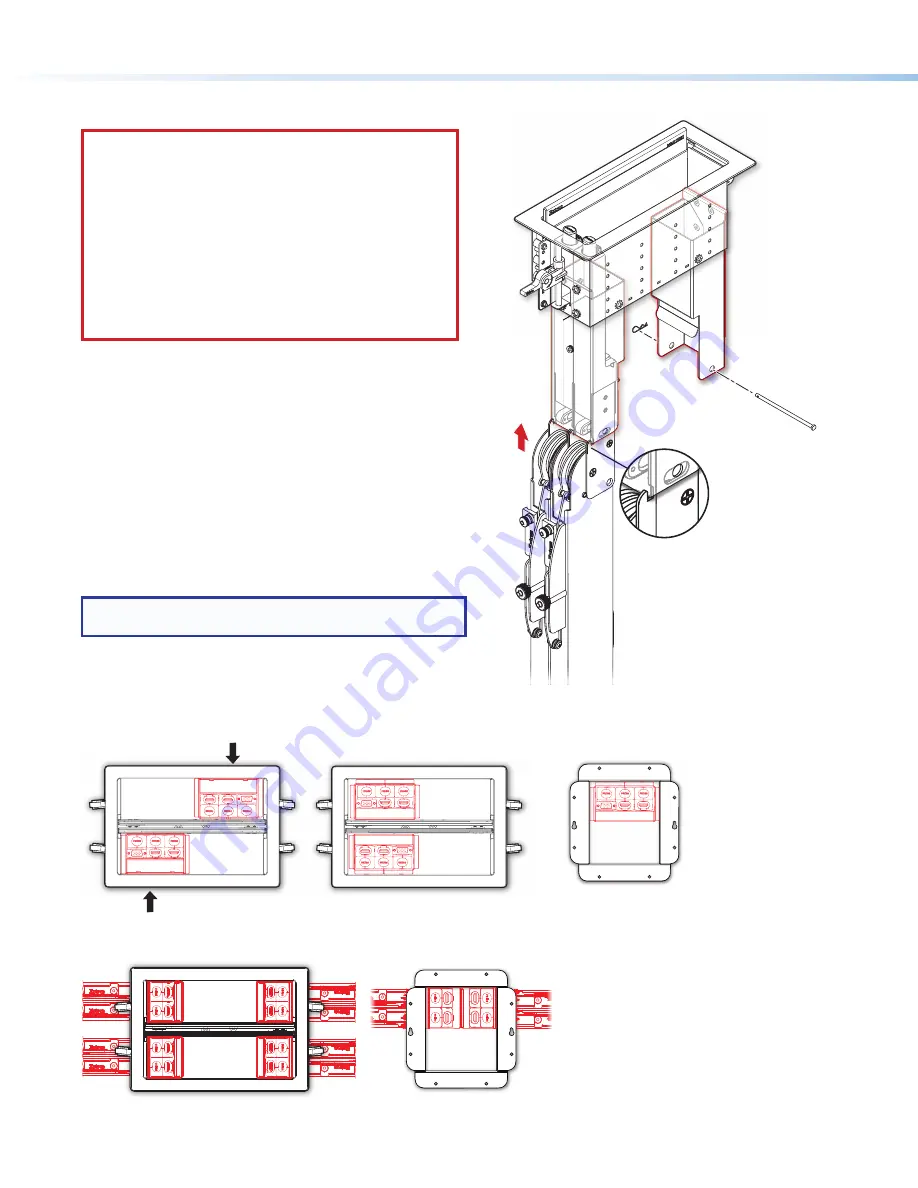
Follow the Retractor mounting instructions in the
Retractor
SM User Guide
and the individual installation guides for
each mounting bracket (see an example installation at right).
3.
Connect retraction system cables and other cables
(if installed).
4.
When the Retractor module is installed, proceed to
Locking
Screw
on the next page for final installation details.
NOTE:
Example installation shown with optional Cable
Cubby 1202 enclosure.
Cable Cubby Installation
Retractor SM modules can be mounted in the Cable Cubby enclosure using the Retractor SM Triple Brackets.
User Access
Cable Cubby 1402
User Access
Cable Cubby 650 UT
Retractor SM modules can be installed using the Retractor SM Quad Brackets.
Cable Cubby 650UT
Cable Cubby 1402
Pin
(x 2)
Clip
(x 2)
1
Cable Cubby 1202
Enclosure
Quad
Bracket
Raise the modules
into the bracket.
Ensure module is flush
against bracket with
notch on outside wall.
2
Secure the modules
with the included
mounting pin and clip.


