39
38
EN
EN
Using the vacuum cleaner
y
The vacuum cleaner is intended for vacuuming only dry
material.
y
Do not vacuum hot particles with the vacuum cleaner,
they would damage the plastic dust container.
y
Do not use the vacuum cleaner for vacuuming soot or
ash from fireplaces, wood stoves and boilers (use a ash/
soot vacuum cleaner).
1. Insert the battery into the appropriate location as
shown in fig. 1, position 6 so that an audible click-in
of the battery is heard in the given location.
2. Insert the vacuum attachment into the air inlet (fig. 1,
position 1).
3. Set the power switch (fig. 1, position 4) to start the
vacuum cleaner.
•
ATTENTION
y
Avoid using the vacuum cleaner without air flowing
through the vacuum cleaner (e.g. when the air inlet
is blocked or when the HEPA filter is heavily clogged
or when the dust container is full). Air flow cools the
motor and a clogged filter causes the battery to dis-
charge faster due to a greater motor power draw
y
Do not operate the vacuum cleaner without the HEPA
filter. The HEPA filter captures dust particles, which
would otherwise enter the inner parts of the vacuum
cleaner and could damage it.
INFORMATION ABOUT THE BATTERY
The battery is equipped with electronic
protection against full discharge, which
damages it, and thereby extends its lifespan.
This protection manifests its self by the vacuum cleaner
coming to a sudden stop even when the power switch is in
the „On“ position. After setting the power switch to the
„Off“ position and then turning it on again, after a certain
time it will start up again, however, it will again stop
suddenly. This is not a fault of the power tool or battery.
When longer operation is required, a battery with a grea-
ter capacity is required.
VI. Emptying the
dust container
y
Remove the dust container as shown in fig. 2A and take
the filter with the plastic partition out of the container
as shown in fig. 2B.
y
Rotate the mesh filter with the inserted HEPA filter so
that it separates from the plastic partition (fig. 2C).
Empty out the dust container.
y
Take the HEPA filter out of the mesh filter and remove
accumulated dust by tapping it. Avoid inhaling the
dust, dust is damaging to health. The HEPA filter can be
washed using a current of flowing water and if necessa-
ry it can be submerged several times in a container with
water. Before inserting the dust container, allow it to
dry thoroughly at room temperature.
In the event of heavy clogging of the HEPA filter or its damage,
replace it with a new original one (part. no: 8891872A; 2 pcs).
VII. Safety instructions
for the charger and battery
y
Read the user‘s manual before charging.
y
The charger is intended only for charging indo-
ors. It is necessary to protect it against rain,
high humidity and temperatures over 40°C.
y
The charger is only intended for charging batteries from
the SHARE 20 V product line and must not be used for
charging other batteries or other purposes.
y
Prevent the charger from being used by persons (inclu-
ding children) whose physical, sensory or mental disabi-
lity or incapacity or insufficient experience or knowledge
prevents them from safely using the appliance without
supervision or instruction. Children must not play with
the device. It is generally not assumed that the charger
will be used by very small children (age 0-3 years inclu-
sive) and used by small children without supervision
(age between 3 and 8 years). It is conceded that seriously
handicapped persons may have needs outside the level
specified by norms EN 60335-1 and EN 60335-2-29.
y
When charging, provide for ventilation since fumes may
be released if the battery of the compressor is damaged
as a result of incorrect handling (e.g. as a result of being
dropped).
it off immediately in the event of a dangerous situation
arising. Before using, first check that all parts are firmly
attached and check that no part of the power tool, such
as for example safety protective elements, is damaged
or incorrectly installed, or missing. Likewise, check the
protective cover and DC connectors of the battery and
the charger, and also check that the power cord or plug
of the charger is not damaged. Do not use the cordless
vacuum cleaner, battery, charger with damaged or
missing parts and have this repaired or replaced at an
authorised service centre for the Extol® brand - see
chapter Servicing and maintenance, or the website
address at the introduction to this user‘s manual.
IV. Charging the battery
y
To check the battery power level, press the button on
the battery and based on the number of lit diodes and
the expected duration of operation of the cordless
vacuum cleaner, charge the battery if necessary. If the
battery is fully charged, all the LED diodes are lit. The
battery can be charged from any charge level without
reducing its capacity.
•
ATTENTION
y
Only the batteries specified in table 1 may be used for
powering the vacuum cleaner and they may only be
charged using the specified charger. Using different
chargers could result in a fire or explosion as a result of
inappropriate charging parameters.
•
ATTENTION
y
Charge the battery at an ambient temperature range
of 10°C-40°C.
a) First insert the battery into the grooves of the
supplied charger.
b) Before connecting the charger to the power sour
-
ce, check that the voltage in the power socket
corresponds to the range 220-240~50 Hz and that
the charger does not have a damaged power cord
(e.g. insulation), cover, charger connectors, etc.
Likewise, check the condition of the battery.
•
WARNING
y
If the charger or battery is damaged, do not use
it and have it replaced with an original in perfect
working order from the manufacturer.
c) Connect the charger to an el. power source.
y
On charger
Extol® Premium 8891893
(model
with a charging current of 2.4 A), the charging
process is indicated by a green flashing diode with
a red lit diode, whilst a fully charged battery is indi-
cated by only a green lit indicator light.
On charger
Extol® Premium 8891892
(model with
a charging current of 4 A) the charging process is indi-
cated only by a red lit LED indicator light and the fully
charged process by only a green lit LED indicator light.
The battery charge level can be seen by the number of
lit LED indicator lights on the battery, which are lit while
the battery is charging. The manufacturer reserves the
right to change the above-described indication of the
charging process / charged state with respect to the
possible changes in the manufacturing process.
y
The charger will automatically stop charging when the
battery is fully charged. Battery overcharging cannot occur.
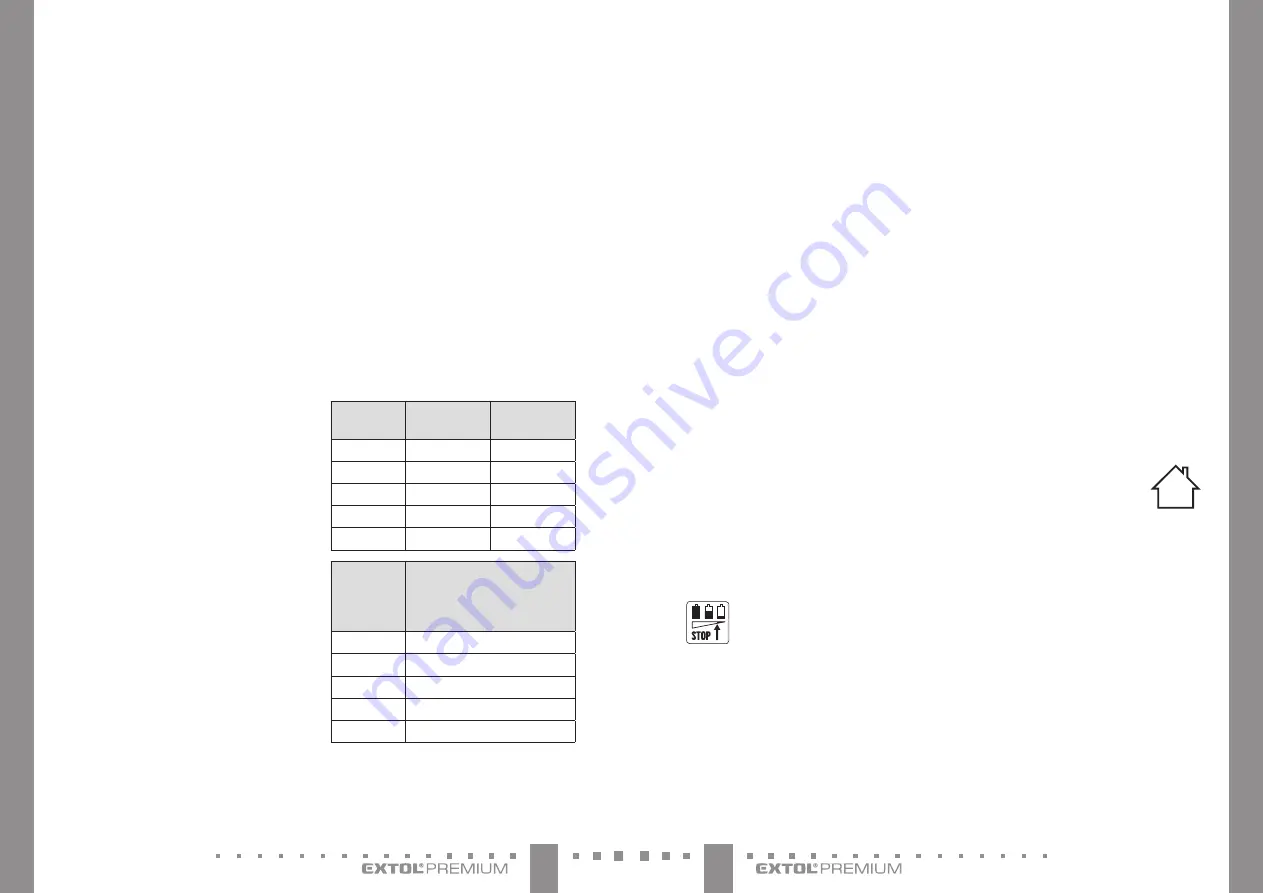
APPROXIMATE BATTERY CHARGING TIMES
Battery
SHARE 20 V
4 A charger
Extol® 8891892
2.4 A charger
Extol® 8891893
8 000
mAh
120 min.
200 min.
6 000
mAh
90 min.
150 min.
5 000
mAh
65 min.
110 min.
4 000
mAh
60 min.
100 min.
2 000
mAh
30 min.
50 min.
Battery
SHARE 20 V
2
×
3.5 A charger Extol® 8891894
(for 2 batteries)
4
×
3.5 A charger Extol® 8891895
(for 4 batteries)
8 000
mAh
140 min.
6 000
mAh
105 min.
5 000
mAh
70 min.
4 000
mAh
60 min.
2 000
mAh
35 min.
Table 2
d) After charging, first disconnect the charger
from the el. power source
and then, after pressing
and holding down the button on the battery, slide the
battery out of the grooves in the charger.


