


7
SDL350-en-GB_V1.5 6/16
RS-232/USB PC Interface
For streaming of data to a PC via the RS232 Output jack, the optional 407001-USB kit (RS232 to
USB cable and driver CD) along with the 407001 software (available free at
www.extech.com/sdl350
) are required.
Setup Mode
Basic settings at a glance
To view the current configuration of the meter with regard to time, date, thermocouple type and
datalogging sampling rate, press the SET/CLOCK ICON key momentarily. The meter will now
display the configuration in quick succession. Repeat as necessary to observe all of the information.
Accessing the Setup mode
1.
Press and hold the SET key for at least 1.5 seconds to access the Setup menu.
2.
Press the SET key momentarily to step through the available parameters. The parameter type
is shown on the bottom of the LCD and the current selection for that type is shown above it.
3.
When a parameter is displayed that is to be changed, use the arrow keys to change the
setting. Press the ENTER key to confirm a change.
4.
Press and hold the SET key for at least 1.5 seconds to exit the Setup mode. Note that the
meter automatically switches out of the Setup mode if no key is pressed in 7 seconds while in
the Setup mode.
5.
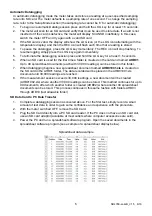
The available Setup parameters are listed below. Additional detailed information is provided
below this list:
dAtE
Set the clock time (Year/Month/Date; Hour/Minute/Second)
SP-t
Set the datalogger sampling rate (1 – 3600 Second)
PoFF
Automatic power-off management
bEEP
Set beeper sound ON/OFF
dEC
Set SD card Decimal character (comma for European format)
Sd F
SD memory card Format
t-CF
Select the Temperature unit of measure to
C
or
F
tYPE
Select the thermocouple type to
K
or
J
F-US/F-EU
Select
F-US
for CFM (cubic feet per minute) or
F-EU
for CMM (cubic meters
per minute) regarding Air Flow (Volume) measurements.
ArEA
For CFM/CMM Air Flow (Volume) measurements the user enters the area of
the duct or other air passageway in units of square feet or square meters.
Setting the Clock Time
1. Access
the
dAtE
parameter.
2.
Use the arrow keys to change a value.
3.
Use the ENTER button to step through the selections.
4.
Press and hold the SET button for at least 1.5 seconds to exit to the normal operation mode (or
simply wait 7 seconds for the meter to automatically switch to the normal operating mode).
5.
The clock will keep accurate time even when the meter is switched off. However, if the battery
expires the clock will have to be reset after fresh batteries are installed.