ENGLISH
GB-8
•
P
rotect the cooktop surface below with cardboard, or the like, to prevent damage
occurring whilst the cooker hood is being installed above.
•
Th
e manufacturer shall not be liable for failure to observe all safety regulations in
force for the correct and normal operation of electrical parts.
Installation:
E
nsure the power has been turned off before beginning this installation.
P
lug must
be assembled in places easy to drag and insert.
•
Th
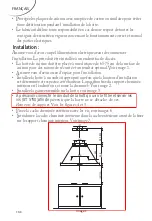
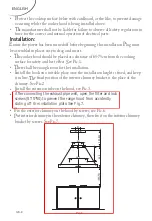
e cooker hood should be placed at a distance of 65-75cm from the cooking
surface for safety and best effect.
S
ee Pic.1.
•
Th
ere shall be enough room for the installation.
•
I
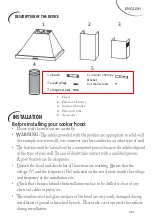
nstall the hook on a suitable place once the installation height is fixed, and keep
it in line.
Th
e fixed position of the interior chimney bracket is the place of the
chimney. See Pic.2.
•
I
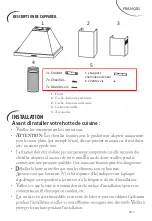
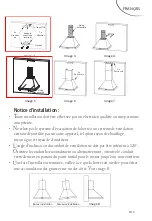
nstall the extension tube on the hood, see Pic.3.
•
•
F
ix the exterior chimney on the hood by screws, see Pic.6.
•
P
ut interior chimney in the exterior chimney, then fix it on the interior chimney
bracket by screws. See Pic.7.
Pic.1
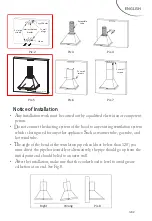
After connecting the exhaust pipe well, open the filter and lock
screws (ST5*50) to prevent the range hood from accidently
sliding off the installation plate.See Fig.7.
390-630
261
360
332
Содержание KH62.3INOX
Страница 1: ......
Страница 2: ......
Страница 3: ......
Страница 4: ......
Страница 5: ......
Страница 6: ...390 630 261 360 332 6 7 7 ...
Страница 8: ...Stop L Mid H g L Fig 7 ST5 50 ...
Страница 9: ...L L Mid H ...
Страница 10: ...L Min Digital Plus ...
Страница 11: ......
Страница 12: ...Ele ...
Страница 13: ...1 5W DC 12 V DSR 1 5 S 70 Ronde Diameter 70mm Maximaal vermogen Spanning Afbeelding Lampvoet ILCOS D code ...
Страница 39: ......
Страница 40: ......

