background image

LIGHT OPERATION & BATTERY LIFE

Located on the back of the light is the stainless steel Function Button and a single LED. The LED 

indicates both mode and battery life remaining.
To turn the light on press the function button twice in quick succession, the light will then turn on in 

the brightest mode.
To switch between high, medium and low modes press the function button once, repeat this 

process to cycle through the modes.
The LED on the back of the light will 

initially

 indicate the mode the light is in:


Green – High.
Amber – Medium.
Red – Low.

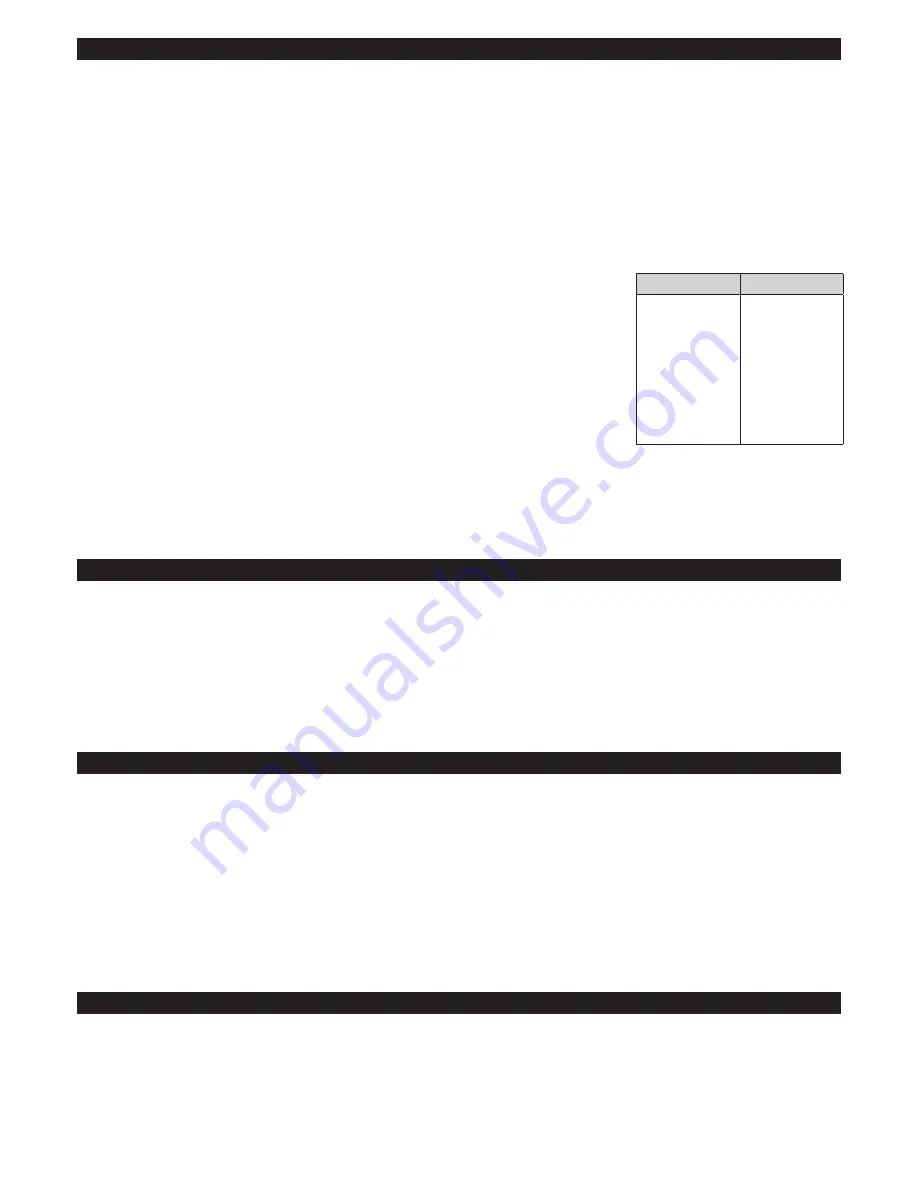
After three seconds the LED on the back of the light  

will indicate battery life remaining. See Fuel Guage table (right). 

To turn the light off hold the function button down until the light emits two flashes and then release.

NOTE:

 If you are using an Exposure Support Cell with the light then the LED will pulse green to 

indicate the light is charging.

DAYBRIGHT (SIRIUS ONLY)

LOW VOLTAGE FLASH

FLASH MODE

To warn the user when the light has 10% or less of battery life left the light will flash. It is then 

advisable, if it is safe to do so, to put the light in a lower setting to prolong battery life. See the OMS 

section for more detail.

NOTE:


The light will continue to give off these warning flashes, regardless of setting, until its 

battery is charged back above 10 %.

We recommend using your Sirius in DayBright mode during daylight hours for your safety.  

To activate DayBright your Sirius will need to be in Program 1 (see OMS section) and then activate 

Flash Mode. (see above)

To activate the Flash Mode first the light needs to be ON. Hold the Function button down and 

immediately release after the light emits a flash. The Flash mode can be activated from any of the 

constant brightness settings.
To return to the constant mode press the Function Button once. NB: The light will then return to the 

brightest setting.
In Program 7 the Flash Mode is replaced with the Morse Code for SOS. For more information about 

changing programs see the OMS section of this guide.

LED

BATTERY %

GREEN  

 100 – 85%

GREEN PULSE

85 – 70%  

AMBER

70 – 55%

AMBER PULSE

 55 – 40%

RED

 40 – 25%

RED PULSE

 25 – 10%

RED FLASH

10% – Empty 

Содержание DIABLO MK9

Страница 1: ...r USB supply respectively If you are using the Smart Charger the LED on the charger will go red for the first 95 and then go green for the trickle charge Sirius Fully insert the USB top up cable and begin charging from a USB supply On the back of the light there is a single LED which will flash green to indicate that it is charging and then turn solid green when the light is 95 charged then the re...

Страница 2: ... when the light has 10 or less of battery life left the light will flash It is then advisable if it is safe to do so to put the light in a lower setting to prolong battery life See the OMS section for more detail NOTE The light will continue to give off these warning flashes regardless of setting until its battery is charged back above 10 We recommend using your Sirius in DayBright mode during day...

Страница 3: ...one band fastens on the rear WARNING Ensure that brake and other cables do not catch on the light or its bracket Try the short bolt first if this isn t long enough use the longer bolt Do not over tighten NOTE The angle of the light can be adjusted by rotating and tilting the ball joint BAR Requires a 5mm hex key HELMET HELMET ...

Страница 4: ... light and the light itself will start to regularly flash For example if you want to put your light in Program 4 then you release the Function Button after the fourth flash The light will then remain in Program 4 regardless of if it is turned on or off until it is reprogrammed WARNING If looping around a handlebar be sure to do so enough times that the light cannot fall into the front wheel DIABLO...

Страница 5: ...t SPT is deactivated before charging NOTE We do not recommend charging devices whilst using your helmet light as the battery can drain considerably faster TAP allows the user to change the brightness mode of the light by tapping the body of the light rather than using the Function Button There are three sensitivities of TAP for user preference To activate TAP or to change the sensitivity of TAP yo...

Страница 6: ...turns number All our lights come with a 2 year warranty If you have a servicing or technical question you can contact us using the information below If you return your light for repair no work will be carried out until you have been contacted with the cost for the repair If you are outside of the UK it would be quicker in the first instance to contact the local distributor 44 0 1798 839300 service...

Отзывы: