

Default Setting
Default IP Address:192.168.2.127
Netmask: 255.255.255.0
Login: root
Password: root
Terminal type: VT100
Network Configuration
To configure the IP address, Netmask and Gateway setting, please modify
/disk/etc/rc
as following:
#Static IP
ifconfig eth0 192.168.2.127 netmask 255.255.255.0
For DHCP setting:
#DHCP
dhcpcd eth0 &
Wireless LAN Configuration
EX9486-L supports wireless LAN by using USB WLAN adaptor which
uses Ralink RT2570 controller. Please refer to the website
http://ralink.rapla.net for the supporting list of the USB WLAN adaptor. To
configure the wireless LAN setting, please use command:
modprobe rt2570
ifconfig wlan0 up
iwconfig wlan0 essid XXXX key YYYYYYYY mode MMMM
For infrastructure mode XXXX is the access point name and YYYYYYYY
is the encryption key and MMMM should be
managed
For Ad-Hoc mode mode XXXX is the EX9486-L device name and
YYYYYYYY is the encryption key MMMM should be
ad-hoc
. To
configure the IP address use command
dhcpcd wlan0 &
or
ifconfig wlan0 192.168.2.127 netmask 255.255.255.0
USB to Ethernet Configuration
To enable the USB to Ethernet Adaptor device driver, use command
modprobe rtl8150
ifconfig eth1 192.168.2.128 netmask 255.255.255.0
Install GNU Tool Chain
Find a PC with Linux 2.6.X Kernel installed and login as a
root
user then
copy the arm-linux-3.3.2.tar.gz to root directory \ of PC. Under \ directory
type following command to install the EX9486-L Tool Chain
#tar zxvf arm-linux-3.3.2.tar.gz
I/O Devices Control
EX9486-L uses standard I/O device control to access following devices:
1. Ethernet:
eth0
2.
Serial Ports: ttyS1, ttyS2, ttyS3,ttyS4
3.
Serial Console Port: ttyS0
4.
Real time clock: rtc
5.
USB Flash Disk: sda, sda1, sdb, sdb1
6.
SD memory Card: mmc0
7.
USB WLAN dongle: wlan0
8.
USB Serial Cable: ttyUSB0, ttyUSB1
Remark: Remember to include the “ex9486.h” header file in your program.
Please refer to the example program included in the EX9486-L SDK CD to
demo the RS-232/422/485 mode configuration of serial port
1
configuration.
File System
EX9486-L uses jffs2 file system for the built-in flash memory disk. The directory
are:
/disk
/home
/etc
Write data to these directories are saved to flash memory and will not be erased
after power off.
Mount External Disk
To mount the USB Flash Disk and SD memory card, use following commands
after the disk are installed properly. To mount USB disk
mount /mnt/sda
or
mount /mnt/sda1
or
mount /mnt/sdb
or
mount /mnt/sdb1
To find out the device name of the USB disk, you can use
dmesg | grep sd
And to mount SD memory card
mount /mnt/mmc
Web Page Directory
The web pages are placed at /home/httpd and the boa.conf contains the boa web
server settings. The home page name should be
index.html
Welcome Message
The welcome message “TopSCCC” can be modified by editing the
/etc/motd
file.
Manager Utility Software
The Manager Utility software,
manager.jar
is a java program and is used to
discovered the EX9486-L in the network if the IP address is forgotten. It can be
run at any OS where java run time is available. To install the java run time
platform at your computer, please visit
http://java.sun.com
and download the
Java 2 Standard Edition (J2SE). Once the EX9486-L is found, you can click the
Telnet Console to configure the EX9486-L
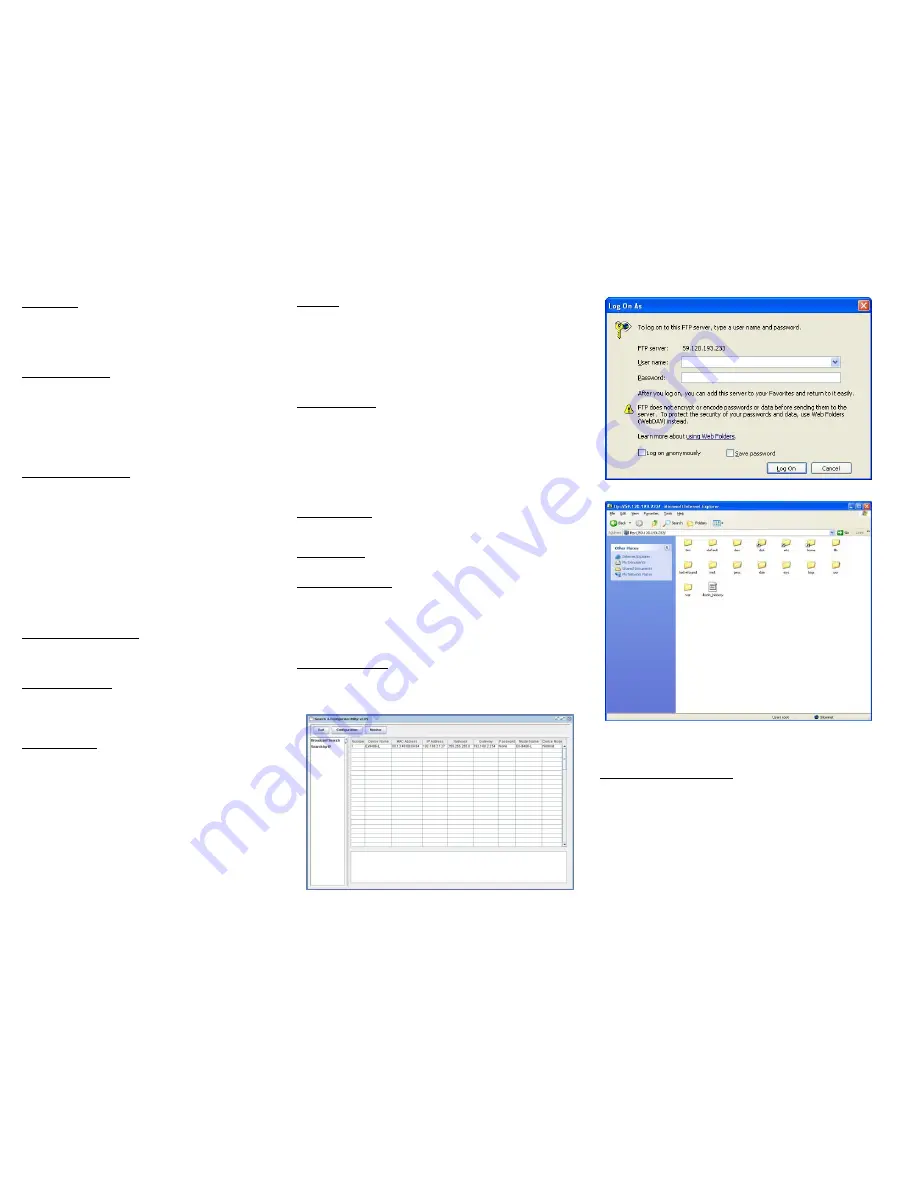
Upload file to EX9486-L
To upload the file to EX9486-L, you can use FTP command in command line or
Web Browser such as Microsoft Internet Explorer. Type
ftp://192.168.2.127
And
under the file menu, click log on option to login EX9486-L. After login, you can
see the files system of EX9486-L.
Compile and upload the C program
Use following command of the GNU cross compiler to compile the C program
#arm-linux-gcc –o hello hello.c
Then upload the
hello
to EX9486-L. Remember to change the mode of the file
After upload to EX9486-L by
chmod +x hello


