EXO Visual Inc
+1 833 733 7427 V3.1
www.exovisual.com
3, Control of the ezPoster.
3.1.
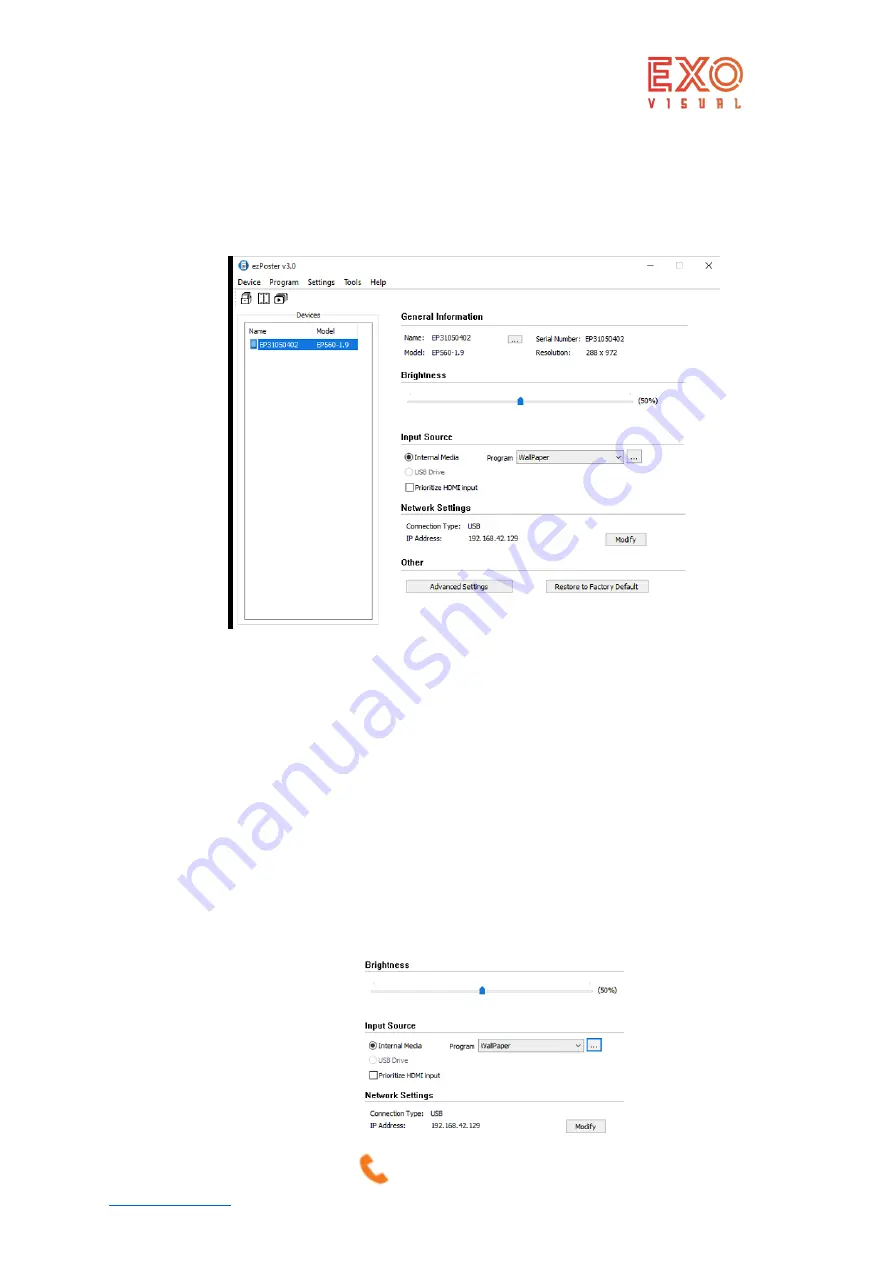
Control ezPoster from the windows laptop.
3.1.1, Download the software from https://www.exovisual.com/support/ and open the software.
Connect the ezPoster with USB Type A - Type B cable or through other connection method. The connected
EXO ezPosters will show up in the Devices list.
3.1.2, Change the name of ezPoster:
name of the ezPoster can be changed under General
Information/Name if needed.
3.1.3, Input Source
: 3 input options available from the dropdown list.
•
Check internal Media to upload content from laptop.
•
By plugging a USB drive directly onto the ezPoster, the photo or video content
exported to the USB drive from the software previously will be displayed
automatically.
•
Check HDMI to stream to the ezPoster.
3.1.4, Change program
, click program, select from the dropdown list,
Add new program:
click “…”, then click “add new” and follow steps in the software to add a
program.
Target device is the ezPoster model. Once target device is selected, its resolution will be
shown in the Width (xxx) Height(xxx) section. By default, the content will be applied to 1
ezPoster. Select more than 1 ezPoster wide from the width dropdown list to apply the
program to a wider screen when needed. Click “+”and follow software guide to load
picture/video from your computer. All programs uploaded will be saved in the software
under the programs list.


