background image

ThE 2-WAy COnTROLLER

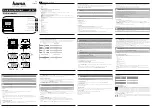
Controller & Transmitter Overview

Controller part number: 

159-03 (w/ 2 CR2032 batteries)

Call your dealer or visit www.caralarm.com to order 

replacement transmitters.

Transmitter part number:


1411-03E (w/ 2 CR2016 batteries)

Call your dealer or visit www.caralarm.com to order 

replacement transmitters.

Transmitter battery replacement:

Remove the small screw from the  lower 

back case, and separate the transmitter 

halves Replace the battery with the same 

type and reassemble the transmitter case

ThE 1-WAy TRAnSmiTTER

LOCK / ARm: 

 Press and release the “LOCK” button

• 

THE SIREN WILL CHIRP & THE PARKING LIGHTS WILL 

FLASH ONCE

• 

UPON RECEIVING CONFIRMATION FROM YOUR SYS-

TEM, THE CONTROLLER WILL SHOW THE LOCK/ARM 

ICON AND BEEP ONCE

nOTE: PRESSinG LOCK TWiCE in 5 SECOnDS  STARTS 

ThE PARKinG TimER. ThE CLOCK WiLL ChAnGE TO 

0:00 AnD START COunTinG in minuTES & hOuRS.

Controller & Transmitter Functions

Controller battery replacement:

Slide the back cover (do not pry up) off 

the back of the case in the direction of the 

arrow Release the small black battery 

clips and pull up on the battery from the 

inside edge (closest to the other battery) 

Sometimes a small tool or the edge of 

the back cover is helpful in gently prying 

up the batteries Insert the new batteries, 

making sure to insert the edge beneath the 

“+” terminal fi rst. Slide the back cover back 

onto the case

lock

button

start

button

unlock

button

trunk

button

start

button

unlock

button

trunk

button

programming

button

lock

button

3

Содержание AL-1860-EDPB

Страница 1: ...AL 1860 EDPB Deluxe 2 way Alarm Remote Start w BLADE Technology July 8 2013 Operation Guide Temporary cover Color cover is in a separate file 1 ...

Страница 2: ...stem Triggers 9 Using The Valet Switch 10 Emergency Override 10 Valet Mode 10 SecureCode 10 The Status Light 11 Multi Car Operation 12 Selecting CAR 1 or CAR 2 12 Controller Options 12 LCD Screen Icons 12 In Range Indicator 12 Setting The Clock 12 Changing remote start melodies 13 Power Save Mode 13 Selecting Melody Vibrate modes 13 Parking Timer Remote Start Timer 13 Button Lock 13 Anti Carjackin...

Страница 3: ...VING CONFIRMATION FROM YOUR SYS TEM THE CONTROLLER WILL SHOW THE LOCK ARM ICON AND BEEP ONCE nOTE PRESSinG LOCK TWiCE in 5 SECOnDS STARTS ThE PARKinG TimER ThE CLOCK WiLL ChAnGE TO 0 00 AnD START COunTinG in minuTES hOuRS Controller Transmitter Functions Controller battery replacement Slide the back cover do not pry up off the back of the case in the direction of the arrow Release the small black ...

Страница 4: ...utton twice within 5 seconds see user feature 8 for additional options THE PARKING LIGHTS WILL FLASH ONCE AND THE STATUS LIGHT WILL FLASH RAPID THE SYSTEM WILL TURN ON THE IGNITIONS AND PROCEED TO START THE ENGINE ONCE THE ENGINE IS RUNNING THE PARKING LIGHTS WILL FLASH EVERY 1 5 SECONDS AND THE STATUS LIGHTS WILL FLASH SLOW UPON RECEIVING CONFIRMATION FROM YOUR SYSTEM THE CONTROLLER WILL PLAY THE...

Страница 5: ...This can only be used once per remote start cycle The controller will also give you run time expiration warning 2 chirps 1 minute before the remote start cycle ends If you decide not to drive your vehicle you can turn off the remote start using the same method to turn it on Default press START twice in 5 seconds nOTE if user feature 8 is programmed for 1 press the 1st press Run Time Extender so an...

Страница 6: ... WILL SHOW THE LOCK ARM OR UNLOCK DISARM ICON x2 SEnSOR ByPASS Press and release the TRUNK button within 5 seconds of locking arming the alarm system THE SYSTEM WILL GIVE ONE CHIRP TO INDICATE THE SENSOR IS BYPASSED UPON RECEIVING CONFIRMATION FROM YOUR SYSTEM THE CONTROLLER WILL ALSO CHIRP ONCE DISPLAY THE SENSOR ICON 1 LOW VOLTAGE TEmP AuTO START Press and release the START button within 5 secon...

Страница 7: ...en TRUNK START within 5 seconds THE SYSTEM WILL ENTER VALET MODE SEE PAGE 10 FOR MORE INFO ON VALET MODES UPON RECEIVING CONFIRMATION FROM YOUR SYS TEM THE CONTROLLER WILL SHOW THE VALET ICON TO EXiT VALET ViA REmOTE REPEAT ThESE STEPS This feature will automatically start the engine if the vehicle battery drops below 11 volts or the interior temperature drops to 15 or 32 degrees fahrenheit You mu...

Страница 8: ...nstaller feature 11 must be turned on Also a setup procedure that ensures the transmission was left in neutral must be performed each time you leave your vehicle and intend to use remote start later Perform these steps 1 With the engine running hold the brake pedal apply the parking brake then release the brake pedal 2 Use the transmitter as if you were activating remote start default press START ...

Страница 9: ...further deny a thief of further access to the vehicle STORM SAFE MODE When the system is triggered pressing the UNLOCK button will stop the alarm from sounding but will leave the doors locked This function is use ful if you have a false triggering situation due to violent weather ZONE VIOLATION RECALL The system is capable of telling you which zones were triggered last The system s status light wi...

Страница 10: ... switch to enter the second digit of your code If the code is correct the alarm will disarm If the code is entered incorrectly you must turn the ignition key OFF then back ON to try again Additionally if 2 failed attempts are made the alarm will ignore any further attempts for 2 minutes Valet Mode Valet mode completely disables all security remote start functions Keyless entry is still operable To...

Страница 11: ...ndicate exactly which zone s has been violated It will store the last 2 violated circuits and continually repeat the flash pattern until the vehicle s ignition key is turned ON 2 FLASHES Hood trigger 3 FLASHES Door trigger 4 FLASHES Sensor port trigger REMOTE START STATUS FLASHING SLOW The engine was remote started successfully and is running FLASHING FAST The remote start sequence has begun and i...

Страница 12: ...hutdown Clock Timer Door Trigger In Range Indicator Sensor Trigger 1 Press the P button for 5 seconds to access the controller features The controller will beep twice 2 Press and release the P button once to select the clock hour digits will flash 3 Press the TRUNK button to scroll up or the START button to scroll down 4 Press the P button to switch to the minute digits 5 Press the TRUNK button to...

Страница 13: ...s simultaneously for 1 second to change the setting The controller has 2 convenient timer functions The PARKING TIMER tells you how long you ve been parked in case you are at a parking meter or other parking areas with time restrictions The REMOTE START TIMER tells you how long your engine has been running in remote start mode PARKING TIMER Press LOCK twice within 5 seconds When the controller rec...

Страница 14: ...tion be turned off in the meantime the stater interrupt will engage Once the system enters the alarm condi tion it will not respond to the transmitter nor will the system reset automatically after 60 seconds and it can only be disengaged by Step 1 Turning the vehicle s ignition off Step 2 Turning the ignition back on Step 3 Within 5 seconds perform an Emergency Override using the Valet Switch If t...

Страница 15: ...t switch 5 times to access user features 10 times to access installer features The siren horn will sound and the status light will turn on Step 3 Within 10 seconds of step 2 press the valet switch the number of times cor responding with the desired feature s number The siren horn will chirp the status lights and the parking lights will flash equal to the selected feature Step 4 Change the feature ...

Страница 16: ...dest press start button to program This feature allows the choice different chirp volume levels and when programming it each selection will be confirmed in the chosen volume making it easy to choose the most suitable setting Feature 4 BROWN Wire Audible Output Pulsed Horn Low press lock button to program Pulsed Horn Medium press unlock button to program Pulsed Horn High press trunk button to progr...

Страница 17: ...trunk release in which case the alarm should also disarm This feature when on configures the system to unlock disarm when the 2nd channel is activated Feature 8 Remote Start Activation From The Remote Press start button 1 time press lock button to program Press start button 2 times press unlock button to program DEFAULT Press start button 3 times press trunk button to program Press start button 4 ...

Страница 18: ...rride On press lock button to program Off press unlock button to program DEFAULT This feature allows an activated system to be overridden and disarmed by simply turning the ignition switch on within 10 seconds of the system s activation After 10 seconds the Emergency Override must be performed Feature 13 SecureCode DEFAULT 1 Press SecureCode is a unique patented feature which allows you to select ...

Страница 19: ...ermine if the engine is running This setting looks for a voltage increase of 0 3v after cranking Tachless Lo sensitivity mode operates like the Tachless Hi setting but looks for a voltage increase of 0 5v after cranking Tach Wire Before this setting is programmed refer to the Violet White wire section of the installation manual for proper wiring connection and the Tach Learn Procedure It will cran...

Страница 20: ...k button to program Double Pulse Unlock Output press trunk button to program Total Closure Lock Output press start button to program This changes the system s doorlocking outputs to suite different vehicle requirements The total closure setting provides a 28 second lock pulse press LOCK or UNLOCK is during the pulse to stop it and a 0 8 second unlock pulse Feature 9 Remote Start Lock Control Off p...

Страница 21: ...y switches to the ADS protocol Feature 13 Alarm Functions On press lock button to program DEFAULT Off press unlock button to program This feature converts the system into a strictly Keyless Entry Remote Start System by eliminating all antitheft alarm oriented operations and features Feature 14 Pulse Ignition On Disarm On press lock button to program Off press unlock button to program DEFAULT This ...

Страница 22: ...ght significantly This is ideal when the system is to be used on vehicles that have limited battery capacity and or may sit for extended periods without charging the battery Feature 18 Arm Disarm or Additional Channels Arm Disarm press lock button to program DEFAULT Arm Channel 5 press unlock button to program Channel 4 Disarm press trunk button to program Channel 4 Channel 5 press start button to...

Страница 23: ...17 Open Door Warning Upon Arming On Off Installer Feature Programming Ignition on off press valet 10 times 1 RS Activation WHITE BLUE wire 1 Pulse 2 pulses 3 pulses 4 pulses 2 PINK WHITE Wire Ignition Accessory Starter 3 Engine Detection Tachless Hi Tachless Lo Tach Wire Data tach Crank Only 4 Gasoline or Diesel Engine Gasoline 15 sec Diesel 20 sec Diesel 30 sec Diesel 5 Light Relay Function Dome ...

Страница 24: ...Back Cover Color cover is in a separate file 24 ...

Отзывы: