16
Final Assembly
If you have any queries about the Final assembly or any other part of the build, then please contact us at
where we will be happy to discuss your problem and send you a photo to
two to illustrate our solution.
Wing
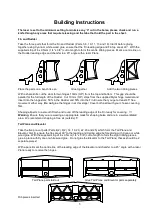
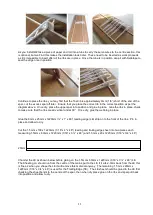
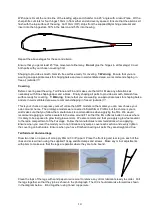
Take the fully covered wing and ailerons, glue the hinges 50% into the aileron using a thin Cyano and ensure
that it penetrates the slots both top and bottom. Slot the hinges into the corresponding slots on the wing.
Move the aileron full travel (min 45°) to ensure that there is no resistance and repeat the gluing process.
Repeat this for the second aileron. Due to the large control surfaces we would recommend pinning the
hinges. This is left to the builder’s discretion.
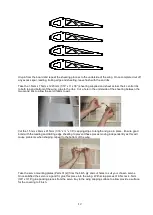
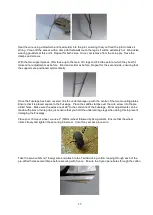
Install the servos in to the wing and feed the wires through the tubes. Pull the wires out at the centre section
where the sheeting was cut earlier. Drill pilot holes and securely screw the servos into place using the
fixings supplied with the servo. Centre the servo and attach a single arm horn.
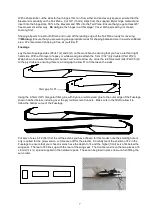
Lay a ruler on the wing lined up with the outermost hole on the servo horn running parallel with the ribs and
mark the position on the aileron LE. Place the supplied control horn
centrally on this mark. Mark the
positions of the holes and drill two 1.5mm (1/16”) pilot holes. Place the horn over the holes and insert 2 No.
bolts through to the supplied backing pieces. Screw on the bolts and tighten the assembly to the aileron,
making sure the horn remains at 90° aileron leading edge. Once satisfied that the horn is secured, cut off
the remaining bolt thread and run some Cyano onto the thread to ensure the nut cannot be loosened.
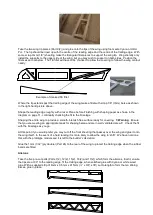
Repeat this for the second aileron. With the supplied threaded rods, screw on a clevis to allow equal
adjustment up and down the thread and connect to the horn. Mark the rod at the servo horn hole when the
training edge of the aileron in line with the wing tip. Make a 90° bend in the wire a curt off the excess wire,
fix to the horn using the swing keeper supplied.
Fuselage
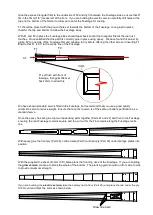
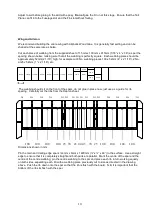
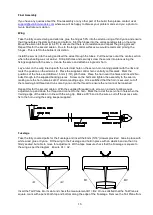
Take the fully covered parts for the Fuselage and insert the 8mm (5/16”) dowels provided. Glue in place with
white wood glue or Cyano. Fit the wing to the Fuselage and hold in place with an elastic band so that it is
firmly seated, but able to move for adjustment. With a tape measure check that the Fuselage is square to
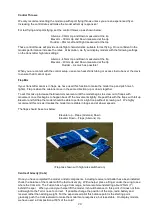
the wing as per the diagram. Ensure A1 = A2.
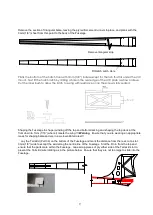
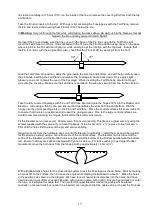
Insert the Tail Plane into its slot and check the measurement B1 = B2. Once satisfied that the Tail Plane is
square, mark with a pencil both top and bottom along the edge of the Fuselage. Remove the Tail Plane from
A2
A1
B2
B1

