background image

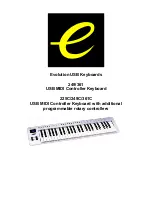
EVOLUTION 249/361/225C/249C/361C MIDI KEYBOARD MANUAL

1.

POWER SUPPLY

There are three methods of powering the Evolution USB Keyboard. Only use one method at one time

Soundcard as power source

Using the supplied self powered connector cable connect the 5 pin male plug to the Evolution MIDI keyboard
and the 15 pin male plug to the MIDI port on your PC soundcard.

IMPORTANT – DO NOT USE THIS CABLE TO POWER ANY OTHER EQUIPMENT

or

AC Power 
You can also use an AC adapter (not included) with the following specification: 9-12V DC output, 250-300mA,
centre positive.

or

USB
Connect to the USB port on your computer. The keyboard is powered from USB.

Note: Do not leave the adapter plugged in for long periods of time if the unit is not in use.

2. Preparation

2-1 Connect the unit with other MIDI equipment you may have:

You can connect the keyboard to any other MIDI device such as a sound module or drum machine as shown below.
Note that the keyboard does not have MIDI in capability and so can not receive MIDI data.

If you are not connecting via USB, you will need to use an external power supply to connect to other MIDI devices.
If you are using USB the keyboard will be powered from the USB port and the external power supply is not
necessary. The keyboard can act in MIDI THRU mode receiving data from the computer and transmitting it to any
other connected MIDI device.

Turn on the POWER switch.

Turn all other equipment on.
Press the BANK MSB and TRANSPOSE simultaneously to select ‘MIDI out from USB’ (only necessary if using
the USB port).

Содержание 225C

Страница 1: ...Evolution USB Keyboards 249 361 USB MIDI Controller Keyboard 225C 249C 361C USB MIDI Controller Keyboard with additional programmable rotary controllers...

Страница 2: ...WWW EVOLUTION CO UK...
Страница 3: ...pter plugged in for long periods of time if the unit is not in use 2 Preparation 2 1 Connect the unit with other MIDI equipment you may have You can connect the keyboard to any other MIDI device such...

Страница 4: ...complete number has been entered the display stops flashing and the value is selected Alternatively if no key is pressed and the display stops flashing the number on the display is selected The update...

Страница 5: ...r 3 seconds the LED will return to show the present PROGRAM CHANGE number The default CHANNEL is 1 when power is turned on If you have a MK 225C MK 249C MK 361C you can assign each of the rotary contr...

Страница 6: ...ND WHEEL Moving the PITCH BEND WHEEL transmits MIDI PITCH BEND messages to any connected equipment This allows you to bend the pitch of a sound up or down one tone to add expression to your performanc...

Страница 7: ...new OCTAVE value Press OCTAVE UP and DOWN switches simultaneously to reset the pitch to the default value Note if the UP or DOWN switch is not pressed for 3 seconds the LED will return to show the PRO...

Страница 8: ...stops flashing and shows the current PROGRAM CHANGE number 15 MIDI OUT FROM USB The MIDI output connector is normally used to send MIDI data from the keyboard If the keyboard is connected to a compute...

Страница 9: ...ler and its assignment Repeat this process to see the controller number assignment 0 132 for any Knob Slider or the Wheel by moving the relevant controller or by typing a new number If no keys are pre...

Страница 10: ...ULATION WHEEL CHANNEL VOLUME DATA ENTRY 4 Rotary Controls 12 rotary controls with assignable controller values 5 Memory storage non volatile 6 Display 3 digit LED 7 Jack DC IN DC 9V MIDI OUT SUSTAIN U...

Страница 11: ...ld 1 1 31 33 95 102 121 Mod Wheel Assign Program Change True Number 0 127 System Exclusive X Song Position Common Song Select Tune X X X System Clock Exclusive Commands X X Aux Local ON OFF Messages A...

Страница 12: ...61 62 Controller 62 63 Controller 63 64 Sustain Pedal 65 Portamento 66 Sostenuto 67 Soft Pedal 68 Legato Pedal 69 Hold 2 70 Sound Variation 71 Resonance 72 Release Time 73 Attack Time 74 Cutoff Frequ...

Отзывы: