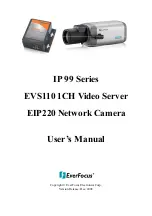
EverFocus EIP220 Скачать руководство пользователя страница 3


IP99 series


2

About this document 

All the safety and operating instructions should be read and followed before the 
unit is operated. This manual should be retained for future reference. The 
information in this manual was current when published. The manufacturer reserves 
the right to revise and improve its products. All specifications are therefore subject 
to change without notice. 

 
Safety Notice 

-These limits are designed to provide reasonable protection. This equipment 
generates, uses and can radiated radio frequency energy and, if not installed and 
used in accordance with the instructions, may cause harmful interference to radio 
communications. However, there is no guarantee that interference will not occur in 
a particular installation. If this equipment does cause harmful interference to radio 
or television reception, which can be determined by turning the equipment off and 
on, the user is encouraged to try to correct the interference by one or more of the 
following measures: -Reorient or relocate the receiving antenna. 
-Increase these separations between the equipment and receiver. 
-Connect the equipment into an outlet on a circuit different from that to which the 
receiver is connected. 
-Consult the dealer or an experienced radio/TV technician for help.   
 
The changes or modifications not expressly approved by the party responsible for 
compliance could void the user's authority to operate the equipment.   

  To reduce risk of fire or electric shock, do not expose this appliance to rain or 

moisture. 

  Do not attempt to disassemble the appliance.    To prevent electric shock, do 

not remove screws or covers.    There are no user-serviceable parts inside.   
Contact qualified service personnel for maintenance. Handle the appliance with 
care. Do not strike or shake, as this may damage the appliance. 

  Do not use strong or abrasive detergents when cleaning the appliance body. 

Use a dry cloth to clean the appliance when it is dirty.    When the dirt is hard to 
remove, use a mild detergent and wipe gently. 

  Do not operate the appliance beyond its specified temperature, humidity or 

Содержание EIP220

Страница 1: ...IP 99 Series EVS110 1CH Video Server EIP220 Network Camera User s Manual Copyright EverFocus Electronics Corp Version Release Dec 2008...

Страница 2: ...by turning the equipment off and on the user is encouraged to try to correct the interference by one or more of the following measures Reorient or relocate the receiving antenna Increase the separati...

Страница 3: ...nterference by one or more of the following measures Reorient or relocate the receiving antenna Increase these separations between the equipment and receiver Connect the equipment into an outlet on a...

Страница 4: ...trademarks of the respective holders Other product names appearing in this User s Guide may be trademarks or registered trademarks of their respective holders Java and all Java related logos and trad...

Страница 5: ...IP99 series 4 For example This web site may change without notices http www microsoft com downloads...

Страница 6: ...11 2 4 ZOOM IN ZOOM OUT 12 2 4 1 Integer zoom in zoom out 12 2 3 2 Single display zoom in zoom out 12 2 4 OPERATING BUTTONS 12 2 4 1 Record 12 2 4 2 Stop recording 13 2 4 3 Snapshot 13 2 4 4 Playback...

Страница 7: ...es 6 3 12 PTZ SETTING 26 3 13 ADMINISTRATOR 27 3 14 CHANGE PASSWORD 28 3 15 SPECIAL SETTING 28 3 16 MAINTENANCE 29 4 FREQUENTLY ASKED QUESTIONS 30 4 1 I HAVE PROBLEM RECORDING AND PLAYBACK ON WINDOWS...

Страница 8: ...Click Search Again to refresh list as shown in diagram 1 1 Diagram 1 1 Search IP device 1 2 Assign New IP address optional The Default IP address is 192 168 1 99 You can change IP address through IP...

Страница 9: ...2 Assign new IP address 1 3 Accessing the camera Double click selected camera in IP99 searcher or Enter IP address in IP address bar as shown in diagram 1 3 Diagram 1 3 enter IP address Enter IP addre...

Страница 10: ...5 Diagram 1 5 Camera Web page 1 4 Reset and Factory Default You can physically push RST button on IP99 camera or click Default on IP searcher to back to factory default 2 IP99 system operation After...

Страница 11: ...urce You can change video resource and simultaneously view multiplies cameras and encoders at same time Right click mouse on display center point and go to Change Resource Then you would see the login...

Страница 12: ...the following layout As shown in diagram 2 4 Diagram 2 4 Display re layout After editing layout click Save button to save settings Note When you open IP browser again click button IE interface will r...

Страница 13: ...that channel display and click on slide the tilt wheel of mouse to zoom in or zoom out video images 2 4 Operating buttons There are 6 operating buttons at top right corner of every camera display thei...

Страница 14: ...k on the green area of it returns to original color meaning that recording is stopped 2 4 3 Snapshot Click button to snapshot the image default file path for the snapshot is C image99 2 4 4 Playback C...

Страница 15: ...co P protocol PTZ control Click button a PTZ control panel pops up as shown in diagram 2 8 Diagram 2 8 PTZ control panel 1 Zoom Click T button to zoom in Click W button to zoom out Right click the mou...

Страница 16: ...k mouse in the view to move PTZ to the clicked direction b Zoom in out Right click mouse at top right corner to zoom in and right click mouse in lower right corner to zoom out Zoom in Zoom out Focus c...

Страница 17: ...era name Second row IP address of camera to be connected Third row User name Fourth row Login password When you finish filling out click on Change button to enter video display with setting changed If...

Страница 18: ...13 Diagram 2 13 PTZ contraol keys and functions 6 File av to AVI Click File av to AVI option select av file to be converted and click Confirm to save it as AVI format Diagram 2 14 File av to AVI confi...

Страница 19: ...ect 2 Video Audio from the drop down menu at top right corner as shown in diagram 3 2 Diagram 3 2 Video Audio settings Enable settings for video stream snapshot OSD Record and Audio 1 CBR setting Set...

Страница 20: ...storage is less than the value you set IP99 will deleted previous recording data in order to keep the newest information 6 Audio Set audio volume enable IP cam audio and enable PC audio Note When set...

Страница 21: ...if lighting source is insufficient the exposure time required is more Set Shutter Speed to Auto if a manual iris lens is used When a DD auto iris lens is connected set Shutter Speed to 1 60 and can ad...

Страница 22: ...O setting Set Alarm Input Output setting and status as shown in diagram 3 5 Select Alarm input level high low or no alarm for each AI alarm inputs Different alarm actions send JPEG file by e mail loa...

Страница 23: ...port information as shown in diagram 3 6 Diagaram 3 6 Networking DHCP will automatically get the IP address If you are not using DHCP you can manually assign IP address and port Primary DNS server has...

Страница 24: ...be made according to local wireless router as shown in diagram 3 7 Diagram 3 7 Wireless settings 3 7 PPPOE setting Select whether to enable PPPoE function If PPPoE function is enabled please enter us...

Страница 25: ...ll automatically notify the IP address to user by e mail 3 8 DDNS setting Dynamic DNS setting as shown in diagram 3 9 Diagram 3 9 DDNS setting IP99 series cameras support 3 DDNS servers DynDNS PeanutH...

Страница 26: ...P setting Enter user name and password of login mail server Once SMTP is set it can be used when snapshot alarm and PPPoE are enabled 3 10 FTP setting Select FTP server setting page as shown in diagra...

Страница 27: ...ame User can upload recorded video and event file to FTP server 3 11 Date Time setting Set camera s current date time and time zone as shown in diagram 3 12 Dirgram 3 12 Date Time settings 3 12 PTZ se...

Страница 28: ...1 Protocols are Pelco D and Pelco P which are in common use Note When using Everfocus speed dome user only needs to set the protocol as AUTO in order to control the speed dome 3 13 Administrator Add u...

Страница 29: ...14 Management 3 14 Change password Change user s login password as shown in diagram 3 15 Diagram 3 15 change password 3 15 Special setting Set compression set camera type and transform to AVI format...

Страница 30: ...he highest rate for smoother image 3 16 Maintenance Maintenance and system upgrade as shown in diagram 3 17 Diagram 3 17 Maintenance server and Upgrade server Note Please only use img file provided by...

Страница 31: ...ne of the user accounts for example you can use the Guest account 4 Under the user account click on the Go to the main User Account page link 5 Under Make changes to your user account click on the Cha...

Страница 32: ...0081 www everfocus com EverFocus Your EverFocus product is designed and manufactured with high quality materials and components which can be recycled and reused This symbol means that electrical and e...

Отзывы: