EverFocus EDH5102 Скачать руководство пользователя страница 2


Precautions 

1.


Do not install the camera near electric or magnetic fields. 

Install the camera away from 

TV/radio transmitters, magnets, electric motors, transformers and audio speakers since the 

electromagnetic fields generated from these devices may distort the video image or otherwise 

interfere with camera operation.


2.


Never disassemble the camera beyond the recommendations in this manual nor 

introduce materials other than those recommended herein. 

Improper disassembly or 

introduction of corrosive materials may result in equipment failure or other damage.


3.


Try to avoid facing the camera toward the sun

In some circumstances, direct sunlight may 

cause permanent damage to the sensor and/or internal circuits, as well as creating unbalanced 

illumination beyond the capability of the camera to compensate.


4.


Keep the power cable away from water and other liquids and never touch the power cord 

with wet hands. 

Touching a wet power cord with your hands or touching the power cord 

with wet hands may result in electric shock.


5.


Never install the camera in areas exposed to oil, gas or solvents. 

Oil, gas or solvents may 

result in equipment failure, electric shock or, in extreme cases, fire.


6.


Cleaning. 

For cameras with interchangeable lenses, do not touch the surface of the sensor 

directly with the hands. Use lens tissue or a cotton tipped applicator and ethanol to clean the 

sensor and the camera lens. Use a damp soft cloth to remove any dirt from the camera body. 

Please do not use complex solvents, corrosive or abrasive agents for cleaning of any part of 

the camera.


7.


Do not operate the camera beyond the specified temperature, humidity or power source 

ratings.


This camera is suitable for indoor operation only.


Use the camera at temperatures 

within -10°C~45°C (14°F~113°F) and humidity between 20%~ 80%; this device is not rated as 

submersible. 

The input power source is 12VDC. Be sure to connect the  / - polarity 

and voltage, as incorrect polarity or    too high a voltage will likely cause the camera to fail, 

and such damage is not covered by the warranty.


8.


Mounting.


Use care in selecting a solid mounting surface which will support the weight of 

the camera plus any wind, snow, ice or other loading, and securely attach the camera to the 

mounting surface using screws and anchors which will properly support the camera. If 

necessary (e.g. when mounting to drop ceilings) use a safety wire to provide additional 

support for the camera.


Содержание EDH5102

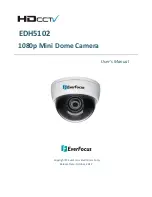
Страница 1: ...EDH5102 1080p Mini Dome Camera User s Manual Copyright EverFocus Electronics Corp Release Date October 2012...

Страница 2: ...ts may result in equipment failure electric shock or in extreme cases fire 6 Cleaning For cameras with interchangeable lenses do not touch the surface of the sensor directly with the hands Use lens ti...

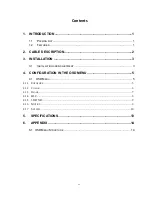
Страница 3: ...CRIPTION 2 3 INSTALLATION 3 3 1 INSTALLATION AND ADJUSTMENT 3 4 CONFIGURATION IN THE OSD MENU 5 4 1 OSD MENU 5 4 1 1 EXPOSURE 5 4 1 2 COLOR 6 4 1 3 IMAGE 7 4 1 4 BLC 8 4 1 5 3D DNR 9 4 1 6 MOTION 9 4...

Страница 4: ...icate at digital speeds up to 1 5 Gb s over existing or new coaxial cable RG59 or other types for longer distances using industry standard BNC connectors The EDH5102 supports both NTSC and PAL scannin...

Страница 5: ...v Output Connects to an HDcctv device such as a DVR or HD monitor using a 75 Ohm BNC type coaxial cable 3 RS485 Green Connects to an RS 485 device such as EverFocus EKB500 keyboard 4 RS485 Blue Connec...

Страница 6: ...anchors and the circle in the middle only if you want to wire the cables through the wall ceiling 3 Insert the supplied anchors into the holes 4 Remove the cover cap from the camera body Cover Cap Cam...

Страница 7: ...ngs a Adjust camera angles by tilting or rotating the camera 360o 90o b To configure camera settings using the OSD Menu Joystick connect one end of the Test Out cable to the Test Out connector on the...

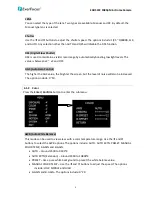
Страница 8: ...Joystick The Setup Menu in the OSD appears 4 1 1 Exposure Press the Enter Confirm button to enter the submenu BRIGHTNESS Use the and buttons to increase or decrease the screen brightness from 0 to 20...

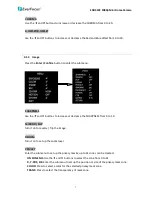
Страница 9: ...n Control The higher the AGC value the brighter the screen but the level of noise will also be increased The options include 0 10 4 1 2 Color Press the Enter Confirm button to enter the submenu AWB Au...

Страница 10: ...tons to increase or decrease the SHARPNESS from 0 to 10 MIRROR FLIP Turn it on to reverse flip the image DZOOM Turn it on to set up the zoom level PRIVACY Enter the submenu to set up the privacy masks...

Страница 11: ...select the AGC Threshold from 0 to 20 DELAY Set up the delay time in 0 5 10 and 30 seconds for the camera to switch between Day and Night HLMASK Turn it on to select the level and color of the maskin...

Страница 12: ...OSITION sign displayed on the screen Use the direction buttons to move the area to the desired position Press the Enter Confirm button to confirm the position a SIZE sign displayed on the screen Use t...

Страница 13: ...and SIZ Select OFF to disable this function or select ON to enable and for further setup After selecting an area block enter the BLC POS SIZ and X Y setup page a POSITION sign displayed on the screen...

Страница 14: ...rotocol is EVF 1 EverFocus DOUT SCALE Digital Output Scale Use the and buttons to select FULL or COMP This function is used to select the value range of auto brightness control The value range of FULL...

Страница 15: ...ccordingly LANGUAGE Select a language for the OSD text Options include English French German Simplified Chinese Korean and Japanese RESET Turn it on to reset the settings F W VERSION Firmware Version...

Страница 16: ...r Speed AUTO MANUAL 1 25 30 1 60 000sec Digital Slow Shutter DSS On Off x4 Brightness 0 20 BLC On Off Contrast Boost CTB On Off Day Night Auto Color B W Auto White Balance Auto Auto extn Preset Manual...

Страница 17: ...TTER AUTO MANUAL 1 25 1 60000 FLK DSS OFF X2 X3 X4 AGC 0 10 default 10 2 COLOR AWB AUTO AUTO extn PRESET MANUAL COLOR TEMP LOW MIDDLE HIGH R GAIN 0 20 B GAIN 0 20 CHROMA 0 20 default 7 R OFFSET 0 20 d...

Страница 18: ...Y 0 20 default 7 BLC SIZ X 0 20 default 5 BLC SIZ Y 0 20 default 5 5 3D DNR HIGH MIDDLE LOW OFF 6 MOTION OFF ON RESOLUTION 0 4 default 1 SENSITIVITY 0 20 default 10 WINDOW TRANS 0 6 default 3 WINDOW U...

Страница 19: ...EDH5102 1080p Mini Dome Camera 16 DOUT FORMAT 720P 1080P DOUT FPS 50 60 25 30 FREQ 50 60 HZ CVBS PAL NTSC LANGUAGE English Chinese Japanese Korean French German Russian RESET PUSH PUSHING...

Страница 20: ...25 8188 FAX 81 3 5625 8189 www everfocus co jp info everfocus co jp EverFocus Europe UK Unit 12 Spitfire Business Park Hawker Road Croydon Surrey CR0 4WD UK TEL 44 20 8649 9757 44 845 430 9999 FAX 44...

Отзывы: