


Keypad
Function Description
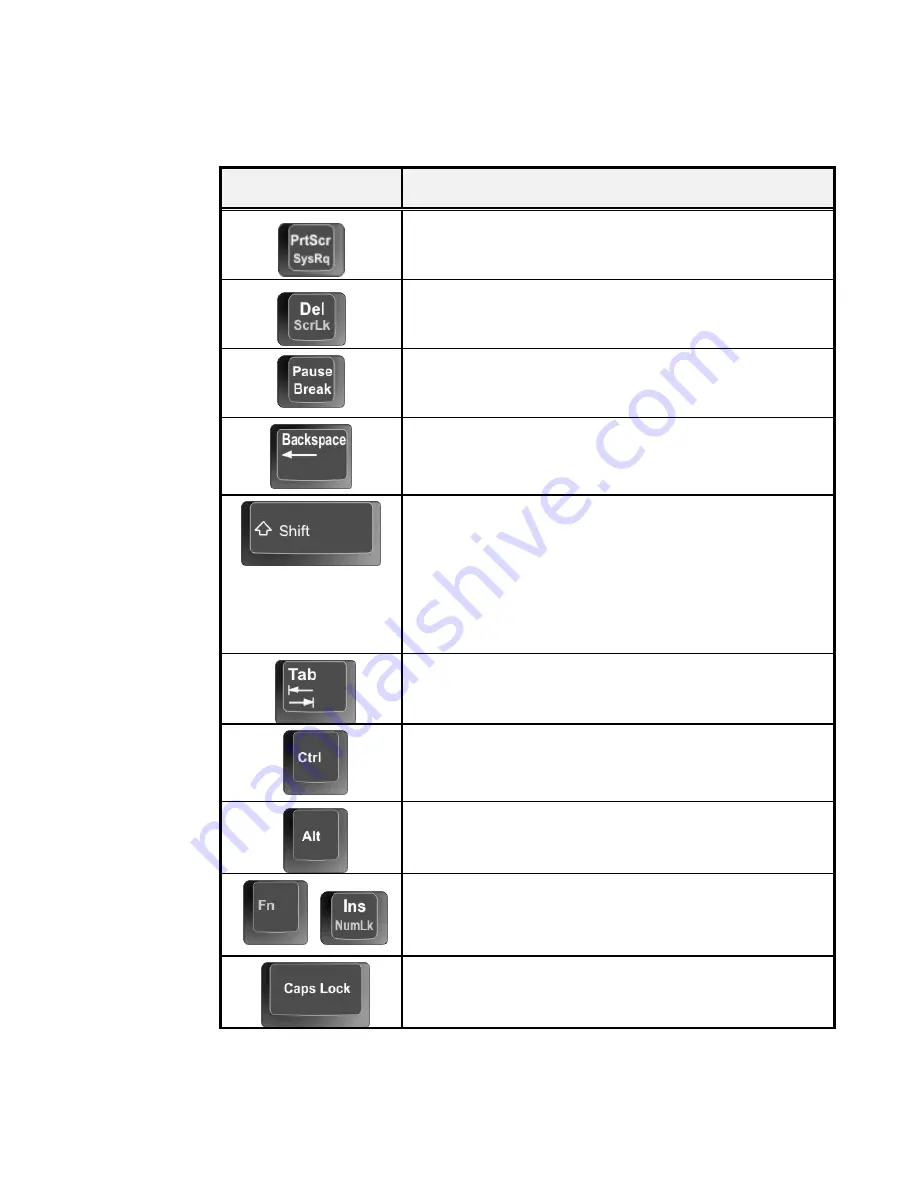
<
PrtScr
> key. Known as the Print Screen key. Press
this key to map the whole screen to share memory for
your specific usage.
<
Del
> key. Known as the Delete key. Press this key
to delete the character to the right of the cursor, or
delete marked texts or items.
<
Pause
> key. Press this key to temporarily halt
execution of a command. Pressing any other key to
resume execution of a command.
<
Backspace
> key. Press this key to delete the
character to the left of the cursor.
<
Shift
> key. Press this key in combination with
alphabet letters to produce uppercase letters in
typing. Use this key in combination with those two-
character keys (found on the second row of the
keyboard) to produce the upper marked keys. Also
used in most application program in combination
with other keys to execute a certain command.
<
Tab
> key. Press this key to move the cursor to the
next tab stop on the right. This key works much the
same as in ordinary typewriter.
<
Ctrl
> key. Known as the Control key. Used in
most application program in combination with other
keys to execute a certain command.
<
Alt
> key. Known as the Alternate key. Used in
most application program in combination with other
keys to execute a certain command.
+
<
Fn
> + <
Num Lock
> key. Activates the
embedded 15-key numeric keypad. The keys are
color coded blue.
<
Caps Lock
> key. Used in most application
program to always activate uppercase alphabet
characters.
Содержание Stepnote NC
Страница 14: ...Installing the LAN Device Driver 136 Installing the TouchPad Device Driver 136 Technical Support 139...
Страница 30: ......
Страница 38: ......
Страница 54: ...This page is intended to be blank...
Страница 59: ...Use Instant Search to quickly find the information you need...
Страница 76: ......
Страница 84: ...This page is intended to be blank...
Страница 112: ...This page is intended to be blank...
Страница 119: ...2 Please choose Repair Your Computer to go into recovery mode...
Страница 122: ...6 The non destructive system recovery is begin...
Страница 125: ...4 When the Destructive option is chosen please click Next 5 Reconfirm your choice by clicking OK...
Страница 126: ...6 Reconfirm your choice by clicking OK the destructive recovery will begin...
Страница 127: ...7 The destructive system recovery is begin...
Страница 132: ...3 Please choose Full Mode to go into full recovery mode...
Страница 133: ...4 Reconfirm your choice by clicking OK...
Страница 134: ...5 Reconfirm your choice by clicking OK the full recovery will begin 6 The full recovery is begin...


