GEMINI user manual
Issue D
14
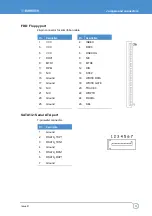
Connecting a floppy disk drive
To connect a floppy device to the board, follow these steps:
1
Lift up the plastic bar on the rear of the floppy device.
2
Slot in the 26-pin ribbon cable provided (blue paste for outside).
3
Press back the plastic bar.
4
On the GEMINI board, lift up the brown plastic bar.
5
Slot in the cable (blue paste for brown bar side). (See
on page
for the location of the floppy port.)
6
Press back the plastic bar
.
Connecting a hard disk drive
The GEMINI provides an Integrated Serial ATA Host Controller, enabling up to two SATA
devices to be connected. There is also a single secondary IDE controller, enabling up to
two IDE devices to be connected. Down to one only if the CF socket is in use.
When connecting SATA peripherals to the GEMINI, the BIOS automatically sets the
following configuration:
Primary Master: Device connected to the onboard connector SATA1.
Primary Slave: Device connected to the onboard connector SATA2.
Secondary Master: Device connected the IDE port and set-up as a MASTER.
Secondary Slave: Device connected the IDE port and set-up as a SLAVE.
The BIOS automatically detects the hard disk drive(s) during the POST processes and
configures the hardware correctly. The BIOS allows either a master or slave device to be
the boot device.
Connecting a CD-ROM (IDE Type)
If a CD-ROM drive is required in the system, it may be connected in place of a secondary
drive (as detailed above). The CD-ROM should be configured as a ‘master’ device.
Drivers are required to support a CD-ROM drive under DOS. If a bootable CD is inserted
in the drive, the BIOS can be configured to automatically boot from this CD.
Содержание GEMINI
Страница 49: ...Appendix B Mechanical drawing Issue D 49 Appendix B Mechanical drawing ...
Страница 54: ...GEMINI user manual Issue D 54 ...
Страница 56: ...www eurotech com ...


