background image

22 

hang the device directly under or in front of an electrical socket (see diagram 1). 

The wall supports must be attached horizontally (use a spirit level!) to the wall.
Determine the location of the wall supports (take the above into account), mark
the location of the screws and drill 5 holes at the marked places using a 6 mm
drill. Put the plugs into the holes and then screw the wall supports to the wall. Be
aware of pipes that may be contained within the walls when drilling holes!

Attach the spacer bracket with both self-tapping screws underneath the fireplace
in the holes provided. The flat side of the bracket must be placed against the
underside of the fireplace; the other must rest against the wall so that the wall
piece sticks out under the fireplace (diagram 3). This bracket will be hidden from
sight once the glass screen has been installed.

Now hang the fireplace carefully on the central wall support with the hanging
bracket (see diagram 2). The bracket should not stick out from the support! The
electrical cable comes out at the right hand, lower side of the fireplace and must
be placed out of range of the heat.

Now mark the location at which the spacer bracket must be screwed to the wall.
Remove the fireplace from the wall, drill both holes and insert a plug. Hang the
fireplace on the bracket and screw the spacer bracket to the wall.

Hang the glass plate (two people are needed for this job!) with the four hooks
over the four knobs on the sides of the fireplace and check that all four hooks are
correctly attached (see diagram 4).

Installation is now complete.

Note: ensure that the weight of the fireplace 

hangs on the wall supports 

and not on the spacer bracket! 

Operating 

Check that the details on the data plate correspond to those of the electrical
supply which you wish to use for the fireplace. Do not use the same connection
for any other equipment.

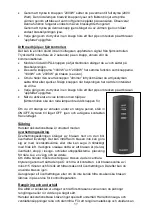
Install two AAA-1,5V batteries in the remote control.

Check that the main ON/OFF switch on the right hand, upper side of the fireplace
is 'off' (the side with the circle is depressed).

Now insert the plug into the socket.

Switch the fireplace on with the main ON/OFF switch (depress the side with the
stripe). You can now further operate the fireplace with the remote control or with
the buttons on the fireplace itself.

Warning: 

This heater is not equipped with a device to control the room temperature. 

Do not use this heater in small rooms when they are occupied by persons not 

capable of leaving the room on their own, unless constant supervision is provided. 

Operating with the buttons: 

Pressing the O/I button switches the atmospheric lighting on. The red light next to
the button will be illuminated. Pressing this button again will switch the
atmospheric lighting off. If you press the O/I button for longer than three seconds,
the dimmer function will start to work: the brightness of the light will gradually
increase and then decrease. Release the button when the lighting reaches the
desired intensity.

Pressing the '1000W' button sets the heating at half capacity (1000 Watt). The
red light next to the button will be illuminated and the ventilator will start to

Содержание Harstad

Страница 1: ...uch Instruction booklet Manuel d utilisation Instruktionsbok Návod k obsluze Návod na použitie Broşură cu instrucţiuni HARSTAD Electrical atmospheric fireplace with remote control Elektrisk dekorationsbrasa med fjärrkontroll ...

Страница 2: ... Dette symbolet på apparatet betyr Må ikke dekkes til FI Tämä laitteessa oleva symboli tarkoittaa ei saa peittää HU A készülékén lévő szimbólum jelentése ne takarja le CS Tento symbol na vašem zařízení znamená nezakrývejte PL Ten symbol na urządzeniu oznacza nie zakrywać SK Tento symbol na vašom zariadení znamená nezakrývajte RO acest simbol ce apare pe aparatul dumneavoastră înseamnă nu acoperiţi...

Страница 3: ... the socket Do not use a fireplace that is wet inside but take it to be repaired Never immerse the fireplace cable or plug in water or any other fluid and never touch the fireplace with wet hands 6 The connection voltage and frequency as given on the device must correspond to that of the socket to be used The electrical installation must be protected via an earth leakage circuit breaker max 30 mAm...

Страница 4: ... 14 Never leave a working fireplace unattended but switch off and then remove the plug from the socket Always remove the plug from the socket if the fireplace is not in use Remove plug by pulling on the plug itself never pull on the cord 15 Always switch the fireplace off remove plug from socket and let the fireplace cool down before you clean the fireplace carry out maintenance on the fireplace t...

Страница 5: ...e are any other signs of a defect Return the complete product to the vendor or to a certified electrician for inspection and or repair Always ask for the original parts Do not use attachments and or accessories that have not been recommended or supplied by the manufacturer The appliance incl cord and plug may only be opened and or repaired by properly authorised and qualified persons Repairs that ...

Страница 6: ...ns and you have read the instruction booklet fully This device was designed to be permanently hung on a wall Ensure the wall is sturdy completely vertical is not sensitive to vibration and is not flammable Make sure it is not made of synthetic material and or covered with flammable material Be aware of pipes that may be contained within the walls when drilling holes Choose a suitable location for ...

Страница 7: ... the fireplace and check that all four hooks are correctly attached see diagram 4 Installation is now complete Note ensure that the weight of the fireplace hangs on the wall supports and not on the spacer bracket Operating Check that the details on the data plate correspond to those of the electrical supply which you wish to use for the fireplace Do not use the same connection for any other equipm...

Страница 8: ... light Release the button when the lighting reaches the desired intensity Every time you press a button you will hear a beep and this indicates that the fireplace has picked up the command When you switch a particular function on using the remote control the red light next to the corresponding button on the fireplace will be illuminated If you want to switch the device off for an extended period s...

Страница 9: ...ectrical supply Is the socket working properly Has the fuse blown If the fireplace stops working suddenly it may mean that the overheating safeguard has been triggered see under Safeguards In the event of other defects immediately switch the fireplace off remove the plug from the socket and consult a supplier or recognised electrician Never carry out repairs yourself as this invalidates the guaran...

Страница 10: ...usch pool duschar etc Se till att den inte kan hamna i vatten och förhindra att vatten kommer in byggfläkten Om den skulle hamna i vatten tag först ur stickkontakten Använd inte en byggfläkt som blivit fuktigt inuti Reparera den Doppa aldrig byggfläkten sladden eller stickkontakten i vatten och vidrör den aldrig med våta händer 6 Spänning och effekt som anges på elementet skall överensstämma med d...

Страница 11: ...lacera inte elementet för nära väggar eller stora föremål och placera det inte under hyllor skåp och liknande 13 Se till att främmande föremål inte hamnar i elementet via ventilerings eller avgasöppningar Detta kan orsaka elektriskt överslag brand eller skador 14 Lämna aldrig elementet utan uppsikt när det är påslaget Stäng först av det tag sedan ur stickkontakten Tag alltid ur kontakten när eleme...

Страница 12: ...ts eller när det finns tecken på någon annan defekt Returnera hela produkten till försäljaren eller till en auktoriserad elektriker för kontroll och eller reparation Be alltid om originaldelar Använd inte tillsatser och eller tillbehör som inte har rekommenderats eller levererats av tillverkaren Värmaren inkl sladden och stickkontakten får bara öppnas och eller repareras av auktoriserade och kvali...

Страница 13: ...ikal vibrationsfri och brandsäker alltså inte av trä eller syntetiskt material eller beklädd med annat brännbart material Tänk på att kontrollera ev elektriska ledningar i väggen innan du borrar Välj en passande plats för brasan minst en meter från övriga föremål väggen och andra brännbara material se även säkerhetsföreskrifterna och i ett område med ett uttag med en säkring av minst 16 AMP säkrad...

Страница 14: ...du vill ansluta brasan till Anslut ingen annan apparatur till samma kontakt Förse fjärrkontrollen med två AAA 1 5V batterier Kontrollera att den centrala PÅ AV brytaren högst upp till höger på brasan är satt i AV läge sidan med ring intryckt Sätt nu in stickkontakten i uttaget Sätt på brasan med den centrala PÅ AV brytaren sidan med streck intryckt Du kan nu välja att manövrera brasan med fjärrkon...

Страница 15: ... uppgiften När du aktiverar en viss funktion med hjälp av fjärrkontrollen ska den röda lampan bredvid knappen för Om du vill stänga av enheten under en längre period ställ in ON OFF brytaren till läget OFF igen och avlägsna kontakten från eluttaget Säkring Harstad dekorationsbrasa är utrustad med en överhettningssäkring Överhettningssäkringen stänger av brasan helt om den blir överhettad invändigt...

Страница 16: ... du den och förvarar den på en sval torr och dammfri plats i sin originalförpackning Se till att den står rakt upp Problem och lösningar Om brasan inte ger full effekt så kontrollera strömtillförseln Är stickkontakten hel Har en säkring gått Om brasan slutade att fungera plötsligen kan överhettningssäkringen har utlösts se under Säkerhetsutrustning Om andra störningar visar sig måste brasans genas...

Страница 17: ...ektrisk dekorationsbrasa med fjärrkontroll elektrická okrasná kamna s dálkovým ovládáním elektrický kozub s diaľkovým ovládaním şemineu electric de ambianţă cu telecomandă bekend onder het merk known under the brand Bekannt unter der Marke commercialisé sous la marque känd under varumärket známé pod značkou známy pod značkou cunoscut sub marca EUROM type typ tip Harstad voldoen aan de eisen van de...

Страница 18: ...60 EUROMAC BV Kokosstraat 20 8281 JC Genemuiden e mail info euromac nl www euromac nl ...

Отзывы: