


System Map: Bottom View - Model B 1 - 17
Quick Start Guide
1
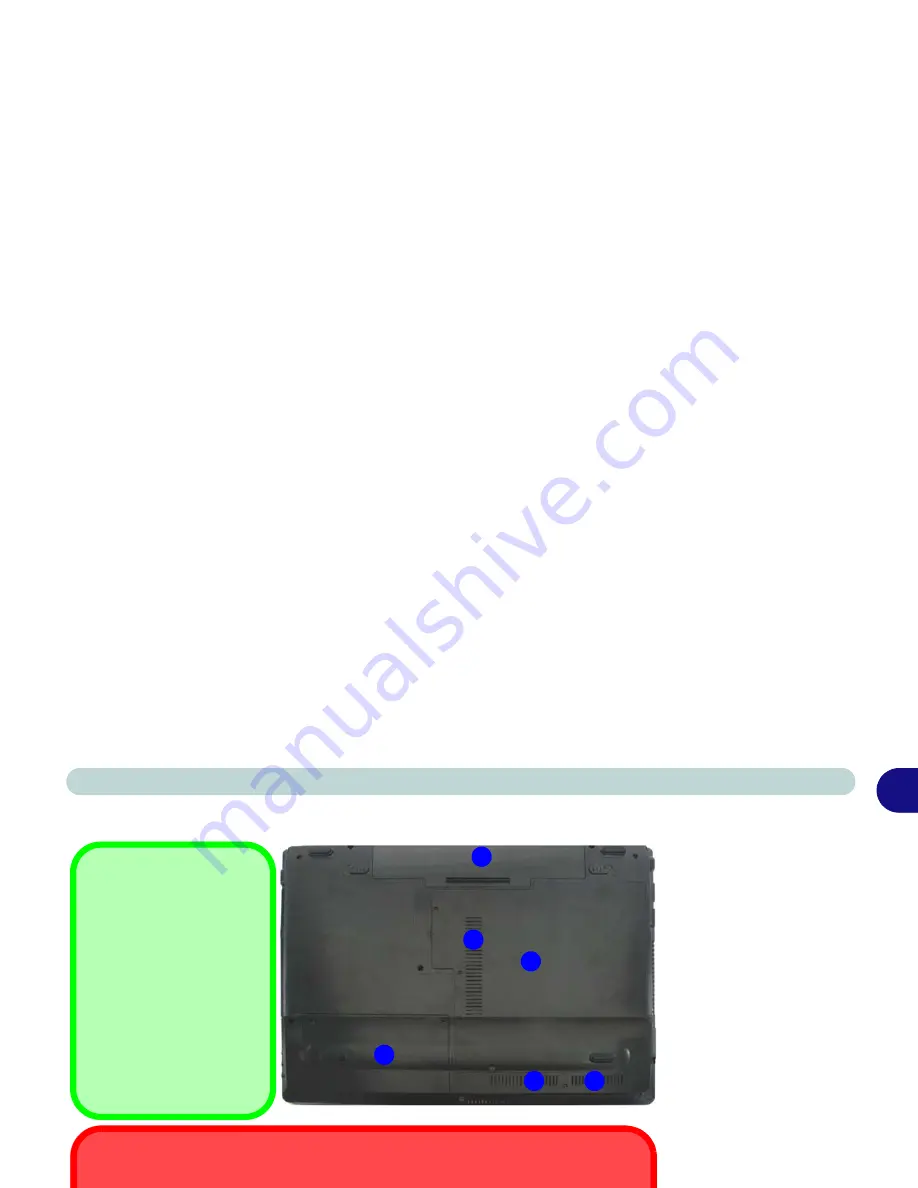
System Map: Bottom View - Model B
Figure 1 - 9
Bottom View
(Model B
Computers)
1.
Battery
2.
RAM & CPU Bay
Cover
3.
Vent/Fan Intake/
Outlet
4.
Hard Disk Bay
Cover
Note: the 3.75G/HSPA
USIM Card is located un-
der the RAM & CPU Bay
Cover.
2
3
1
4
3
3
Battery Information
Always completely dis-
charge, then fully charge, a
new battery before using it.
Completely discharge and
charge the battery at least
once every 30 days or after
about 20 partial discharges.
See
“Energy Star Power
Saving” on page 3 - 10
for
full instructions.
CPU
The CPU is not a user serviceable part.
Overheating
To prevent your computer from overheating make sure nothing blocks the Vent/Fan Intake
while the computer is in use.
Содержание Notebook V09.2.00
Страница 1: ......
Страница 2: ......
Страница 16: ...Preface...
Страница 44: ...Quick Start Guide 1...
Страница 74: ...Power Management 3...
Страница 88: ...BIOS Utilities 5 Main Menu System Time Date Main Menu Figure 5 2 Main Menu...
Страница 90: ...BIOS Utilities 5 Advanced Menu Legacy USB Support Advanced Menu Figure 5 3 Advanced Menu...
Страница 96: ...BIOS Utilities 5...
Страница 136: ...Modules Options 7 Figure 7 26 Audio Setup for PC Camera Right click...
Страница 164: ...Modules Options 7...
Страница 178: ...Troubleshooting 8...
Страница 196: ...ATI Video Driver Controls...
Страница 266: ...Windows 7 Information...


