Eureka 5700 Series Скачать руководство пользователя страница 11

11

Pre-Motor Filter

Check the pre-motor filter each time the dust bag is changed.
Clean or replace as needed.

To Clean Pre-Motor Filter

1. Locate dust bag support in bottom of dust bag compartment.

Remove filter centered in the bottom of the dust bag
compartment.

2. Shake filter to remove excess dust. If necessary, the filter

can be cleaned by vacuuming with another cleaner or
washing with mild detergent.

3. Reinstall filter after completely dry.

Use GENUINE EUREKA replacement pre-motor filter, Part
No. 71480.

To remove True HEPA 

cartridge filter

1.

Push down on filter door latch and pull door away from
cleaner.

2.

Push down on HEPA cartridge latch and remove filter.

To replace True HEPA 

cartridge filter

1.  Place bottom tabs of filter cartridge into slots. Rotate

filter toward cleaner, press firmly against cleaner to
latch.  Make sure True HEPA cartridge latch is
secured on both sides.

2.

Replace filter door by placing tabs of door into slots on
cleaner. Rotate door up and against cleaner until it locks
into place.

NOTE: To have the benefit of a sealed True HEPA

system, you must use one of the True HEPA
cartridge filter systems.

To remove Filter Pad from

 filter door

1.

Push down on filter door  latch and pull door away from
cleaner.

 2. Lift filter pad up and out of filter door. Dispose of old filter

pad.

To replace Filter Pad into 

filter door

1.

Place new filter pad in filter door.

2.

Replace filter door by placing tabs of door into slots on
cleaner. Rotate door up and against cleaner until it locks
into place.

Filter Pad Replacement Options:
HEPA, Style HF6

Models equipped with Cartridge Filter

(Only cartridge style filters can be used with these
models.)
Check the True HEPA filter each time the dust bag is
replaced. Replace filter cartridge twice a year or as needed.

Models equipped with Filter Pads

Check the filter pad each time the dust cup is
emptied. Replace twice a year or as needed.

Filter
Door
Latch

Use GENUINE EUREKA replacement True HEPA filter,
Style HF5.

Use GENUINE EUREKA replacement filter pads.

True HEPA
Cartridge
Latch

Filter
Door
Latch

F i l t e r
Pad

Pre-Motor
Filter

Dust Bag
Support

Side Door Filt

ers

R

OUTINE MAINTENANCE

Содержание 5700 Series

Страница 1: ... you call 1 800 438 7352 8 a m to 4 45 p m Central Standard Time Monday through Friday En Mexico llame al 5670 6169 www eureka com Upright Vacuum Cleaner Owner s Guide 5700 5739 Series 5800 5829 Series HouseholdType IMPORTANT INFORMATION 2 4 5 6 7 8 9 10 11 12 13 14 15 17 18 QUICK REFERENCE HOWTO ASSEMBLE HOWTO USE PERIODIC MAINTENANCE ROUTINE MAINTENANCE Brush Roll Belt Brush Roll Light Bulb PROB...

Страница 2: ...capacity Turn off all controls before unplugging Do not unplug by pulling on cord To unplug grasp the plug not the cord Do not handle plug or vacuum cleaner with wet hands Do not put any object into openings Do not use with any opening blocked keep free of dust lint hair and anything that may reduce airflow This vacuum cleaner creates suction and contains a revolving brush roll Keep hair loose clo...

Страница 3: ...brancher Ne pas débrancher en tirant sur le cordon Pour débrancher tenez la fiche et non le cordon Ne pas manipuler la fiche ou l aspirateur avec les mains mouillées Ne pas rien insérer dans les ouvertures Ne pas utiliser si des ouvertures sont bloquées assurez vous qu elles soient dégagées de poussière mousse cheveux ou toute autre chose qui pourrait réduire le passage de l air Cet aspirateur cré...

Страница 4: ...er you can write to The Eureka Company Service Division 807 North Main Street Bloomington Illinois 61701 USA In Canada write to The Eureka Company 866 Langs Drive Cambridge Ontario N3H 2N7 Refer to The Eureka Limited Warranty for complete service information DO NOT OIL the motor or the brush roll at any time The bearings are permanently lubricated and sealed 4 Rating Plate The model type and seria...

Страница 5: ...the cleaner base to match the type of floor surface WARNING Avoid injury Keep loose clothing hair fingers and all other parts of body away from any moving part such as the revolving brush Turn off the switch and unplug the cleaner before changing the cleaner height setting 1 2 3 4 5 6 7 8 9 QUICK REFERENCE Helpful Information Listen to your cleaner If you notice a change in the sound of the motor ...

Страница 6: ... sock rug etc Thermal Cut Off This cleaner has a special thermostat that protects the cleaner in case of motor overheating If the cleaner suddenly turns off follow this procedure 1 Push rocker switch to off O position 2 Unplug cleaner 3 Check for source of overheating problem i e full dust bag blocked hose or clogged filter 4 If a full dust bag blocked hose or clogged filter is found change the du...

Страница 7: ...use thumb and finger pressure to slide handle into position Attach handle with the two screws provided in the assembly packet Use a Phillips head screwdriver NOTE Hand tighten with screwdriver to be sure both screws are firmly seated Groove Groove 1 2 Pick up hose and lay across upper hose retainer Push the end of the hose in the lower hose retainer to secure Upper Hose Retainer 3 4 Lower Hose Ret...

Страница 8: ...r cord hook Firmly push the electrical cord down into the cord retainer This will place the cord out of the way the next time you vacuum Next wind the cord around the two cord hooks on the back side of cleaner Secure the plug to the cord to prevent unwinding Cord Retainer Nested Wands Dusting Brush 5 6 6 Plug 7 5 6 7 HOW TO ASSEMBLE ...

Страница 9: ...etting until cleaner is comfortable to push The brush roll must reach the carpet for effective cleaning For ease in moving the adjustment knob place handle in operating position and tilt cleaner back to remove weight from front wheels Handle Release Step on handle release to pull handle back to a comfortable operating position To lower handle completely to the floor depress handle release a second...

Страница 10: ...lug the electrical cord before routine maintenance Never operate the vacuum cleaner without the dust bag or filter assembly in place 2 1 Removing the Dust Bag Style LS Grasp dust bag flaps and pull out from cleaner Place the bottom of the dust bag cover on cleaner lining up grooves on outer edge of cover with rails on side of cleaner Rotate cover up pressing against cleaner until it locks into pla...

Страница 11: ... against cleaner until it locks into place NOTE To have the benefit of a sealed True HEPA system you must use one of the True HEPA cartridge filter systems To remove Filter Pad from filter door 1 Push down on filter door latch and pull door away from cleaner 2 Lift filter pad up and out of filter door Dispose of old filter pad To replace Filter Pad into filter door 1 Place new filter pad in filter...

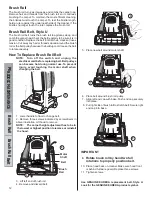
Страница 12: ...oll turns as it sweeps and combs the carpet nap Remove hair and threads from the brush roll so it continues brushing the carpet To maintain the most efficient cleaning the bristles must touch the carpet To test the bristle length hold a ruler against the underneath side of the cleaner If the bristles no longer touch the ruler replace the brush roll Brush Roll Belt Style U The brush roll belt turns...

Страница 13: ...changing light bulb Lower handle Remove the screw from lens cover Requires a Phillips head screwdriver Pull lens cover from cleaner Pull old light bulb out of socket Push new light bulb into socket Replace lens cover Secure with screw Use GENUINE EUREKA replacement light bulb Part No 57940 2 Light Bulb 1 2 3 4 6 5 PERIODIC MAINTENANCE ...

Страница 14: ...the cleaner Remove lower hose adapter from rear of cleaner by lifting up and twisting Check for blockages in the hose and base hose Flexing the hose may help loosen any blockage If no blockage is found continue to step 8 If blockage is found clear and continue to step 11 Remove hood from cleaner and check for a blockage in the brush roll area Make sure the hose inlet is clear After the blockage is...

Страница 15: ...om the brush roll Brush Roll Remove hood and clean debris or items from the brush area roll area Belt Replace a broken cut loose or out of shape belt Page 12 Cleaner is hard to push Cleaner Height Setting Put handle in operating position Tilt the cleaner back to raise the front wheels off floor Then turn the knob to a higher setting Belt Replace a broken cut loose or out of shape belt Page 12 Clea...

Страница 16: ...16 ...

Страница 17: ......

Страница 18: ... and serial number from the data plate on the cleaner Further Limitations and Exclusions Any warranty that may be implied in connection with your purchase or use of the cleaner including any warranty of Merchantability or any warranty for Fitness ForA Particular Purpose is limited to the duration of this warranty Some states do not allow limitations on how long an implied warranty lasts so the abo...

Страница 19: ......

Страница 20: ...ms in This Carton 1 hardware package 2 screws Questions Do Not Return To Store Call 1 800 282 2886 7 a m to 8 p m Central Standard Time Monday through Saturday Don t Forget to Use Genuine Eureka Bags Belts and Filters Caution Damages caused by the use of non genuine Eureka parts are not covered by the Eureka Limited Warranty 1 Dusting Upholstery Brush 1 extra belt ...

Отзывы: