background image

EN 7

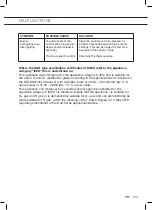
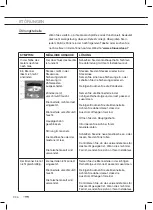
MALFUNCTIONS

SYMPTOM

POSSIBLE CAUSE

SOLUTION

Burner 
extinguishes out 
after igniting.

You did not press the 
control knob long and/or 
deep enough (at least 3 
seconds).

Thermocouple (3) is dirty.

Keep the control knob fully pressed for 
at least 3 seconds between high and low 
settings. This can be longer the first time, 
because of the supply of gas.

Clean/dry the thermocouple.

Where the GAD type examination certificates of KIWA refer to the appliance 
category “I2EK” this is understood as:

This appliance was configured for the appliance category K (I2K) and is suitable for 
the use of G and G+ distribution gases according to the specifications as included in 
the NTA 8837:2012 Annex D with a Wobbe index of 43.46 – 45.3 MJ/m3 (dry, 0 °C, 
upper value) or 41.23 – 42.98 (dry, 15 °C, upper value).
This appliance can moreover be converted and/or again be calibrated for the 
appliance category E (I2E) This therefore implies that the appliance: “is suitable for 
G+ gas and H gas or is demonstrably suitable for G+ gas and can demonstrably be 
made suitable for H gas” within the meaning of the “Dutch Decree of 10 May 2016 
regarding amendment of the Dutch Gas Appliances Decree….”

Содержание KG675RVSA

Страница 1: ...GEBRUIKSAANWIJZING INSTRUCTIONS FOR USE MODE D EMPLOI BEDIENUNGSANLEITUNG GASKOOKPLAAT GAS HOB TABLE DE CUISSON GAZ GASKOCHFELD KG959RVSA KG959ZTA KG875RVSA KG859RVSA KG859ZTA...

Страница 2: ...N 3 EN 8 FR Notice d utilisation FR 3 FR 8 DE Anleitung DE 3 DE 8 Gebruikte pictogrammen Pictograms used Pictogrammes utilis s Benutzte Piktogramme Belangrijk om te weten Important information Importa...

Страница 3: ...regeld tussen vol en kleinstand Branders met elektrische vonkonsteking Druk de bedieningsknop in en draai deze linksom De brander ontsteekt Houd de bedieningsknop minimaal 3 seconden volledig ingedruk...

Страница 4: ...Kleinere pannen staan niet stabiel De aanbevolen panbodemdiameters zijn sterkbrander minimaal 22 cm normaalbrander minimaal 18 cm sudderbrander minimaal 14 cm wokbrander minimaal 24 cm Pandrager Plaat...

Страница 5: ...branderdoppen vangschalen Hardnekkige vlekken kunt u het beste ver wij de ren met een vloei baar reinigingsmiddel of een kunststof schuursponsje Gebruik nooit schuurpoeders schuurpads scherpe voorwer...

Страница 6: ...soort gas gebruikt Steek de stekker in het stopcontact Monteer een nieuwe zekering of schakel de zekering weer in Reinig droog de bougie Zet de branderdelen in de juiste volgorde en goed passend in el...

Страница 7: ...dan wordt hieronder verstaan Dit toestel is afgesteld voor de toestelcategorie K I2k en is geschikt voor het gebruik van G en G distributiegassen volgens de specificaties zoals die zijn weergegeven in...

Страница 8: ...dat het apparaat aan het einde van zijn levensduur niet bij het gewone huisvuil mag worden gevoegd maar naar een speciaal centrum voor gescheiden afvalinzameling van de gemeente moet worden gebracht...

Страница 9: ...between high and low heat Burners with electric ignition Press the control knob and turn it anticlockwise The burner ignites Keep the control knob fully pressed for at least 3 seconds between high an...

Страница 10: ...ot stable The recommended pan base diameters are rapid burner at least 22 cm standard burner at least 18 cm simmer burner at least 14 cm wok burner at least 24 cm Pan support Put the pan supports down...

Страница 11: ...l pan supports burner covers drip trays The best way to remove stubborn stains is with a liquid cleaning agent or a plastic scourer Never use abrasive powder abrasive pads sharp objects or caustic cle...

Страница 12: ...Gas cylinder or tank is empty Wrong type of gas used Put the plug into the socket Fit a new fuse or switch the fuse back on Clean dry the spark plug Put the parts of the burner in the correct order so...

Страница 13: ...erstood as This appliance was configured for the appliance category K I2K and is suitable for the use of G and G distribution gases according to the specifications as included in the NTA 8837 2012 Ann...

Страница 14: ...of a crossed out dustbin which is attached to the product This means that at the end of its working life the product must not be disposed of as urban waste It must be taken to a special local authori...

Страница 15: ...avec allumage pi zo lectrique Appuyez sur le bouton du br leur et faites le pivoter vers la gauche Le br leur s allume Maintenez le bouton du br leur enfonc bien fond durant 3 secondes entre la positi...

Страница 16: ...e sont pas stables Les diam tres de casserole recommand s sont br leur rapide minimum 22 cm br leur semi rapide minimum 18 cm br leur mijoteur minimum 14 cm br leur wok minimum 24 cm Support de casser...

Страница 17: ...ur l mail supports de casseroles capuchons de br leurs fond de la table de cuisson Nettoyez de pr f rence les taches tenaces avec un d tergent liquide ou une ponge r curer synth tique N utilisez jamai...

Страница 18: ...e gaz utilis n est pas le bon Branchez la prise sur le secteur Remplacez le fusible ou enclenchez le disjoncteur Nettoyez s chez la bougie Placez les l ments du br leur dans le bon ordre en les embo t...

Страница 19: ...nt longtemps 3 secondes minimum ou profond ment enfonc Le thermocouple 3 est encrass Maintenez le bouton du br leur enfonc bien fond durant 3 secondes minimum entre la position maximum et la position...

Страница 20: ...appos sur le produit Au terme de son utilisation le produit ne doit pas tre limin avec les d chets urbains Le produit doit tre remis l un des centres de collecte s lective pr vus par l administration...

Страница 21: ...ufe eingestellt werden Brenner mit elektrischer Funkenz ndung Dr cken Sie auf den Bedienknopf und drehen Sie ihn nach links Der Brenner wird angez ndet Halten Sie den Bedienknopf mindestens 3 Sekunden...

Страница 22: ...r als 12 cm Kleinere T pfe Pfannen stehen nicht stabil Die empfohlenen Topf Pfannenbodendurchmesser sind Starkbrenner mindestens 22 cm Normalbrenner mindestens 18 cm Schmorbrenner mindestens 14 cm Wok...

Страница 23: ...lecken auf dem Email Topftr ger Brennerkappen Auffangschalen Hartn ckige Flecken entfernen Sie am besten mit einem fl ssigen Reinigungsmittel oder einem Scheuerschwamm aus Kunststoff Verwenden Sie kei...

Страница 24: ...ieder in die Steckdose Setzen Sie eine neue Sicherung ein oder schalten Sie die Sicherung wieder ein Reinigen trocknen Sie die Z ndkerze Setzen Sie die Brennerteile in der richtigen Reihenfolge und ko...

Страница 25: ...lang tief mindestens 3 Sekunden gedr ckt gehalten Thermoelement 3 ist verschmutzt Halten Sie den Bedienknopf mindestens 3 Sekunden vollst ndig zwischen der Voll und der Kleinstufe gedr ckt Bei der er...

Страница 26: ...mers angebracht Dies bedeutet dass das Ger t am Ende seiner Lebensdauer NICHT zusammen mit dem Hausm ll entsorgt werden darf Es kann zu den eigens von den st dtischen Beh rden eingerichteten Sammelste...

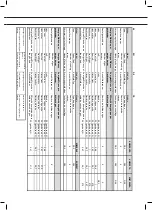
Страница 27: ...2 1 Measurements according EN30 2 1 Messungen gem EN30 2 1 Mesures selon EN30 2 1 Informatie volgens verordening EU 66 2014 Information according regulation EU 66 2014 Informationen gem Verordnung EU...

Страница 28: ...eafdeling het complete typenummer bij de hand When contacting the service department have the complete type number to hand En cas de contact avec le service apr s vente ayez aupr s de vous le num ro d...

Отзывы: