


VOOR JE BEGINT...
MONTAGE INSTRUCTIES
FIRST STEPS...
ASSEMBLY INSTRUCTIONS
1.
Zorg dat de trampoline op een vlakke ondergrond geplaatst kan
worden.
2.
Plaats de trampolines niet op beton, asfalt of andere harde
ondergrond en niet in de nabijheid van andere installaties zoals:
zwembaden, schommels, glijbanen en/of klimrekken.
3.
Zorg voor een vrije ruimte van 2 meter om de trampoline heen
en 4 meter boven de trampoline.
4.
Zorg dat de ruimte onder de trampoline leeg is.
5.
Draag handschoenen bij de montage van de trampoline om
blessures te voorkomen.
6.
Wees voorzichtig met tuinmeststoffen in de buurt van de tram
poline. Deze kunnen het frame aantasten.
1.
Make sure the trampoline is placed on a flat surface.
2.
Make sure the trampoline is not installed over concrete, asphalt
or any other hard surface nor at proximity of other conflicting
installations (e.g. paddling pools, swings, slides, climbing
frames).
3.
Make sure nothing is placed underneath the trampoline.
4.
Reserve 2 metres of free space around and 4 metres above the
trampoline.
5.
Wear gloves while assembling the trampoline in order to pre
vent injuries.
6.
Please keep fertiliser away from the trampoline. This may da
mage the frame.
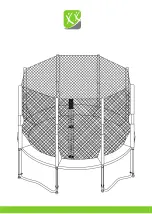
Содержание Hi-Flyer 06 Combi
Страница 8: ......
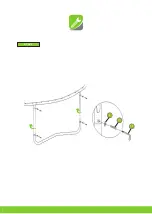
Страница 11: ...STEP 2 9 10 11 6 5 ...
Страница 12: ...STEP 3 6 6 6 6 5 4 6 6 6 6 5 3 ...
Страница 13: ...STEP 4 9 10 11 ...
Страница 14: ...STEP 5 SPRINGMAT JUMPING MAT SPRUNGMATTE TAPIS DE SAUT ...
Страница 23: ...SAFETY NET ...
Страница 25: ...Allen Wrench Cord Enclosure Netting HF06 1 4 1 1 5 1 1 6 1 1 7 1 1 8 1 HF08 HF10 HF12 HF14 L M N ...
Страница 29: ...STEP 12 ...


