


42
12.4.1 Creating a new patient
To create a new patient, select the
“New”
tab and enter the data using the on-screen keyboard (MYOPIA
EXPERT 700 only). Once you have entered the new patient data, tap on the
“New Exam”
button to confirm
the information and continue with the examination. If you want to clear all the fields, tap on the
“Clear”
button.
If you only want to create the patient press on button “
Save
”.
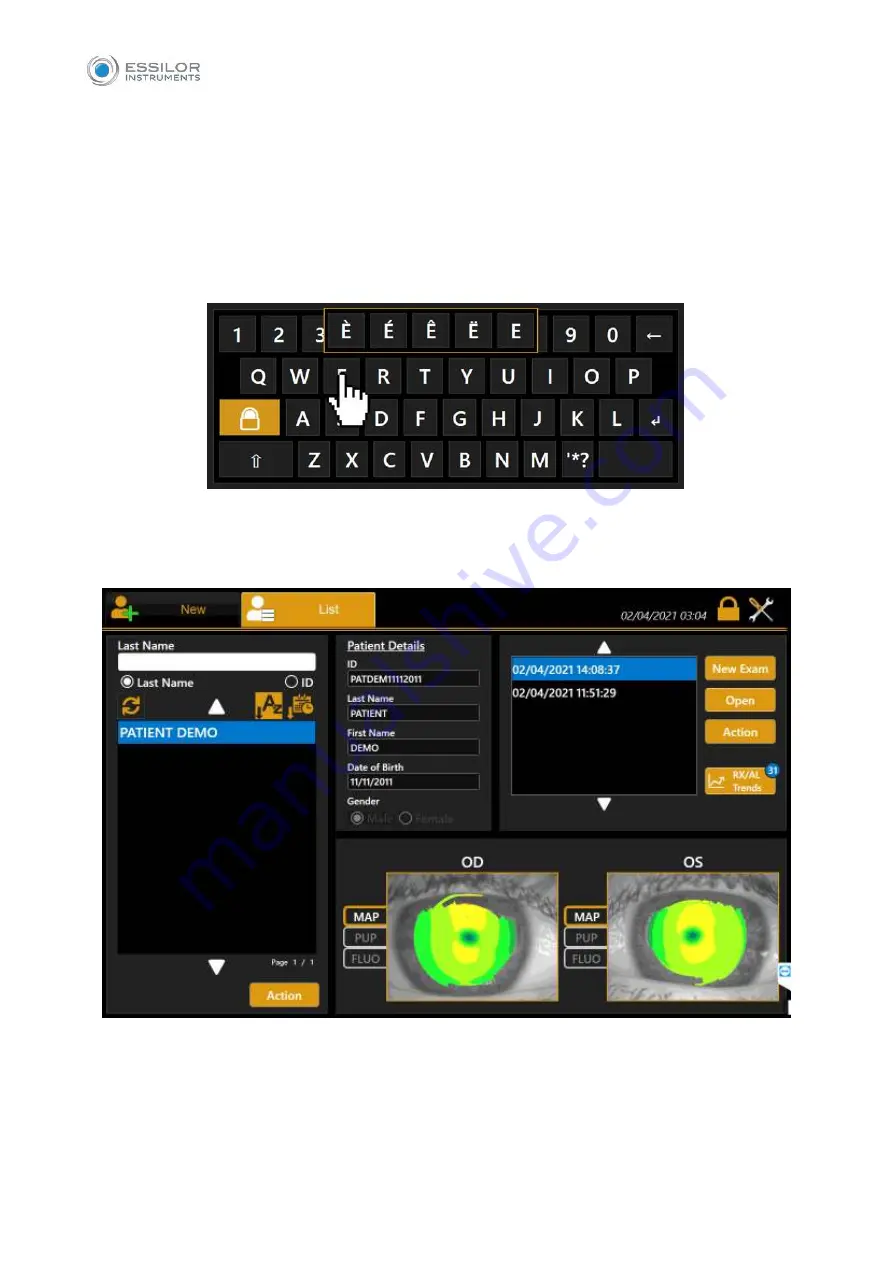
A special character can be entered simply by touching and holding the corresponding letter (Fig.16)
Fig. 16
12.4.2 Selecting or editing a patient
On the input screen, tap on the
“List”
tab to access all the patients found in the database (Fig.17).
Fig. 17
On this screen, you can select a previously created patient and the examinations associated with him/her.
The list can be viewed by
patient ID
or by
Last Name
(and name) selecting the corresponding radio
button. If you type into the
“Last Name”
field, a search is done in the local database for patients with
the corresponding surname or whose surname contains the selected key, same for patient ID. By pressing
Содержание MYOPIA EXPERT 700
Страница 1: ...MYOPIA EXPERT 700 Biometer USER MANUAL Rev 1 07 04 2021...
Страница 15: ...13 3 1 DEVICE SAMPLE LABELING...
Страница 24: ...22...
Страница 60: ...58 RX AL Refraction Axial Length trend Combined trend view with Refraction error S E and Axial Length...
Страница 63: ...61 Delete Button Delete the selected row...
Страница 79: ...77 Fig 43 It is possible to switch between ETDRS and Landolt C Visus simulation view...
Страница 82: ...80 Fig 46 14 4 2 3D Press the 3D button to view the 3D map of the altimetric data Fig 47 Fig 47...
Страница 94: ...92 Fig 59...


