


ESI
Juli@
15
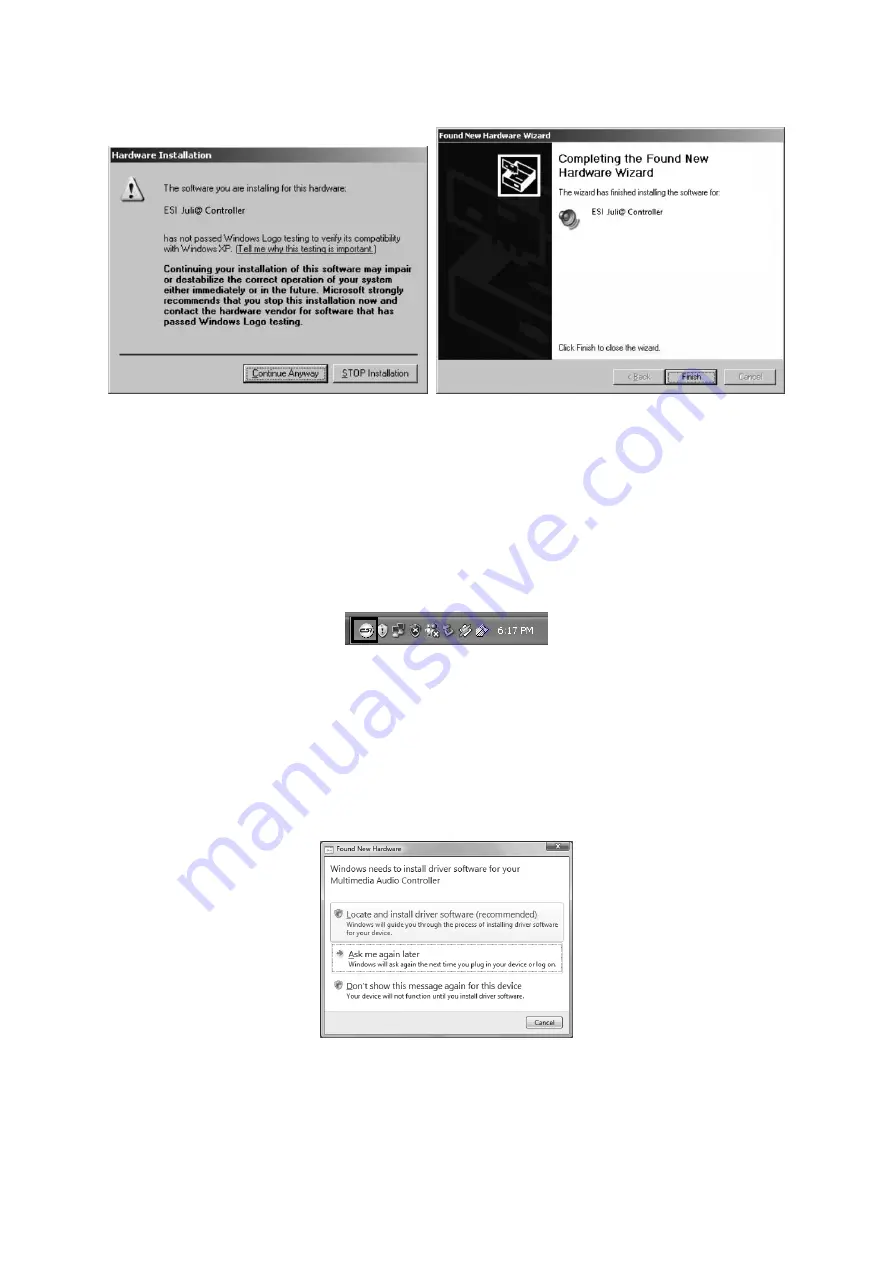
Windows will now prompt you to confirm the Windows Logo testing in the
Hardware Installation
dialog with
Continue Anway
before the driver installation proceeds. After some time, the
installation of the
ESI Juli@ Controller
device will be completed and you need to click
Finish
.
Once this is done, the
Found New Hardware Wizard
will automatically appear again. Please follow
the exact steps one more time, this time to install the
ESI Juli@ Audio
device. After that is finally
confirmed on the last dialog via
Finish
, the Juli@ driver software has been completely installed. To
confirm this, please check if the ESI icon is displayed in the taskbar notification area as shown
below.
If yes, the driver installation has been completed successfully. Note that on some systems the
computer has to be rebooted (Windows will display a message in that case) before everything is
completed.
Windows Vista & 7
Turn on your computer. Windows will automatically detect a new device installation and the
Found
New Hardware
window will appear as seen on the following picture.
Select
Locate and install driver software (recommended)
. Insert the driver CD only if you are
installing the original driver from the CD. If you are installing an updated driver from our website,
proceed by clicking on
I don’t have the disc. Show me other options.
on the following dialog.
Содержание Juli@
Страница 1: ...High Quality 24 bit 192kHz 4x4 reference audio interface with swappable I O socket User s Guide...
Страница 2: ...ESI Copyright 2004 2012 Revision 8 July 2012 www esi audio com...
Страница 10: ...ESI Juli 10 5 Put the metal bracket to the card 6 Tighten screws again in opposite order...
Страница 13: ...ESI Juli 13 Figure 5 Juli Installed in a PCI slot Close the computer case...


