ESI
Prodigy 7.1 HiFi
13
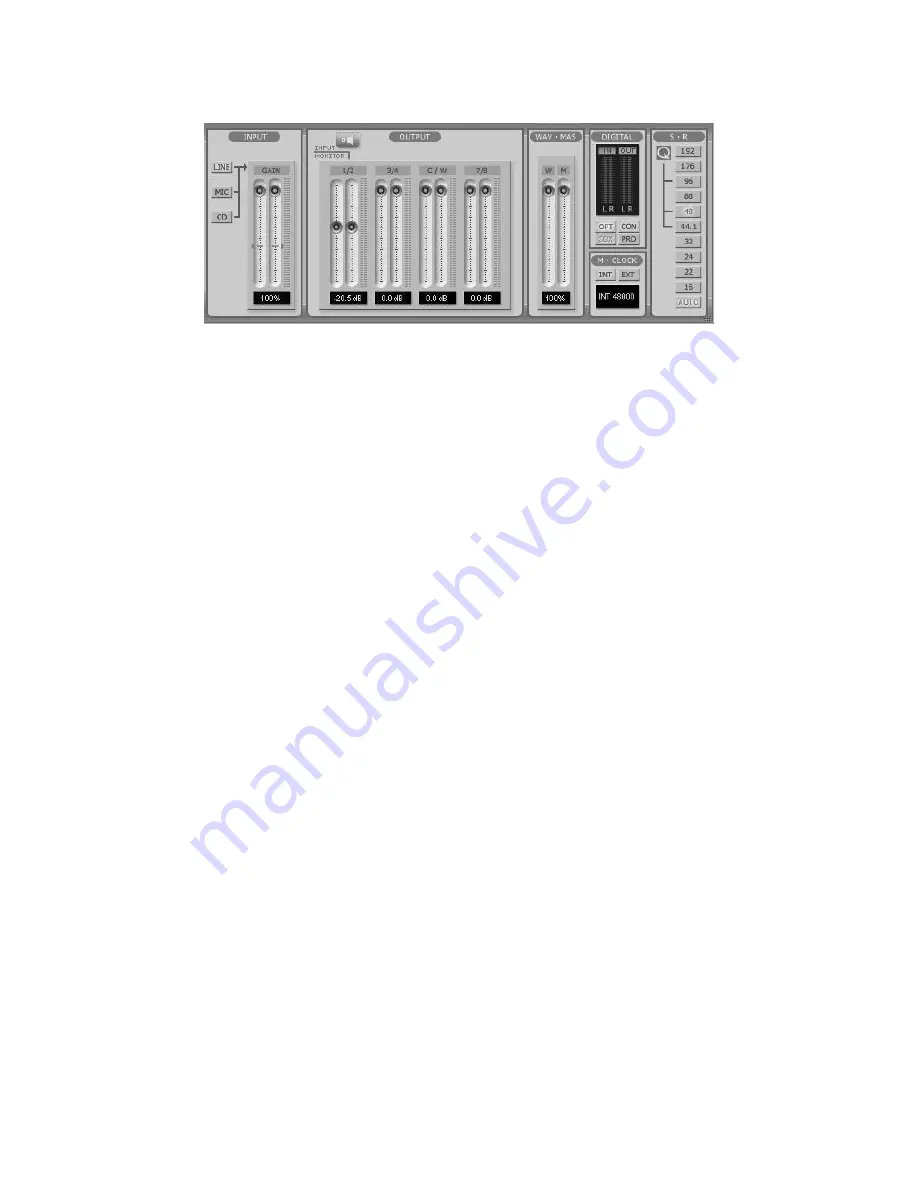
1) Input: You can change the input level on channels 1/2 by clicking and dragging the fader bar.
The number on the bottom shows the relative amount in dB. Clicking this number enables you to
mute the channel. And you can choose input level MIC or LINE.
2) Output: You can change the output level on all channels by clicking and dragging the fader bar.
The number on the bottom shows the relative amount in dB. Clicking this number enables you to
mute the channel. And you can choose output monitoring from speaker level to output 1/2.
3) WAV·MAS: You can adjust all input / output monitoring levels by clicking and dragging the
fader in the master control panel. Again the number on the bottom shows you the relative
monitoring level in %. Clicking this number enables you to mute all channels.
Note: MAS (Master) refers to the actual audio output level. WAV (Wave) refers to the actual
playback of (digital PCM) audio data.
4) Digital: It shows digital output signal monitor.
5) M-Clock: Shows the Master Clock of the digital output signal frequency.
6) S.R: Shows the sampling rate. When you click “AUTO” then the setting changes to “LOCK” for
fixed sample rate. The sample rates will be converted during playback when the “LOCK” setting is
active. In QSound mode (QVE 96-24), there is only support for 44.1kHz, 48kHz and 96kHz
2. QSound
Under Windows XP only, you can control QSound® Virtual Engine™ QVE setting on “QSound”
tab. QVE provides a full suite of spatial enhancements for stereo and surround input formats and
output configurations. Applying expansion, virtualization, or surround synthesis as appropriate,
QVE automatically produces the maximum spatial impact possible from every source/output
combination. If you want to use QSound then you must change the audio driver mode to QVE 96-
24.


