background image

1 SAFETY

0463 691 001

- 5 -

© ESAB AB 2019

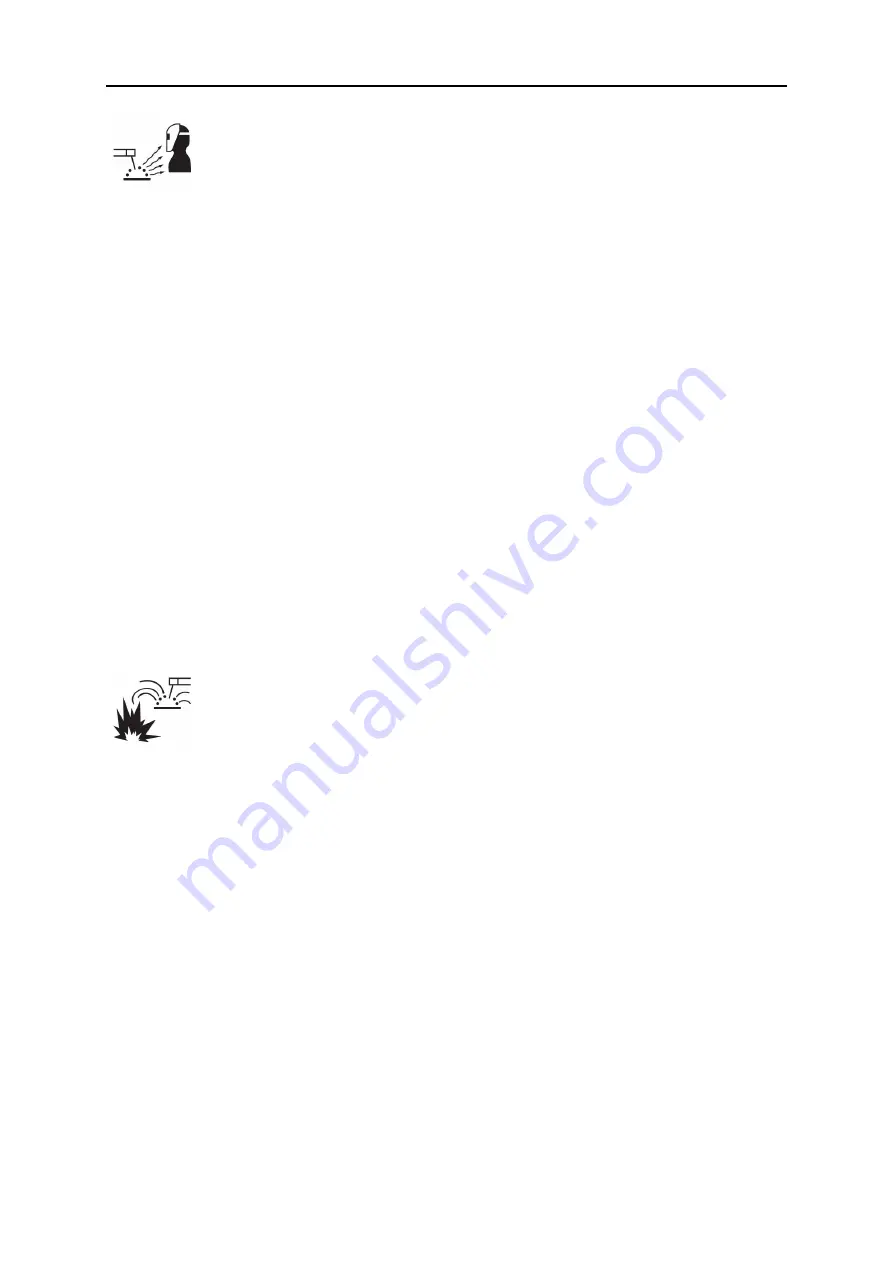
PROTECT YOURSELF AND OTHERS

Some welding, cutting and gouging processes are noisy and require
hearing protection. The arc, like the sun, emits ultraviolet (UV) and
other radiation and can injure the skin and eyes. Hot metal can cause
burns. Training in the proper use of the processes and equipment is
essential to prevent accidents. Therefore:

1.

Wear a welding helmet fitted with a proper shade of filter to protect your face and eyes
when welding or watching.

2.

Always wear safety glasses with side shields in any work area, even if welding
helmets, face shields and goggles are also required.

3.

Use a face shield fitted with the correct filter and cover plates to protect your eyes,
face, neck and ears from sparks and rays of the arc when operating or observing
operations. Warn bystanders not to look at the arc and not to expose themselves to
the rays of the electric-arc or hot metal.

4.

Wear flameproof gauntlet-type gloves, heavy long-sleeve shirt, cuffless pants,
high-topped shoes, and a welding helmet or cap for protection, to protect against arc
rays and hot sparks or hot metal. A flameproof apron may also be desirable as
protection against radiated heat and sparks.

5.

Hot sparks or metal can lodge in rolled up sleeves, trouser cuffs, or pockets. Sleeves
and collars should be kept buttoned and open pockets eliminated from the front of the
clothing.

6.

Protect other personnel from arc rays and hot sparks with a suitable non-flammable
partition or curtains.

7.

Use goggles over safety glasses when chipping slag or grinding. Chipped slag may be
hot and can fly for long distances. Bystanders should also wear goggles over safety
glasses.

FIRES AND EXPLOSIONS

The heat from flames and arcs can start fires. Hot slag or sparks can
also cause fires and explosions. Therefore:

1.

Protect yourself and others from flying sparks and hot metal.

2.

Move all combustible materials well away from the work area or cover the materials
with a protective non-flammable covering. Combustible materials include wood, cloth,
sawdust, liquid and gas fuels, solvents, paints, and coating paper, etc.

3.

Hot sparks or hot metal can fall through cracks or crevices in floors or wall openings
and cause a hidden smoldering fire or fires on the floor below. Make certain that such
openings are protected from hot sparks and metal.

4.

Do not weld, cut, or perform other hot work until the work piece has been completely
cleaned so that there are no substances on the work piece which might produce
flammable or toxic vapors. Do not perform hot work on closed containers, they may
explode.

5.

Have fire extinguishing equipment handy for instant use, such as a garden hose,
water pail, sand bucket, or portable fire extinguisher. Be sure you are trained in its
use.

6.

Do not use equipment beyond its ratings. For example, an overloaded welding cable
can overheat and create a fire hazard.

7.

After completing work, inspect the work area to make sure there are no hot sparks or
hot metal that could cause a fire later. Use fire watchers when necessary.

Содержание Robust Feed PRO

Страница 1: ...Instruction manual 0463 691 001 US 20190710 Valid for serial no 904 xxx xxxx Robust Feed PRO ...

Страница 2: ...it 22 5 8 Bobbin brake 22 5 9 Changing and loading wire 23 5 10 Changing feed rollers 23 5 11 Changing the wire guides 24 5 11 1 Inlet wire guide 24 5 11 2 Middle wire guide 25 5 11 3 Outlet wire guide 25 5 12 Roller pressure 25 5 13 Wear parts storage compartment 27 5 14 Attaching the wheel kit 27 5 14 1 Attaching the wheels to the wheel kit frame 27 5 14 2 Wire feed unit in vertical position 28 ...

Страница 3: ...35 7 MAINTENANCE 36 7 1 Inspection cleaning and replacement 36 7 2 Calibration and validation of measured values 36 8 TROUBLESHOOTING 37 9 ORDERING SPARE PARTS 38 DIAGRAM 39 ORDERING NUMBERS 41 WEAR PARTS 42 ACCESSORIES 44 Rights reserved to alter specifications without notice ...

Страница 4: ... contain chemicals known in the State of California to cause birth defects and in some cases cancer California Health Safety Code Section 25249 5 et seq WARNING This product can expose you to chemicals including lead which are known to the state of California to cause cancer and birth defects or other reproductive harm Wash hands after use For more information go to www P65Warnings ca gov 1 3 Safe...

Страница 5: ...om arc rays and hot sparks with a suitable non flammable partition or curtains 7 Use goggles over safety glasses when chipping slag or grinding Chipped slag may be hot and can fly for long distances Bystanders should also wear goggles over safety glasses FIRES AND EXPLOSIONS The heat from flames and arcs can start fires Hot slag or sparks can also cause fires and explosions Therefore 1 Protect you...

Страница 6: ...DS May be dangerous Electric current flowing through any conductor causes localized Electric and Magnetic Fields EMF Welding and cutting current creates EMF around welding cables and welding machines Therefore 1 Welders with pacemakers fitted should consult their doctor before welding EMF may interfere with some pacemakers 2 Exposure to EMF may have other health effects which are unknown 3 Welders...

Страница 7: ...acturer s operating instructions for mounting a regulator to a compressed gas cylinder 3 Always secure cylinders in an upright position by chain or strap to suitable hand trucks undercarriages benches wall post or racks Never secure cylinders to work tables or fixtures where they may become part of an electrical circuit 4 When not in use keep cylinder valves closed Have valve protection cap in pla...

Страница 8: ... 52 529 The following publications are recommended to you 1 ANSI ASC Z49 1 Safety in Welding and Cutting 2 AWS C5 5 Recommended Practices for Gas Tungsten Arc Welding 3 AWS C5 6 Recommended Practices for Gas Metal Arc welding 4 AWS SP Safe practices Reprint Welding Handbook 5 ANSI AWS F4 1 Recommended Safe Practices for Welding and Cutting of Containers That Have Held Hazardous Substances 6 OSHA 2...

Страница 9: ...rings etc which could become trapped or cause burns 5 General precautions Make sure the return cable is connected securely Work on high voltage equipment may only be carried out by a qualified electrician Appropriate fire extinguishing equipment must be clearly marked and close at hand Lubrication and maintenance must not be carried out on the equipment during operation WARNING Wire feeders are in...

Страница 10: ...our health Keep your head out of the fumes Use ventilation extraction at the arc or both to take fumes and gases away from your breathing zone and the general area ARC RAYS Can injure eyes and burn skin Protect your eyes and body Use the correct welding screen and filter lens and wear protective clothing Protect bystanders with suitable screens or curtains NOISE Excessive noise can damage hearing ...

Страница 11: ...TY 0463 691 001 11 ESAB AB 2019 ESAB has an assortment of welding accessories and personal protection equipment for purchase For ordering information contact your local ESAB dealer or visit us on our website ...

Страница 12: ...ndix The wire feed units are sealed and contain four wheel drive wire feed mechanisms as well as control electronics They can be used together with wire on ESAB s Marathon Pac or on wire bobbin standard Ø 200 mm and Ø 300 mm The wire feed unit can be placed on a trolley suspended above the workplace or on the floor standing up or laying down and with or without a wheel set ESAB accessories for the...

Страница 13: ...ust Feed PRO 37 1 lb 16 9 kg Robust Feed PRO Water 37 8 lb 17 2 kg Robust Feed PRO Offshore 38 1 lb 17 3 kg Robust Feed PRO Offshore Water 38 7 lb 17 6 kg Robust Feed PRO Tweco 37 1 lb 16 9 kg Robust Feed PRO Offshore Tweco 38 1 lb 17 3 kg Maximum weight wire spool 18 5 kg 40 8 lbs Dimensions L W H Robust Feed PRO 26 6 10 4 16 5 in 675 265 418 mm Operating temperature 20 to 55 C 4 to 131 F Transpo...

Страница 14: ... min 32 315 in min The Robust Feed PRO will be able to achieve higher feeding speed above 8 0 m min 315 in min but with higher tolerances Duty cycle The duty cycle refers to the time as a percentage of a ten minute period that you can weld or cut at a certain load without overloading Enclosure class The IP code indicates the enclosure class i e the degree of protection against penetration by solid...

Страница 15: ...urces are marked with the symbol CAUTION This product is intended for industrial use In a domestic environment this product may cause radio interference It is the user s responsibility to take adequate precautions 4 1 Lifting instructions CAUTION Risk of crushing when lifting the wire feeder Protect yourself and warn bystanders of the risk CAUTION To avoid personal injury and damage to the equipme...

Страница 16: ...The lifting points are rated for a maximum total weight of 40 kg 90 lb when lifted using the two outer upper lifting handles in accordance with the illustration above The 40 kg 90 lb approved weight includes the wire feeder and any accessories the standard feeder weight is 17 6 kg 38 7 lb For all weights please see the TECHNICAL DATA chapter ...

Страница 17: ...intended for transportation Never pull the equipment by the welding torch WARNING Make sure the side panels are closed during operation WARNING To prevent the reel from sliding off the brake hub lock the reel in place by tightening the brake hub nut NOTE Replace the brake hub nut and the brake hub sleeve if they are worn out and don t lock properly CAUTION Before threading welding wire make sure t...

Страница 18: ...coolant 350 A 100 duty cycle 500 A 60 duty cycle 0 5 ft 95 mm 2 2 35 m 19 pole 19 pole with coolant 400 A 100 duty cycle At an ambient temperature of 40 C and a normal 10 minute cycle Imax Cable area Cable length Note 350 A 60 duty cycle 0 5 ft 70 mm 2 2 35 m 19 pole 19 pole with coolant 300 A 100 duty cycle 430 A 60 duty cycle 0 5 ft 95 mm 2 2 35 m 19 pole 19 pole with coolant 375 A 100 duty cycl...

Страница 19: ...onnection for cooling liquid from the power source the cooling unit 1 6 Connection for the welding torch Euro or Tweco type 14 Connection for shielding gas 7 Internal control panel see the CONTROL PANEL chapter 15 Connection for control cable from power source 8 Heat kit switch Offshore versions NOTE 1 Cooling liquid connections are only available on certain models WARNING The right and left side ...

Страница 20: ...5 OPERATION 0463 691 001 20 ESAB AB 2019 5 4 Retrofitting an interconnection strain relief kit ...

Страница 21: ... hoses if applicable are routed through the strain relief device Using a pre assembled interconnection cable kit which includes the strain relief is also an option see the ACCESSORIES appendix NOTE The interconnection strain relief should be clamped onto clean cables Locate the welding current cable in the larger 2 of the two holes in the strain relief clamp Ensure that the cable ties wrapped arou...

Страница 22: ...ng can be done If the power source is set to another welding method at power on the voltage settings on the feeder panel cannot be guaranteed If this happens switch off the power source set the mode switch to GMA MIG MAG and restart the power source again 5 7 Lighting inside the wire feed unit Lights are fitted inside the cabinet of the wire feed unit The lights automatically switch on when the fe...

Страница 23: ...according to the illustration on the inside of the feeder unit 6 Close and lock the left door of the wire feeder NOTE Replace the brake hub nut and the brake hub sleeve if they are worn out and don t lock properly 5 10 Changing feed rollers When changing to a different type of wire the feed rollers should also be changed to match the new type of wire For more information about correct feed rollers...

Страница 24: ...he left door of the wire feeder 5 11 Changing the wire guides When changing to a different type of wire the wire guides may need to be changed to match the new type of wire For information about the correct wire guides depending on wire diameter and type see the WEAR PARTS appendix For tips about easy access to essential wear parts see the Wear parts storage compartment section in this manual 5 11...

Страница 25: ...ck the outlet wire guide quick lock A by folding it out 4 Remove the outlet wire guide B 5 Install the correct outlet wire guide according to the WEAR PARTS appendix 6 Lock the new outlet wire guide into place using the wire guide quick lock A 7 Reattach the second pair of feed rollers and reapply the roller pressure see the Changing feed rollers section 5 12 Roller pressure The roller pressure sh...

Страница 26: ...correct bobbin brake force If the torch cables are long dirty or worn the pressure setting may need to be increased Always check the roller pressure setting on a case by case basis by feeding out the wire against an insulated object as described above A table showing approximate settings can also be found on the inside of the left door of the wire feeder Wire diameter in mm 023 58 3 0 6 030 58 3 0...

Страница 27: ... wire guide 4 Feed rollers 4 pcs 2 Middle wire guide 5 Contact tips for the welding torch 4 pcs 3 Outlet wire guide 5 14 Attaching the wheel kit 5 14 1 Attaching the wheels to the wheel kit frame Before attaching the wire feed unit to the wheel kit fasten the wheels to the frame using the M12 screws washers and nuts using a tightening torque of 40 4 Nm 354 35 4 in lb The fixed wheels at the rear e...

Страница 28: ...AB 2019 5 14 2 Wire feed unit in vertical position 5 14 3 Wire feed unit in horizontal position NOTE In order to attach the wire feeder to the wheel kit in the horizontal position the two bumpers on the wire feeder door must be removed ...

Страница 29: ... Attaching both the wheel kit and the torch strain relief accessory If the torch strain relief accessory is to be used with the wheel kit when it is fitted in the vertical position the assembly steps below must be completed in the following order ...

Страница 30: ...he wheel kit to the wire feeder using the two screw joints near the rear end of the wire feeder Ensure that the two distance washers are inserted between the wheel kit and the wire feeder 3 Fasten the wheel kit and the torch strain relief to the wire feeder using the two screw joints located closer to the front end of the wire feeder ...

Страница 31: ... or measured value 4 Overtemperature indicator illuminated when the temperature of the wire feeder is approaching a critical level or has already reached the critical level 2 Knob for setting the voltage V 5 Push button for wire inching 3 Knob for setting the wire feed speed m min or in min 6 Push button for gas purge ...

Страница 32: ...t via a so called hidden function To change the unit of measurement from metric to imperial or vice versa proceed as follows 1 Access the hidden functions by keeping the wire inching and gas purging buttons pressed down simultaneously for three seconds The left display will show a flashing C letter which denotes the unit of measurement and a value 0 or 1 At the same time the currently selected spe...

Страница 33: ... that is in use 2 stroke With 2 stroke gas pre flow starts when the welding torch trigger switch is pressed The welding process then starts Releasing the trigger switch stops welding entirely and starts gas post flow 4 stroke With 4 stroke the gas pre flow starts when the welding torch trigger switch is pressed The wire feed starts when the switch is released The welding process continues until th...

Страница 34: ...r the selected time unless the trigger is released If the trigger is released before the set time has expired crater filling will be interrupted when the trigger is released 6 4 Overtemperature indicator The overheating protection has two levels Warning When the overtemperature indicator is illuminated this indicates that the wire feeder is approaching a critical temperature level The weld that is...

Страница 35: ...on the flow meter scale will only be correct if the wire feeder is in upright position 6 7 Rotating the control panel To use the wire feeder in the horizontal position the external control panel may be rotated 90 1 Remove the two screws for the control panel and remove the panel 2 Rotate the control panel 90 counter clockwise 3 Attach the control panel ensuring that the small tabs are in the corre...

Страница 36: ...ce if necessary Welding torch The wear parts of the welding torch should be cleaned and replaced at regular intervals in order to achieve trouble free wire feed Blow the wire guide clean regularly and clean the contact tip 7 2 Calibration and validation of measured values Robust Feed PRO displays the measured values arc voltage and welding current as rectified arithmetic mean values measure value ...

Страница 37: ...h If the fault persists despite replacing the torch contact an ESAB authorized service technician The overheating protection trips frequently More precisely the overtemperature indicator on the front panel is illuminated and the text Err is visible in the display Overtemperature error The wire feeder has reached a critical temperature level and the ongoing weld is suspended For more information ab...

Страница 38: ...IEC EN 60974 10 Class A Canadian standard CAN CSA E60974 5 and US standard ANSI IEC 60974 5 It is the obligation of the service unit which carried out the service or repair work to make sure that the product still conforms to these standards Spare parts and wear parts can be ordered through your nearest ESAB dealer see the back cover of this document When ordering please state product type serial ...

Страница 39: ...DIAGRAM 0463 691 001 39 ESAB AB 2019 DIAGRAM ...

Страница 40: ...DIAGRAM 0463 691 001 40 ESAB AB 2019 ...

Страница 41: ...Robust Feed PRO Offshore With EURO connector incl gas flow meter and heater 0445 800 883 Robust Feed PRO Offshore Water With EURO connector and including torch cooling system incl gas flow meter and heater 0445 800 884 Robust Feed PRO Tweco With Tweco 4 connector 0445 800 885 Robust Feed PRO Offshore Tweco With Tweco 4 connector incl gas flow meter and heater 0463 659 001 Spare parts list Robust F...

Страница 42: ... 0445 830 883 Tweco 0445 830 881 Euro Cored wire Different wire guides dependent on wire diameter Wire diameter in mm 040 0 9 1 0 045 1 2 052 1 4 1 16 1 6 070 1 8 5 64 2 0 3 32 2 4 Feed roller V K knurled X X 0445 850 030 X 0445 850 031 X X 0445 850 032 X 0445 850 033 X 0445 850 034 X 0445 850 035 X 0445 850 036 Inlet wire guide Middle wire guide Outlet wire guide Wire diameter 0 040 1 16 in 0 9 1...

Страница 43: ...r in mm 023 0 6 030 0 8 040 0 9 1 0 045 1 2 052 1 4 1 16 1 6 070 1 8 Feed roller U groove X X 0445 850 050 X X 0445 850 051 X X 0445 850 052 Inlet wire guide Middle wire guide Outlet wire guide 0445 822 001 2 mm 0446 080 881 0445 830 886 Tweco 0445 830 885 Euro ...

Страница 44: ...r Feed 304 0349 313 100 RF retrofit kit for use with existing Warrior trolley with ordering no 0465 510 880 0446 120 880 Euro connector including front plate 0446 120 882 Tweco 4 connector including front plate 0446 120 884 Tweco 5 connector including front plate 0446 123 880 Liquid cooling kit F102 440 880 Quick connector Marathon Pac ...

Страница 45: ...890 70 mm liquid cooled 2 0 m 0446 160 891 70 mm liquid cooled 5 0 m 0446 160 892 70 mm liquid cooled 10 0 m 0446 160 893 70 mm liquid cooled 15 0 m 0446 160 894 70 mm liquid cooled 25 0 m 0446 160 895 70 mm liquid cooled 35 0 m 0446 160 980 95 mm gas cooled 2 0 m 0446 160 981 95 mm gas cooled 5 0 m 0446 160 982 95 mm gas cooled 10 0 m 0446 160 983 95 mm gas cooled 15 0 m 0446 160 984 95 mm gas co...

Страница 46: ...For contact information visit esab com ESAB AB Lindholmsallén 9 Box 8004 402 77 Gothenburg Sweden Phone 46 0 31 50 90 00 http manuals esab com ...

Отзывы: