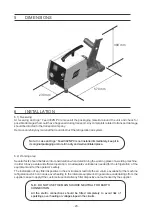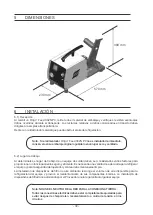
5.3) Installation of the wire feeder
1) Connect the wire feeder to the power source through the cable of comand.
2) Fix the welding cable connected to the te power source in the terminal in the wire feeder.
3) Fix the hose of the gas pressure regulator in the inlet niple of the rear solenoid valvule of the wire feeder.
4) Install the welding gun (see especific manual).
5) Install the wire.
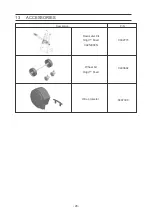
6) Install the feed rollers according to the type and wire diameter to be used.
TABELA 5.1
Table 6.1
- 24 -
- 25 -
Solid steel
Aluminiun
Cored
0,60 - 0,80
0,80 - 1,00
1,00 - 1,20
1,20 - 1,60
1,00 - 1,20
1,20 - 1,60
1,20 – 1,20
1,20 - 1,60
Type
Diameter (mm)
0900905
0900251
0901338
0900822
0900168
0901272
0712720
0900121
P/N
6.4) Wire feed pressure
Start by making sure that the wire moves smoothly through the wire guide. Then set the pressure of the wire
feeder's pressure rollers. It is important that the pressure is not too great.
To check that the feed pressure is set correctly, you can feed out the wire against an insolated object, e.g. a
piece of wood.
When you hold the gun approx. 5 mm from the piece of wood (pic.1) the feed rollers should slip.
If you hold the gun approx. 50 mm from the piece of wood, the wire should be fed out and bend (pic.2).
6.5) Adjusting the braking torque:
The hub is adjusted when delivered, if readjustment is required, follow the instructions below. Adjust the
brake hub so that wire is slightly slack when wire feed stops.
¡
Turn the red handle to the locked position.
¡
Insert a screwdriver into the springs in the hub.
¡
Turn the springs clockwise to reduce the braking torque.
¡
Turn the springs counterclockwise to increase the braking torque.
NOTE: In order to latch or unlatch, just turn the red handle. There´s no need to remove it.
Note: Turn both springs through the same amount.
1) Turn on the power source.
2) Adjust the wire speed, the power source voltage, the burnback time and the shielding gas according to
the wire diameter, thickness and material to be weld.
3) Start the welding and re-adjust the parameters, if needed.
7
OPERATION
8 MAINTENANCE
8.1) Recomendations
The wire feeder requires little maintenance in normal environment and opperation conditions. It is sufficient
to blow it dry clean using dry compressed air free from oil once a month.
After cleaning the equipment with blow dry air, check that the electric connections and components are
properly fixed. Check for possible faults in the wire isolations or electric cables, including the welding cable
and any others and if any of them is faulty change it.
When working with damaged cables or with worn out isolation, the non-isolated parts, can become in
contact with another part of an earth. The electric arc which results from this contact can hurt the eyes if not
protected and cause a fire. The body contact of a part with a cable without isolation can cause a violent
electric hazard, burns and even death.
Note: Cleaning and preventive maintenance should be intensified when operating in environment
contaminated by dust, soot or any other poluent which can cause damage or harm to the performance.
Содержание 0402503
Страница 6: ...6 1 2 3 8 9 4 6 7 5...
Страница 15: ...15 p gina em branco...
Страница 16: ...16 p gina em branco...
Страница 22: ...22 1 2 3 8 9 4 6 7 5...
Страница 31: ...31 white page...
Страница 32: ...32 white page...
Страница 38: ...38 1 2 3 8 9 4 6 7 5...
Страница 53: ...53 P gina en blanco...
Страница 54: ...54 P gina en blanco...
Страница 55: ...55 P gina en blanco...


