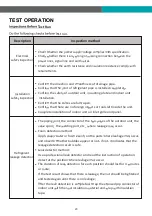
EQK 17S-EACH36R2W/C Скачать руководство пользователя страница 25

23

TEST OPERATION

Electrical 

safet  inspection

Chec

hether the po er supp

oltage co plies ith specification.

Chec

hether there is an

rong or issing connection bet een the 

po er lines signal line and earth ires.
Chec

hether the earth resistance and insulation resistance co p

ith 

re uire ents.

stallation 

safet  inspection

Confir  the direction and s oothness of drainage pipe.
Confir  that the oint of refrigerant pipe is installed co plete .
Confir  the safet  of outdoor unit ounting plate and indoor unit
 installation.
Confir  that the a es are full  open.
Confir  that there are no foreign ob cts or tools left inside the unit.
Co plete installation of indoor unit air inlet grille and panel.

Refrigerant 

lea age detection

The piping oint the connector of the t o a es of the outdoor unit the 

a e spoo   the elding port etc

here lea age a  occur.

Foa  detection ethod: 

pp  soap

ater or foa  e en  on the parts here lea age a  occur

and obser e hether bubbles appear or not if not it indicates that the 
lea age detection result is safe.
Lea  detector ethod: 
Use a professional lea  detector and read the instruction of operation
detect at the position here lea age a  occur.
The duration of lea  detection for each position should last for 3 inutes 
or ore; 

 the test result sho s that there is lea age the nut should be tightened 

and tested again until there is no lea age; 

fter the lea  detection is co pleted rap the e posed pip connector of 

indoor unit ith ther al insulation aterial and rap ith insulation 
tape.

st run.

est Run

Description

Inspection method

Содержание 17S-EACH36R2W/C

Страница 1: ...itioner Please read this owen s manual carefully before using your air conditioner Model No 19S EACH9R1W C 19S EACH9R2W C 19S EACH12R1W C 19S EACH12R2W C 19S EACH18R2W C 19S EACH24R2W C 17S EACH36R2W...

Страница 2: ...tulations on your purchase and welcome to the Family Your new Air Conditioner combines high efficiency operation with portable convenience By following the operating and care instructions in this manu...

Страница 3: ...g and using the appliance 2 D forbidden to children Unforeseeable accidents could happen 3 M 4 C 5 C 6 P 7 E 8 C et changed 9 T 10 T sons 11 D ances 12 er 13 T er for disposal 14 15 T 16 B 17 T 18 T s...

Страница 4: ...2 SAFETY PRECAUTIONS SAFETY RULES AND RECOMMENDATIONS FOR THE INSTALLER 19 D 20 C 21 E 22 D 23 T t not be used c 24 25 T 26 T ap 27 N 28 29 T 30 H acturer 31 U 32 T 33 E 34...

Страница 5: ...3 SAFETY PRECAUTIONS 1 D 2 D 3 D 4 D 5 6 D sources of heat 7 T 8 D 9 D 10 D 11 12 D 13 D 14 N 15 C SAFETY RULES AND PROHIBITIONS...

Страница 6: ...the actual object Please take the latter as the standard Mounting plate Air inlet Drainage pipe Wiring cover Connection wiring Valve protective cover With the protective cover removed Liquid valve Hi...

Страница 7: ...The shape and position of s itches and indicators a be different according to the ode but their function is the sa e 1 2 3 1 5 3 4 2 1 2 3 dicator for T er te perature and Error codes Lights up durin...

Страница 8: ...6 REMOTE CONTROL Remote control DISPLAY Symbols Cooling Mode Fan speed Mute function ture indicator Meaning EC Mode No 1 2 3 4 5 6 7 8 9 10 11 12 13 14 15 16 17 18 19 20 21 22...

Страница 9: ...To stop or start ho ontal lo er nt or set the desired up n air f dire on 12 13 To s tch the EEL fun on 14 To s tch the MUTE fun on MUTE Long press to a te ea te the GEN func n depending on odels To st...

Страница 10: ...8 REMOTE CONTROL e Control Cool Heat C F indoor unit appliances...

Страница 11: ...NTROL COOLING MODE HEATING MODE HEAT MODE MODE COOL For North American market frost DRY MODE DRY Press MODE FAN MODE Not F FAN To set the F MODE AUTO MODE AUTO MODE ture FAN Press FAN 1 Long press MOD...

Страница 12: ...ce an set the 2 Press the TIMER 3 Press TIMER TIMER Note cancelled TIMER TIMER Flaps aps the current angle the current angle ether SWING SWING SWING SWING TURBO TURBO te the highest fan 1 Press TIMER...

Страница 13: ...TE 1 Press MUTE Press I FEEL ou and ensure er I FEEL DISPLA Indoor display DISPLAY LED displa panel Press DISPLAY the panel Press ag tch on the LED displa ECO Press the ECO Press again to cancel it No...

Страница 14: ...12 REMOTE CONTROL appliance ou can the process cancelled SWING SWING 8 o C 1 Long press ECO o o 8 C 46 F o C o 46 o o C 48 o C o 64 it unit o o Te F 30 o o o o 41 F 5 F 30 es...

Страница 15: ...n or s itch it to other ode during operation and the air conditioner protection de ice ill start The co pressor ill resu e operation after 3 inutes Characteristics of heating operation applicable to H...

Страница 16: ...Area mm 15 and 24 24 and 28 28 and 32 0 75 8 10 20 8 and 10 Dedicated Distribution Device and Wire for Air Conditioner Note This table is only for reference the installation shall meet the requirement...

Страница 17: ...oor unit is out of reach of children 1 6 ounting all strong enough to ithstand four t es the full eight and ibration of the unit 1 7 Filter can be easil accessed for cleaning 1 8 Lea e enough free spa...

Страница 18: ...all slee er tdoor oor all b ue angle Step2 Install Mounting Plate ate drainage Note Ma e sure the ounting plate is fir enough and flat against the all after installation This figure sho n a be differe...

Страница 19: ...outlet Step4 Connecting Refrigerant Pipe 4 2 Bending the connecting pipes ith the port facing up as sho n in the figure N YE 4 3 Ta e off the plastic co er in the pipe ports and ta e off the protect...

Страница 20: ...o ensure proper drainage Step6 Connect Wiring 6 1 Choose the right cables s e deter ined b the a u operating current on the na eplate Chec the cables s e refer to section INSTALLATION PRECAUTIONS 6 2...

Страница 21: ...inage hose rapped bundle through the all hole 8 2 Hoo the top of indoor unit on the ounting plate 8 3 pp slight pressure to the left and right sides of the indoor unit a e sure the indoor unit is hoo...

Страница 22: ...here it ill be e posed to direct sunlight other ise use a protection if necessar that should not interfere ith the air flo 1 5 Reser e the spaces as sho n in the picture for the air to circulate free...

Страница 23: ...UNIT INSTALLATION Step4 Install Wiring Step5 Connecting Refrigerant Pipe connection pipes flare nuts Ta e do n the a e co er Ter inal bloc Cable cla p iring co er iring diagra 5 3 INSTALLATION PRECAU...

Страница 24: ...Vacuum Pumping co pound gauge Lo pressure e e protec caps Pressure hose Pressure gauge High pressure al Charge hose High pressure al Lo pressure e cu p p ice port Manifold gauge 6 5 or 1 the pressure...

Страница 25: ...grille and panel Refrigerant lea age detection The piping oint the connector of the t o a es of the outdoor unit the a e spoo the elding port etc here lea age a occur Foa detection ethod pp soap ater...

Страница 26: ...24 TEST OPERATION Test Run Instruction T ainage hose e storage of accessories Note...

Страница 27: ...tioner clean and good appearance ring it dr Gentle ipe the unit surface Warning 40 pposite to the direction of ta ing out the filter Ta e out the filter fro the unit Clean the filter ith soap ater and...

Страница 28: ...r Bac flo of l uid in the refrigerant circulation This occurs hen the air in the roo beco es er cold for e a ple in the C L G or DEHUM Y G DRY odes This noise is ade b the e pansion or contraction of...

Страница 29: ...follo ing error codes utdoor suction te perature sensor fault utdoor fan otor fault door and outdoor co unication fault This appliance contains refrigerant and other rials disposing of this special a...

Страница 30: ...Emerson Quiet Kool Co Ltd 120 US 46 Parsippany Troy Hills NJ 07054 Toll Free 1 888 493 0305 Version Update 2021 5 0...

Отзывы: