Rev.072512-JA
3
www.elitescreens.com/epv
Hardware Parts List for the PowerMax Series
Please make sure all parts listed below are included before proceeding with the installation.
a.
b.
c.
d.
e.
f.
Installation Instructions
Please consult a professional Installer. Elite Screens is not liable for faulty installations.
Flush Mount to the Wall
1.
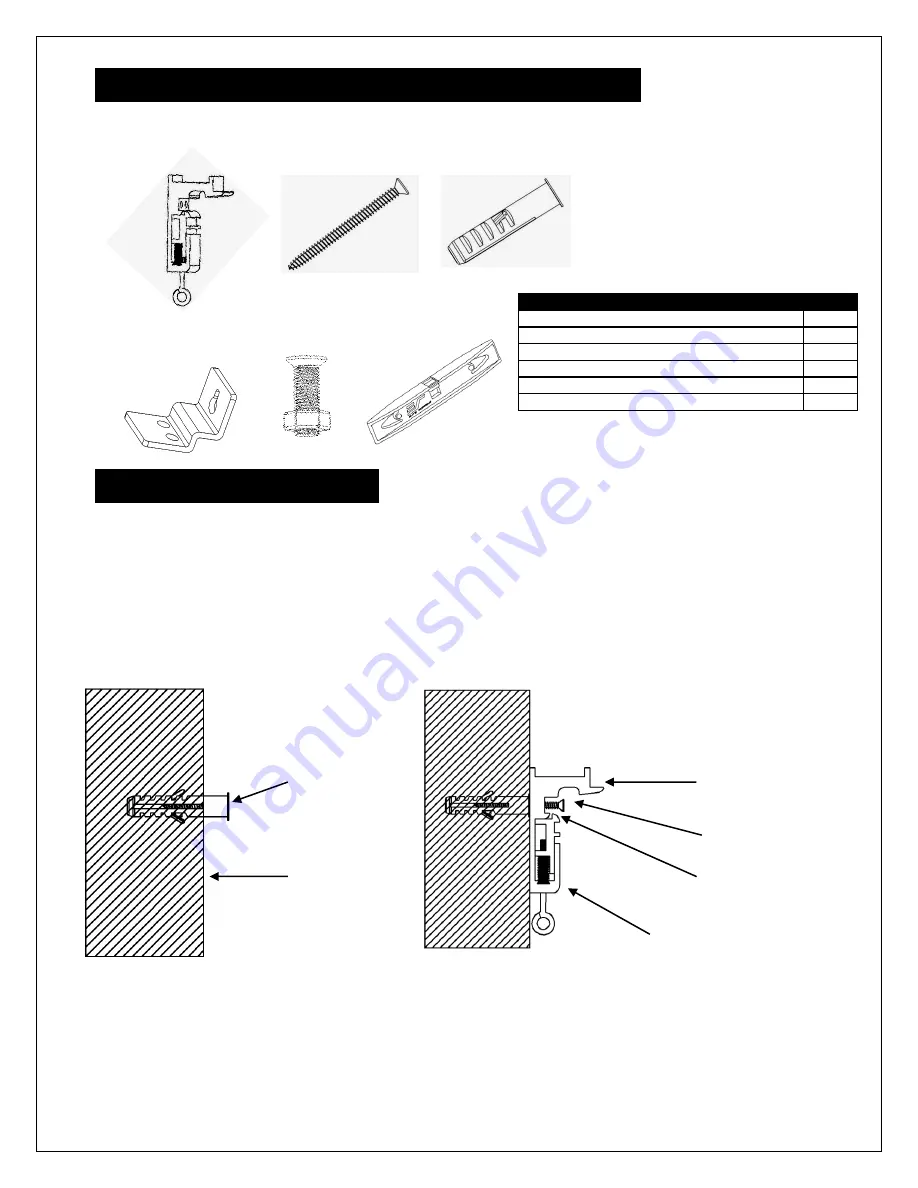
Mark the location of where the screen is to be installed, drill your holes, and insert the M10
Anchors (c).
2.
Install the Mounting Brackets (a) to the wall and secure with the M4x50 Screws (b).
Anchor
Fix Plate 1
M4x50 Screw
Wall
Mounting Bracket
Fix Plate 2
Mounting Bracket
3.
Attach the screen to the Mounting Bracket by inserting the top of the case to the first fix plate,
and securing the back of the case to the second Fix Plate. Make sure the case slots are securely
attached to the Mounting Bracket.
Hardware Parts List
QTY
a.
Mounting Bracket
2
b. M4x50 Screw
4
c. M10 Anchor
4
d. Suspended Ceiling Bracket Connector
2
e. M5x15 Screw& Bolt
4
f. Bubble Leveler
1


