3
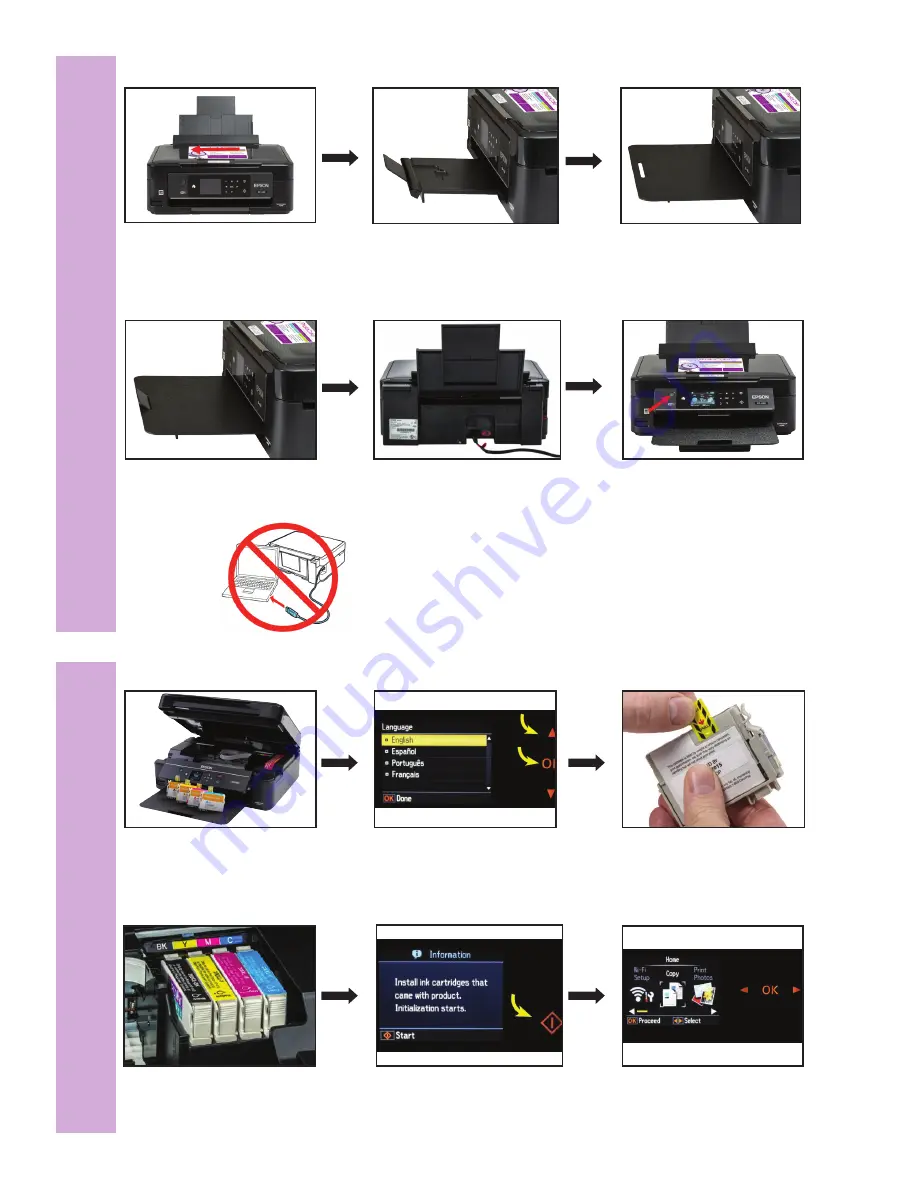
Ink Cartridge Installation
:
3A:
With the Printer powered on,
open the lid of the Printer.
3B:
Use arrow to select
preferred language.
3C:
Touch ‘OK’ once selected.
3D:
Remove Ink Cartridge from
packaging.
3E
: Remove yellow ‘Pull’ tab
from each cartridge.
3F:
Insert each cartridge according
to the color code displayed on the
Ink Carriage.
3G:
Once Ink Cartridges have
been installed, close the Printer
and select ‘Start’.
3H:
Once initialization is complete,
the Home Screen will appear.
2
Printer Set Up
:
2A
: Extend the Input Tray.
2B
: Slide the gray paper guide to
the left.
2C
: Extend the stationary Output
Tray extension.
2D
: Lift the tab up on the end of
the extension.
2E
: Slide the removable OutputTray
onto the stationary Output Tray
extension.
2F:
Place the extension through
the hole in the removable
Output Tray.
2G:
Connect the Power Cable into
the back of the Printer and into the
wall outlet.
2H:
Press and hold the Power
button to power on the Printer.
IMPORTANT REMINDER
:
To ensure your printer functions properly, please DO NOT
connect the printer USB Cable until you are prompted during
the Epson Printer/Scanner Driver Installation.


