


Faxing
See these sections to fax using your product.
Note:
This product allows you to store names, telephone numbers, and fax data in its memory even
when the power is turned off. Make sure you restore all of the default settings if you give away or dispose
of the product. This will erase all of your network settings and fax data.
Connecting a Telephone or Answering Machine
Setting Up Fax Features
Setting Up Speed Dial and Group Dial Lists
Sending Faxes
Receiving Faxes
Connecting a Telephone or Answering Machine
You must connect your product to a telephone wall jack to send or receive faxes. If you want to use the
same telephone line to receive calls, you can connect a telephone or answering machine to your product
using an additional phone cable.
Note:
If you do not connect a telephone to your product, make sure to turn on
Auto Answer
. Otherwise,
you cannot receive faxes.
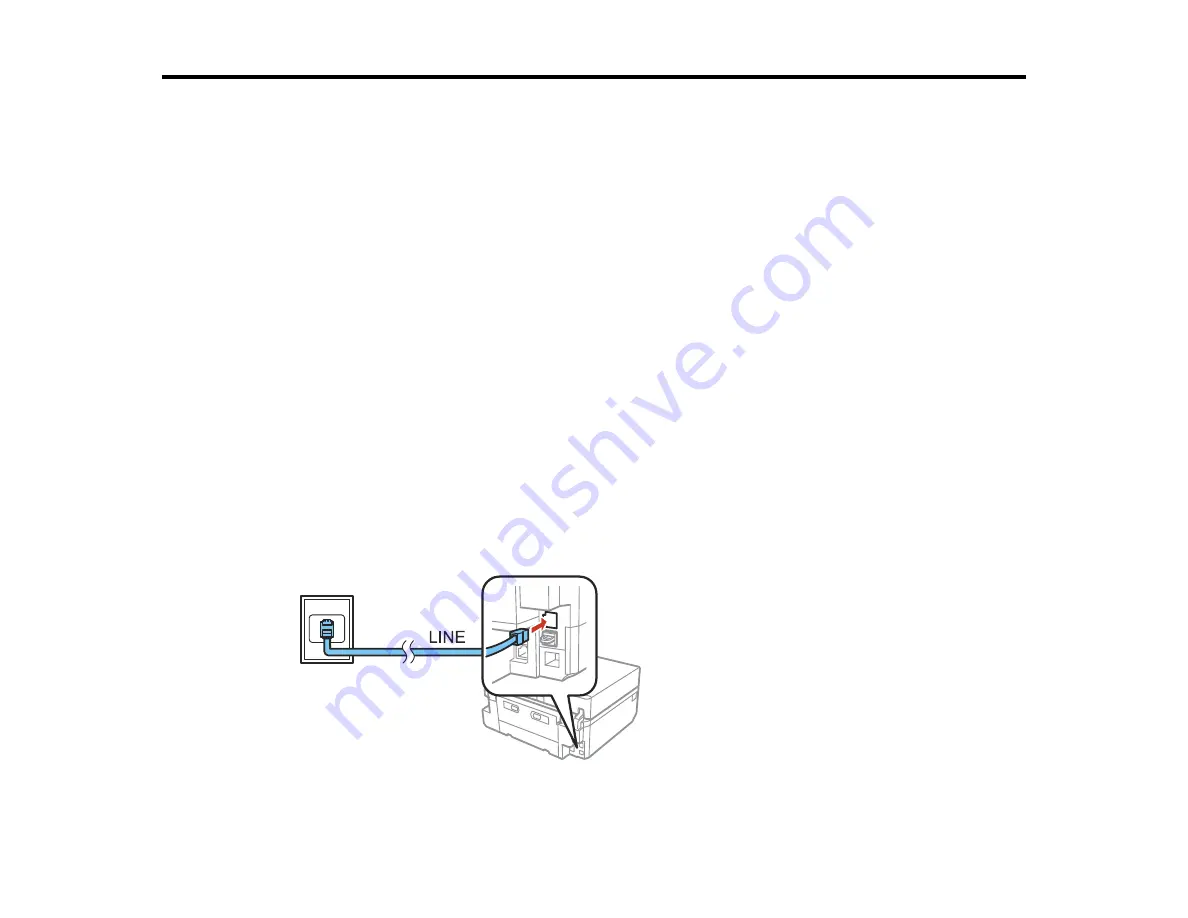
1.
Connect the phone cable to your telephone wall jack and to the
LINE
port on your product.
151
Содержание XP-850
Страница 1: ...XP 850 User s Guide ...
Страница 2: ......
Страница 14: ......
Страница 15: ...XP 850 User s Guide Welcome to the XP 850 User s Guide 15 ...
Страница 20: ...1 Rear paper feed slot 2 Paper support Parent topic Product Parts Locations 20 ...
Страница 120: ... Normal preview Click the Auto Locate icon to create a marquee dotted line on the preview image 120 ...
Страница 126: ...126 ...
Страница 171: ...5 Select Fax Settings for Printer Select your product if prompted You see this window 171 ...
Страница 181: ...5 Select Fax Settings for Printer Select your product if prompted You see this window 181 ...
Страница 182: ...6 Select Speed Dial Group Dial List You see this window 182 ...
Страница 219: ...2 Press the left or right arrow button and then select Setup 3 Scroll down and select External Device Setup 219 ...
Страница 273: ...273 ...
Страница 303: ...5 Press the tabs and remove the document mat 6 Carefully remove any jammed paper 303 ...


