


Purchase Epson Ink Cartridges and Maintenance Box
You can purchase genuine Epson ink, maintenance boxes, and paper at Epson Supplies Central at
(U.S. sales) or
(Canadian sales). You can also purchase supplies
from an Epson authorized reseller. To find the nearest one, call 800-GO-EPSON (800-463-7766).
Note:
We recommend that you use genuine Epson maintenance boxes and cartridges and do not refill
them. The use of other products may affect your print quality and could result in printer damage.
Part of the ink from the included set of cartridges is used for priming the printer. Yields vary considerably
based on images printed, print settings, paper type, frequency of use, and temperature. For print quality,
a variable amount of ink remains in the cartridge after the "replace cartridge" indicator comes on.
Ink Cartridge and Maintenance Box Part Numbers
Parent topic:
Replacing Ink Cartridges and Maintenance Boxes
Ink Cartridge and Maintenance Box Part Numbers
Use these part numbers when you order or purchase a new maintenance box or ink cartridges, and use
the cartridges within six months of installing them.
Part
Part number
Black cartridge
676XL
Cyan cartridge
676XL
Magenta cartridge
676XL
Yellow cartridge
676XL
Maintenance box
T671000
Parent topic:
Purchase Epson Ink Cartridges and Maintenance Box
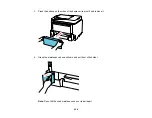
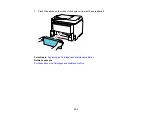
Removing and Installing Ink Cartridges
Make sure you have your replacement cartridges handy before you begin. You must install new
cartridges immediately after removing the old ones.
199
Содержание WorkForce Pro WP-4530
Страница 1: ...WorkForce Pro WP 4530 User s Guide ...
Страница 2: ......
Страница 12: ......
Страница 13: ...WorkForce Pro WP 4530 User s Guide Welcome to the WorkForce Pro WP 4530 User s Guide 13 ...
Страница 20: ...Printer Parts Inside 1 Ink cartridge slots 2 Front cover 3 Print head Parent topic Product Parts Locations 20 ...
Страница 28: ...4 Load a stack of paper printable side down in the cassette as shown 28 ...
Страница 32: ...2 Pull up the rear MP tray 3 Flip the feeder guard forward then slide the edge guides outward 32 ...
Страница 35: ...2 Pull up the rear MP tray 3 Flip the feeder guard forward then slide the edge guides outward 35 ...
Страница 50: ...Parent topic Placing Originals on the Product 50 ...
Страница 51: ...Related topics Copying Scanning Faxing 51 ...
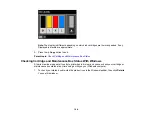
Страница 111: ... Normal preview Click the Auto Locate icon to create a marquee dotted line on the preview image 111 ...
Страница 115: ...3 Adjust the scan area as necessary 115 ...
Страница 122: ...122 ...
Страница 130: ...3 Adjust the scan area as necessary 130 ...
Страница 176: ...5 Select Fax Settings for Printer You see this window 176 ...
Страница 177: ...6 Select your product 7 Select Speed Dial Group Dial List You see this window 177 ...
Страница 215: ...215 ...
Страница 220: ...220 ...
Страница 225: ...Parent topic Cleaning and Transporting Your Product Related concepts Print Head Cleaning Print Head Alignment 225 ...
Страница 240: ...3 Remove any jammed paper inside the cassette 4 Remove any paper jammed inside the paper cassette slot 240 ...
Страница 242: ...3 Carefully remove the jammed paper 4 If paper is jammed in the duplexer remove the paper as shown 242 ...
Страница 246: ...6 Lower the document cover 7 Raise the ADF input tray 8 Carefully remove the jammed pages 246 ...