Epson TM-H2000 Скачать руководство пользователя страница 4

EPSON TM-H2000

6/12

EPSON TM-H2000

 - 3

Parallel Interface

Control Panel

LEDs

 (Power)

On when the power is on.

Note: 

Turn off the product before opening any covers.

Error

Steadily on when the printer is offline. See if a cover is open. 
Blinking if there is an error. Turn the printer off for a few 
seconds, then turn the printer back on. If still blinking, 
contact a dealer or qualified service person. 

Paper

Comes on when roll paper is low or out. Flashes when the 
product is performing a self-test.

Slip

Blinks when the printer is ready to receive slip paper. Steadily 
on during printing of a slip, and blinks again when slip paper 
should be removed.

Buttons

Feed

Pressing this button once feeds paper by one line. Holding 
this button down feeds paper continuously. 

Release

Pressing this button releases slip paper or starts a slip paper 
self-test.

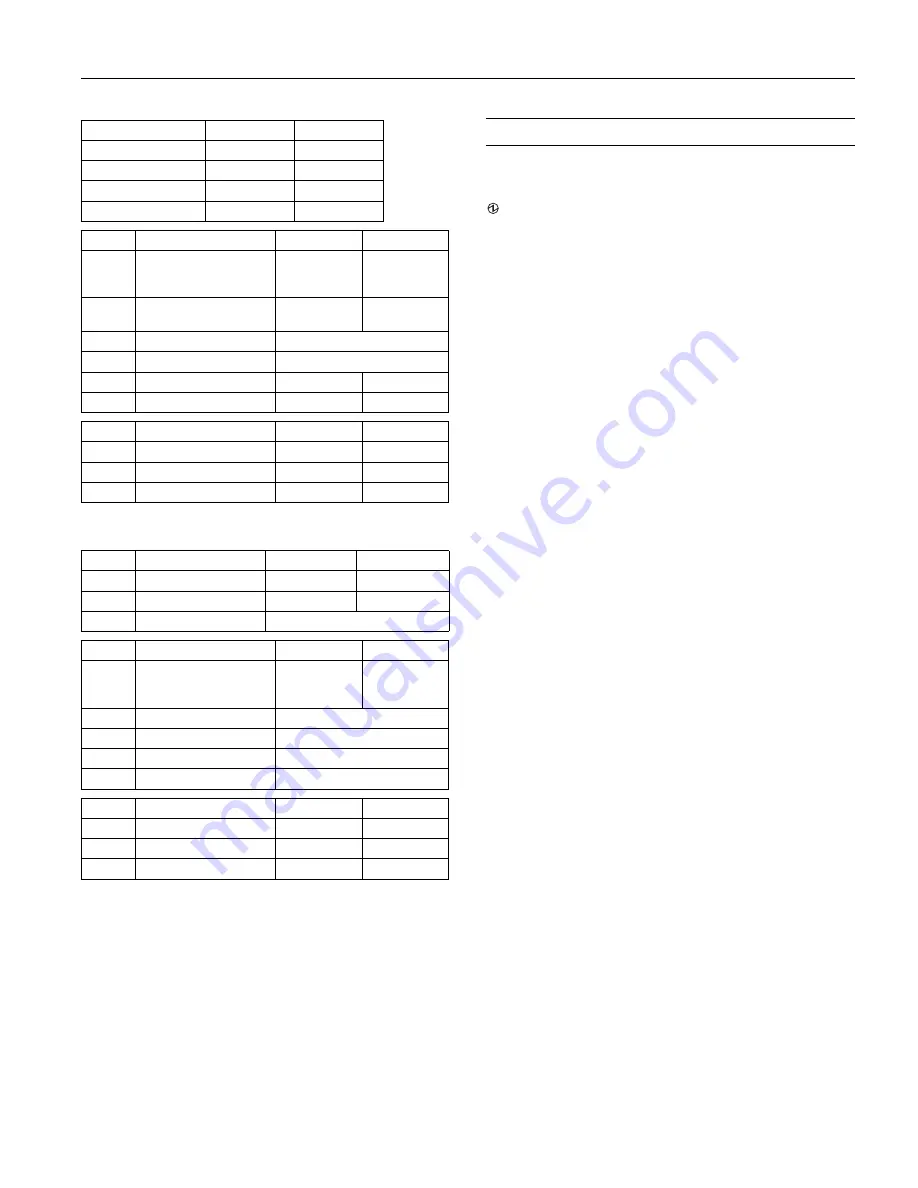
Transmission speed

Switch 1-7

Switch 1-8

4800

ON

ON

9600

OFF

ON

19200

ON

OFF

38400

OFF

OFF

Bank 2

Function

ON

OFF

1

Handshaking (BUSY)

Receive buffer 
full

Offline or 
receive buffer 
full

2

Customer display (DM-D) 
connection

Connected

Not connected

3 and 4

Print density

See table below

5 and 6

Reserved

Set to OFF (Do not change.)

7

I/F pin 6 reset

Enabled

Disabled

8

I/F pin 25 reset

Enabled

Disabled

Level

Function

Switch 2-3

Switch 2-4

1

Standard

OFF

OFF

2

Medium

ON

OFF

3

Dark

OFF

ON

Bank 1

Function

ON

OFF

1

Auto line feed

Always enabled

Always disabled

2

Receive buffer capacity

45 bytes

4 KB

3 — 8

Reserved

Set to OFF (Do not change.)

Bank 2

Function

ON

OFF

1

Handshaking (BUSY)

Receive buffer 
full

Offline or 
receive buffer 
full

2

Reserved

Set to OFF (Do not change.)

3 and 4

Print density

See table below

5 — 7

Reserved

Set to OFF (Do not change.)

8

I/F pin 31 reset

Set to ON (Do not change.)

Level

Function

Switch 2-3

Switch 2-4

1

Standard

OFF

OFF

2

Medium

ON

OFF

3

Dark

OFF

ON

Содержание TM-H2000

Страница 1: ...at s in the Box 1 Accessories 1 Printer Specifications 1 Media 2 Reliability 2 Safety 2 Dimensions 2 Dip Switches 2 Control Panel 3 Loading Paper 4 Installing a Ribbon 4 Testing the Printer 4 Removing a Paper Jam 5 Related Documentation 5 ...

Страница 2: ... 35 font B 46 2 28 paper Print direction unidirectional with friction feed Print speed 10 2 sec 260 mm sec maximum Paper feed speed approx 7 9 sec 200 mm sec continuous paper feed Power switch Roll paper cover Receipt unit Manual cutter Front cover Control panel Control panel Power LED Error LED Paper LED Feed button Slip LED Release button Drawer kick out Power supply Serial Parallel USB interfac...

Страница 3: ... or carbon copy paper Paper size 2 68 to 9 06 W 2 68 to 11 69 L 68 to 230 mm W 68 to 297 mm L Minimum paper size 2 68 5 98 68 152 mm Sheets 3 parts maximum Total thickness 0 0035 to 0 0122 0 09 to 0 31 mm Reliability Receipt Printer Print head life 150 million pulses 150 km Mechanism 20 million lines Autocutter 2 million cuts MTBF 360 000 hours MCBF 96 million lines Endorsement Printer Print head ...

Страница 4: ... or starts a slip paper self test Transmission speed Switch 1 7 Switch 1 8 4800 ON ON 9600 OFF ON 19200 ON OFF 38400 OFF OFF Bank 2 Function ON OFF 1 Handshaking BUSY Receive buffer full Offline or receive buffer full 2 Customer display DM D connection Connected Not connected 3 and 4 Print density See table below 5 and 6 Reserved Set to OFF Do not change 7 I F pin 6 reset Enabled Disabled 8 I F pi...

Страница 5: ... Ribbon Note Be sure to turn on the power before installing the ribbon 1 Unpack the ribbon and turn the knob on the ribbon in the direction marked on the ribbon to remove any slack 2 Turn the printer on 3 Open the printer s front cover using the tabs on each side of the cover 4 Remove the old ribbon if this is one 5 Insert the new ribbon until it clicks into place 6 Close the printer s front cover...

Страница 6: ... two tabs on the roll paper cover and pushing the cover back 3 Remove the jammed paper 4 Close the roll paper cover Slip Section 1 Turn off the printer 2 Open the printer s front cover using the tabs on each side of the cover 3 Open the franking unit using the lever at the right of the franking unit 4 Remove the jammed paper Related Documentation EPSON TM H2000 Specifications EPSON TM H2000 Develo...

Отзывы: