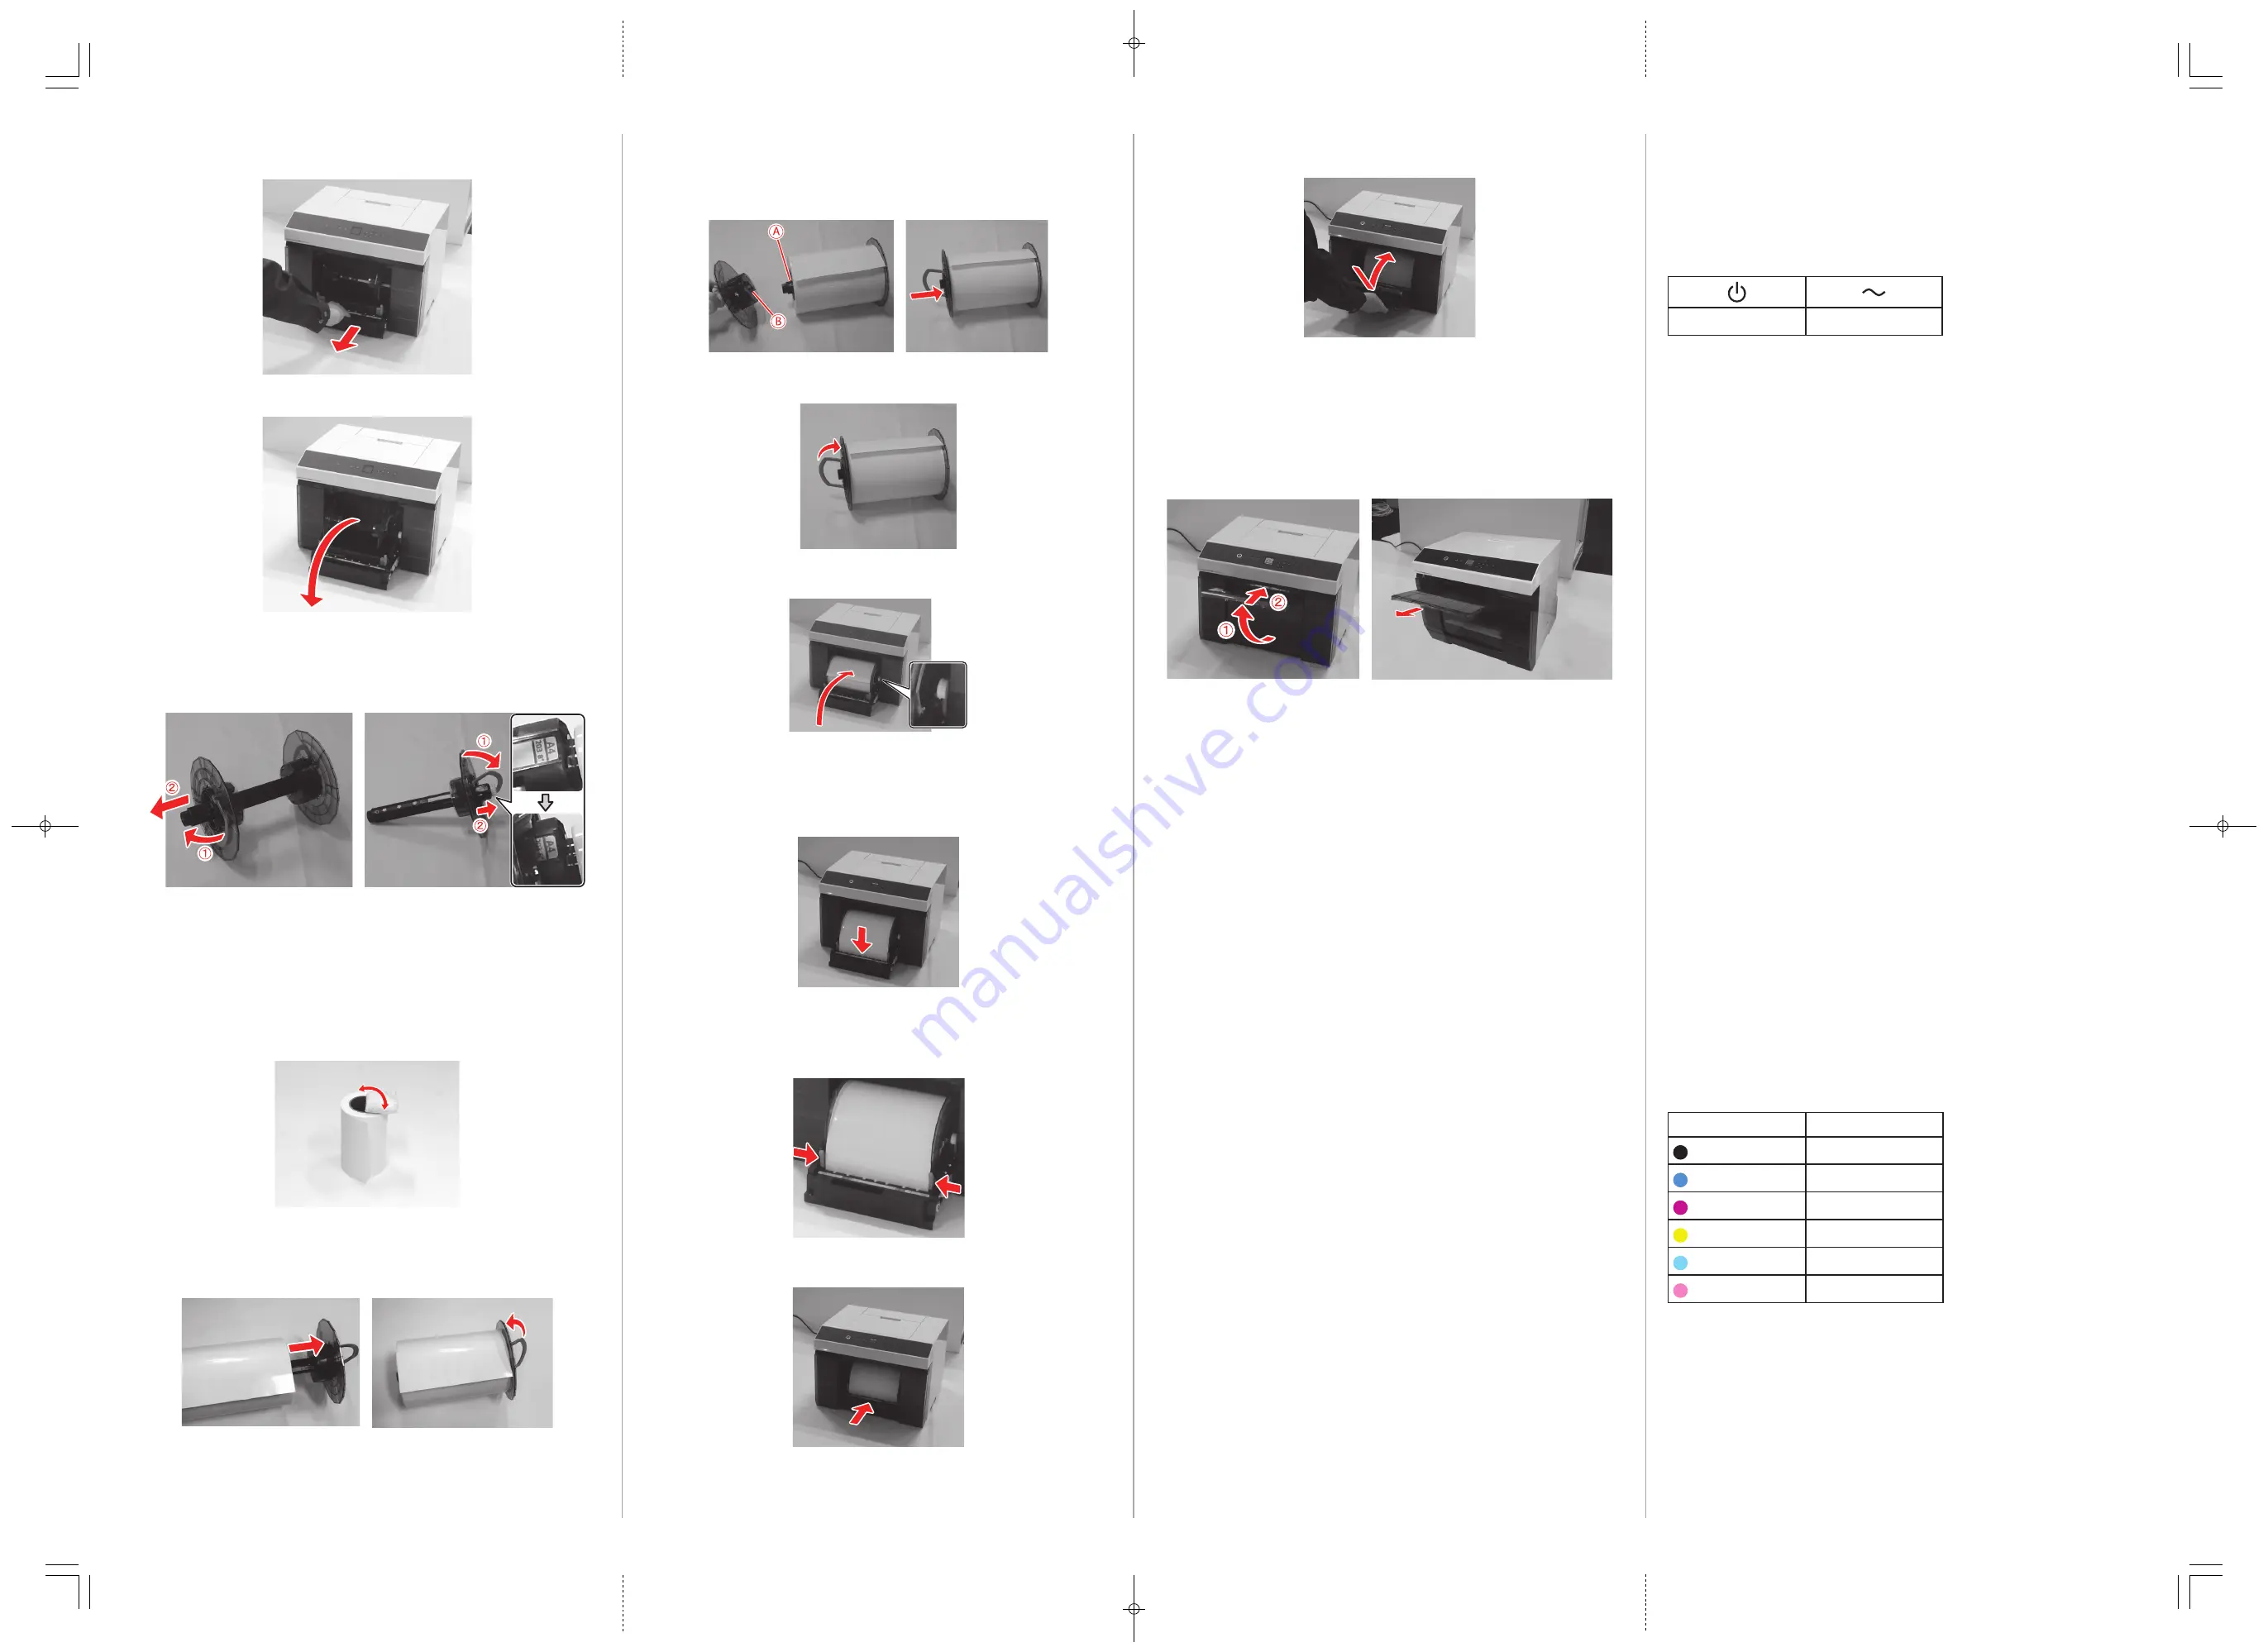
9
Match the orientation of the oval end of the spindle (A) with the media
edge guide (B). Insert the media edge guide onto the spindle and make
sure there are no gaps between the edge of the roll paper and the media
edge guides.
10
Lower the handle to lock the media edge guide in place.
11
Place the spindle into the printer with the gear on the right side.
Note:
Do not use the handles to lift the roll paper or the paper may fall off the
spindle.
12
Feed the leading edge of the roll paper into the paper feed slot until you
hear a beep.
Note:
Make sure the leading edge is cut straight across to avoid paper
feeding problems.
13
Adjust the media edge guides to match the width of the roll paper.
14
Push the roll paper unit all the way into the printer.
3
Grip the handle to release the roll paper unit and pull it towards you
until it stops.
4
Remove the roll paper spindle and set it aside.
5
Raise the handle on the media edge guide that is not connected to the
gear and remove the edge guide as shown. Adjust the position of the
other media edge guide by lifting the handle and sliding the edge guide
along the spindle to match the width of the roll paper.
6
Remove the paper roll from its packaging. Remove any tape and
protective paper from the end of the roll.
Note:
Wear gloves to avoid marking the paper with dirt or oils from your
hands.
7
Stand the paper roll on its side and wipe the edge of the paper roll with
a soft, clean cloth several times to remove any dust. Flip the paper roll
and repeat the process.
8
Insert the paper roll onto the spindle as shown, then lower the handle.
Make sure there is no gap between the media edge guide and the roll
paper.
EPSON and SureLab are registered trademarks and EPSON Exceed Your Vision is a registered logomark
of Seiko Epson Corporation.
General Notice: Other product names used herein are for identification purposes only and may be
trademarks of their respective owners. Epson disclaims any and all rights in those marks.
This information is subject to change without notice.
© 2021 Epson America, Inc., 11/21
Printed in U.S.A.
CPD-61555
15
Reattach the scrap paper box. The paper loads into the printer and a
message appears on the LCD screen.
16
When the LCD screen displays the paper type, press the OK button if
the type is correct, or select Change and press OK to select a different
paper type.
Note:
For instructions on adding a new paper type, see the online
User's Guide
.
17
Attach and extend the output tray.
Install software
Note:
An Internet connection is required to obtain the product software.
Firmware Update Notice:
The printer is designed to work only with genuine Epson
branded ink packs. Other brands of ink packs and ink supplies are not compatible
and, even if described as compatible, may not function properly or at all. Epson
periodically provides firmware updates to address issues of security, performance,
minor bug fixes and ensure the printer functions as designed. These updates may
affect the functionality of third-party ink. Non-Epson branded or altered Epson packs
that functioned prior to a firmware update may not continue to function.
1
Make sure the product is NOT CONNECTED to your computer.
2
Download and run your product’s software package. For the latest
software, visit
http://epson.com/support
(U.S.),
http://epson.ca/support
(Canada), or
http://latin.epson.com/support
(Caribbean) and search for your
product.
3
Follow the instructions on the screen to run the setup program.
4
If prompted, connect a USB 2.0 cable to the printer and your computer.
Using the Maintenance Tool
Open the Maintenance Tool software utility to perform the following
maintenance tasks:
• Diagnostic Cleaning – Detects clogged nozzles and automatically performs
cleaning
• Nozzle Check – Checks for clogged nozzles
• Forced Cleaning – Performs manual cleaning
Note:
See the online
User's Guide
for details on using the Maintenance Tool utility.
The Symbols on the Product
The symbols on this Epson product are used in order to ensure safety and
proper use of the product and to prevent danger to customers and other
persons, and property damage. The symbols indicate the meaning below. Be sure
that you completely understand the meaning of symbols on the product before
using it.
Stand-by
Alternating Current
Product support
Epson technical support
Visit
http://epson.com/support
(U.S.),
http://epson.ca/support
(Canada),
or
http://latin.epson.com/support
(Caribbean) and search for your product to
download software and utilities, view manuals, get FAQs, or contact Epson.
Epson provides technical support and information on the installation,
configuration, and operation of professional printing products through your
Epson limited warranty. Dial (888) 377-6611, 7
am
to 4
pm
, Pacific Time,
Monday through Friday. Days and hours of support are subject to change
without notice. Before you call, make sure you have your:
• Printer serial number: ___________________________________________
• Proof of purchase and date: _______________________________________
Note:
If you experience difficulty with the toll-free line, call (562) 276-1305.
Online guides
Instructions for using your printer and maintenance tools.
Recycling
Epson offers a recycling program for end of life hardware and ink packs. Please
go to
http://epson.com/recycle
(U.S.) or
http://epson.ca/recycle
(Canada)
for information on how to return your products for proper disposal.
Need ink or paper?
Ensure brilliant results with Epson specialty and plain papers, engineered
specifically for Epson printers. Find Epson papers and Epson Genuine Ink at
http://epson.com
(U.S. sales) or
http://epson.ca
(Canadian sales) and at
Epson authorized resellers. Call 800-GO-EPSON (800-463-7766).
Epson SureLab D1070/D1070DE
replacement ink packs
Color
Part number
Black
T46J120
Cyan
T46J220
Magenta
T46J320
Yellow
T46J420
Light Cyan
T46J520
Light Magenta
T46J620


