EPSON Stylus Pro 4400/4450/4800/4880/4880C
Revision C
Adjustment
Mechanical Adjustment
385
5.2.6 Multi Sensor Position Adjustment
This adjustment sets a suitable distance between the Multi Sensor (Multi
Sensor Holder) and the platen.
Required Tools
Multi Sensor Position Tool
CR Lock Tool
Procedure
1.
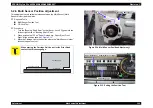
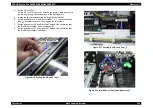
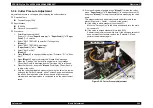
Turn the "Bushing, Shaft, Rear" so that [Lever, Lock, PG] goes into the
furthest right notch of "Bushing, Shaft, Rear".
2.
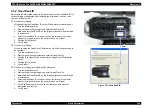
Place position tool 3.0 on "Paper Guide Assy., Paper Eject, Front,
Right" at the position shown by
3.
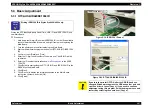
Move the Carriage Unit to the position where the "Multi Sensor Holder"
touches the position tool.
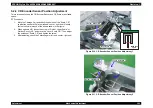
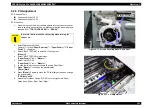
Figure 5-14. Multi Sensor Position Adjustment_1
Figure 5-15. Setting the Position Tool
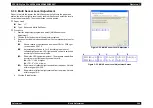
C A U T I O N
When moving the Carriage Unit, do not let the Print Head
contact the thickness gauge.
Carriage Unit
Printhead
Thickness gauge
Bushing, Shaft, Rear
Lever, Lock, PG
Thickness gauge
Paper Guide Assy., Paper Eject, Front, Right
Содержание Stylus Pro 4800 Portrait Edition
Страница 1: ...EPSONStylusPro 4400 4450 4800 4880 4880C Color Large Format Inkjet Printer SERVICE MANUAL SEIJ04008 ...
Страница 9: ...C H A P T E R 1 PRODUCTDESCRIPTION ...
Страница 113: ...C H A P T E R 2 OPERATINGPRINCIPLES ...
Страница 156: ...C H A P T E R 3 TROUBLESHOOTING ...
Страница 200: ...C H A P T E R 4 DISASSEMBLY ASSEMBLY ...
Страница 366: ...C H A P T E R 5 ADJUSTMENT ...
Страница 448: ...C H A P T E R 6 MAINTENANCE ...
Страница 457: ...C H A P T E R 7 APPENDIX ...
Страница 463: ...EPSON Stylus Pro 4400 4450 4800 4880 4880C Revision C Appendix Exploded Diagrams 463 7 2 Exploded Diagrams ...
Страница 469: ...PX 6500 E PS ON S TYLUS PR O 4800 No 4 R ev 01 C593 ME CH 011C8 A2 518 520 507 505 513 501 511 508 512 514 517 519 500 ...


