10
Printing
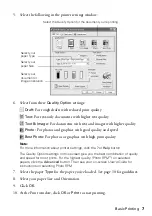
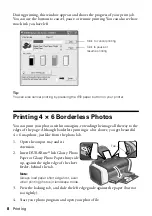
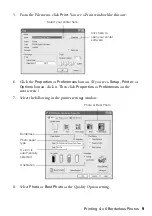
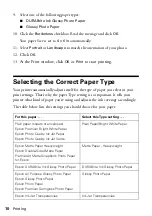
9. Select one of the following paper types:
■
DURABrite Ink Glossy Photo Paper
■
Glossy Photo Paper
10. Click the
Borderless
checkbox. Read the message and click
OK
.
Your paper Size is set to
4 × 6 in
automatically.
11. Select
Portrait
or
Landscape
to match the orientation of your photo.
12.
Click
OK
.
13.
At the Print window, click
OK
or
to start printing.
Selecting the Correct Paper Type
Your printer automatically adjusts itself for the type of paper you select in your
print settings. That’s why the paper Type setting is so important. It tells your
printer what kind of paper you’re using and adjusts the ink coverage accordingly.
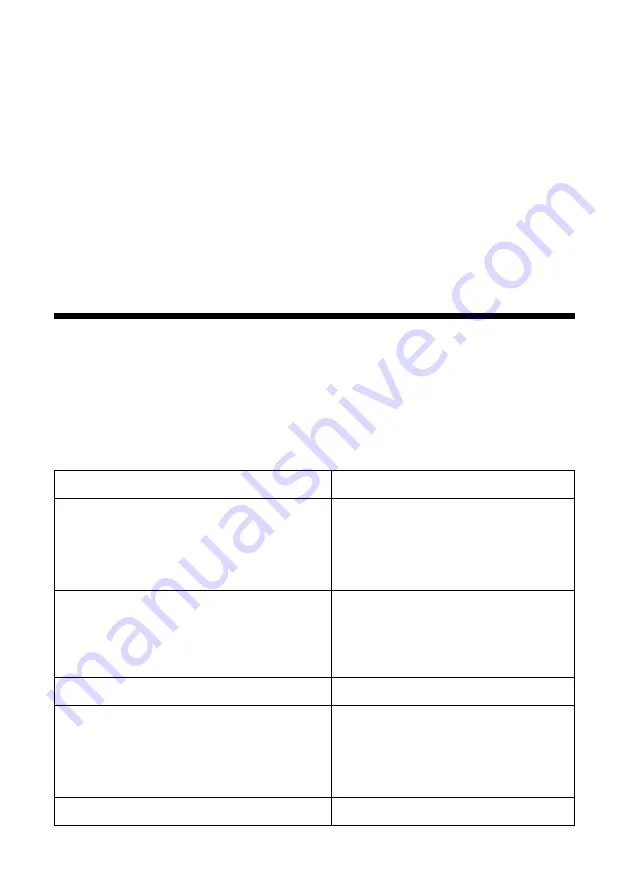
The table below lists the settings you should choose for your paper:
For this paper . . .
Select this Type setting . . .
Plain paper (sheets or envelopes)
Epson Premium Bright White Paper
Epson Photo Quality Ink Jet Paper
Epson Photo Quality Ink Jet Cards
Plain Paper/Bright White Paper
Epson Matte Paper Heavyweight
Epson Double-Sided Matte Paper
PremierArt Matte Scrapbook Photo Paper
for Epson
Matte Paper - Heavyweight
Epson DURABrite Ink Glossy Photo Paper
DURABrite Ink Glossy Photo Paper
Epson All Purpose Glossy Photo Paper
Epson Glossy Photo Paper
Epson Photo Paper
Epson Premium Semigloss Photo Paper
Glossy Photo Paper
Epson Ink Jet Transparencies
Ink Jet Transparencies
Содержание Stylus C66
Страница 1: ...Quick Guide Printing Solving Problems Notices CPD 17763 4049260 00 XXX ...
Страница 4: ...4 Contents ...
Страница 24: ...Printed in XXXXXX XX XX XX ...


