Before Printing
To maintain print quality, perform the following
inspection before starting work each day.
Check the amount of ink remaining:
Check the level of the ink. If the remaining ink is 70
mm or less from the bottom of the ink tank, replace
the chip unit and refill the ink.
While printing, you can replace the chip unit and refill
the ink while continuing to print when the remaining
ink is 70 mm or less from the bottom of the ink tank.
U
“Procedure for Ink Refills” on page 66
Print Check Pattern
Print a check pattern to check for clogged nozzles.
Perform head cleaning if parts of the pattern are faint
or missing.
Print a Check Pattern
U
Head Cleaning
U
Saving New Media
Settings
Type and Summary of Media
Settings
To print in the optimum conditions for the media you
are using, you must register the print information and
the setting values that are appropriate for the media
you are using to the printer and the RIP.
Each media has its own particular characteristics, such
as needing large amounts of ink when printing and
taking some time to dry. If printing is not done
according to these characteristics, you will not get
satisfying print results.
However, searching for the optimum print settings for
each type of media can be a complicated and time
consuming endeavor.
You can easily, and quickly, register media setting
values to the printer using one of the following methods.
❏
Easy Media Setup
This is suitable for quick printing. After
registering the media settings to the printer, in
Easy Media Setup, select the generic print
information that was already registered to the
supplied RIP (Epson Edge Print).
❏
Register the media settings to the printer from
Epson Control Dashboard.
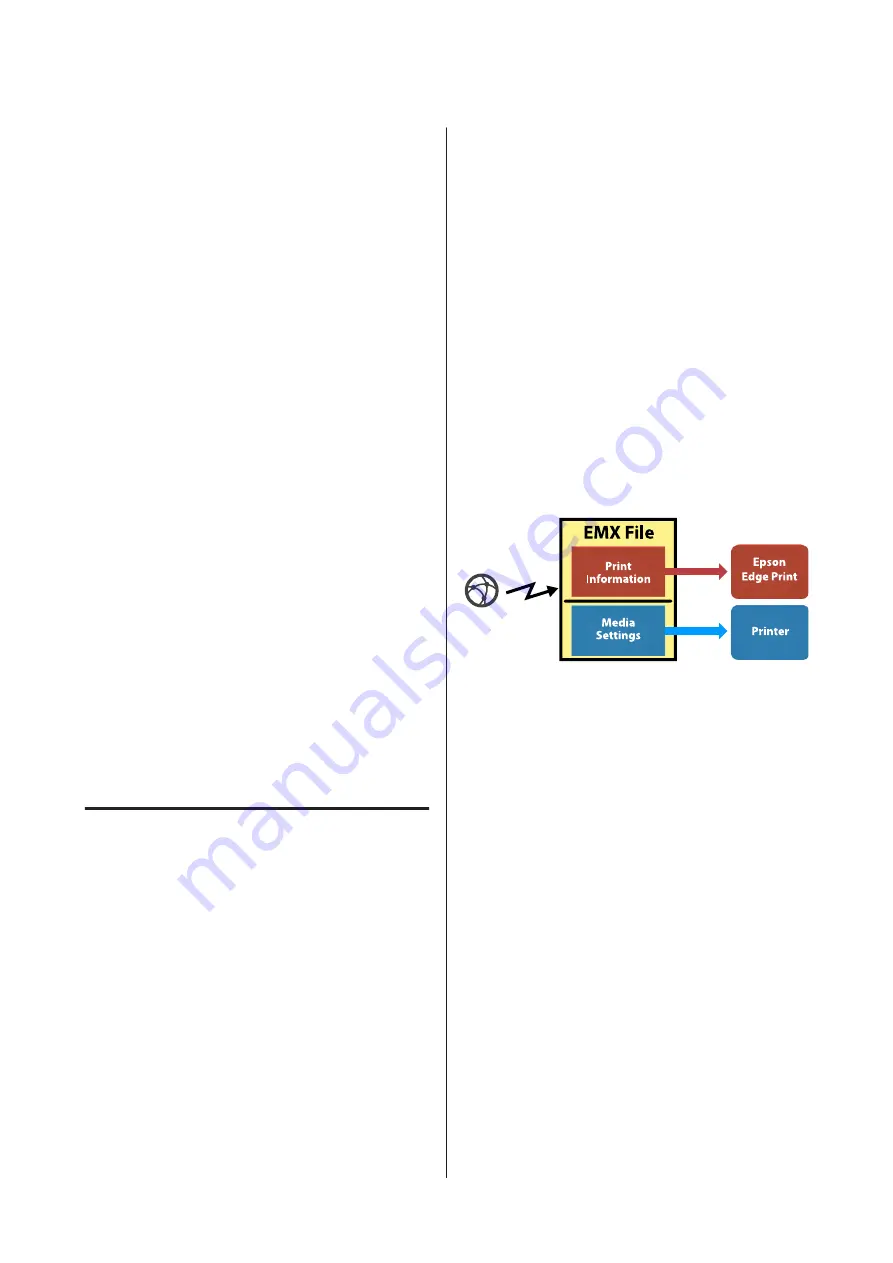
By using print settings files (EMX) that Epson
provides free-of-charge, you can easily print with
the print quality achieved as though experts did
the entire setup.
AnEMX file is a print settings file for each media
type and includes the following information
necessary for optimal printing on commercially
available media.
Performing Easy Media Setup from
the printer's setup menu
When you select the media type that you loaded in the
printer, the appropriate settings are loaded. Next,
media adjustments to optimize the settings for the
current media width, whether the media is installed
on Auto Take-up Reel Unit or not, and so on are
performed.
To adjust the media, you can choose either
Auto Feed
Adjustment
or
Manual
. Normally, after doing
Auto
Feed Adjustment
, execute Manual - Head Alignment
in the
Media Adjust
menu.
For
Auto Feed Adjustment
, the media feed
automatically adjusts while printing and reading the
media adjustment pattern.
The approximate maximum length of the media
required to print the test pattern is given below.
Approx. 670 mm
SC-F9300 Series User's Guide
Basic Operations
45
Содержание SC-F9300 series
Страница 1: ...User s Guide CMP0106 00 EN ...


