EPSON Stylus Photo R260/R265/R270, R360/R380/R390
Revision B
Adjustment
Banding Reduction System (BRS) Adjustment/ Paper Feed Amount Profile (PFP) Correction
Adjustment Flow
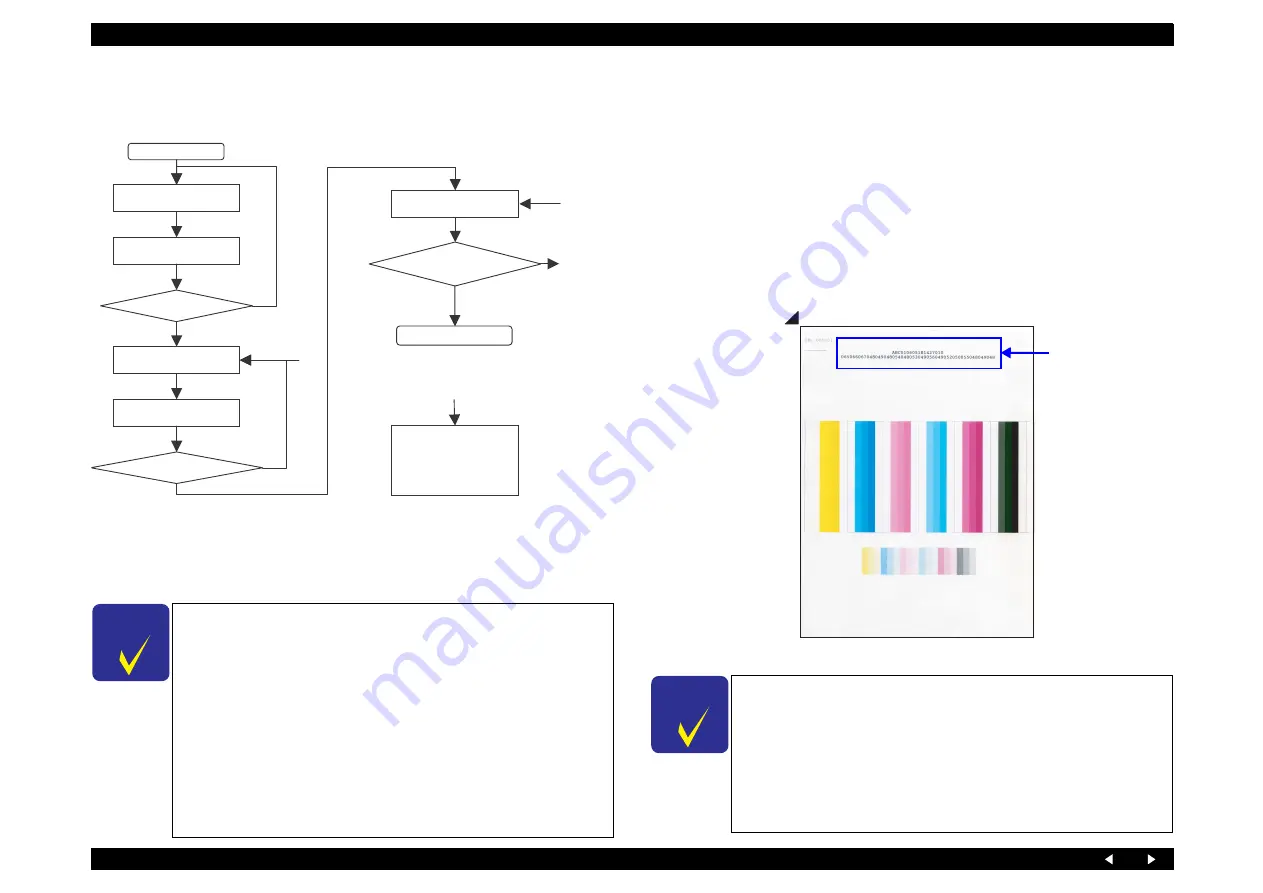
Carry out the adjustment following the adjustment flow below.
Figure 5-12. BRS/PFP Adjustment Flow
Note*: When a PFP pattern is judged as NG, repeat the steps as described below.
First time NG: retry from step
Second time NG:retry from step
Third time NG: perform step
5.3.2 Adjustment Procedure
5.3.2.1 BRS (Banding Reduction System) Adjustment
Printing the BRS Adjustment Pattern
1. Load A4 size Matte Paper-Heavyweight on the paper support.
2. Select [BRS Adjustment] in the adjustment program.
3. Click the [Print] button on the “1. Print Test Pattern” column to print the
adjustment pattern.
4. Let the printed pattern dry for more than 5 minutes if using CIS sensor type
scanner.
Figure 5-13. BRS Test Pattern
C H E C K
P O I N T
When an error is displayed in the Adjustment program, check the
points below, then carry out the adjustment again. If an error
occurs even after checking the points below, change the scanner
with a different one and carry out the adjustment again.
1. Check that the printer that printed the pattern and the printer
to register the adjustment value is the same.
2. Check that the printed pattern is placed on the document table
of the scanner correctly.
3. Check that there is no gap between the PFP Base Scale and the
pattern printed sheet.
4. Check that the scanner glass surface and the PFP Base Scale is
free from any dirt or dust.
START
Error?
END
cde
*
c
d
Determine that it is
mechanism failure of
removed/replaced parts
and carry out check/
reassembling.
e
Error?
NG
NG
NG
OK
OK
OK
c
d
e
C H E C K
P O I N T
In the Adjustment program, the identification code is used to
distinguish whether the printer that printed the pattern and the
printer to register the adjustment value is the same.
Make sure to let the printed pattern dry for more than 5
minutes if using CIS sensor type scanner. When using CCD
sensor type scanner, the printed pattern does not need to be
dried before scanning. Refer to
Printer Identification
Code
Содержание R380 - Stylus Photo Color Inkjet Printer
Страница 1: ...EPSONStylusPhotoR260 R265 R270 R360 R380 R390 Color Inkjet Printer SEIJ06001 SERVICE MANUAL ...
Страница 7: ...C H A P T E R 1 PRODUCTDESCRIPTION ...
Страница 22: ...C H A P T E R 2 OPERATINGPRINCIPLES ...
Страница 30: ...C H A P T E R 3 TROUBLESHOOTING ...
Страница 55: ...C H A P T E R 4 DISASSEMBLY ASSEMBLY ...
Страница 111: ...C H A P T E R 5 ADJUSTMENT ...
Страница 128: ...C H A P T E R 6 MAINTENANCE ...
Страница 136: ...C H A P T E R 7 APPENDIX ...
Страница 138: ...Model PM D870 Stylus Photo R360 R380 R390 Board C658 MAIN Sheet 1 4 ...
Страница 139: ...Model PM D870 Stylus Photo R360 R380 R390 Board C658 MAIN Rev C Sheet 2 4 ...
Страница 140: ...Model PM D870 Stylus Photo R360 R380 R390 Board C658 MAIN Rev B Sheet 3 4 ...
Страница 141: ...Model PM D870 Stylus Photo R360 R380 R390 Board C658 MAIN Rev A Sheet 4 4 ...
Страница 142: ...Model PM D870 Stylus Photo R360 R380 R390 Board C658 PNL Rev A Sheet 1 1 ...
Страница 143: ...Model PM D870 Stylus Photo R360 R380 R390 Board C658 PNL B Rev A Sheet 1 1 ...
Страница 144: ...Model PM D870 Stylus Photo R360 R380 R390 Board C658 STG Rev B Sheet 1 1 ...
Страница 145: ...Model PM G850 Stylus Photo R260 R265 R270 Board C653 MAIN Rev C Sheet 1 1 ...
Страница 146: ...Model PM G850 Stylus Photo R260 R265 R270 Board C653 PNL Rev A Sheet 1 1 ...
Страница 147: ...Model PM G850 Stylus Photo R260 R265 R270 Board C653 I F Rev A Sheet 1 1 ...
Страница 148: ...Model PM D870 PM G850 Stylus Photo R360 R380 R390 Stylus Photo R260 R265 R270 Board C653 PSB Rev B Sheet 1 1 ...
Страница 149: ...Model PM D870 PM G850 Stylus Photo R360 R380 R390 Stylus Photo R260 R265 R270 Board C653 PSE Rev B Sheet 1 1 ...
Страница 150: ...Model PM D870 PM G850 Stylus Photo R360 R380 R390 Stylus Photo R260 R265 R270 Board C653 HEAD Rev B Sheet 1 1 ...


