


69
5.
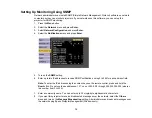
If you see the PIN entry screen on your mobile device, enter the PIN code displayed on the Screen
Mirroring standby screen or at the bottom right of the projected image.
The projector displays the image from your mobile device.
Caution:
It may take some time to establish the connection. Do not disconnect the projector's power
cord while it is connecting to your device. Doing so may cause your device to freeze or malfunction.
Note:
Depending on the mobile device, you may need to delete a device when connecting. Follow
the on-screen instructions on your device.
Parent topic:
Wireless Network Projection from a Mobile Device or Windows Computer (Screen
Related references
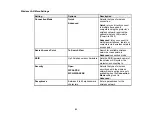
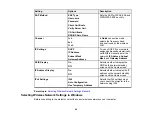
Projector Network Settings - Network Menu
Related tasks
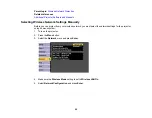
Selecting Screen Mirroring Settings
Connecting for Screen Mirroring with a Windows 8.x/Windows 10 Computer
You can set up your computer to wirelessly project images and play sound using Screen Mirroring
(PowerLite 2142W/2247U).
1.
Select the
Screen Mirroring
settings on your projector as necessary.
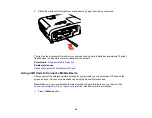
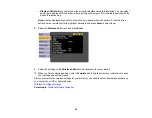
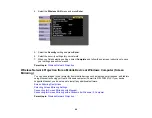
2.
Press the
LAN
button on the remote control to switch to the Screen Mirroring source.
You see the Screen Mirroring standby screen.
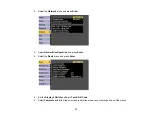
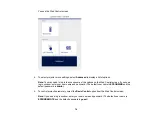
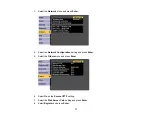
3.
Do one of the following:
•
Windows 10
: Open
Action Center
and select
Connect
.
•
Windows 8.x
: Select
Devices
>
Project
>
Add a wireless display
.
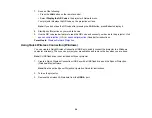
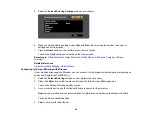
4.
Select your projector's Display Name from the list.
5.
If you see the PIN entry screen on your computer, enter the PIN code displayed on the Screen
Mirroring standby screen or at the bottom right of the projected image.
The projector displays the image from your computer or mobile device.
Note:
It may take some time to establish the connection. Do not disconnect the projector's power
cord while it is connecting to your device. This may cause your device to freeze or malfunction.
Содержание PowerLite 2042
Страница 1: ...PowerLite 2042 2142W 2247U User s Guide ...
Страница 2: ......
Страница 10: ......
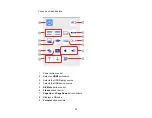
Страница 24: ...24 Projector Parts Remote Control 1 Power button ...
Страница 26: ...26 Parent topic Projector Part Locations ...
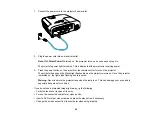
Страница 55: ...55 1 Remove the wireless LAN module cover screw 2 Insert the wireless LAN module into the USB A port ...
Страница 137: ...137 Parent topic Copying Menu Settings Between Projectors ...
Страница 164: ...164 2 Carefully open the air filter cover ...


