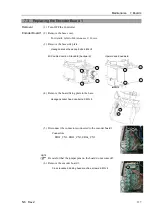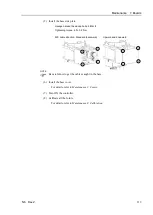
Epson N6 Series Скачать руководство пользователя страница 348

Maintenance  7. Boards 


336 

N6  Rev.2


Installation 

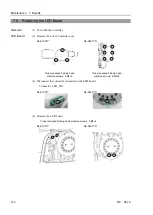
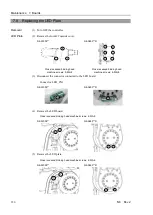
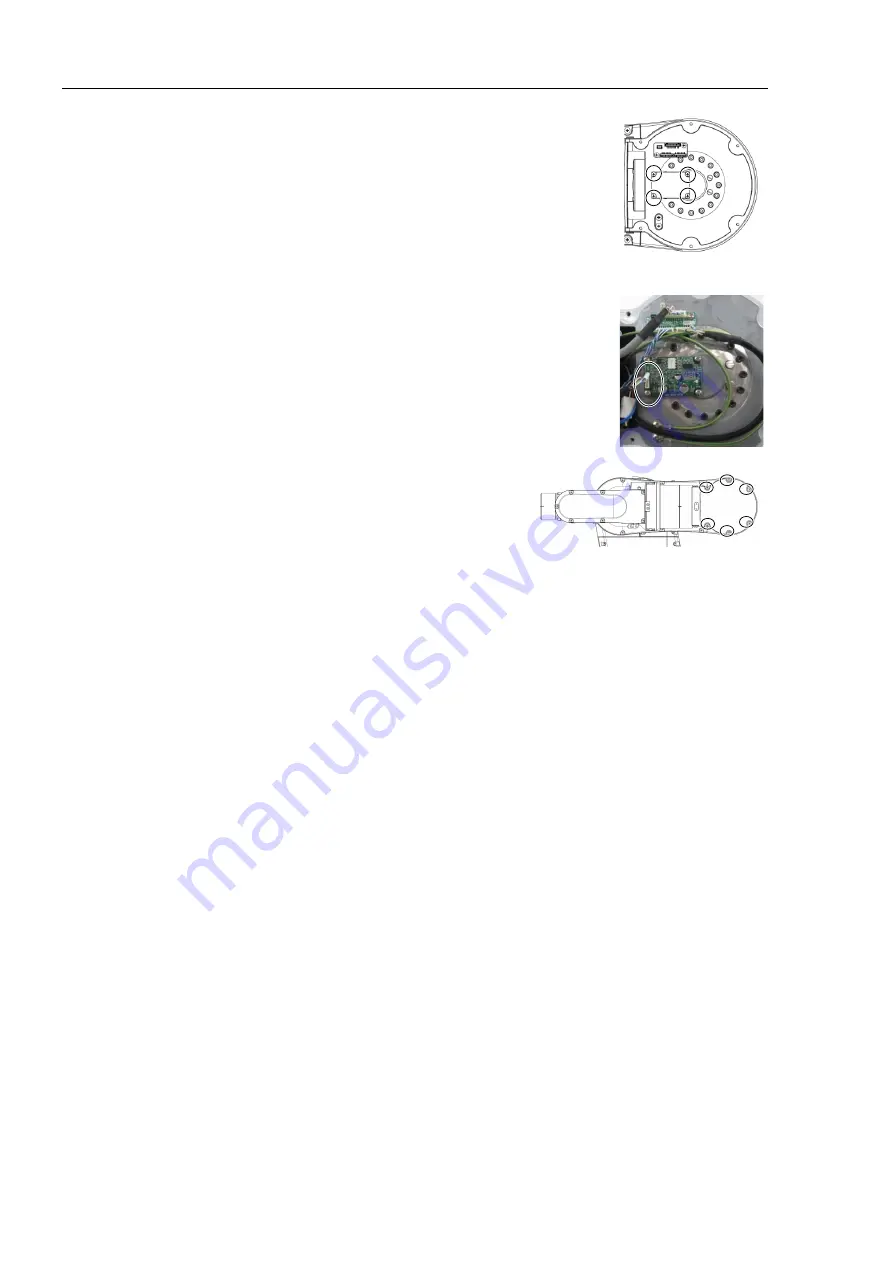
Control Board 2


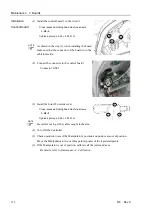
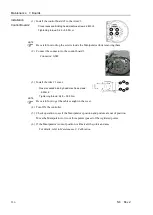
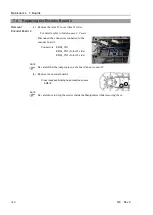
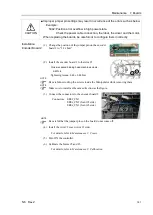
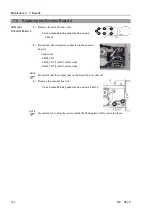
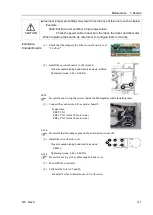
(1)   Install the control board #2 to the Arm #3. 

Cross recessed binding head machine screws: 4-M3×6 

Tightening torque: 0.45 

±

 0.05 N·m


Be careful not to drop the screws inside the Manipulator while removing them. 


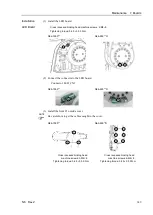
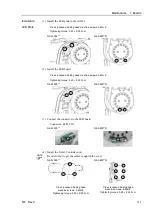
(2)  Connect the connector to the control board 2. 

Connector: GS02 


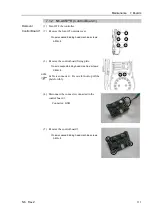
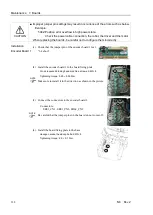
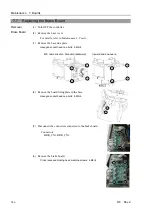
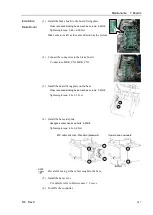
(3)  Install the Arm #3 cover. 

Cross recessed binding head machine screws: 

6-M4×8 

Tightening torque: 0.45 

±

 0.05 N·m 


Be careful not to get the cables caught in the cover. 


(4)  Turn ON the controller. 


(5)  Check operation to see if the Manipulator's position and posture are out of position. 

Move the Manipulator to two or three points (poses) of the registered points. 


(6)  If the Manipulator is out of position, calibrate all the joints and axes. 

For details, refer to 

Maintenance 8. Calibration


NOTE 


NOTE 

Содержание N6 Series

Страница 1: ...Rev 2 EM187R3735F 6 Axis Robots N6 series MANIPULATOR MANUAL ...

Страница 2: ...Manipulator manual N6 series Rev 2 ...

Страница 3: ...N6 Rev 2 i 6 Axis Robots N6 series Manipulator Manual Rev 2 Copyright 2018 SEIKO EPSON CORPORATION All rights reserved ...

Страница 4: ...nty period information However customers will be charged for repairs in the following cases even if they occur during the warranty period 1 Damage or malfunction caused by improper use which is not described in the manual or careless use 2 Malfunctions caused by customers unauthorized disassembly 3 Damage due to improper adjustments or unauthorized repair attempts 4 Damage caused by natural disast...

Страница 5: ...ries Other brand and product names are trademarks or registered trademarks of the respective holders NOTICE No part of this manual may be copied or reproduced without authorization The contents of this manual are subject to change without notice Please notify us if you should find any errors in this manual or if you have any comments regarding its contents MANUFACTURER ...

Страница 6: ...ailer where you purchased this product Use of the chemical symbols Pb Cd or Hg indicates if these metals are used in the battery This information only applies to customers in the European Union according to DIRECTIVE 2006 66 EC OF THE EUROPEAN PARLIAMENT AND OF THE COUNCIL OF 6 September 2006 on batteries and accumulators and waste batteries and accumulators and repealing Directive 91 157 EEC and ...

Страница 7: ... Software EPSON RC This manual contains setup procedures using the software Those sections are indicated by the symbol on the left Turning ON OFF Controller When you see the instruction Turn ON OFF the Controller in this manual be sure to turn ON OFF all the hardware components Photos and Illustrations Used in This Manual The appearance of some parts may differ from those on an actual product depe...

Страница 8: ...vi N6 Rev 2 ...

Страница 9: ...tandard Motion Range 24 2 5 Specifications 26 2 5 1 Specifications table 26 2 5 2 Option 29 2 6 How to Set the Model 29 3 Environment and Installation 30 3 1 Environmental Conditions 30 3 2 Unpacking Transportation and Relocation 31 3 3 Mounting Dimensions 35 3 3 1 Mounting Area 35 3 3 2 Mounting dimensions 35 3 3 3 Motion range 37 3 4 Installation 41 3 5 Base Table 44 3 6 Connecting the Cables 46...

Страница 10: ... brake release unit 83 Remove the brake release unit 84 How to use the brake release unit 85 6 2 Camera Plate Unit 86 6 3 Tool Adapter ISO Flange 89 6 4 User Wiring 90 6 5 M C Cable 90 Maintenance 1 Safety Maintenance 93 2 General Maintenance 94 2 1 Maintenance Inspection 94 2 1 1 Schedule for Maintenance Inspection 94 2 1 2 Inspection Point 95 2 2 Overhaul Parts Replacement 97 2 3 Greasing 99 2 3...

Страница 11: ...rm 3 Inside Cover 137 3 10 Arm 3 Cover 139 3 11 Joint 4 Side Cover 140 3 12 Joint 4 Inside Cover 142 3 13 Joint 4 Outside Cover 144 3 14 Arm 4 Side Cover 145 3 15 Arm 4 Cable Cover 147 4 Cable 148 4 1 Replacing the Cable Unit N6 A1000 Cable Direction Standard backward 148 4 2 Replacing the Cable Unit N6 A1000 B Cable Direction Upward and Downward 184 4 3 Replacing the Cable Unit N6 A850 R Cable Di...

Страница 12: ...ke 307 5 6 Joint 6 308 5 6 1 Replacing the Joint 6 Motor Unit 308 5 6 2 Replacing the Joint 6 Timing Belt 314 5 6 3 Replacing the Joint 6 Electromagnetic Brake 317 5 7 Joint 5 and 6 Units 318 6 Battery 323 6 1 Replacing the Battery Unit Lithium Metal Battery 325 6 2 Replacing the Battery Board 327 7 Boards 329 7 1 Replacing the Control Board 1 331 7 1 1 N6 A1000 Control Board 1 331 7 1 2 N6 A850 R...

Страница 13: ...Setup Operation This volume contains information for setup and operation of the Manipulators Please read this volume thoroughly before setting up and operating the Manipulators ...

Страница 14: ......

Страница 15: ...siderations are indicated throughout the manual by the following symbols Be sure to read the descriptions shown with each symbol WARNING This symbol indicates that a danger of possible serious injury or death exists if the associated instructions are not followed properly WARNING This symbol indicates that a danger of possible harm to people caused by electric shock exists if the associated instru...

Страница 16: ...onstructing the robot system without understanding the safety requirements is extremely hazardous and may result in serious bodily injury and or severe equipment damage to the robot system WARNING The Manipulator and the Controller must be used within the environmental conditions described in their respective manuals This product has been designed and manufactured strictly for use in a normal indo...

Страница 17: ...roblems in case that the Manipulator moves unexpectedly Immediately press the Emergency Stop switch whenever the Manipulator moves abnormally during operation Continuing the operation while the Manipulator moves abnormally is extremely hazardous and may result in serious bodily injury and or severe equipment change to the robot system WARNING Be sure to connect the AC power cable to a power recept...

Страница 18: ...rating angle less than 5 degrees they may get damaged early because the bearings are likely to cause oil film shortage in such situation To prevent early breakdown move the joints larger than 30 degrees for about five to ten times a day Oscillation resonance may occur continuously depending on the robot motion speed combination of Arm orientation and end effector load Oscillation arises from natur...

Страница 19: ...oving Refer to the Controller manual for instructions on how to wire the Emergency Stop switch circuit Do not turn OFF the Controller while the Manipulator is operating If you attempt to stop the Manipulator in emergency situations make sure to stop the Manipulator using the Emergency Stop switch of the Controller If the Manipulator is stopped by turning OFF the Controller while it is operating th...

Страница 20: ...ree running distance in emergency The Manipulator in operation cannot stop immediately after the Emergency Stop switch is pressed However time angle and distance of the free running vary by following factors Hand weight WEIGHT Setting ACCEL Setting Workpiece weight SPEED Setting Posture etc Approximate time and distance of the free running are as follow Conditions of Measurement N6 series ACCEL Se...

Страница 21: ...Manipulator as the arms of the Manipulator may move in unexpected directions Be careful of the arm falling when releasing the brake While the brake is being released the Manipulator s arm falls by its own weight The arm falling may cause hands and fingers to be caught and or may cause equipment damage to or malfunction of the Manipulator Before releasing the brake be sure to keep the Emergency Sto...

Страница 22: ...Setup Operation 1 Safety 10 N6 Rev 2 Arm Motion N6 A1000 J1 J1 J2 J2 J3 J3 J4 J4 J5 J5 J6 J6 Base Arm 1 Arm 2 Arm 3 Arm 4 Arm 5 Arm 6 ...

Страница 23: ...the Manipulator since it may get your hands or fingers caught during operation The Manipulator may also collide with peripheral equipment and cause equipment damage to or malfunction of the Manipulator CAUTION Carefully operate the Manipulator in the low power status A comparatively high joint torque may be generated It may cause your hands and fingers caught and or cause equipment damage to or ma...

Страница 24: ...the warning labels Use meticulous care when handling those parts or units to which the following warning labels are attached as well as the nearby areas Location Warning Label NOTE A To avoid the Manipulator from falling support the Manipulator before removing the base mounting screws Follow the instructions in this manual for transportation and installation B When releasing the brakes be careful ...

Страница 25: ...e a crane and a forklift If unauthorized personnel perform these operations it is extremely hazardous and may result in serious bodily injury and or severe equipment damage to the robot system F Do not touch the current carrying parts inside the Manipulator while the power is ON It may cause electrical shock G HOT You can get burned due to high temperature Location Label NOTE H Manipulator model s...

Страница 26: ...Setup Operation 1 Safety 14 N6 Rev 2 Location of Labels N6 A1000 F C A D F G F F E F H G F B G G F N6 A1000 B F ...

Страница 27: ...Setup Operation 1 Safety N6 Rev 2 15 N6 A850 R C A D F G F E H G F B G F G F F F N6 A850 BR F ...

Страница 28: ...oom ESD model Brake equipment 0 Brakes on the Joints 2 to 6 Arm length 100 1010 mm 85 860 mm Payload 6 6 kg Manipulator is set to Table top mounting at shipment To use the manipulator as Ceiling mounting you need to change the model settings N6 A850 R is for Ceiling mounting only Table Top mounting is not available For details on how to change the model settings refer to 5 5 Changing the Robot and...

Страница 29: ...able connectors User cable connector User When the LED lamp is lighting or the controller power is on the current is being applied to the manipulator The LED lamp may not be seen depending on the Manipulator s posture Be very careful Performing any work with the power ON is extremely hazardous and it may result in electric shock and or improper function of the robot system Make sure to turn OFF th...

Страница 30: ... User cable connector User Air 1 Air 2 When the LED lamp is lighting or the controller power is on current is being applied to the manipulator The LED lamp may not be seen depending on the Manipulator s posture Be very careful Performing any work with the power ON is extremely hazardous and it may result in electric shock and or improper function of the robot system Make sure to turn OFF the contr...

Страница 31: ...tubes Signal cable Brake release connector B release Ether 1 Ether 2 Ethernet cable connector User cable connector User Power cable Cable direction Upward and Downward Air 2 One touch fittings for ø6 mm pneumatic tubes Signal cable Brake release connector B release Ether 1 Ether 2 Ethernet cable connector User cable connector User Power cable Air 1 ...

Страница 32: ...Setup Operation 2 Specifications 20 N6 Rev 2 2 3 Outer Dimensions Unit mm 2 3 1 Basic Orientation N6 A1000 Cable direction Standard backward ...

Страница 33: ...Setup Operation 2 Specifications N6 Rev 2 21 N6 A1000 B Cable direction Upward and Downward N6 A850 R Cable direction Standard backward ...

Страница 34: ...Setup Operation 2 Specifications 22 N6 Rev 2 N6 A850 BR Cable direction Upward ...

Страница 35: ...Setup Operation 2 Specifications N6 Rev 2 23 2 3 2 Orientation with the Maximum Arm Length N6 A1000 N6 A850 R ...

Страница 36: ... 5 moves keeping a constant angle regardless of the arm pose Depending on the arm pose of the basic arms the wrist may collide with the Manipulator The collision may cause equipment damage to and or malfunction of the Manipulator N6 A1000 Unit mm A P point Intersection of the rotation centers for Joint 4 5 and 6 A No entry range Refer to Setup Operation 5 2 Coordinate System ...

Страница 37: ...ition Joints 4 6 0 pulse position Joint 2 0 pulse position Joints 3 5 0 pulse position Robot installation face Lateral View Lateral View Robot installation face P point Intersection of the rotation centers for Joint 4 5 and 6 A No entry range Refer to Setup Operation 5 2 Coordinate System ...

Страница 38: ...Joint 3 5308416 pulse Joint 4 5898240 pulse Joint 5 3640889 pulse Joint 6 8773632 pulse Resolution Joint 1 0 0000272 pulse Joint 2 0 0000272 pulse Joint 3 0 0000339 pulse Joint 4 0 0000339 pulse Joint 5 0 0000343 pulse Joint 6 0 0000410 pulse Motor power consumption Joint 1 600 W Joint 2 600 W Joint 3 400 W Joint 4 100 W Joint 5 100W Joint 6 100W Payload 3 Rated 3 kg Max 6 kg Allowable moment Join...

Страница 39: ...odel settings Mounting types other than Table Top mounting and Ceiling mounting are out of the specification If you prefer other mounting types please contact us For details on how to change the model settings refer to 5 5 Changing the Robot and EPSON RC User s Guide Robot Configuration 2 In case of PTP control 3 Do not apply the load exceeding the maximum payload 4 If the center of gravity is at ...

Страница 40: ...round the center of the motion area less than 2832 particles Exhaust System Fitting for ø10 mm mm pneumatic tube Refer to Setup Operation 3 6 User Wires and Pneumatic Tubes 60 L min vacuum Exhaust tube Polyurethane tube Outer diameter ø10mm Inner diameter ø6 7 mm ESD specification uses resin materials with antistatic treatment This model controls adhesion of dust due to electrostatic charge 9 In g...

Страница 41: ...able Camera plate unit The option for mounting the camera to the Manipulator Tool adapter ISO flange The option for mounting the end effector whose dimensions are designed for the ISO flange to the N6 series Manipulators User wires The option for using the internal wiring for the end effector drive Standard user connector kit Standard D sub 15 pin 2 2 6 How to Set the Model The Manipulator model f...

Страница 42: ...ors only For the Controller which the Manipulator is connected to refer to the Controller manual When using the Manipulators in inadequate environments that do not meet the above conditions please contact us Special Environmental Conditions The surface of the Manipulator has general oil resistance However if your requirements specify that the Manipulator must withstand certain kinds of oil please ...

Страница 43: ...ely hazardous and may result in serious bodily injury and or severe equipment damage to the robot system as the fall of the Manipulator CAUTION When removing the anchor bolts support the Manipulator to prevent falling Removing the anchor bolts without supporting the Manipulator may get hands fingers or feet caught as the Manipulator may fall The base and the Arm 1 are fixed by the fixing jig for t...

Страница 44: ...turn ON the power only after the condensation dries When using the Manipulator for the robot system again after long term storage perform a test run to verify that the Manipulator works properly Then operate the Manipulator thoroughly Relocating Follow the procedures described below when relocating the Manipulator The Joint 1 is not equipped with the brake When installing the Manipulator be carefu...

Страница 45: ...port when removing it Recommended posture N6 A1000 Joint 2 65deg Joint 3 25deg N6 A850 R Basic orientation EPSON RC Command N6 A1000 Go AglToPls 0 65 25 0 0 0 N6 A850 R Go AglToPls 0 0 0 0 0 0 N6 A1000 N6 A850 R 3 Turn OFF the power for all devices and disconnect the power cable connector and signal cable connector from the controller 4 Unscrew the anchor bolts Then remove the Manipulator from the...

Страница 46: ... fall if the balance is lost and this is extremely hazardous To prevent damage on the covers and arms it is recommended to protect the contacting parts of the wire and arm with a cloth Be very careful not to damage the covers since they are made of plastic N6 A1000 Holes for eye bolt 3 M10 depth 18 Manipulator weight 69 kg 152 lb N6 A850 R Holes for eye bolt 3 M10 depth 18 Manipulator weight 64 kg...

Страница 47: ...al equipment Space for teaching points Space for maintenance and inspections for installing jigs Space for cables To prevent the power cable from bending make sure to leave space for 150mm When installing the cable be sure to maintain sufficient distance from obstacles In addition leave enough space for other cables to prevent them from bending Unit mm 3 3 2 Mounting dimensions N6 A1000 Cable dire...

Страница 48: ...00 Cable direction Upward and Downward Standard model Cleanroom model Example of space for Manipulator base for Cable direction Upward and Downward Design the base table as shown above considering not interfering with the positioning holes and the installation holes ...

Страница 49: ...oles 3 3 3 Motion range The following figures are the cases when the length of the end effector is 100 mm Match the ranges with the actual end effector length If the camera or the electromagnetic valve attached on the Arm is large define the max motion ranges by considering the area where these tools may reach When operating in narrow space with the basic orientation make sure to consider the radi...

Страница 50: ...Setup Operation 3 Environment and Installation 38 N6 Rev 2 N6 A1000 Maximum motion range 150 867 ...

Страница 51: ...Rev 2 39 N6 A1000 Radius of arm rotation Basic orientation Motion range CP motion P point 844 150 P point 844 P point 310 R510 Motion position When the P point is 310mm apart from the center upward and downward distance in CP motion will be the maximum ...

Страница 52: ...Setup Operation 3 Environment and Installation 40 N6 Rev 2 N6 A850 R Maximum motion range 802 ...

Страница 53: ...proper operation of the Manipulator Improper operation of the Manipulator is extremely hazardous and may result in serious bodily injury and or severe equipment damage to the robot system CAUTION The Manipulator must be installed to avoid interference with buildings structures utilities other machines and equipment that may create a trapping hazard or pinch points Oscillation resonance may occur d...

Страница 54: ...ep them for future use The eyebolts 3 eyebolts and wire must be strong enough to withstand the Manipulator weight See the figures below Only authorized personnel should perform sling work and operate a crane and a forklift When these operations are performed by unauthorized personnel it is extremely hazardous and may result in serious bodily injury and or severe equipment damage to the robot syste...

Страница 55: ...oes not fall over 3 Wipe off the dust on the Manipulator with a little alcohol or distilled water on a lint free cloth 4 Transport the Manipulator to the cleanroom 5 Secure the Manipulator to the base table When operating the Manipulator after installing it exhaust from the exhaust port is 60L min Cable direction Standard backward Cleanroom model Exhaust port One touch fittings for ø10 mm pneumati...

Страница 56: ...rossbeams The torque and reaction force produced by the movement of the Manipulator are as follows The plate for the Manipulator mounting face should be 30 mm thick or more and made of steel to reduce vibration The surface roughness of the steel plate should be 25 μm or less The base table must be secured on the floor to prevent it from moving The Manipulator must be installed horizontally When us...

Страница 57: ... 82 Power Cable Connector Straight Signal Cable Connector M C Cables 105 Power Cable Connector L shaped 85 35 80 For environmental conditions regarding space when placing the Controller on the base table refer to the Controller manual WARNING To ensure safety a safeguard must be installed for the robot system For details on the safeguard refer to the EPSON RC User s Guide NOTE ...

Страница 58: ...system Before wiring turn OFF the Controller and related equipment and then pull up a warning sign e g DO NOT TURN ON THE POWER Wiring with the power ON is extremely hazardous and may result in electric shock and or malfunction of the robot system When connecting or replacing the brake release unit and the external short connector turn OFF the power to the Controller and the brake release unit Ins...

Страница 59: ...grounding electrodes may result in electric shock and or malfunction of the robot system When using metal ducts metallic conduits or distributing racks for cable ground in accordance with national and local electric equipment technical standards Grounding that does not meet the standards may result in electric shock and or malfunction of the robot system Follow local regulations for grounding It i...

Страница 60: ...ersonnel may result in bodily injury and or malfunction of the robot system User electrical wires and pneumatic tubes are contained in the cable unit N6 A1000 Ether 2 Ether 1 Air 2 Air 1 One touch fittings for ø6 mm pneumatic tubes User cable connector USER Ethernet cable connectors N6 A850 R Ether 2 Ether 1 User cable connector USER Ethernet cable connectors Air 1 Air 2 One touch fittings for ø6 ...

Страница 61: ...pe Be careful not to connect the wrong connector The Ethernet cable connectors Ether 1 and Ether 2 have the same shape Be careful not to connect the wrong connector Electrical wires Specifications of the user wires D sub 15 pin Rated Voltage Allowable Current Wires Nominal Sectional Area Note AC DC30 V 1 A 15 0 106 mm2 Shielded Pins with the same number indicated on the connectors on both ends of ...

Страница 62: ...me of shipment the Manipulator s basic orientation shown below is configured as the origin position After installing the Manipulator and setup the operating environment move the manipulator to the origin position by RC and check that it moves to the basic position correctly How to return to the origin position 1 Turn ON the Controller 2 Turn ON the Manipulator motors EPSON RC Command Motor On 3 Mo...

Страница 63: ...ction gear units belts etc have been replaced due to malfunction or any other reason a gap occurs between the origin positions The process to compensate the position gap is called Calibration If the gap still exists and the Manipulator cannot be in the basic orientation after calibration please contact us ...

Страница 64: ... work piece as the work piece is released when the Emergency Stop switch is pressed I O outputs are configured at the factory so that they are automatically shut off 0 by power disconnection the Emergency Stop switch or the safety features of the robot system Details of Wrist Flange Arm 6 Attach an end effector to the end of the Arm 6 using the M5 bolts Screw depth of Arm 6 screw 8 mm Layouts When...

Страница 65: ... and the tubes by yourself Compatibility with ISO flange For installing the end effector whose mounting dimensions are designed for the ISO flange the optional tool adapter ISO flange is available For details refer to Setup Operation 6 Options 4 2 Attaching Camera and Valves The decks are equipped to the Arms 3 4 and 5 for easy installation of the air valves To mount the camera the camera plate un...

Страница 66: ...Setup Operation 4 End Effectors 54 N6 Rev 2 N6 A850 R Unit mm ...

Страница 67: ...g parameters makes the operation of the Manipulator optimal reduces vibration to shorten the operating time and improves the capacity for larger loads In addition it reduces persistent vibration produced when the inertia moment of the end effector and work piece is bigger The allowable load for N6 series Manipulators is 6 kg at the maximum Due to the limitations of the moment and inertia moment sh...

Страница 68: ...ent I do not exceed the allowable load The eccentric quantity of load L should satisfy the following Less than 260 mm from the Arm 5 rotation center 160 mm or less from the flange Less than 160 mm from the Arm 6 rotation center Example When the load is 3 kg and the center of gravity is 120 mm from the flange m 3 0kg L 120 100 220mm 0 220m The moment M and the inertia moment are below the allowable...

Страница 69: ...rresponding to the load is set automatically Setting method of Weight parameters EPSON RC Select Tools Robot Manager Weight panel and set the value in Weight You may also execute the Weight command from Command Window Load on the Manipulator When you attach the equipment to the decks on the upper arm convert its weight into equivalent weight assuming that the equipment is attached to the end of th...

Страница 70: ...0 Load on the fore end of Arm 6 is 3 0 kg Mw Load on the Arm 3 deck is 1 0 kg Ma The deck is 120 mm La away from Joint 3 Load on the Arm 5 deck is 0 5 kg Mb The deck is 550 mm Lb away from the Joint 3 Wa 1 0 1202 6102 0 039 Wb 0 5 5502 6102 0 41 Mw Wa Wb 3 0 0 039 0 41 3 449 3 5 round up Enter 3 5 for the Weight parameter ...

Страница 71: ...er N6 A1000 140 0 1 2 3 4 5 6 kg Weight Parameter Speed Acceleration Deceleration 120 100 80 60 40 20 0 N6 A850 R 140 0 1 2 3 4 5 6 kg Weight Parameter 120 100 80 60 40 20 0 Speed Acceleration Deceleration The percentages in the graphs are based on the speed at rated weight 3 kg as 100 ...

Страница 72: ...maller than the actual inertia moment may cause errors excessive shock insufficient function of the Manipulator and or shorten the life of parts mechanisms The acceptable inertia moment of load for N6 series Manipulators is 0 03 kg m2 nominal rating and 0 14 kg m2 maximum Change the setting of the inertia moment according to the inertia moment of the load using the INERTIA setting After the settin...

Страница 73: ...mum When the eccentric quantity of the load exceeds the rating change the setting of eccentric quantity parameter using the INERTIA setting After changing the setting the maximum acceleration deceleration speed of Manipulator corresponding to eccentric quantity is set automatically Position of Load s Center of Gravity Rotation Center a b Eccentric Quantity 160 mm or less Flange a b To set the para...

Страница 74: ... 0 08 0 10 0 12 0 14 120 100 80 60 40 20 0 kg m 2 Inertia moment The percentage in the graph is based on the acceleration deceleration at rated eccentricity 0 03 kg m2 as 100 Automatic setting by eccentricity setting 0 50 100 150 160 200 120 100 80 60 40 20 0 mm Eccentricity The percentage in the graph is based on the acceleration deceleration at rated eccentricity 50 mm as 100 ...

Страница 75: ... Inertia of End Effector a Moment of Inertia of Work Piece b Moment of Inertia of Work Piece c Whole Moment of Inertia The methods for calculating the inertia moment for a b and c are shown in this and the next page Figure out the whole inertia moment using the basic formulas below a Inertia moment of a rectangular parallelepiped h b L Weight m Rectangular Parallelepiped s Center of Gravity Rotati...

Страница 76: ...educed to prevent residual vibration INERTIA Setting The acceleration deceleration of Arm 6 are controlled according to the inertia moment set by the INERTIA setting The acceleration deceleration of the whole Manipulator are controlled according to the eccentricity set by the INERTIA setting The more the inertia moment and eccentricity of the load increase the more the acceleration deceleration ar...

Страница 77: ...fficiency or safety follow the descriptions in 5 1 through 5 3 to set the range 5 1 Motion Range Setting by Pulse Range for Each Joint Pulses are the basic unit of Manipulator motion The motion range of the Manipulator is controlled by the pulse range the lower limit and the upper limit of each axis Pulse values are read from the encoder output of the servo motor The pulse range should be set with...

Страница 78: ...lues in clockwise direction are negative Arm 1 0 pulse position direction direction direction direction Angle deg 180 Pulse pulse 6619136 Joint 2 N6 A1000 When viewing from the arrow on the right figure pulse values in counterclockwise direction are positive and values in clockwise direction are negative Arm 2 0 pulse position direction direction direction direction Angle deg 180 Pulse pulse 66191...

Страница 79: ...se direction are negative Arm 3 0 pulse position direction direction direction direction Angle deg 180 Pulse pulse 5308416 Joint 4 N6 A1000 When viewing from the arrow on the right figure pulse values in counterclockwise direction are positive and values in clockwise direction are negative Arm 4 0 pulse position direction direction direction direction Angle deg 200 Pulse pulse 5898240 ...

Страница 80: ...se direction are negative Arm 5 0 pulse position direction direction direction direction Angle deg 125 Pulse pulse 3640889 Joint 6 N6 A1000 When viewing from the arrow on the right figure pulse values in counterclockwise direction are positive and values in clockwise direction are negative Arm 6 0 pulse position direction direction direction direction Angle deg 360 Pulse pulse 8773632 ...

Страница 81: ...alues in clockwise direction are negative direction direction direction direction Arm 1 0 pulse position Angle deg 180 Pulse pulse 6619136 Joint 2 N6 A850 R When viewing from the arrow on the right figure pulse values in counterclockwise direction are positive and values in clockwise direction are negative direction direction direction direction Arm 2 0 pulse position Angle deg 180 Pulse pulse 661...

Страница 82: ...se direction are negative Arm 3 0 pulse position direction direction direction direction Angle deg 180 Pulse pulse 5308416 Joint 4 N6 A850 R When viewing from the arrow on the right figure pulse values in counterclockwise direction are positive and values in clockwise direction are negative Arm 4 0 pulse position direction direction direction direction Angle deg 200 Pulse pulse 5898240 ...

Страница 83: ...se direction are negative Arm 5 0 pulse position direction direction direction direction Angle deg 125 Pulse pulse 3640889 Joint 6 N6 A850 R When viewing from the arrow on the right figure pulse values in counterclockwise direction are positive and values in clockwise direction are negative Arm 6 0 pulse position direction direction direction direction Angle deg 360 Pulse pulse 8773632 ...

Страница 84: ...erfering each other the Manipulator operation is restricted as follows Combination restriction of joint angles The motion ranges of the Joints 2 and 3 are defined according to the combinations of their angles If the combination of the joint angles falls the painted areas in the below figure the Manipulator motion will be restricted ...

Страница 85: ...n Error 4066 occurs The error occurs in PTP motion and CP motion Error 4066 occurs in the following situations When the target position is inside the combination restriction area of joint angle Fig 1 Green Blue Remedy Change the target position and avoid Error 4066 N6 A1000 Joint 2 angle Joint 3 angle Unit deg N6 A850 R Joint 2 angle Joint 3 angle Unit deg Fig 1 Combination restriction of joint an...

Страница 86: ...on Normally the arm elbow orientation of the current position will not be able to move to a restricted orientation since Error 4066 will occur before operating the motion However if using jog or releasing the brake to move the Manipulator by hand the arm elbow orientation of the current position will be able to move to a restricted orientation If Error 4066 occurs when the motion command Go Pulse ...

Страница 87: ... that Error 4248 will occur The range of Fig 4 is when Tool 0 and Local 0 Remedy Set relay points to avoid a collision P1 XY 420 0 1200 0 90 0 R A NF P2 XY 0 420 280 0 90 90 R B F P3 XY 0 420 305 0 90 90 R B F Go P1 Go P3 CP Relay point Go P2 Go P3 CP Relay point Go P1 Error 4248 will occur again even the Manipulator is moved outside of the orange area Fig 4 in PTP motion after Error 4248 occurred...

Страница 88: ...oordinate System The origin point is where the Manipulator s installation face intersects with the rotation axis of Joint 1 For details on the coordinate system refer to the EPSON RC Users Guide manual N6 A1000 N6 A1000 R Z X Y Z X Y N6 A850 R Z X Y ...

Страница 89: ...entation flag is selected the robot may collide with the equipment Be sure to select the proper orientation flag for your equipment Ex 3 Orientation which the robot does not collide with the equipment Orientation which the robot collides with the equipment When you cannot select the orientation flag for N6 A1000 use the command AutoOrientationFlag Orientation flag is automatically changed to the o...

Страница 90: ...will be the orientation flag which minimizes the movement of Joint 4 How to use the command Syntax 1 AutoOrientationFlag On Off 2 AutoOrientationFlag Example Motor On Power High AutoOrientationFlag On Go P1 Go P2 Use AutoOrientationFlag with LJM Function When you use the command with LJM Function Wrist Flag J4Flag and J6Flag will be the orientation selected by LJM Function For example when you set...

Страница 91: ...CAUTION Changing the manipulator should be done with great caution It initializes the robot calibration parameters Hofs CalPls additional axis information and PG parameter data Before changing the robot make sure to save the calibration data by following the procedure below 1 Select the EPSON RC 7 0 menu Setup System Configuration 2 Select Robot Robot Calibration from the tree list Then click Save...

Страница 92: ...ordinate system of the Manipulator is specified by the limited Manipulator operation area and the XYLim setting The limited Manipulator operation area is defined so that the end effector does not interfere with the rear side of the Manipulator The XYLim setting that you can determines the upper and lower limits of the X and Y coordinates The limited Manipulator operation area and the XYLim setting...

Страница 93: ...lly release the brake of joints one by one Take extra care if you need to release the brakes of two or more joints simultaneously Releasing the brakes of two or more joints simultaneously may cause hands and fingers to be caught and or equipment damage to or malfunction of the Manipulator as the arms of the Manipulator may move in unexpected directions Be careful of the arm falling when releasing ...

Страница 94: ...nection of the connector for the brake release unit Keep the external short connector Otherwise you cannot release the brakes If you turn ON the brake release unit while the brake release switch is being pressed an unintended arm may move downward Before turning ON the brake release unit make sure that the brake release switch is not pressed If you turn ON the brake release unit without the connec...

Страница 95: ...le is already connected to the Controller Go to the step 3 3 Disconnect the external short connector M C cable direction Standard backward Upward and downward External short connector External short connector 4 Connect the brake release unit to the connector of the connection cable The connection cable connector and the adjacent user cable connector have the same shape Be careful not to connect th...

Страница 96: ... M C short connector is connected to the M C power cable in the Installation step 2 disconnect the M C short conenctor 5 Connect the external short connector to the connector of the connection cable The connection cable connector and the adjacent user cable connector have the same shape Be careful not to connect the wrong connector M C cable direction Standard backward Upward and downward External...

Страница 97: ...ator it may lead to the breakdown of the manipulator or you may get your hand or fingers caught 1 Power cable 2 Power switch 4 Arm switches connector lock 3 Power lamp 1 Connect the power cable to the brake release unit 2 Connect the power cable to the power supply plug 3 Turn ON the brake release unit When the brake release unit is enabled the power lamp lights up 4 Press the switch of the arm J2...

Страница 98: ... F D D Parts included unit A Camera adapter plate 1 B Camera mid plate 1 C Camera base plate 1 D Hexagon socket head screws M4 12 6 E Hexagon socket head screws M4 20 2 F Plain washer for M4 small washer 2 Installation Mounting holes for the camera base plate on the N6 series Manipulator Camera base plate mounting hole 62 6 45 6 2 M4 8 For the installation steps refer to the following manual EPSON...

Страница 99: ...ra mid plate and camera size Refer to the table below for the values Camera adapter plate Mounting holes to be used are different depending on the camera Camera mid plate The camera mid plate uses the mounting holes A to D By using the different mounting holes it can be mounted to the camera base plate in the different four positions ...

Страница 100: ...mm A B C D Y 33 mm 13 mm 7 mm 27 mm The Joint 5 motion range varies depending on the mounting position of camera mid plate and the camera you are using The table below shows the motion range reference values based on the available cameras for this option and the mounting positions of the camera mid plate The values in the table may vary depending on how to secure the cables Direction of the Joint ...

Страница 101: ...O flange to the N6 series Manipulators Parts included Unit ISO flange 1 Pin ø2 8 2 Hexagon socket head cap bolts M4 8 4 Dimensions of ISO flange To mount the ISO flange 1 Insert the two pins into ISO flange Pin projection 4 mm from the flange Pin Pin 2 Align the pin and the pin hole on the arm and then mount the flange Hexagon socket head cap bolts 4 M4 8 4 M4 8 ...

Страница 102: ...se it additionally When purchasing you can select the M C cable from the following combinations Cable type Cable length Connector shape controller connection side Cable type Length Connector shape Code Default 3m Straight R12NZ900YF L shaped R12NZ900YM 5m Straight R12NZ900YH L shaped R12NZ900YN 10m Straight R12NZ900YJ L shaped R12NZ900YP 15m Straight R12NZ900YK L shaped R12NZ900YQ 20m Straight R12...

Страница 103: ...Maintenance This volume contains maintenance procedures with safety precautions for the N6 series Manipulators ...

Страница 104: ......

Страница 105: ...oblems as the Manipulator may move even it seems to be stopped When you check the operation of the Manipulator after replacing parts be sure to check it while you are outside of the safeguarded area Checking the operation of the Manipulator while you are inside of the safeguarded area may cause serious safety problems as the Manipulator may move unexpectedly Before operating the robot system make ...

Страница 106: ... careful when performing maintenance 2 General Maintenance This chapter describes maintenance inspection procedures Performing maintenance inspection properly is essential to prevent trouble and ensure safety Be sure to perform the maintenance inspections in accordance with the schedule 2 1 Maintenance Inspection 2 1 1 Schedule for Maintenance Inspection Inspection points are divided into five sta...

Страница 107: ...rs If the connectors are loosen push it securely or tighten External connectors on Manipulator on the connector plates etc Manipulator cable unit Visually check for external defects Clean up if necessary External appearance of Manipulator External cables Check the leak of grease for cables Joint 1 to Joint 4 Check for bends or improper location Repair or place it properly if necessary Safeguard et...

Страница 108: ...n brake release unit is installed Connect the brake release unit and check the sound of the Electromagnetic brake with the brake released If there is no sound replace the actuator unit When brake release unit is not installed Execute Brake off command brake off joint from the command window of the EPSON RC while the motors are OFF and then check the sound of the Electromagnetic brake If there is n...

Страница 109: ...erhauls is 20 000 operation hours of the Manipulator as a rough indication However it may vary depending on usage condition and degree of the load such as when operated with the maximum motion speed and maximum acceleration deceleration in continuous operation applied on the Manipulator For the EPSON RC 7 0 Ver 7 2 x or later firmware Ver 7 2 x x or later the recommended replacement time for the p...

Страница 110: ...Controller Status button to open the Browse For Folder dialog 3 Select the folder where the information is stored 4 Click OK to view the Controller Status Viewer dialog 5 Select Robot from the tree menu on the left side For the parts subject to overhaul refer to Maintenance 9 Maintenance Parts List For details of replacement of each part refer to the Maintenance section Please contact the distribu...

Страница 111: ...the repairs If grease gets into your eyes mouth or on your skin follow the instructions below If grease gets into your eyes Flush them thoroughly with clean water and then see a doctor immediately If grease gets into your mouth If swallowed do not induce vomiting See a doctor immediately If grease just gets into your mouth wash out your mouth with water thoroughly If grease gets on your skin Wash ...

Страница 112: ...cessed head screws Flat head screwdriver 1 For grease plug Before greasing move the Manipulator so that the grease inlet is not directed down Do not remove the grease plug while the grease inlet is directed down Otherwise the oil content separated from the grease may leak out Do not use any tool to install and remove the grease nipple and grease line extension jig Always handle them directly by yo...

Страница 113: ...ntenance 3 Covers 2 Remove the two grease plug from the Joint 1 grease inlet located inside the Arm 1 3 Attach the grease nipple to one side of the Joint 1 grease inlet N6 A1000 N6 A850 R 4 Inject grease from the grease nipple using a grease gun Grease SK 1A Grease amount 8g N6 A1000 N6 A850 R 5 Remove the grease nipple from the Joint 1 grease inlet 6 Attach the grease plug to the Joint 1 grease i...

Страница 114: ...N6 A850 R 3 Attach the grease nipple to one side of the Joint 2 grease inlet 4 Inject grease from the grease nipple using a grease gun Grease SK 1A Grease amount 7g N6 A1000 N6 A850 R 5 Remove the grease nipple from the Joint 2 grease inlet 6 Attach the grease plug to the Joint 2 grease inlet If the grease plug is damaged or deteriorated replace it with a new one N6 A1000 N6 A850 R 7 Install the J...

Страница 115: ...d inside the Arm 3 3 Attach the grease nipple to one side of the Joint 3 grease inlet 4 Inject grease from the grease nipple using a grease gun Grease SK 1A Grease amount 4g 5 Remove the grease nipple from the Joint 3 grease inlet 6 Attach the grease plug to the Joint 3 grease inlet If the grease plug is damaged or deteriorated replace it with a new one 7 Install the Arm 3 cover For details refer ...

Страница 116: ... of the Arm 4 2 Attach the grease nipple to one side of the Joint 4 grease inlet 3 Inject grease from the grease nipple using a grease gun Grease SK 1A Grease amount 2g 4 Remove the grease nipple from the Joint 4 grease inlet 5 Attach the grease plug to the Joint 4 grease inlet If the grease plug is damaged or deteriorated replace it with a new one ...

Страница 117: ...5 grease inlet Be careful not to confuse it with the Joint 6 grease inlet 3 Inject grease from the grease nipple using a grease gun Grease SK 1A Grease amount 1g Be careful not to mix with the grease used in the Joint 6 SK 2 4 Remove the grease nipple from the Joint 5 grease inlet 5 Attach the grease plug to the Joint 5 grease inlet If the grease plug is damaged or deteriorated replace it with a n...

Страница 118: ... grease inlet Be careful not to confuse it with the Joint 5 grease inlet 3 Inject grease from the grease nipple using a grease gun Grease SK 2 Grease amount 0 7g Be careful not to mix with the grease used in the Joint 5 SK 1A 4 Remove the grease nipple from the Joint 6 grease inlet 5 Attach the grease plug to the Joint 6 grease inlet If the grease plug is damaged or deteriorated replace it with a ...

Страница 119: ... to the mating surface of the bevel gear inside the Arm 5 Grease SK 2 Grease amount 3g 4 Apply a thin coat of grease to the O ring Fit the O ring into the base groove Grease SK 2 Do not allow the O ring to come out of the groove If the O ring is swollen damaged or deteriorated replace it with a new one 5 Install the Arm 5 grease inlet cover Hexagon socket head cap bolts 4 M3 6 Tightening torque 2 ...

Страница 120: ...4 1 kgf cm Set Screw Tightening Torque M3 2 0 0 1 N m 21 1 kgf cm M3 0 9 0 1 N m 9 1 kgf cm M4 4 0 0 2 N m 41 2 kgf cm M4 2 4 0 1 N m 26 1 kgf cm M5 8 0 0 4 N m 82 4 kgf cm M5 3 9 0 2 N m 40 2 kgf cm M6 13 0 0 6 N m 133 6 kgf cm M6 8 0 0 4 N m 82 4 kgf cm M8 32 0 1 6 N m 326 16 kgf cm M10 58 0 2 9 N m 590 30 kgf cm M12 100 0 5 0 N m 1 020 51 kgf cm It is recommended to fasten the bolts aligned on ...

Страница 121: ...rd 2 Encoder Board 3 Joint 6 Motor Unit Joint 6 Timing belt Joint 6 Electromagnetic brake Joint 4 Actuator Unit Encoder Board 1 Brake Board N6 A850 R Joint 6 Motor Unit Joint 6 Timing belt Joint 6 Electromagnetic brake LED Plate LED Board Control Board 1 Battery Board Battery Encoder Board 1 Brake Board Joint 5 Motor Unit Joint 5 Timing belt Joint 5 Electromagnetic brake Encoder Board 4 Control Bo...

Страница 122: ...onnect the power plug from the power source Be sure to connect the AC power cable to a power receptacle DO NOT connect it directly to a factory power source Before performing any replacement procedure turn OFF the Controller and related equipment and then disconnect the power plug from the power source Performing any replacement procedure with the power ON is extremely hazardous and may result in ...

Страница 123: ... 3 inside cover Arm 3 cover Arm 1 inside cover Joint 4 side cover Arm 2 cover Joint 1 cover Joint 1 inside cover Joint 2 cover Joint 2 outside cover Joint 4 inside cover Joint 4 outside cover Arm 4 side cover Arm 4 side cover Arm 4 cable cover Base cover Arm 2 cover ...

Страница 124: ...over Arm 3 inside cover Arm 4 side cover Joint 1 cover Joint 2 outside cover Joint 4 outside cover Arm 4 cable cover Arm 3 cover Arm 1 inside cover Base cover Arm 2 cover Joint 1 inside cover Joint 4 inside cover Arm 4 cable cover Arm 4 side cover Arm 2 cover ...

Страница 125: ...80 Arm 4 side cover 2 1749179 Arm 4 cable cover 2 1739221 Tool Cross point screwdriver 2 1 For cross recessed screws Cleanroom Model N6 A1000C N6 A850C R Name Qty Code Note Maintenance part Cover Cleanroom model Base Base cover 1 1761617 Arm 1 N6 A1000 Joint 1 cover 1 1755506 Joint 1 inside cover 1 1755504 Arm 1 inside cover 1 1755508 Joint 2 outside cover 1 1755507 Joint 2 cover 1 1755505 Arm 1 N...

Страница 126: ...t failure These are extremely hazardous and may result in electric shock and or improper function of the robot system When routing the cables check the cable locations at removing the cover Be sure to place the cables back to their original locations Removal 1 Move the Arm 1 to a position where you can remove the the base cover N6 A1000 N6 A850 R 2 Remove the screws and then remove the base cover ...

Страница 127: ...r N6 A1000 N6 A850 R 2 Install the base cover Cross recessed binding head machine screw 4 M4 8 Tightening torque 0 45 0 05 N m N6 A1000 N6 A850 R Be careful not to get the cables caught in the cover The cover may get broken if it is fastened too tight Be careful not to exceed the above tightening torque NOTE NOTE ...

Страница 128: ... or improper function of the robot system When routing the cables check the cable locations at removing the cover Be sure to place the cables back to their original locations Removal 1 Remove the base cover For more details refer to Maintenance 3 1 Base Cover 2 Remove the screws of the Joint 1 cover Cross recessed binding head machine screw 2 M4 8 3 Move the Arm 1 to the origin position while hold...

Страница 129: ...er easily Joint 1 cover When moving the arm be careful not to get the cover caught on the manipulator If you move the cover while the cover is got caught on the Manipulator the cover may get broken 3 Fix the Joint 1 cover with the screws Cross recessed binding head machine screw 2 M4 8 Tightening torque 0 45 0 05 N m Base Arm 1 The cover may get broken if it is fastened too tight Be careful not to...

Страница 130: ...ing the cables check the cable locations at removing the cover Be sure to place the cables back to their original locations Removal 1 Remove the base cover For more details refer to Maintenance 3 1 Base Cover 2 Remove the Arm 1 outside cover Hexagon socket head cap bolts 8 M5 20 with plain washer 2 Remove the screws of the Joint 1 cover Cross recessed binding head machine screw 2 M4 8 3 Hold the J...

Страница 131: ...not to get the cover caught on the manipulator If you move the cover while the cover is got caught on the Manipulator the cover may get broken 3 Fix the Joint 1 cover with the screws Cross recessed binding head machine screw 2 M4 8 Tightening torque 0 45 0 05 N m The cover may get broken if it is fastened too tight Be careful not to exceed the above tightening torque 4 Install the Arm 1 outside co...

Страница 132: ...nt 1 inside cover Cross recessed binding head machine screw 3 M4 8 Installation Set the Joint 1 inside cover to the Manipulator and fix it with the screws Cross recessed binding head machine screw 3 M4 8 Tightening torque 0 45 0 05 N m The cover may get broken if it is fastened too tight Be careful not to exceed the above tightening torque NOTE ...

Страница 133: ...Operate the brake of the Joint 2 EPSON RC Command brake on 2 5 Turn OFF the controller 6 Remove the screws and then remove the Joint 1 inside cover Cross recessed binding head machine screw 3 M4 8 Installation 1 Set the Joint 1 inside cover to the Manipulator and fix it with the screws Cross recessed binding head machine screw 3 M4 8 Tightening torque 0 45 0 05 N m The cover may get broken if it i...

Страница 134: ...ock and or improper function of the robot system When routing the cables check the cable locations at removing the cover Be sure to place the cables back to their original locations Removal Remove the screws and then remove the Arm 1 inside cover Cross recessed binding head machine screw 8 M4 8 Installation Install the Arm 1 inside cover to the Manipulator and fix it with the screws Cross recessed...

Страница 135: ...cable locations at removing the cover Be sure to place the cables back to their original locations Removal 1 Turn ON the controller 2 Release the brake on the Joint 2 EPSON RC Command brake off 2 When releasing the brake be careful of the arm falling due to its own weight 3 Move the Arm 2 about 100 degrees 4 Operate the brake of the Joint 2 EPSON RC Command brake on 2 5 Turn OFF the controller 6 R...

Страница 136: ...removing the cover Be sure to place the cables back to their original locations Removal Remove the screws and then remove the Joint 2 outside cover N6 A1000 N6 A850 R Cross recessed binding head machine screw 3 M4 8 Cross recessed binding head machine screw 6 M4 8 Installation Install the Joint 2 outside cover to the Manipulator and fix it with the screws N6 A1000 N6 A850 R Cross recessed binding ...

Страница 137: ...hen routing the cables check the cable locations at removing the cover Be sure to place the cables back to their original locations Removal 1 Turn ON the controller 2 Release the Joint 2 brake EPSON RC Command brake off 2 When releasing the brake be careful of the arm falling due to its own weight 3 Move the Arm 2 about 100 degrees to a position where you can remove the screws of the Joint 2 cover...

Страница 138: ...oint 2 cover into the Arm 1 inside cover Arm 1 inside cover Joint 2 cover 2 Fix the Joint 2 cover with the screws Cross recessed binding head machine screw 3 M4 8 Tightening torque 0 45 0 05 N m The cover may get broken if it is fastened too tight Be careful not to exceed the above tightening torque NOTE ...

Страница 139: ... the cables back to their original locations Removal 1 Remove the Joint 2 cover For more details refer to Maintenance 3 6 1 N6 A1000 Joint 2 Cover 2 Remove the screws shown in the right figure of the screws that fix the Arm 2 cover Arm 1 side Cross recessed binding head machine screw 4 M4 8 3 Turn ON the controller 4 Release the Joint 2 brake EPSON RC Command brake off 2 When releasing the brake b...

Страница 140: ...4 8 Tightening torque 0 45 0 05 N m The cover may get broken if it is fastened too tight Be careful not to exceed the above tightening torque Make sure that there is no space between the Arm 2 cover and Arm 2 and then fix it Correct Wrong 2 Turn ON the controller 3 Release the Joint 2 brake EPSON RC Command brake off 2 When releasing the brake be careful of the arm falling due to its own weight NO...

Страница 141: ...t 2 brake EPSON RC Command brake on 2 6 Turn OFF the controller 7 Fix the Arm 2 cover Arm 1 side with the screws Cross recessed binding head machine screw 2 M4 8 Tightening torque 0 45 0 05 N m 8 Install the Joint 2 cover For more details refer to Maintenance 3 6 1 N6 A1000 Joint 2 Cover ...

Страница 142: ...over Be sure to place the cables back to their original locations Removal 1 Remove the Arm 1 inside cover For more details refer to Maintenance 3 4 2 N6 A850 R Arm 1 Inside Cover 2 Remove the screws shown in the right figure of the screws that fix the Arm 2 cover Arm 1 side Cross recessed binding head machine screw 7 M4 8 3 Turn ON the controller 4 Release the Joint 2 brake EPSON RC Command brake ...

Страница 143: ...ful of the arm falling due to its own weight 4 Move the Arm 2 about 100 degrees while holding the Arm 2 cover Arm 1 side 5 Activate the Joint 2 brake EPSON RC Command brake on 2 6 Turn OFF the controller 7 Fix the Arm 2 cover Arm 1 side with the screws Cross recessed binding head machine screw 7 M4 8 Tightening torque 0 45 0 05 N m 8 Install the Arm 1 inside cover For more details refer to Mainten...

Страница 144: ...able locations at removing the cover Be sure to place the cables back to their original locations Removal 1 Remove the following covers in order Joint 4 inside cover Joint 4 side cover Arm 2 side Arm 3 inside cover Details are described in the following sections Maintenance 3 9 Arm 3 Inside Cover 3 12 Joint 4 Inside Cover 3 11 Joint 4 Side Cover N6 A1000 N6 850 R Joint 4 inside cover Joint 4 side ...

Страница 145: ...e careful of the arm falling due to its own weight 5 Move the Arm 3 to the origin position N6 A1000 N6 850 R 6 Activate the Joint 3 brake EPSON RC Command brake on 3 7 Turn OFF the controller 8 Remove the rest of screws that fix the Arm 2 cover and remove the Arm 2 cover Cross recessed binding head machine screw 2 M4 8 N6 A1000 N6 850 R NOTE ...

Страница 146: ...ening torque 0 45 0 05 N m N6 A1000 N6 850 R The cover may get broken if it is fastened too tight Be careful not to exceed the above tightening torque Make sure that there is no space between the Arm 2 cover and Arm 2 and then fix it Correct Wrong 2 Turn ON the controller 3 Release the Joint 3 brake EPSON RC Command brake off 3 When releasing the brake be careful of the arm falling due to its own ...

Страница 147: ... Joint 3 brake EPSON RC Command brake on 3 6 Turn OFF the controller 7 Fix the Arm 2 cover with the screws Cross recessed binding head machine screw 5 M4 8 Tightening torque 0 45 0 05 N m N6 A1000 N6 850 R The cover may get broken if it is fastened too tight Be careful not to exceed the above tightening torque NOTE ...

Страница 148: ...r Arm 2 side Joint 4 inside cover Details are described in the following sections Maintenance 3 9 Arm 3 Inside Cover 3 12 Joint 4 Inside Cover 3 11 Joint 4 Side Cover N6 A1000 N6 850 R Joint 4 inside cover Joint 4 side cover Arm 3 inside cover Joint 4 inside cover Joint 4 side cover Arm 3 inside cover ...

Страница 149: ...routing the cables check the cable locations at removing the cover Be sure to place the cables back to their original locations Removal 1 Remove the following covers in order Joint 4 inside cover Joint 4 side cover Arm 2 side Details are described in the following sections Maintenance 3 11 Joint 4 Side Cover 3 12 Joint 4 Inside Cover N6 A1000 N6 850 R Joint 4 inside cover Joint 4 side cover Arm 3 ...

Страница 150: ... machine screw 2 M4 8 Tightening torque 0 45 0 05 N m The cover may get broken if it is fastened too tight Be careful not to exceed the above tightening torque 2 Install the following covers Joint 4 side cover Arm 2 Joint 4 inside cover Details are described in the following sections Maintenance 3 11 Joint 4 Side Cover 3 12 Joint 4 Inside Cover NOTE ...

Страница 151: ...ot system When routing the cables check the cable locations at removing the cover Be sure to place the cables back to their original locations Removal Remove the screws and then remove the Arm 3 cover Cross recessed binding head machine screw 6 M4 8 Installation Set the Arm 3 cover to the Manipulator and fix it with the screws Cross recessed binding head machine screw 6 M4 8 Tightening torque 0 45...

Страница 152: ...em When routing the cables check the cable locations at removing the cover Be sure to place the cables back to their original locations Removal 1 Remove the following covers Joint 4 inside cover Joint 4 outside cover Details are described in the following sections Maintenance 3 12 Joint 4 Inside Cover 3 13 Joint 4 Outside Cover N6 A1000 N6 850 R Joint 4 inside cover Joint 4 outside cover Joint 4 s...

Страница 153: ...ers are not matched properly The covers may get broken Be sure to install the cover while pressing it to the Manipulator If the cover is installed away from the Manipulator it may rub the other covers during the operation 2 Install the following covers Joint 4 inside cover Joint 4 outside cover Details are described in the following sections Maintenance 3 12 Joint 4 Inside Cover 3 13 Joint 4 Outsi...

Страница 154: ... of the robot system When routing the cables check the cable locations at removing the cover Be sure to place the cables back to their original locations Removal 1 Turn ON the controller 2 Release the Joint 3 brake EPSON RC Command brake off 3 When releasing the brake be careful of the arm falling due to its own weight 3 Move the Arm 3 about 90 degree as shown below N6 A1000 N6 850 R 4 Activate th...

Страница 155: ... the screws Cross recessed binding head machine screw 4 M4 8 Tightening torque 0 45 0 05 N m The cover may get broken if it is fastened too tight Be careful not to exceed the above tightening torque Do not tighten the screws when the covers are not matched properly The covers may get broken Be careful not to get the cables caught in the cover NOTE NOTE NOTE ...

Страница 156: ...ver Be sure to place the cables back to their original locations Removal Remove the screws and then remove the Joint 4 outside cover Cross recessed binding head machine screw 4 M4 8 Installation Match the Joint 4 inside cover and the Joint 4 outside cover and set them to the Manipulator Then fix them with the screws Cross recessed binding head machine screw 4 M4 8 Tightening torque 0 45 0 05 N m T...

Страница 157: ...esult in electric shock and or improper function of the robot system When routing the cables check the cable locations at removing the cover Be sure to place the cables back to their original locations Removal 1 Turn ON the controller 2 Release the Joint 3 brake EPSON RC Command brake off 3 When releasing the brakes be careful of the arm falling due to its own weight 3 Move the Arm 3 about 90 degr...

Страница 158: ... M4 8 Installation Set the Arm 4 side covers 2 covers to the Manipulator and fix with the screws Cross recessed binding head machine screw 14 M4 8 Tightening torque 0 45 0 05 N m Be careful not to get the cables caught in the cover The cover may get broken if it is fastened too tight Be careful not to exceed the above tightening torque NOTE NOTE ...

Страница 159: ...outing the cables check the cable locations at removing the cover Be sure to place the cables back to their original locations Removal Remove the screws and then remove the Arm 4 cable covers 2 covers Cross recessed binding head machine screw 4 M4 8 Installation Set the Arm 4 cable covers 2 covers and fix them with the screws Cross recessed binding head machine screw 4 M4 8 Tightening torque 0 45 ...

Страница 160: ...tenance Turning ON the power to the robot system when any foreign substances exist in them is extremely hazardous and may result in electric shock and or malfunction of the robot system Be sure to connect the cables properly Do not allow unnecessary strain on the cables Do not put heavy objects on the cables Do not bend or pull the cables forcibly Unnecessary strain on the cables may result in dam...

Страница 161: ... 3 mm 1 For M4 hexagon socket head cap bolts width across flats 4 mm 1 For M5 hexagon socket head cap bolts width across flats 5 mm 1 For M6 hexagon socket head cap bolts Box wrench width across flats 5 mm 1 For D Sub connector Long nose pliers 1 For removing air tubes Nippers 1 For cutting a cable tie Cross point screwdriver 2 1 For cross recessed head screws Torque wrench 1 For tightening torque...

Страница 162: ... Manipulator to the orientation as shown below EPSON RC Command Brake off the number from 2 to 6 corresponding to the arm whose brake will be turned off Joint 1 Joint 2 Joint 3 Joint 4 Joint 5 Joint 6 90 90 90 0 0 0 When releasing the brake the arm may rotate by its own weight Normally release the brake of joints one by one Take extra care if you need to release the brakes of two or more joints si...

Страница 163: ...ctor 8 Disconnect the M C cable For details refer to Maintenance 4 6 M C Cable 9 Cut off the cable tie of the cables Be careful not to cut the cables 10 Remove the user attachment of the Arm 4 Hexagon socket head cap bolts 2 M4 8 Cables are connected to the user attachment When you disconnect the cables make sure not to pull the user attachment forcibly User attachment NOTE NOTE ...

Страница 164: ...71 X72 12 Disconnect the connector connected to the encoder board 4 Connector EB05_CN1 Be careful that the jumper pins on the board do not come off 13 Remove the connectors Connectors PW5 PW6 BR5 BR6 14 Remove the two air tubes 15 Remove the ground wire terminals Cross recessed binding head machine screw M4 8 NOTE ...

Страница 165: ...e the removed cable fixing plate 18 Cut off the cable tie of the flange on the Joint 4 actuator unit 19 Disconnect the connectors connected to the encoder board 3 and the control board 2 Connectors EB04_CN1 EB04_CN3 EB0x_CN2 GS02 Be careful that the jumper pins on the board do not come off 20 Remove the two ground wire terminals Cross recessed binding head machine screws 2 M4 8 NOTE NOTE ...

Страница 166: ...ion since the parts being heavy When removing it make sure not to lose the positioning pin Also be careful not to catch the cables on the Joint 4 actuator unit 23 Remove the J3 cable fixing plate fixed on the Arm 3 Hexagon socket head cap bolts 2 M3 6 24 Remove the encoder board 3 and the control board 2 Cross recessed binding head machine screws 6 M3 6 Be careful not to lose the removed board 25 ...

Страница 167: ...ll it on the reduction gear unit 26 Cut off the cable tie of the removed J3 cable fixing plate Be careful not to lose the removed cable fixing plate 27 Cut off the cable tie of the cables 28 Disconnect the connectors connected to the Joint 2 actuator unit Connectors PW2 BR2 29 Disconnect the connectors connected to the Joint 3 actuator unit Connectors PW3 BR3 NOTE NOTE ...

Страница 168: ...from the Joint 2 actuator unit to the Arm 3 side Cables connectors PW2 BR2 EB0x_CN2 Do not pull the cables forcibly while the connectors get caught Doing so may result in disconnection of the cables or breakage of the connectors 32 Remove the two ground wire terminals Cross recessed binding head machine screw 2 M4 8 33 Remove the J3 cable fixing plate fixed on the Arm 2 Hexagon socket head cap bol...

Страница 169: ...ugh the Arm 2 Be careful not to catch the cables coming from the Joint 2 actuator unit to the cable unit 37 Remove the Arm 2 Hexagon socket head cap bolts 8 M6 35 with plain washer Be sure to have at least 2 people to perform the operation since the parts being heavy Be careful not to catch the cables on the Joint 2 actuator unit or Arm 2 38 Cut off the cable tie of the removed J2 cable fixing pla...

Страница 170: ...BAT_CN6 You do not need to disconnect the connectors of the batteries 41 Disconnect the connectors connected to the control board 1 and the LED board Connectors GS01 LED_CN1 42 Remove the J2 cable fixing plate fixed on the Arm 1 Hexagon socket head cap bolts 2 M4 8 43 Remove the ground wire terminals Cross recessed binding head machine screw M4 8 NOTE ...

Страница 171: ...5 Cut off the cable tie of the removed J2 cable fixing plate Be careful not to lose the removed cable fixing plate 46 Cut off the cable tie that fixes the cable unit 47 Remove the J1 cable fixing plate fixed on the Arm 1 Hexagon socket head cap bolts 2 M4 8 48 Remove the six ground wire terminals Cross recessed binding head machine screw M4 8 NOTE ...

Страница 172: ...ther1 Ether2 D sub SW1 Standard model Cleanroom model 51 Remove the board fixing plate Hexagon socket head cap bolts 2 M3 6 52 Disconnect the connectors connected to the encoder board 1 and the brake board Connectors EB01_CN1 EB01_CN3 EB0x_CN2 BRK_CN1 BRK_CN2 Be careful that the jumper pins on the board do not come off 53 Remove the four ground wire terminals fixed on the board fixing plate Cross ...

Страница 173: ...ct the connector connected to the Joint 1 actuator unit Connector PW1 55 Remove the J1 cable fixing plate fixed on the base Hexagon socket head cap bolts 2 M4 8 56 Rotate the Arm 1 to the origin position 57 Pull out the cable unit from the Arm 1 ...

Страница 174: ...Maintenance 4 Cable 162 N6 Rev 2 58 Remove the cable unit from the Joint 1 59 Cut off the cable tie of the removed J1 cable fixing plate Be careful not to lose the removed cable fixing plate NOTE ...

Страница 175: ...e A B1 B2 B8 cable B Do not cut off or move the position of the cable tie The cable unit will not be able to install properly 2 Fix the cable unit to the cable fixing plate Be careful for the following Cable ties AB200 4 1 to 4 Tightening strength 85 5 N Base side Front A B Cable A Set the A1 of the cable tie to the cable fixing plate and fix it by using the cable ties 1 and 2 Make sure that the g...

Страница 176: ...de of the plate Cable B Set the B2 of the cable tie to the cable fixing plate and fix it by using the cable ties 3 and 4 Make sure to twist 180 degrees and fix the cable B so that the two air tubes blue and white are on the plate side End effector side Front B A Refer to the figure for positions of the cable tie heads Rotate the heads of the cable ties A2 and B2 to set positions Be careful for the...

Страница 177: ...te B 6 Move the Arm 1 approx 90 degrees Be careful not to get the cables caught in the Arm 1 7 Install the cable fixing plate B to the base Hexagon socket head cap bolts 2 M4 8 Tightening torque 4 0 0 2 N m Be careful not to tighten the screws with the cables get caught on the plate 8 Install the cable fixing plate A to Arm 1 Hexagon socket head cap bolts 2 M4 8 Tightening torque 4 0 0 2 N m Be ca...

Страница 178: ...orcibly while the connectors get caught Doing so may result in disconnection of the cables or breakage of the connectors 10 Pass the cables connectors through the hole on the end of the Arm 1 Cables connectors BAT_CN3 BAT_CN6 GS01 LED_CN1 11 Fix the cables on the Arm 1 Cable ties AB150 4 NOTE ...

Страница 179: ...that the two air tubes blue and white are on the opposite side of the plate Back B A 1 3 B3 A3 Base side 2 4 Refer to the figure for positions of the cable tie heads Rotate the heads of the cable ties A3 and B3 to set positions Be careful for the orders and the positions of the cable ties Distance between the cable tie 1 and A3 and 3 and B3 should be as close as possible Improper order or position...

Страница 180: ... heads Rotate the heads of the cable ties A4 and B4 to set positions Be careful for the orders and the positions of the cable ties Distance between the cable tie 1 and A4 and 3 and B4 should be as close as possible A End effector side B Back 1 3 A4 B4 2 4 Improper order or position of the cable tie may shorten the life cycle of the cables 14 Apply the grease to the cables between the two cable fix...

Страница 181: ... positions the cable unit Cable ties AB200 Fix to the Arm 1 18 To face the two cable fixing plates bend the cable unit and pass it through the Joint 2 19 Install the Arm 2 while aligning the cable unit to the direction of the cables coming from the Joint 2 actuator Hexagon socket head cap bolts 8 M6 35 with plain washer Tightening torque 18 0 9 N m Arm 2 Cable unit ...

Страница 182: ... apply excessive shock to the parts 20 Pass the cable unit except the following cables connectors to Arm 2 Cables connectors PW2 PW3 BR2 BR3 EB02_CN1 ground wire Do not pass the cables forcibly while the connectors get caught Doing so may result in disconnection of the cables or breakage of the connectors 21 Install the cable fixing plates to Arm 2 Hexagon socket head cap bolts 2 M4 8 Tightening t...

Страница 183: ...les connectors PW2 BR2 EB0x_CN2 Do not pull the cables forcibly while the connectors get caught Doing so may result in disconnection of the cables or breakage of the connectors 23 Connect the connectors to the encoder board 2 Connectors EB02_CN1 EB0x_CN2 J2 side Be careful that the jumper pins on the board do not come off 24 Install the two ground wire terminals Cross recessed binding head machine...

Страница 184: ...ored cable is on the plate side Cable B Set the B5 of the cable tie to the cable fixing plate and fix it by using the cable ties 3 and 4 Make sure that the two air tubes blue and white are on the opposite side of the plate Back Base side B A 1 3 B5 A5 2 4 Refer to the figure for positions of the cable tie heads Rotate the heads of the cable ties A5 and B5 to set positions Be careful for the orders...

Страница 185: ...s 3 and 4 Make sure to twist 180 degrees and fix the cable B so that the two air tubes blue and white are on the plate side Front A B End effector side Refer to the figure for positions of the cable tie heads Rotate the heads of the cable ties A6 and B6 to set positions Be careful for the orders and the positions of the cable ties Distance between the cable tie 1 and A6 and 3 and B6 should be as c...

Страница 186: ...o the Arm 3 Hexagon socket head cap bolts 16 M4 30 with plain washer Tightening torque 5 5 0 25 N m Be sure to have at least 2 people to perform the operation since the parts being heavy Be careful not to catch the cables Make sure that the O ring will not be out of the groove Do not apply excessive shock to the parts 33 Install the encoder board 3 and the control board 2 Cross recessed binding he...

Страница 187: ...1 N m Be careful not to tighten the screws with the cables get caught on the plate 38 Install the Joint 4 actuator unit to the Arm 3 Hexagon socket head cap bolts 7 M4 15 with plain washer Tightening torque 5 5 0 25 N m Be sure to have at least 2 people to perform the operation since the parts being heavy Make sure to take out the cables from the Joint 4 actuator unit to outside of the Arm 3 Confi...

Страница 188: ...d B7 to set positions Distance between the cable tie 1 and A7 and 3 and B7 should be as close as possible Do not pull the cables forcibly to get close the cable ties Be careful not to bend the air tubes Improper order or position of the cable tie may shorten the life cycle of the cables 41 Place marks on the cable of cable A near the cable ties A7 and A8 on the opposite side of the flange 42 As wi...

Страница 189: ...ixing plate As shown on the right set the position of the cable tie A8 to the cable fixing plate and fix it by using cable ties 1 and 2 Cable ties AB200 2 1 and 2 Tightening strength 85 5 N 1 A8 2 Cable B Bend the cable so that the mark near the cable tie B8 will be on the cable fixing plate side Cable fixing plate As shown on the right set the position of the cable tie B8 to the cable fixing plat...

Страница 190: ...y the grease to the cables between the cable tie A7 and A8 and B7 and B8 Grease Krytox Cable A and B Standard model 0 5g for each Cleanroom model 0 8g for each Apply the grease to each cable evenly 46 Pass the cables connectors through the Arm 4 and connect them to the user attachment Cables connectors Ether1 Ether2 X71 X72 Connect the Ether1 and Ether2 depending on the user attachment display 47 ...

Страница 191: ...proper length and connect them to fittings Air1 White Air2 Blue For cleanroom model cut the yellow air tube with the length as shown in the picture Make sure that the air tube does not interfere with the pulley or belt 51 Install the user attachment on the Arm 4 Hexagon socket head cap bolts 2 M4 8 Tightening torque 4 0 0 2 N m Be careful not to get the cables caught NOTE NOTE ...

Страница 192: ... AB200 2 53 Connect the connector Connector PW1 54 Install the four ground wire terminals except the connector X11 X12 to the board fixing plate Cross recessed binding head machine screws 4 M4 8 Tightening torque 0 9 0 1 N m 55 Connect the connectors to the encoder board 1 and the brake board Connectors EB01_CN1 EB01_CN3 EB0x_CN2 BRK_CN1 BRK_CN2 ...

Страница 193: ... cap bolts 2 M3 6 Tightening torque 2 0 0 1 N m 57 Connect the connectors to the base side plate Connectors Ether1 Ether2 D sub SW1 58 Connect the connectors to the box shaped plate Connectors X11 X12 X010 BR010 Refer to the right picture for installation direction of black colored connectors X010 BR010 B A A B ...

Страница 194: ...board fixing plate then connect to the fittings Be careful not to bend or collapse the air tubes Pass through the rear side of the board fixing plate 60 Install the base side plate Hexagon socket head cap bolts 4 M4 8 Tightening torque 4 0 0 2 N m As shown on the right make sure that the cable of Ether1 passes through the rear side of the board fixing plate 61 Install the two air tubes as shown on...

Страница 195: ... Arm 1 outside cover 65 Install the following covers Arm 4 side cover 2 covers Joint 4 inside cover Joint 4 outside cover Joint 4 side covers 2 covers Arm 3 cover Arm 3 inside cover Arm 2 cover 2 covers Joint 2 cover Joint 2 outside cover Arm 1 inside cover Joint 1 cover Base cover For details refer to Maintenance 3 Covers 66 Perform calibration For details refer to Maintenance 8 Calibration ...

Страница 196: ...nance Turning ON the power to the robot system when any foreign substances exist in them is extremely hazardous and may result in electric shock and or malfunction of the robot system Be sure to connect the cables properly Do not allow unnecessary strain on the cables Do not put heavy objects on the cables Do not bend or pull the cables forcibly Unnecessary strain on the cables may result in damag...

Страница 197: ... 3 mm 1 For M4 hexagon socket head cap bolts width across flats 4 mm 1 For M5 hexagon socket head cap bolts width across flats 5 mm 1 For M6 hexagon socket head cap bolts Box wrench width across flats 5 mm 1 For D Sub connector Long nose pliers 1 For removing air tubes Nippers 1 For cutting a cable tie Cross point screwdriver 2 1 For cross recessed head screws Torque wrench 1 For tightening torque...

Страница 198: ...nce 4 1 Cable Unit N6 A1000 Cable direction Standard backward 4 Remove the base side plate Hexagon socket head cap bolts 4 M4 8 5 Remove the board fixing plate Hexagon socket head cap bolts 2 M3 6 6 Disconnect the connectors connected to the encoder board 1 and the brake board Connectors EB01_CN1 EB01_CN3 EB0x_CN2 BRK_CN1 BRK_CN2 Be careful that the jumper pins on the encoder board do not come off...

Страница 199: ... so may result in disconnection of the cables since the cables are connected 11 Remove the plate part 2 from the base bottom Hexagon socket head cap bolts 5 M4 8 12 Remove the two air tubes and connectors from the plate part 1 Connectors Ether1 Ether2 D sub SW1 13 Remove the nine ground wire terminals fixed on the plate part 3 Cross recessed binding head machine screws 9 M4 8 14 Remove the plate p...

Страница 200: ...Maintenance 4 Cable 188 N6 Rev 2 15 Disconnect the connectors from the plate part 3 Connectors X11 X12 X010 BR010 For cleanroom model disconnect the yellow air tube as well ...

Страница 201: ... Manipulator Manipulator is heavy Be sure to have at least 2 people to perform the operation 3 Pull out the cable unit except the following cables Cables connectors BRK_CN2 EB01_CN3 ground wire 4 Connect the connectors to the plate part 3 Connectors X11 X12 X010 BR010 There are the front side and the back side on the plate part 3 Be careful for the directions Front Refer to the right picture for i...

Страница 202: ...6 Pass the connectors through the hole of the plate part 3 and install on the the plate part 1 Connectors Ether1 Ether2 D sub SW1 7 Connect the two air tubes to fittings Air1 White Air2 Blue 8 Install the plate part 3 to the base Hexagon socket head cap bolts 4 M4 8 Tightening torque 4 0 0 2 N m Refer to the right figure for the installation position Cable direction 9 Install the plate part 2 Hexa...

Страница 203: ...e 4 6 M C Cable 13 Mount the Manipulator on the base table Be sure to have at least 2 people to mount the Manipulator 14 Connect the connectors Connector PW1 15 Install the ground wire terminal on the board fixing plate Cross recessed binding head machine screw M4 8 Tightening torque 0 9 0 1 N m 16 Install the board fixing plate in the back of the base Hexagon socket head cap bolts 2 M3 6 Tighteni...

Страница 204: ...le direction Standard backward 20 Install the Arm 1 outside cover Hexagon socket head cap bolts 8 M5 20 with plain washer Tightening torque 8 0 0 4 N m Arm 1 outside cover 21 Install the following covers Arm 4 side cover 2 covers Joint 4 inside cover Joint 4 outside cover Joint 4 side covers 2 covers Arm 3 cover Arm 3 inside cover Arm 2 cover 2 covers Joint 2 cover Joint 2 outside cover Arm 1 insi...

Страница 205: ...ance Turning ON the power to the robot system when any foreign substances exist in them is extremely hazardous and may result in electric shock and or malfunction of the robot system Be sure to connect the cables properly Do not allow unnecessary strain on the cables Do not put heavy objects on the cables Do not bend or pull the cables forcibly Unnecessary strain on the cables may result in damage...

Страница 206: ...agon socket head cap bolts width across flats 4 mm 1 For M5 hexagon socket head cap bolts width across flats 5 mm 1 For M6 hexagon socket head cap bolts Box wrench width across flats 5 mm 1 For D Sub connector Long nose pliers 1 For removing air tubes Nippers 1 For cutting a cable tie Cross point screwdriver 2 1 For cross recessed head screws Torque wrench 1 For tightening torque control Cable tie...

Страница 207: ...outside cover simultaneously with the Joint 1 cover 3 Turn ON the Controller 4 Release the brakes of each joint and move the Manipulator to the orientation as shown below EPSON RC Command Brake off the number from 2 to 6 corresponding to the arm whose brake will be turned off Joint 1 Joint 2 Joint 3 Joint 4 Joint 5 Joint 6 90 90 90 0 0 0 When releasing the brake the arm may rotate by its own weigh...

Страница 208: ...s refer to Maintenance 4 6 M C Cable 9 Cut off the cable tie of the cables Be careful not to cut the cables 10 Remove the user attachment of the Arm 4 Hexagon socket head cap bolts 2 M4 8 Cables are connected to the user attachment When you disconnect the cables make sure not to pull the user attachment forcibly User attachment NOTE NOTE ...

Страница 209: ...71 X72 12 Disconnect the connector connected to the encoder board 4 Connector EB05_CN1 Be careful that the jumper pins on the board do not come off 13 Remove the two air tubes 14 Remove the connectors Connectors PW5 PW6 BR5 BR6 15 Remove the ground wire terminals Cross recessed binding head machine screw M4 8 NOTE ...

Страница 210: ...e the removed cable fixing plate 18 Cut off the cable tie of the flange on the Joint 4 actuator unit 19 Disconnect the connectors connected to the encoder board 3 and the control board 2 Connectors EB04_CN1 EB04_CN3 EB0x_CN2 GS02 Be careful that the jumper pins on the board do not come off 20 Remove the two ground wire terminals Cross recessed binding head machine screws 2 M4 8 NOTE NOTE ...

Страница 211: ...at least 2 people to perform the operation since the parts being heavy When removing it make sure not to lose the positioning pin Also be careful not to catch the cables on the Joint 4 actuator unit 23 Remove the J3 cable fixing plate fixed on the Arm 3 Hexagon socket head cap bolts 2 M3 6 24 Remove the encoder board 3 and the control board 2 Cross recessed binding head machine screws 6 M3 6 Be ca...

Страница 212: ...ring is installed on the Arm 3 re install it on the reduction gear unit 26 Cut off the cable tie of the removed J3 cable fixing plate Be careful not to lose the removed cable fixing plate 27 Cut off the cable tie of the cables 28 Disconnect the connectors connected to the Joint 2 actuator unit Connectors PW2 BR2 29 Disconnect the connectors connected to the Joint 3 actuator unit Connectors PW3 BR3...

Страница 213: ...ctors PW2 BR2 EB0x_CN2 Do not pull the cables forcibly while the connectors get caught Doing so may result in disconnection of the cables or breakage of the connectors 32 Remove the two ground wire terminals Cross recessed binding head machine screw 2 M4 8 33 Remove the J3 cable fixing plate fixed on the Arm 2 Hexagon socket head cap bolts 2 M4 8 34 Cut off the cable tie of the removed J3 cable fi...

Страница 214: ...tuator unit to the cable unit 37 Remove the Arm 2 Hexagon socket head cap bolts 8 M6 35 with plain washer Be sure to have at least 2 people to perform the operation since the parts being heavy Be careful not to catch the cables on the Joint 2 actuator unit or Arm 2 38 Cut off the cable tie of the removed J2 cable fixing plate Be careful not to lose the removed cable fixing plate 39 Cut off the cab...

Страница 215: ...lts 2 M4 8 42 Disconnect the connectors connected to the control board 1 Connector GS01 Be careful not to lose the removed plate and board 43 Disconnect the connectors connected to the battery board Connectors BAT_CN3 BAT_CN6 You do not need to disconnect the connectors of the batteries 44 Remove the J2 cable fixing plate fixed on the Arm 1 Hexagon socket head cap bolts 2 M4 8 NOTE NOTE ...

Страница 216: ...onnectors to the inside of the Arm 1 Cables connectors BAT_CN3 BAT_CN6 GS01 LED_CN1 47 Cut off the cable tie of the removed J2 cable fixing plate Be careful not to lose the removed cable fixing plate 48 Cut off the cable tie that fixes the cable unit 49 Remove the J1 cable fixing plate fixed on the Arm 1 Hexagon socket head cap bolts 2 M4 8 NOTE ...

Страница 217: ...ve the base side plate Hexagon socket head cap bolts 4 M4 8 52 Disconnect the connectors and two air tubes for cleanroom model three air tubes from the removed base side plate Connectors X11 X12 X010 BR010 Ether1 Ether2 D sub SW1 Standard model Cleanroom model 53 Remove the board fixing plate Hexagon socket head cap bolts 2 M3 6 ...

Страница 218: ...the jumper pins on the board do not come off 55 Remove the four ground wire terminals fixed on the board fixing plate Cross recessed binding head machine screws 4 M4 8 56 Disconnect the connector connected to the Joint 1 actuator unit Connector PW1 57 Remove the J1 cable fixing plate fixed on the base Hexagon socket head cap bolts 2 M4 8 58 Rotate the Arm 1 to the origin position NOTE ...

Страница 219: ...e N6 Rev 2 207 59 Pull out the cable unit from the Arm 1 60 Remove the cable unit from the Joint 1 61 Cut off the cable tie of the removed J1 cable fixing plate Be careful not to lose the removed cable fixing plate NOTE ...

Страница 220: ...fter referred to as below in order from the base side A1 A2 A8 cable A B1 B2 B8 cable B Do not cut off or move the position of the cable tie The cable unit will not be able to install properly 2 Fix the cable unit to the cable fixing plate Be careful for the following Cable ties AB200 4 1 to 4 Tightening strength 85 5 N Base side Front A B Cable A Set the A1 of the cable tie to the cable fixing pl...

Страница 221: ...ble fixing plate and fix it with by using the cable ties 1 and 2 Make sure to twist 180 degrees and fix the cable A so that the gray colored cable is on the opposite side of the plate Cable B Set the B2 of the cable tie to the cable fixing plate and fix it by using the cable ties 3 and 4 Make sure to twist 180 degrees and fix the cable B so that the two air tubes blue and white are on the plate si...

Страница 222: ...nit and pass it through the Joint 1 End effector side Plate A Base side Plate B Base side End effector side When operating the Manipulator make sure not to apply excessive force to the cables Plate A Plate B 6 Move the Arm 1 approx 90 degrees Be careful not to get the cables caught in the Arm 1 7 Install the cable fixing plate B to the base Hexagon socket head cap bolts 2 M4 8 Tightening torque 4 ...

Страница 223: ...ght on the plate 9 Pass the cable unit to the Arm 1 Do not pass the cables forcibly while the connectors get caught Doing so may result in disconnection of the cables or breakage of the connectors 10 Pass the cables connectors through the hole on the end of the Arm 1 Cables connectors BAT_CN3 BAT_CN6 GS01 LED_CN1 11 Connect the connectors to the board Cables connectors BAT_CN3 BAT_CN6 LED_CN1 NOTE...

Страница 224: ...ixing plate Be careful for the following Cable ties AB200 4 1 to 4 Tightening strength 85 5 N Front A B Base side Cable A Set the A3 of the cable tie to the cable fixing plate and fix it by using the cable ties 1 and 2 Make sure that the gray colored cable is on the plate side Cable B Set the B3 of the cable tie to the cable fixing plate and fix it by using the cable ties 3 and 4 Make sure that th...

Страница 225: ...ixing plate and fix it with by using the cable ties 1 and 2 Make sure to twist 180 degrees and fix the cable A so that the gray colored cable is on the opposite side of the plate Cable B Set the B4 of the cable tie to the cable fixing plate and fix it by using the cable ties 3 and 4 Make sure to twist 180 degrees and fix the cable B so that the two air tubes blue and white are on the plate side A ...

Страница 226: ...e cable fixing plates to Arm 1 Hexagon socket head cap bolts 2 M4 8 Tightening torque 4 0 0 2 N m Be careful not to tighten the screws with the cables get caught on the plate 19 Install the two ground wire terminals Cross recessed binding head machine screw M4 8 Tightening torque 0 9 0 1 N m 20 Install the cable unit as shown on the right and then bundle three positions with the cable ties Fix one...

Страница 227: ...le of the Arm 2 Be careful not to get the cables caught Be sure to have at least 2 people to perform the operation since the parts being heavy Do not apply excessive shock to the parts 23 Pass the cable unit except the following cables connectors to Arm 2 Cables connectors PW2 PW3 BR2 BR3 EB02_CN1 ground wire Do not pass the cables forcibly while the connectors get caught Doing so may result in di...

Страница 228: ...x_CN2 Do not pull the cables forcibly while the connectors get caught Doing so may result in disconnection of the cables or breakage of the connectors 26 Connect the connectors to the encoder board 2 Connectors EB02_CN1 EB0x_CN2 J2 side Be careful that the jumper pins on the board do not come off 27 Install the two ground wire terminals Cross recessed binding head machine screws 2 M4 8 Tightening ...

Страница 229: ...ble ties 3 and 4 Make sure that the two air tubes blue and white are on the opposite side of the plate Back Base side B A 1 3 B5 A5 2 4 Refer to the figure for positions of the cable tie heads Rotate the heads of the cable ties A5 and B5 to set positions Be careful for the orders and the positions of the cable ties Distance between the cable tie 1 and A5 and 3 and B5 should be as close as possible...

Страница 230: ... heads Rotate the heads of the cable ties A6 and B6 to set positions Be careful for the orders and the positions of the cable ties Distance between the cable tie 1 and A6 and 3 and B6 should be as close as possible Back A B 1 3 A2 B2 End effector side 2 4 Improper order or position of the cable tie may shorten the life cycle of the cables 32 Apply the grease to the cables between the two cable fix...

Страница 231: ...the operation since the parts being heavy Be careful not to catch the cables Make sure that the O ring will not be out of the groove Do not apply excessive shock to the parts 36 Install the encoder board 3 and the control board 2 Cross recessed binding head machine screws 6 M3 6 Tightening torque 0 45 0 05 N m 37 Pull the cables connectors to the outside of the Arm 3 Cables connectors PW4 BR4 EB04...

Страница 232: ...te 41 Install the Joint 4 actuator unit to the Arm 3 Hexagon socket head cap bolts 7 M4 15 with plain washer Tightening torque 5 5 0 25 N m Be sure to have at least 2 people to perform the operation since the parts being heavy Make sure to take out the cables from the Joint 4 actuator unit to outside of the Arm 3 Confirm that the positioning pins are installed on the Arm 3 Then install the Joint 4...

Страница 233: ...se as possible Do not pull the cables forcibly to get close the cable ties Be careful not to bend the air tubes Improper order or position of the cable tie may shorten the life cycle of the cables 44 Place marks on the cable of cable A near the cable ties A7 and A8 on the opposite side of the flange 45 As with the above place marks on the cable or the air tube of cable B near the cable ties B7 and...

Страница 234: ...the cable tie B8 will be on the cable fixing plate side Cable fixing plate As shown on the right set the position of the cable tie B8 to the cable fixing plate and fix it by using cable ties 3 and 4 Cable ties AB200 2 3 and 4 Tightening strength 85 5 N Be careful not to bend the air tubes 3 B8 4 Refer to the figure for positions of the cable tie heads Rotate the heads of the cable ties A8 and B8 t...

Страница 235: ...ard model 0 5g for each Cleanroom model 0 8g for each Apply the grease to each cable evenly 49 Pass the cables connectors through the Arm 4 and connect them to the user attachment Cables connectors Ether1 Ether2 X71 X72 Connect the Ether1 and Ether2 depending on the user attachment display 50 Connect the connectors Connectors PW5 PW6 BR5 BR6 NOTE ...

Страница 236: ...stall the ground wire terminals Cross recessed binding head machine screw M4 8 Tightening torque 0 9 0 1 N m 53 Cut the two air tubes with proper length and connect them to fittings Air1 White Air2 Blue For cleanroom model cut the yellow air tube with the length as shown in the picture Make sure that the air tube does not interfere with the pulley or belt NOTE NOTE ...

Страница 237: ... 4 Hexagon socket head cap bolts 2 M4 8 Tightening torque 4 0 0 2 N m Be careful not to get the cables caught 55 Bundle the cables with the cable tie to prevent the cables from interfering with the pulley or belt Cable ties AB200 2 56 Connect the connector Connector PW1 NOTE ...

Страница 238: ...nd the brake board Connectors EB01_CN1 EB01_CN3 EB0x_CN2 BRK_CN1 BRK_CN2 59 Install the board fixing plate in the back of the base Hexagon socket head cap bolts 2 M3 6 Tightening torque 2 0 0 1 N m 60 Connect the connectors to the base side plate Connectors Ether1 Ether2 D sub SW1 61 Connect the connectors to the box shaped plate Connectors X11 X12 X010 BR010 Refer to the right picture for install...

Страница 239: ...ard fixing plate and then connect to the fittings Be careful not to bend or collapse the air tubes Pass through the rear side of the board fixing plate 63 Install the base side plate Hexagon socket head cap bolts 4 M4 8 Tightening torque 4 0 0 2 N m As shown on the right make sure that the cable of Ether1 passes through the rear side of the board fixing plate 64 Install the two air tubes as shown ...

Страница 240: ...outside cover Joint 4 side covers 2 covers Arm 3 cover Arm 3 inside cover Arm 2 cover 2 covers Joint 2 outside cover Arm 1 inside cover Arm 2 outside cover Joint 1 cover Base cover For details refer to Maintenance 3 Covers Install the Arm 1 outside cover simultaneously with the Joint 1 cover 68 Perform calibration For details refer to Maintenance 8 Calibration ...

Страница 241: ...Turning ON the power to the robot system when any foreign substances exist in them is extremely hazardous and may result in electric shock and or malfunction of the robot system Be sure to connect the cables properly Do not allow unnecessary strain on the cables Do not put heavy objects on the cables Do not bend or pull the cables forcibly Unnecessary strain on the cables may result in damage to t...

Страница 242: ...agon socket head cap bolts width across flats 4 mm 1 For M5 hexagon socket head cap bolts width across flats 5 mm 1 For M6 hexagon socket head cap bolts Box wrench width across flats 5 mm 1 For D Sub connector Long nose pliers 1 For removing air tubes Nippers 1 For cutting a cable tie Cross point screwdriver 2 1 For cross recessed head screws Torque wrench 1 For tightening torque control Cable tie...

Страница 243: ...e 4 3 Cable Unit N6 A850 R Cable direction Standard backward 4 Remove the base side plate Hexagon socket head cap bolts 4 M4 8 5 Remove the board fixing plate Hexagon socket head cap bolts 2 M3 6 6 Disconnect the connectors connected to the encoder board 1 and the brake board Connectors EB01_CN1 EB01_CN3 EB0x_CN2 BRK_CN1 BRK_CN2 Be careful that the jumper pins on the encoder board do not come off ...

Страница 244: ... so may result in disconnection of the cables since the cables are connected 11 Remove the plate part 2 from the base bottom Hexagon socket head cap bolts 5 M4 8 12 Remove the two air tubes and connectors from the plate part 1 Connectors Ether1 Ether2 D sub SW1 13 Remove the nine ground wire terminals fixed on the plate part 3 Cross recessed binding head machine screws 9 M4 8 14 Remove the plate p...

Страница 245: ...Maintenance 4 Cable N6 Rev 2 233 15 Disconnect the connectors from the plate part 3 Connectors X11 X12 X010 BR010 For cleanroom model disconnect the yellow air tube as well ...

Страница 246: ... the Manipulator Manipulator is heavy Be sure to have at least 2 people to perform the operation 3 Pull out the cable unit except the following cables Cables connectors BRK_CN2 EB01_CN3 ground wire 4 Connect the connectors to the plate part 3 Connectors X11 X12 X010 BR010 There are the front side and the back side on the plate part 3 Be careful for the directions Front Refer to the right picture f...

Страница 247: ...6 Pass the connectors through the hole of the plate part 3 and install on the the plate part 1 Connectors Ether1 Ether2 D sub SW1 7 Connect the two air tubes to fittings Air1 White Air2 Blue 8 Install the plate part 3 to the base Hexagon socket head cap bolts 4 M4 8 Tightening torque 4 0 0 2 N m Refer to the right figure for the installation position Cable direction 9 Install the plate part 2 Hexa...

Страница 248: ...e 4 6 M C Cable 13 Mount the Manipulator on the base table Be sure to have at least 2 people to mount the Manipulator 14 Connect the connectors Connector PW1 15 Install the ground wire terminal on the board fixing plate Cross recessed binding head machine screw M4 8 Tightening torque 0 9 0 1 N m 16 Install the board fixing plate in the back of the base Hexagon socket head cap bolts 2 M3 6 Tighteni...

Страница 249: ...ance 4 3 Cable Unit N6 A850 R Cable direction Standard backward 20 Install the following covers Arm 4 side cover 2 covers Joint 4 inside cover Joint 4 outside cover Joint 4 side covers 2 covers Arm 3 cover Arm 3 inside cover Arm 2 cover 2 covers Joint 2 outside cover Arm 1 inside cover Arm 1 outside cover Joint 1 cover Base cover For details refer to Maintenance 3 Covers Install the Arm 1 outside ...

Страница 250: ...the robot system when any foreign substances exist in them is extremely hazardous and may result in electric shock and or malfunction of the robot system Be sure to connect the cables properly Do not allow unnecessary strain on the cables Do not put heavy objects on the cables Do not bend or pull the cables forcibly Unnecessary strain on the cables may result in damage to the cables disconnection ...

Страница 251: ... width across flats 3 mm 1 For M4 hexagon socket head cap bolts width across flats 4 mm 1 For M5 hexagon socket head cap bolts width across flats 5 mm 1 For M6 hexagon socket head cap bolts Box wrench width across flats 5 mm 1 For D Sub connector Long nose pliers 1 For removing air tubes Nippers 1 For cutting a cable tie Cross point screwdriver 1 1 For cross recessed head screws Cross point screwd...

Страница 252: ... the actuator unit and the motor unit on each joint Refer to the following steps depending on the positions to replace 1 Remove the Joint 1 actuator unit For details refer to Maintenance 5 1 Replacing the Joint 1 Actuator Unit 2 Remove the encoder cover Cross recessed head screws 3 M2 5 6 Encoder cover 3 Disconnect the connector Connector ENC_x ...

Страница 253: ...sections Maintenance 3 7 1 N6 A1000 Arm 2 Cover Arm 1 Side Maintenance 3 7 2 N6 A850 R Arm 2 Cover Arm 1 Side Maintenance 3 8 Arm 2 Cover Arm 3 side 2 Remove the connector from the encoder board 2 Connector EB0x_CN2 Joint 2 side 3 Remove the encoder cover Cross recessed head screws 3 M2 5 6 Encoder cover 4 Disconnect the connector Connector ENC_x ...

Страница 254: ... the following sections Maintenance 3 7 1 N6 A1000 Arm 2 Cover Arm 1 Side Maintenance 3 7 2 N6 A850 R Arm 2 Cover Arm 1 Side 2 Remove the connector from the encoder board 2 Connector EB0x_CN2 Joint 3 side 3 Remove the encoder cover Cross recessed head screws 3 M2 5 6 Encoder cover 4 Disconnect the connector Connector ENC_x ...

Страница 255: ...intenance 3 Covers 2 Remove the Joint 4 actuator unit from the Arm 3 For details refer to the following section Removal steps 9 through 22 in Maintenance 4 1 Cable Unit N6 A1000 Cable direction Standard backward Removal steps 9 through 22 in Maintenance 4 3 Cable Unit N6 A850 R Cable direction Standard backward 3 Remove the encoder cover Cross recessed head screws 2 M2 5 6 Encoder cover 4 Disconne...

Страница 256: ...Cut off the cable tie that bundles the cables then disconnect the connector from the encoder board 4 Connector EB0x_CN2 Joint 5 motor connection You do not need to disconnect the connector connected to the Joint 6 motor Joint 5 motor Joint 6 motor 3 Remove the encoder cover Cross recessed head screws 3 M2 5 6 Encoder cover 4 Disconnect the connector Connector ENC_x NOTE ...

Страница 257: ...ff the cable tie that bundles the cables then disconnect the following connector from the encoder board 4 Connector EB0x_CN2 Joint 6 motor connection You do not need to disconnect the connector connected to the Joint 5 motor Joint 5 motor Joint 6 motor 3 Remove the encoder cover Cross recessed head screws 3 M2 5 6 Encoder cover 4 Disconnect the connector Connector ENC_x NOTE ...

Страница 258: ... on the positions to replace 1 Connect the connector of the relay cable 1 to the encoder Connector ENC_x 2 Install the encoder cover Cross recessed head screws 3 M2 5 6 Tightening torque 0 2 0 1 N m Encoder cover 3 Install the Joint 1 actuator unit For details refer to Maintenance 5 1 Replacing the Joint 1 Actuator Unit 4 Perform calibration for the Joint 1 For details refer to Maintenance 8 Calib...

Страница 259: ...Encoder cover 3 Connect the connector to the encoder board 2 Connector EB0x_CN2 4 Install the Arm 2 cover 2 covers For details refer to the following sections Maintenance 3 7 1 N6 A1000 Arm 2 Cover Arm 1 Side Maintenance 3 7 2 N6 A850 R Arm 2 Cover Arm 1 Side Maintenance 3 8 Arm 2 Cover Arm 3 side 5 Connect the M C cable For details refer to Maintenance 4 6 M C Cable 6 Perform calibration for the ...

Страница 260: ...torque 0 2 0 1 N m Encoder cover 3 Connect the connector to the encoder board 2 Connector EB0x_CN2 4 Install the Arm 2 cover 2 covers For details refer to the following sections Maintenance 3 7 1 N6 A1000 Arm 2 Cover Arm 1 Side Maintenance 3 7 2 N6 A850 R Arm 2 Cover Arm 1 Side 5 Connect the M C cable For details refer to Maintenance 4 6 M C Cable 6 Perform calibration for the Joint 3 For details ...

Страница 261: ...er 3 Install the Joint 4 actuator unit to the Arm 3 For details refer to the following sections Installation steps 38 through 52 in Maintenance 4 1 Cable Unit N6 A1000 Cable direction Standard backward Installation steps 41 through 55 in Maintenance 4 3 Cable Unit N6 A850 R Cable direction Standard backward 4 Connect the M C cable For details refer to Maintenance 4 6 M C Cable 5 Perform calibratio...

Страница 262: ... Encoder cover 3 Connect the connectors to the encoder board 4 Connector EB0x_CN2 4 Bundle the cables with the cable tie to prevent the cables from interfering with the pulley or belt Cable ties AB200 2 5 Install the Arm 4 side cover For details refer to Maintenance 3 14 Arm 4 Side Cover 6 Connect the M C cable For details refer to Maintenance 4 6 M C Cable 7 Perform calibration for the Joint 5 an...

Страница 263: ...Encoder cover 3 Connect the connector to the encoder board 4 Connector EB0x_CN2 4 Bundle the cables with the cable tie to prevent the cables from interfering with the pulley or belt Cable ties AB200 2 5 Install the Arm 4 side cover 2 covers For details refer to Maintenance 3 14 Arm 4 Side Cover 7 Connect the M C cable For details refer to Maintenance 4 6 M C Cable 6 Perform calibration for the Joi...

Страница 264: ...er attachment For details refer to the following sections Removal steps 9 through 11 in Maintenance 4 1 Cable Unit N6 A1000 Cable direction Standard backward Removal steps 9 through 11 in Maintenance 4 3 Cable Unit N6 A850 R Cable direction Standard backward 4 Disconnect the connector plate Hexagon socket head cap bolts 3 M3 5 5 Disconnect the relay cable 2 Be careful not to lose the fixing plate ...

Страница 265: ... socket head cap bolts 3 M3 5 Tightening torque 2 0 0 1 N m 3 Install the user attachment on the Arm 4 For details refer to the following section Installation steps 46 51 and 52 in Maintenance 4 1 Cable Unit N6 A1000 Cable direction Standard backward Installation steps 49 54 and 55 in Maintenance 4 3 Cable Unit N6 A850 R Cable direction Standard backward 4 Install the Arm 4 side cover 2 covers For...

Страница 266: ...he robot system when any foreign substances exist in them is extremely hazardous and may result in electric shock and or malfunction of the robot system Be sure to connect the cables properly Do not allow unnecessary strain on the cables Do not put heavy objects on the cables Do not bend or pull the cables forcibly Unnecessary strain on the cables may result in damage to the cables disconnection a...

Страница 267: ...ntenance 4 Cable N6 Rev 2 255 N6 A1000 M C cable M C cable Cable direction Standard backward Cable direction Downward N6 A850 R M C cable Cable direction Standard backward M C cable Cable direction Upward ...

Страница 268: ...2NZ900YP 15m Straight 1 R12NZ900YK L shaped 1 R12NZ900YQ 20m Straight 1 R12NZ900YL L shaped 1 R12NZ900YR Flexible 3m Straight 1 R12NZ900YT L shaped 1 R12NZ900YY 5m Straight 1 R12NZ900YU L shaped 1 R12NZ900YZ 10m Straight 1 R12NZ900YV L shaped 1 R12NZ900Z1 15m Straight 1 R12NZ900YW L shaped 1 R12NZ900Z2 20 m Straight 1 R12NZ900YX L shaped 1 R12NZ900Z3 Tool Hexagonal wrench width across flats 3 mm 1...

Страница 269: ... cable connector Signal cable connector 3 Loosen the bolts fixing the plate You do not need to remove them completely Hexagon socket head cap bolts 4 M4 8 4 Slide the plate upward to remove it Do not pull the M C cable after removing the plate M C cables are connected by the connectors Doing so may result in disconnection of the cables NOTE ...

Страница 270: ...lt in the disconnection Wrong Signal cable 6 Disconnect the connectors in the order as shown on the right Latches of each connector are positions in the figure Push the latch to disconnect the connector 1 2 3 4 Connector white for the power cable is difficult to disconnect for safety purpose Do not pull the cables Doing so may result in disconnection Do not remove the M C cable from the plate NOTE...

Страница 271: ... 3 4 3 Slide the plate downward to install it Hexagon socket head cap bolts 4 M4 8 Tightening torque 4 0 0 2 N m Slide the plate until the line on the base side plate will not be seen Be careful not to tighten the screws with the cables get caught on the plate 4 Connect the connectors to the encoder board 2 Power cable connector Signal cable connector NOTE NOTE ...

Страница 272: ...ble length 1 3m 2 5m 3 10m 4 15m 20m 6 Turn ON the Controller 7 Check operation to see if the Manipulator s position and posture are out of position Move the Manipulator to two or three points poses of the registered points 8 If the Manipulator is out of position calibrate all the joints For details refer to Maintenance 8 Calibration ...

Страница 273: ...261 4 7 Connector Pin Assignment The following table shows the codes and cable colors indicated in the pin assignments Code Cable color B Black W White R Red G Green Y Yellow BR Brown L Blue V Violet A Azure O Orange GL Gray P Pink ...

Страница 274: ...Maintenance 4 Cable 262 N6 Rev 2 4 7 1 Signal Power cable ...

Страница 275: ...Maintenance 4 Cable N6 Rev 2 263 ...

Страница 276: ...Maintenance 4 Cable 264 N6 Rev 2 4 7 2 User Cable ...

Страница 277: ...le the parts units Disassembled the parts will cause a positional gap and cannot be used again After parts units have been replaced the Manipulator cannot perform positioning properly because a gap exists between the origin stored in the parts and its corresponding origin stored in the Controller After replacing the parts it is necessary to match these origins The process of aligning the two origi...

Страница 278: ...or M5 hexagon socket head cap bolts width across flats 5 mm 1 For M6 hexagon socket head cap bolts Box wrench width across flats 5 mm 1 For D Sub connector Long nose plier 1 For removing air tubes Cross point screwdriver 2 1 For cross recessed head screws Torque wrench 1 For tightening torque control Nippers 1 For cutting a cable tie The Joint 1 is not equipped with the brake When performing maint...

Страница 279: ...ide cover 3 Remove the cable unit inside the Joint 1 For details refer to the Removal steps 7 47 through 56 and 58 in Maintenance 4 1 Cable Unit N6 A1000 Cable direction Standard backward 4 Disconnect the M C cable For details refer to Maintenance 4 6 M C Cable 5 Lay down the Manipulator Be sure to have at least 2 people to lay down the Manipulator 6 Remove the base bottom plate Hexagon socket hea...

Страница 280: ...tuator unit and the O ring Hexagon socket head cap bolts 16 M5 35 with plain washer Be sure to have at least 2 people to perform the operation since the parts being heavy Do not apply excessive shock to the parts 16 M5 35 with plain washer Joint 1 actuator unit NOTE ...

Страница 281: ...p bolts 16 M5 35 with plain washer Tightening torque 10 0 5 N m Be sure to have at least 2 people to perform the operation since the parts being heavy Do not apply excessive shock to the parts Be sure to install the O ring properly 16 M5 35 with plain washer Joint 1 actuator unit 4 Install the base Hexagon socket head cap bolts 8 M6 40 with plain washer Tightening torque 18 0 9 N m When installing...

Страница 282: ... 4 1 Cable Unit N6 A1000 Cable direction Standard backward 7 Install the Arm 1 outside cover Hexagon socket head cap bolts 8 M5 20 with plain washer Tightening torque 8 0 0 4 N m 8 M5 20 with plain washer Arm 1 outside cover 8 Install the following covers Base cover Joint 1 cover and Joint 1 inside cover For details refer to Maintenance 3 Covers 9 Disconnect the M C cable For details refer to Main...

Страница 283: ...o the Removal steps 2 4 through 7 and 9 through 15 in Maintenance 4 2 Cable Unit N6 A1000 B Cable direction Upward and Downward 5 Remove the cable unit inside the Joint 1 For details refer to the Removal steps 54 through 56 and 58 in Maintenance 4 1 Cable Unit N6 A1000 Cable direction Standard backward 6 Disconnect the M C cable For details refer to Maintenance 4 6 M C Cable 7 Remove the base Hexa...

Страница 284: ...m Be sure to have at least 2 people to perform the operation since the parts being heavy Do not apply excessive shock to the parts Be sure to install the O ring properly 16 M5 35 with plain washer Joint 1 actuator unit 4 Install the base Hexagon socket head cap bolts 8 M6 40 with plain washer Tightening torque 18 0 9 N m Refer to the picture for installing direction When installing it pass the cab...

Страница 285: ...ll the Arm 1 outside cover Hexagon socket head cap bolts 8 M5 20 with plain washer Tightening torque 8 0 4 N m 8 M5 20 with plain washer Arm 1 outside cover 8 Install the following covers Base cover Joint 1 cover and Joint 1 inside cover For details refer to Maintenance 3 Covers 9 Disconnect the M C cable For details refer to Maintenance 4 6 M C Cable 10 Perform calibration for the Joint 1 For det...

Страница 286: ...ble For details refer to Maintenance 4 6 M C Cable 4 Lay down the Manipulator Be sure to have at least 2 people to lay down the Manipulator 5 Remove the base bottom plate Hexagon socket head cap bolts 4 M4 8 6 Remove the base Hexagon socket head cap bolts 8 M6 40 with plain washer When you remove it be careful not to catch the cables on the Joint 1 actuator unit 8 M6 40 with plain washer 7 Remove ...

Страница 287: ...ap bolts 16 M5 35 with plain washer Tightening torque 10 0 5 N m Be sure to have at least 2 people to perform the operation since the parts being heavy Do not apply excessive shock to the parts Be sure to install the O ring properly 16 M5 35 with plain washer Joint 1 actuator unit 4 Install the base Hexagon socket head cap bolts 8 M6 40 with plain washer Tightening torque 18 0 9 N m When installin...

Страница 288: ...etails refer to the Removal steps 4 through 8 56 through 64 and 66 in Maintenance 4 3 Cable Unit N6 A850 R Cable direction Standard backward 7 Install the following covers Base cover Joint 1 cover and Joint 1 inside cover For details refer to Maintenance 3 Covers 8 Disconnect the M C cable For details refer to Maintenance 4 6 M C Cable 9 Perform calibration for the Joint 1 For details refer to Mai...

Страница 289: ...e Unit N6 A850 BR Cable direction Upward 4 Remove the cable unit inside the Joint 1 For details refer to the Removal steps 56 through 58 and 60 in Maintenance 4 3 Cable Unit N6 A850 R Cable direction Standard backward 5 Disconnect the M C cable For details refer to Maintenance 4 6 M C Cable 6 Remove the base Hexagon socket head cap bolts 8 M6 40 with plain washer When you remove it be careful not ...

Страница 290: ...heavy Do not apply excessive shock to the parts Be sure to install the O ring properly 16 M5 35 with plain washer Joint 1 actuator unit 4 Install the base Hexagon socket head cap bolts 8 M6 40 with plain washer Tightening torque 18 0 9 N m Refer to the picture for installing direction When installing it pass the cables of the Joint 1 actuator unit through the hole of the base Be careful not to get...

Страница 291: ...wing covers Base cover Joint 1 cover and Joint 1 inside cover For details refer to Maintenance 3 Covers 8 Disconnect the M C cable For details refer to Maintenance 4 6 M C Cable 9 Perform calibration for the Joint 1 For details refer to Maintenance 8 Calibration ...

Страница 292: ...width across flats 3 mm 1 For M4 hexagon socket head cap bolts width across flats 4 mm 1 For M5 hexagon socket head cap bolts width across flats 5 mm 1 For M6 hexagon socket head cap bolts Box wrench width across flats 5 mm 1 For D Sub connector Long nose pliers 1 For removing air tubes Nippers 1 For cutting a cable tie Cross point screwdriver 2 1 For cross recessed head screws Torque wrench 1 For...

Страница 293: ...Maintenance 5 Actuator Units N6 Rev 2 281 N6 A1000 N6 A850 R Joint 2 actuator unit Joint 2 actuator unit ...

Страница 294: ...tails refer to Maintenance 3 Covers 2 Remove the cable unit from Joint 1 to Joint 2 For details refer to the Removal steps 2 through 5 9 through 37 and 42 in Maintenance 4 1 Cable Unit N6 A1000 Cable direction Standard backward 3 Remove the Joint 2 actuator unit and the O ring Hexagon socket head cap bolts 16 M5 35 with plain washer Be sure to have at least 2 people to perform the operation since ...

Страница 295: ...r Cable exit of the actuator unit Be sure to have at least 2 people to perform the operation since the parts being heavy Do not apply excessive shock to the parts Be sure to install the O ring properly 3 Install the robot arm and the cable unit For details refer to the Removal steps 14 through 52 in Maintenance 4 1 Cable Unit N6 A1000 Cable direction Standard backward 4 Install the following cover...

Страница 296: ... details refer to Maintenance 3 Covers 2 Remove the cable unit from Joint 1 to Joint 2 For details refer to the Removal steps 3 through 6 9 through 37 and 44 in Maintenance 4 3 Cable Unit N6 A850 R Cable direction Standard backward 3 Remove the Joint 2 actuator unit and the O ring Hexagon socket head cap bolts 16 M5 35 with plain washer Be sure to have at least 2 people to perform the operation si...

Страница 297: ...r Cable exit of the actuator unit Be sure to have at least 2 people to perform the operation since the parts being heavy Do not apply excessive shock to the parts Be sure to install the O ring properly 3 Install the robot arm and the cable unit For details refer to the Removal steps 17 through 55 in Maintenance 4 3 Cable Unit N6 A850 R Cable direction Standard backward 4 Install the following cove...

Страница 298: ...exagon socket head cap bolts width across flats 3 mm 1 For M4 hexagon socket head cap bolts width across flats 5 mm 1 For M6 hexagon socket head cap bolts Long nose pliers 1 For removing air tubes Nippers 1 For cutting a cable tie Cross point screwdriver 2 1 For cross recessed head screws Torque wrench 1 For tightening torque control Cable tie gun 1 Refer HellermannTyton MK8 Cable tie gun tester 1...

Страница 299: ...ps 2 through 5 9 through 25 27 29 and 33 in Maintenance 4 1 Cable Unit N6 A1000 Cable direction Standard backward 3 Disconnect the connector connected to the encoder board 2 Connector EB0x_CN2 Joint 3 side Be careful that the jumper pins on the board do not come off 4 Remove the Joint 3 actuator unit and the O ring Hexagon socket head cap bolts 8 M6 35 with plain washer Be sure to have at least 2 ...

Страница 300: ...uator unit through the hole of the Arm 2 Be careful not to get the cables caught in the Arm and the actuator unit Be sure to have at least 2 people to perform the operation since the parts being heavy Do not apply excessive shock to the parts Joint 3 actuator unit 8 M6 35 with plain washer Hole for cables Protruding part of the Arm 2 Groove of the actuator unit Motor cable Brake cable 3 Install th...

Страница 301: ... covers Arm 4 side cover 2 covers Joint 4 inside cover Joint 4 outside cover Joint 4 side covers 2 covers Arm 3 cover Arm 3 inside cover Arm 2 cover 2 cover For details refer to Maintenance 3 Covers 6 Perform calibration For details refer to Maintenance 8 Calibration ...

Страница 302: ... Removal steps 3 through 6 9 through 25 27 29 33 in Maintenance 4 3 Cable Unit N6 A850 R Cable direction Standard backward 3 Disconnect the connector connected to the encoder board 2 Connector EB0x_CN2 Joint 3 side Be careful that the jumper pins on the board do not come off 4 Remove the Joint 3 actuator unit and the O ring Hexagon socket head cap bolts 8 M6 35 with plain washer Be sure to have at...

Страница 303: ...uator unit through the hole of the Arm 2 Be careful not to get the cables caught in the Arm and the actuator unit Be sure to have at least 2 people to perform the operation since the parts being heavy Do not apply excessive shock to the parts Joint 3 actuator unit 8 M6 35 with plain washer Hole for cables Protruding part of the Arm 2 Groove of the actuator unit Motor cable Brake cable 3 Install th...

Страница 304: ...m 4 side cover 2 covers Joint 4 inside cover Joint 4 outside cover Joint 4 side covers 2 covers Arm 3 cover Arm 3 inside cover Arm 2 cover 2 cover Arm 1 inside cover For details refer to Maintenance 3 Covers 6 Perform calibration For details refer to Maintenance 8 Calibration ...

Страница 305: ...nch width across flats 2 5 mm 1 For M3 hexagon socket head cap bolts width across flats 3 mm 1 For M4 hexagon socket head cap bolts Long nose pliers 1 For removing air tubes Nippers 1 For cutting a cable tie Cross point screwdriver 2 1 For cross recessed head screws Torque wrench 1 For tightening torque control Cable tie gun 1 Refer HellermannTyton MK8 Cable tie gun tester 1 Refer HellermannTyton ...

Страница 306: ...ler 5 Remove the covers Arm 4 side cover 2 covers Joint 4 inside cover Joint 4 outside cover Joint 4 side cover 2 covers Arm 3 cover For details refer to Maintenance 3 Covers 6 Remove the cable unit from Joint 1 to Joint 4 For more details refer to the following sections N6 A1000 N6 A850 R Removal steps 9 through 16 18 Maintenance 4 1 Cable Unit N6 A1000 Cable direction Standard backward Removal s...

Страница 307: ...te Hexagon socket head cap bolts 2 M4 8 Do not disconnect the cable from the plate 10 Remove the Joint 4 flange Hexagon socket head cap bolts 16 M3 20 with plain washer Remove the O ring as well 16 M3 20 with plain washer O ring 11 Remove the Joint 4 actuator unit Hexagon socket head cap bolts 7 M4 15 with plain washer 7 M4 15 with plain washer When removing it make sure not to lose the positionin...

Страница 308: ... actuator unit Be careful not to get the cables caught in the actuator unit Pass the cables of the Joint 4 actuator unit to be out from the Arm 3 board side Positioning pin 7 M4 15 with plain washer 3 Connect the connectors Connector PW4 BR4 EB0x_CN2 4 Install the Joint 4 flange Hexagon socket head cap bolts 16 M3 20 with plain washer Tightening torque 2 4 0 1 N m Be sure to install the O ring pro...

Страница 309: ...e sure to install the O ring properly Be careful not to get the cables caught in the Arm Positioning pins 7 Install the cable unit For more details refer to the following sections N6 A1000 N6 A850 R Installation steps 40 through 42 44 through 52 Maintenance 4 1 Cable Unit N6 A1000 Cable direction Standard backward Installation steps 43 through 45 47 through 55 Maintenance 4 1 Cable Unit N6 A850 R ...

Страница 310: ... socket head cap bolts width across flats 3 mm 1 For M4 hexagon socket head cap bolts Cross point screwdriver 2 1 For cross recessed head screws Torque wrench 1 For tightening torque control Feeler gauge 0 5 mm 2 For positioning of drive boss Belt tension meter 1 Refer Unitta U 505 Joint 5 motor unit 1749172 is a dedicated motor unit Do not use it for the Joint 6 motor unit The belt tensile jig is...

Страница 311: ...troller 5 Remove the Arm 4 side cover 2 covers For details refer to Maintenance 3 Covers 6 Cut off the cable tie of the cables Be careful not to cut the cables 7 Disconnect the connectors Connectors PW5 BR5 EB0x_CN2 Joint 5 motor side 8 Remove the bolts fixing the Arm 4 and the Joint 5 motor unit Then remove the timing belts on the Joint 5 motor unit and the Joint 5 Hexagon socket head cap bolts 2...

Страница 312: ...the brass bushing Be careful not to lose it Bushing 10 Remove the drive bosses from the motor shaft of the Joint 5 motor unit Hexagon socket set screws 2 M4 4 Drive bosses 11 Remove the Joint 5 electromagnetic brake Hexagon socket head cap bolts 3 M3 13 Electromagnetic brake 12 Remove the motor plate from the Joint 5 motor Hexagon socket head cap bolts 2 M4 55 Motor plate NOTE ...

Страница 313: ...omagnetic brake Direction to exit the cables of the electromagnetic brake is set Install the electromagnetic brake so that the cables of the electromagnetic brake are positioned in the same direction as the motor cables 3 Install the drive bosses on the motor shaft on the Joint 5 motor Hexagon socket set screws 2 M4 4 Tightening torque 2 4 0 1 N m Drive bosses When fixing the drive bosses make sur...

Страница 314: ...ll the timing belt and temporarily fix the Joint 5 motor unit Hexagon socket head cap bolts 2 M4 15 with plain washer for slotted hole thickness 1 5mm Timing belt When temporary fixing the Joint 5 motor unit make sure that the motor unit can be moved by hand and does not tilt when being pulled If the unit is fixed too loose or too tight the belt will not have proper tension 7 Apply the proper tens...

Страница 315: ...er with the hexagon socket set screws M3 20 to apply tension Be careful not to push the set screws forcibly Belt tensile jig Hexagon socket set screws M3 20 Direction of set screws 2 M4 15 Rubber 8 Connect the connectors Connector PW5 BR5 EB0x_CN2 Joint 5 motor side 9 Bundle the cables with the cable tie to prevent the cables from interfering with the pulley or belt 10 Install the Arm 4 side cover...

Страница 316: ...p bolts Cross point screwdriver 2 1 For cross recessed head screws Torque wrench 1 For tightening torque control Belt tension meter 1 Refer Unitta U 505 The belt tensile jig is an assembly jig Use this jig when adjusting belt tension The brake is mounted on each joint to prevent the arm from lowering due to its own weight while the controller power is OFF or the motor is OFF status The brake does ...

Страница 317: ... 3 about 30 degrees from the origin positions N6 A1000 N6 A850 R 4 Turn OFF the Controller 5 Remove the Arm 4 side cover Cross recessed binding head machine screw 7 M4 8 6 Loosen the screws fixing the Arm 4 and the Joint 5 motor unit Then remove the timing belt of the Joint 5 Hexagon socket head cap bolts 2 M4 15 with plain washer for slotted hole thickness 1 5mm Timing belt If a heavy part such a...

Страница 318: ... 4 0 0 2 N m Regarding belt tension Jumping position gap may occur if the value is below the lower limit Vibration abnormal noise or reduction of life of the parts may occur if the value exceeds the upper limit When using belt tensile jig maintenance part 1 Install the hexagon socket set screws M3 20 to the holes on inscribed side of 5 on the belt tensile jig 2 Fix the belt tensile jig on the Arm ...

Страница 319: ...htening torque control Feeler gauge 0 5 mm 2 For positioning of drive boss Belt tension meter 1 Refer Unitta U 505 The belt tensile jig is an assembly jig Use this jig when adjusting belt tension The brake is mounted on each joint to prevent the arm from lowering due to its own weight while the controller power is OFF or the motor is OFF status The brake does not work during replacement Be careful...

Страница 320: ... socket head cap bolts width across flats 3 mm 1 For M4 hexagon socket head cap bolts Cross point screwdriver 2 1 For cross recessed head screws Torque wrench 1 For tightening torque control Feeler gauge 0 5 mm 2 For positioning of drive boss Belt tension meter 1 Refer Unitta U 505 Joint 6 motor unit 1749173 is a dedicated motor unit Do not use it for the Joint 5 motor unit The belt tensile jig is...

Страница 321: ...ler 5 Remove the Arm 4 side cover 2 covers For details refer to Maintenance 3 Covers 6 Cut off the cable tie of the cables Be careful not to cut the cables 7 Disconnect the connectors Connectors PW6 BR6 EB0x_CN2 Joint 6 motor side 8 Remove the bolts fixing the Arm 4 and the Joint 6 motor unit Then remove the timing belt of the Joint 6 motor unit and the Joint 6 Hexagon socket head cap bolts 2 M4 1...

Страница 322: ...the brass bushing Be careful not to lose it Bushing 10 Remove the drive bosses from the motor shaft on the Joint 6 motor unit Hexagon socket set screws 2 M4 4 Drive bosses 11 Remove the Joint 6 electromagnetic brake Hexagon socket head cap bolts 3 M3 13 Electromagnetic brake 12 Remove the motor plate from the Joint 6 motor Hexagon socket head cap bolts 2 M4 55 Motor plate NOTE ...

Страница 323: ...tromagnetic brake Direction to exit the cables of the electromagnetic brake is set Install the electromagnetic brake so that the cables of the electromagnetic brake are positioned in the same direction as the motor cables 3 Install the drive bosses on the motor shaft of the Joint 6 motor Hexagon socket set screws 2 M4 4 Tightening torque 2 0 0 1 N m Drive bosses When fixing the drive bosses make s...

Страница 324: ...6 Install the timing belt and temporarily fix the Joint 6 motor unit Hexagon socket head cap bolts 2 M4 15 with plain washer for slotted hole thickness 1 5mm Timing belt When temporary fixing the Joint 6 motor unit make sure that the motor unit can be moved by hand and does not tilt when being pulled If the unit is fixed too loose or too tight the belt will not have proper tension 7 Apply the prop...

Страница 325: ...er with the hexagon socket set screws M3 20 to apply tension Be careful not to push the set screws forcibly Belt tensile jig Hexagon socket set screws M3 20 Direction of set screws 2 M4 15 Rubber 8 Connect the connectors Connector PW6 BR6 EB0x_CN2 Joint 6 motor side 9 Bundle the cables with the cable tie to prevent the cables from interfering with the pulley or belt 10 Install the Arm 4 side cover...

Страница 326: ...p bolts Cross point screwdriver 2 1 For cross recessed head screws Torque wrench 1 For tightening torque control Belt tension meter 1 Refer Unitta U 505 The belt tensile jig is an assembly jig Use this jig when adjusting belt tension The brake is mounted on each joint to prevent the arm from lowering due to its own weight while the controller power is OFF or the motor is OFF status The brake does ...

Страница 327: ...bout 30 degrees from the origin positions N6 A1000 N6 A850 R 4 Turn OFF the Controller 5 Remove the Arm 4 side cover Cross recessed binding head machine screws 7 M4 8 6 Loosen the screws fixing the Arm 4 and the Joint 6 motor unit Then remove the timing belt of the Joint 6 Hexagon socket head cap bolts 2 M4 15 with plain washer for slotted hole thickness 1 5mm Timing belt If a heavy part such as e...

Страница 328: ...N m Regarding belt tension Jumping position gap may occur if the value is below the lower limit Vibration abnormal noise or reduction of life of the parts may occur if the value exceeds the upper limit When using belt tensile jig maintenance part 1 Install the hexagon socket set screws M3 20 to the holes on inscribed side of 6 on the belt tensile jig 2 Fix the belt tensile jig on the Arm 4 with th...

Страница 329: ...htening torque control Feeler gauge 0 5 mm 2 For positioning of drive boss Belt tension meter 1 Refer Unitta U 505 The belt tensile jig is an assembly jig Use this jig when adjusting belt tension The brake is mounted on each joint to prevent the arm from lowering due to its own weight while the controller power is OFF or the motor is OFF status The brake does not work during replacement Be careful...

Страница 330: ...Tools Hexagonal wrench width across flats 3 mm 1 For M4 hexagon socket head cap bolts Long nose pliers 1 For removing air tubes Nippers 1 For cutting a cable tie Cross point screwdriver 2 1 For cross recessed head screws Torque wrench 1 For tightening torque control Spanner width across flats 8 mm 1 For air tube fittings The brake is mounted on each joint to prevent the arm from lowering due to it...

Страница 331: ...etails refer to the Removal steps 9 through 15 in Maintenance 4 1 Cable Unit N6 A1000 Cable direction Standard backward 7 Remove the Joint 5 motor unit and the timing belt For details refer to the Removal steps 7 and 8 in Maintenance 5 5 1 Replacing the Joint 5 Motor Unit Place a mark on the Joint 5 motor unit to distinguish it later To distinguish the Joint 5 motor unit from the Joint 6 motor uni...

Страница 332: ...ews 2 M3 6 11 Remove the Arm 4 Cross recessed head bolts 8 M4 20 with plain washer Be sure to have at least 2 people to perform the operation since the parts being heavy When removing it make sure not to lose the two positioning pins Positioning pins 12 Remove the O ring from the Joint 4 flange O ring NOTE NOTE ...

Страница 333: ... 0 mm Apply a thin coat of grease to the O ring Grease SK 1A O ring 4 Install the Joint 5 and 6 units on the Joint 4 actuator unit Hexagon socket head cap bolts 8 M4 20 with plain washer Tightening torque 5 5 0 25 N m Be sure to have at least 2 people to perform the operation since the parts being heavy Confirm that the two pins are installed on the Joint 4 flange When installing it make sure to a...

Страница 334: ... refer to the Removal steps 5 through 8 in Maintenance 5 6 1 Replacing the Joint 6 Motor Unit When installing the Joint 5 motor unit and the Joint 6 motor unit make sure to use the proper part If the wrong part is installed the Manipulator will move abnormally 7 Install the cable unit For details refer to the Removal steps 46 through 52 in Maintenance 4 1 Cable Unit N6 A1000 Cable direction Standa...

Страница 335: ...ng discharge Deforming by pressure Short circuit Polarity Positive Negative Heating 85 C or more Soldering the terminal of the lithium battery directly When disposing the battery consult with the professional disposal services or comply with the local regulation Make sure that the battery terminal is insulated even for a used buttery If the terminal contacts with the other metals it may short and ...

Страница 336: ...sition moves from the originals after replaced the battery Always use the lithium metal battery and battery board designated by us Be careful of the battery polarity to connect it correctly N6 A1000 Battery board Battery N6 A850 R Battery board Battery Name Qty Note Maintenance Parts Battery 1 2172925 2 lithium metal batteries for replacement Battery board 1 2173216 Tools Cross point screwdriver 2...

Страница 337: ...4 8 Cross recessed binding head machine screws 6 M4 8 3 Remove the old batteries from the battery box Do not disconnect the connectors If you remove all batteries before connecting the new ones the calibration data will be deleted and you will need to perform calibration N6 A1000 N6 A850 R 4 Connect the two new batteries to the connectors of the battery board which is nothing is connected N6 A1000...

Страница 338: ... Cross recessed binding head machine screws 3 M4 8 Tightening torque 0 45 0 05 N m Cross recessed binding head machine screws 6 M4 8 Tightening torque 0 45 0 05 N m 8 Turn ON the controller 9 Check operation to see if the manipulator s position and posture are out of position Move the Manipulator to two or three points poses of the registered points Make sure to operate the robot in LowPower mode ...

Страница 339: ...two origins is called Calibration Refer to Maintenance 8 Calibration and follow the steps to perform calibration Removal 1 Turn OFF the Controller Battery Board 2 Remove the Joint 2 outside cover N6 A1000 N6 A850 R Cross recessed binding head machine screws 3 M4 8 Cross recessed binding head machine screws 6 M4 8 3 Remove the battery connectors Hold the board by hand and pull the battery cable upw...

Страница 340: ...oard Connector BAT_CN3 BAT_CN6 3 Connect the battery connector to the battery board N6 A1000 N6 A850 R 4 Install the Joint 2 outside cover Be careful not to get the cables caught in the arm N6 A1000 N6 A850 R Cross recessed binding head machine screws 3 M4 8 Tightening torque 0 45 0 05 N m Cross recessed binding head machine screws 6 M4 8 Tightening torque 0 45 0 05 N m 5 Perform calibration For d...

Страница 341: ... disconnect the power plug from the power source Be sure to connect the AC power cable to a power receptacle DO NOT connect it directly to a factory power source Before performing any replacement procedure turn OFF the Controller and related equipment and then disconnect the power plug from the power source Performing any replacement procedure with the power ON is extremely hazardous and may resul...

Страница 342: ...oard 4 Name Qty Note Maintenance Part Control board 1 2 1 2138032 Encoder board 1 2 3 4 1 2179137 Brake board 1 2178379 LED board 1 2190495 Tools Hexagonal wrench width across flats 2 5 mm 1 For M3 hexagon socket head cap bolts Hexagonal wrench width across flats 3 mm 1 For M4 hexagon socket head cap bolts Cross point screwdriver 2 1 For cross recessed head screws ...

Страница 343: ...ard 1 Removal 1 Turn OFF the controller Control Board 1 2 Remove the Joint 2 outside cover Cross recessed binding head machine screws 3 M4 8 3 Disconnect the connector connected to the control board 1 Connector GS01 4 Remove the control board 1 Cross recessed binding head machine screws 3 M3 6 ...

Страница 344: ...or to the control board 1 Connector GS01 3 Install the Joint 2 outside cover Cross recessed binding head machine screws 3 M4 8 Tightening torque 0 45 0 05 N m Be careful not to get the cables caught in the arm 4 Turn ON the Controller 5 Check operation to see if the Manipulator s position and posture are out of position Move the Manipulator to two or three points poses of the registered points 6 I...

Страница 345: ...ss recessed binding head machine screws 6 M4 8 3 Remove the control board fixing plate Cross recessed binding head machine screws 2 M4 8 Cable is connected Be careful not to pull the plate forcibly 4 Disconnect the connector connected to the control board 1 Connector GS01 5 Remove the control board 1 Cross recessed binding head machine screws 3 M3 6 NOTE ...

Страница 346: ...head machine screws 2 M4 8 Tightening torque 4 0 0 2 N m Make sure to install it in the direction as shown in the picture 3 Install the Joint 2 outside cover Cross recessed binding head machine screws 6 M4 8 Tightening torque 0 45 0 05 N m Be careful not to get the cables caught in the arm 4 Turn ON the Controller 5 Check operation to see if the Manipulator s position and posture are out of positi...

Страница 347: ... the Arm 3 cover Cross recessed binding head machine screws 6 M4 8 2 Disconnect the connector connected to the control board 2 Connector GS02 3 Remove the control board 2 Cross recessed binding head machine screws 4 M3 6 Be careful not to drop the screws inside the Manipulator while removing them NOTE ...

Страница 348: ...l board 2 Connector GS02 3 Install the Arm 3 cover Cross recessed binding head machine screws 6 M4 8 Tightening torque 0 45 0 05 N m Be careful not to get the cables caught in the cover 4 Turn ON the controller 5 Check operation to see if the Manipulator s position and posture are out of position Move the Manipulator to two or three points poses of the registered points 6 If the Manipulator is out...

Страница 349: ...xagon socket head cap bolts 4 M4 8 M C cable direction Standard backward Upward and downward 4 Remove the board fixing plate in the base Hexagon socket head cap bolts 2 M3 6 5 Disconnect the connectors connected to the encoder board 1 Connectors EB01_CN1 EB01_CN3 EB0x_CN2 Be careful that the jumper pins on the board do not come off 6 Remove the encoder board 1 Cross recessed binding head machine s...

Страница 350: ...ard 1 1 Check that the jumper pin of the encoder board 1 is at 3 4 short 2 Install the encoder board 1 to the board fixing plate Cross recessed binding head machine screws 2 M3 6 Tightening torque 0 45 0 05 N m Make sure to install it in the direction as shown in the picture 3 Connect the connectors to the encoder board 1 Connectors EB01_CN1 EB01_CN3 EB0x_CN2 Be careful that the jumper pins on the...

Страница 351: ...tening torque 4 0 0 2 N m M C cable direction Standard backward Upward and downward Be careful not to get the cables caught in the base 6 Install the base cover For details refer to Maintenance 3 Covers 7 Turn ON the controller 8 Calibrate all the Joints For details refer to Maintenance 8 Calibration NOTE ...

Страница 352: ...e 3 Covers Disconnect the connectors connected to the encoder board 2 Connectors EB02_CN1 EB0x_CN2 Joint 2 side EB0x_CN2 Joint 3 side Be careful that the jumper pins on the board do not come off 2 Remove the encoder board 2 Cross recessed binding head machine screws 2 M3 6 Be careful not to drop the screws inside the Manipulator while removing them NOTE NOTE ...

Страница 353: ... Install the encoder board 2 to the Arm 2 Cross recessed binding head machine screws 2 M3 6 Tightening torque 0 45 0 05 N m Be careful not to drop the screws inside the Manipulator while removing them Make sure to install as the same direction as the figure 3 Connect the connectors to the encoder board 2 Connectors EB02_CN1 EB0x_CN2 Joint 2 side EB0x_CN2 Joint 3 side Be careful that the jumper pin...

Страница 354: ...machine screws 6 M4 8 2 Disconnect the connectors connected to the encoder board 3 Connectors EB04_CN1 EB04_CN3 EB0x_CN2 Be careful that the jumper pins on the board do not come off 3 Remove the encoder board 3 Cross recessed binding head machine screws 2 M3 6 Be careful not to drop the screws inside the Manipulator while removing them NOTE NOTE ...

Страница 355: ... 3 to the Arm 2 Cross recessed binding head machine screws 2 M3 6 Tightening torque 0 45 0 05 N m Be careful not to drop the screws inside the Manipulator while removing them 3 Connect the connectors to the encoder board 3 Connectors EB04_CN1 EB04_CN3 EB0x_CN2 Be careful that the jumper pins on the board do not come off 4 Install the Arm 3 cover Cross recessed binding head machine screws 6 M4 8 Ti...

Страница 356: ...M4 8 2 Disconnect the connectors connected to the encoder board 4 Connectors EB05_CN1 EB0x_CN2 Joint 5 motor side EB0x_CN2 Joint 6 motor side Be careful that the jumper pins on the board do not come off 3 Remove the encoder board 4 Cross recessed binding head machine screws 2 M3 6 Be careful not to drop the screws inside the Manipulator while removing them NOTE NOTE ...

Страница 357: ...4 to the Arm 4 Cross recessed binding head machine screws 2 M3 6 Tightening torque 0 45 0 05 N m Be careful not to drop the screws inside the Manipulator while installing them 3 Connect the connectors to the encoder board 4 Connectors EB05_CN1 EB0x_CN2 Joint 5 motor side EB0x_CN2 Joint 6 motor side Be careful that the jumper pins on the board do not come off 4 Install the Arm 4 side cover Cross re...

Страница 358: ...Covers 3 Remove the base side plate Hexagon socket head cap bolts 4 M4 8 M C cable direction Standard backward Upward and downward 4 Remove the board fixing plate in the base Hexagon socket head cap bolts 2 M3 6 5 Disconnect the connectors connected to the brake board Connectors BRK_CN1 BRK_CN2 6 Remove the brake board Cross recessed binding head machine screws 4 M3 6 ...

Страница 359: ...s to the brake board Connectors BRK_CN1 BRK_CN2 3 Install the board fixing plate on the base Cross recessed binding head machine screws 2 M3 6 Tightening torque 2 0 0 1 N m 4 Install the base side plate Hexagon socket head cap bolts 4 M4 8 Tightening torque 4 0 0 2 N m M C cable direction Standard backward Upward and downward Be careful not to get the cables caught in the base 5 Install the base c...

Страница 360: ...oint 2 outside cover N6 A1000 N6 A850 R Cross recessed binding head machine screws 3 M4 8 Cross recessed binding head machine screws 6 M4 8 3 Disconnect the connector connected to the LED board Connector LED_CN1 N6 A1000 N6 A850 R 4 Remove the LED board Cross recessed binding head machine screws 2 M3 6 N6 A1000 N6 A850 R ...

Страница 361: ...1000 N6 A850 R 2 Connect the connector to the LED board Connector LED_CN1 N6 A1000 N6 A850 R 3 Install the Joint 2 outside cover Be careful not to get the cables caught in the cover N6 A1000 N6 A850 R Cross recessed binding head machine screws 3 M4 8 Tightening torque 0 45 0 05 N m Cross recessed binding head machine screws 6 M4 8 Tightening torque 0 45 0 05 N m NOTE ...

Страница 362: ...recessed binding head machine screws 3 M4 8 Cross recessed binding head machine screws 6 M4 8 3 Disconnect the connector connected to the LED board Connector LED_CN1 N6 A1000 N6 A850 R 4 Remove the LED board Cross recessed binding head machine screws 2 M3 6 N6 A1000 N6 A850 R 5 Remove the LED plate Cross recessed binding head machine screws 2 M3 6 N6 A1000 N6 A850 R ...

Страница 363: ...nding head machine screws 2 M3 6 Tightening torque 0 45 0 05 N m N6 A1000 N6 A850 R 3 Connect the connector to the LED board Connector LED_CN1 N6 A1000 N6 A850 R 4 Install the Joint 2 outside cover Be careful not to get the cables caught in the cover N6 A1000 N6 A850 R Cross recessed binding head machine screws 3 M4 8 Tightening torque 0 45 0 05 N m Cross recessed binding head machine screws 6 M4 ...

Страница 364: ...y of an operator However operating the robot system while someone is inside the safeguarded area is extremely hazardous and may result in serious safety problems in case that the Manipulator moves unexpectedly There are two methods to move the Manipulator during calibration Releasing the Electromagnetic brake and moving the arms manually For details refer to the Setup Operation 1 5 How to Move Arm...

Страница 365: ...e Manipulator will be the same posture For example posture at 180 degree and 180 degree is the same When you are not sure the current joint angle check the internal wiring and tubing cables You can check the cable conditions by removing the each cover Joint 1 Base cover Joint 2 Joint 2 cover N6 A1000 Arm 1 inside cover N6 A850 R Joint 3 Arm 3 inside cover Joint 4 Joint 4 inside cover Joint 4 outsi...

Страница 366: ... A1000 Detail of A Joint 2 180 deg 180 deg A J2 180 deg J2 180 deg Cable direction Arm 2 side Joint 3 180 deg 180 deg A J3 180 deg J3 180 deg Cable direction Arm 2 side Joint 4 180 deg 180 deg A J4 180 deg J4 180 deg Cable direction Arm 3 side ...

Страница 367: ...ce 8 Calibration N6 Rev 2 355 N6 A850 R N6 A850 R Detail of A Joint 1 180 deg 180 deg A J1 180 deg J1 180 deg Cable direction Arm 1 side Joint 2 180 deg 180 deg A J2 180 deg J2 180 deg Cable direction Arm 2 side ...

Страница 368: ...tenance 8 Calibration 356 N6 Rev 2 N6 A850 R Detail of A Joint 3 180 deg 180 deg A J3 180 deg J3 180 deg Cable direction Arm 2 side Joint 4 180 deg 180 deg A J4 180 deg J4 180 deg Cable direction Arm 3 side ...

Страница 369: ...ion Flowchart Carry out these procedures if necessary Start 1 Basic Orientation Confirmation 2 Part Replacement 3 Encoder Initialization End 4 Calibration 6 Accuracy Testing 5 Position adjustment at teaching point Required Not required Re adjustment ...

Страница 370: ...he basic orientation define the reference orientation in advance and record the point data Also put the match marks to indicate the orientation The coordinate points including the Arm orientation are referred to as points and the data of the points are called point data in EPSON RC 2 Part Replacement Replace the parts as instructed in this manual Be careful not to injure yourself or damage parts d...

Страница 371: ...Maintenance 8 Calibration N6 Rev 2 359 4 Calibration Calibration marks of each joint N6 A1000 A Detail of A J1 J3 J2 J4 J5 J6 N6 A850 R J1 J3 J2 J4 J5 J6 ...

Страница 372: ...ify the pulse values to be set as the origin point calpls J1 pulse J2 pulse J3 pulse J4 pulse J5 pulse J6 pulse Manipulator will not move Specify the pulse values 0 when the Manipulator is aligned to the calibration marks or the values recorded at the predetermined reference orientation where the match marks are aligned to the command parameters pulse values If the point data for the reference ori...

Страница 373: ...J1 pulse J2 pulse J3 pulse J4 pulse J5 pulse J6 pulse Manipulator will not move Specify the pulse values of the selected point data to the command parameters If the point data for the reference orientation is P1 the command parameters can be specified as follows calpls ppls P1 1 ppls P1 2 ppls P1 3 ppls P1 4 ppls P1 5 ppls P1 6 Manipulator will not move Then execute the following command in the Co...

Страница 374: ...ulator The operation hours can be checked in Controller Status Viewer dialog Motor On Hours For details refer to Maintenance 2 2 Overhaul Parts Replacement Name Code Note Reference in Maintenance Grease Joint 1 2 3 4 5 SK 1A For purchasing the grease please contact the sales company in your region 2 1 2 2 3 Joint 6 bevel gear SK 2 Cable GPL 224 4 5 Due to the chemicals regulations of individual co...

Страница 375: ... shaped R12NZ900YH 5 m Straight R12NZ900YJ L shaped R12NZ900YK 10 m Straight R12NZ900YL L shaped R12NZ900YM 15 m Straight R12NZ900YN L shaped R12NZ900YP 20 m Straight R12NZ900YQ L shaped R12NZ900YR M C cable flexible 3 m Straight R12NZ900YT L shaped R12NZ900YU 5 m Straight R12NZ900YV L shaped R12NZ900YW 10 m Straight R12NZ900YX L shaped R12NZ900YY 15 m Straight R12NZ900YZ L shaped R12NZ900Z1 20 m ...

Страница 376: ... Plating 3 Arm 1 N6 A1000 Joint 1 cover 1755506 Joint 1 inside cover 1755504 Arm 1 inside cover 1755508 Joint 2 outside cover 1755507 Joint 2 cover 1755505 Arm 1 N6 A850 Joint 1 cover 1757779 Joint 1 inside cover 1757780 Arm 1 inside cover 1757782 Joint 2 outside cover 1757781 Arm 2 Arm 2 cover 1761612 Arm 3 Arm 3 inside cover 1755511 Arm 3 cover 1761613 Joint 4 side cover 1761614 Arm 4 Joint 4 in...

Отзывы: