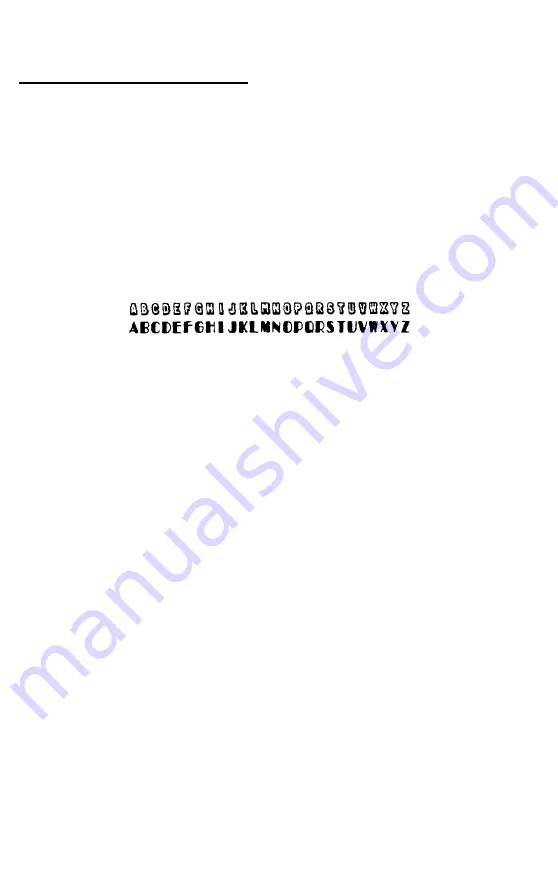
User-defined Characters
With this printer, it is possible to define and print characters of your
own design. You can design
an
entirely new alphabet or typeface,
create special characters for use as mathematical or scientific
symbols, or create graphic patterns with user-defined characters to
serve as building blocks for larger designs.
Below, you
can
see samples of typefaces created with the user-
defined character function.
You can make the task of defining characters easier by using a
commercial software program
that
assists you in creating characters
or simply supplies you with sets of characters already created. Also,
some
popular software programs make use of the printer’s user-
defined character function to enhance printouts. (These characters
are called download characters in some programs.)
The standard ASCII characters are stored in the printer’s Read Only
Memory (ROM) or optional Multi-Font Module, and the user-
defined characters are stored in the printer’s Random Access
Memory (RAM).
Designing Your Characters
User-defined characters are like dot graphics because you send the
printer precise instructions on where you want each dot printed. In
fact, planning a user-defined character is like planning a small dot
graphics pat tern.
4-22
Software and Graphics
Содержание LQ-1050
Страница 1: ......
Страница 2: ...EPSON LQ 850 950 1050 User s Manual ...
Страница 19: ...4 Remove th 5 Slide the print head to the middle of the printer Setting Up the Printer 1 5 ...
Страница 20: ...6 Remove the left and right locking tabs 7 Attach the printer cover unit 1 6 Setting Up the Printer ...
Страница 56: ...uide cover and remove the paper guide 3 Open the paper g 4 Attach the paper rest 2 8 Paper Handling ...
Страница 67: ...4 Push the paper release lever back to the single sheet position 5 Lift the paper Paper Handling 2 19 ...
Страница 111: ......
Страница 115: ...Epson Extended Graphics ODE 0 1 23456789ABCDEF 0 1 2 3 4 5 6 7 8 9 A B C D E F Using the Printer 3 33 ...
Страница 162: ...7 Raise the cut sheet feeder s paper path guide and attach the printer cover 5 6 Using the Printer Options ...
Страница 223: ...Chapter 6 Maintenance Cleaning the Printer 6 2 Replacing the Ribbon 6 4 Transporting the Printer 6 9 Maintenance 6 1 ...
Страница 230: ...8 Reattach the 6 8 Maintenance ...
Страница 234: ...9 Fit the printer back into the white packing material and then back into its original box 6 12 Maintenance ...
Страница 330: ...Appendix Proportional Width Table A 2 Character Tables A 6 A l ...
Страница 336: ...Epson Extended Graphics Character Table A 7 ...
Страница 352: ...EPSON L Q 8 5 0 9 5 0 1 0 5 0 Quick Reference ...
Страница 356: ...EPSON Printed in Japan 90 01 40 0 ...


