98
4.
Click the
Extended Settings
button.
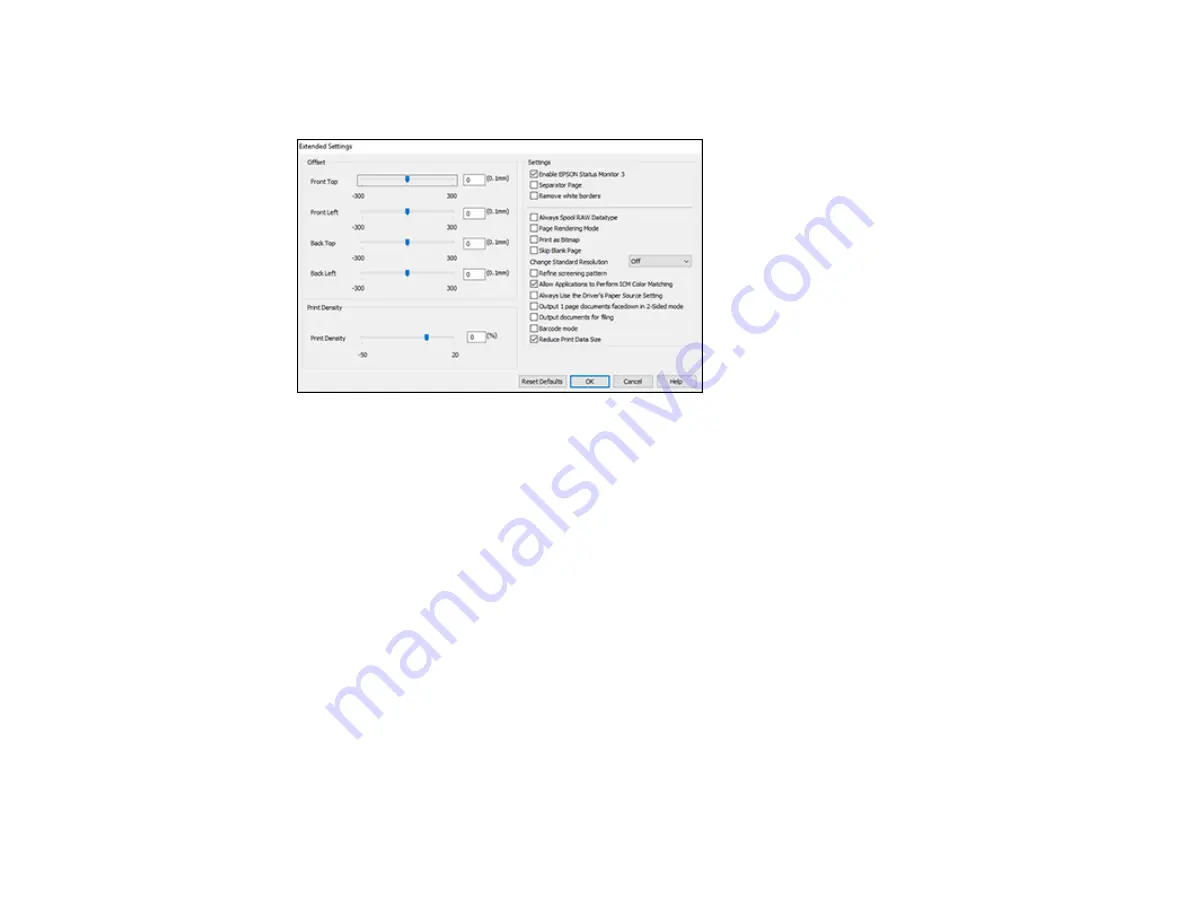
You see this window:
5.
Select any of the extended settings to customize your print.
6.
Click
OK
to close the Extended Settings window.
7.
Click
OK
to close the printer software window.
Parent topic:
Extended Settings - Windows
You can select from these settings on the Extended Settings window.
Enable EPSON Status Monitor 3
Enables product monitoring for ink and paper supplies and other issues.
Separator Page
Before each document, prints a separator page containing the title, user, date, and time.
Remove white borders
Removes white margins that may appear when you print borderless photos.
Always Spool RAW Datatype
Increases print speed and may solve other printing problems.
Содержание ET-4760
Страница 1: ...ET 4760 User s Guide ...
Страница 2: ......
Страница 12: ......
Страница 13: ...13 ET 4760 User s Guide Welcome to the ET 4760 User s Guide For a printable PDF copy of this guide click here ...
Страница 18: ...18 3 Select General Settings 4 Select Basic Settings 5 Select Date Time Settings ...
Страница 26: ...26 Product Parts Inside 1 Document cover 2 Scanner glass 3 Control panel ...
Страница 60: ...60 2 Pull out the paper cassette until it stops 3 Slide the edge guides outward ...
Страница 203: ...203 3 Open the ink tank cover then open the cap for the ink tank you are going to fill ...
Страница 231: ...231 4 Slide out the paper cassette and remove the paper 5 Make sure the ink tank caps are securely closed ...
Страница 235: ...235 7 Make sure the ink tank caps are securely closed and close the ink tank cover 8 Lower the scanner unit ...


