background image

How To

56

Network Guide

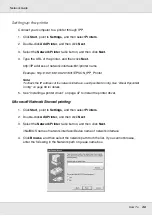
Microsoft Network Shared printing

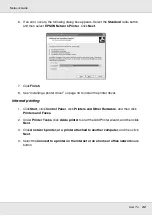
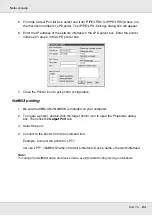
1. Click 

Start

, point to 

Settings

, and then select 

Printers

.

2. Double-click 

Add Printer

 to start the Add Printer wizard, and then click 

Next

.

3. Select the 

Network printer

 radio button and then click 

Next

.

4. Select the 

Type the printer name, or click Next to browse for a printer

 radio button.

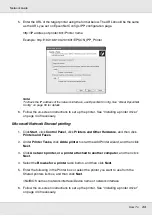
5. Enter the following in the Name box or click 

Next

 to browse for a printer.

\\NetBIOS name of network interface\Device name of network interface

6. Follow the on-screen instructions to set up the printer. See “Installing a printer driver” 

on page 56 if necessary.

Installing a printer driver

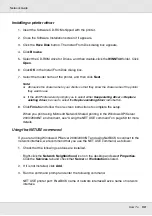
1. Insert the Software CD-ROM shipped with the printer.

2. Close the Software Installation screen if it appears.

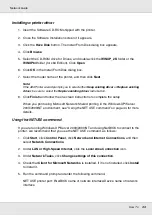
3. Click the 

Have Disk

 button. The Install From Disk dialog box appears.

4. Click 

Browse

.

5. Select the CD-ROM drive for Drives, and double-click the 

WINXP_2K

 folder. Click 

Open

.

6. Click 

OK

 in the Install From Disk dialog box.

7. Select the model name of the printer, and then click 

Next

.

Note:

If the Add Printer wizard prompts you to select either 

Keep existing driver

 or 

Replace existing 

driver

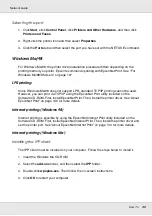
, be sure to select the 

Replace existing driver

 radio button.

8. Click 

Finish

 and follow the on-screen instructions to complete the setup.

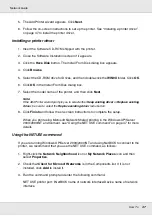
When you print using Microsoft Network Shared printing in the Windows XP/Server 
2003/2000/NT environment, see “Using the NET USE command” on page 57 for more 
details.

Содержание EPL-6200

Страница 1: ...Network Guide Network Guide NPD2565 00 ...

Страница 2: ...re freely available from http www info zip org on the Internet IBM and PS 2 are registered trademarks of International Business Machines Corporation Microsoft and Windows are registered trademarks of Microsoft Corporation in the United States of America and other countries Apple and Macintosh are registered trademarks of Apple Computer Inc EPSON and EPSON ESC P are registered trademarks and EPSON ...

Страница 3: ...e Software 13 Terms and Concepts 14 Chapter 2 How To Overview 15 Selecting a Printing Method 16 Printing from Windows 16 Printing from Macintosh 16 Features of the Printing Methods 17 Installing Components on Your Computer 19 About Installing Components on Your Computer 19 Windows XP 19 Windows Me 98 21 Windows Server 2003 24 Windows 2000 26 Windows NT 4 0 28 Macintosh 30 Setting Up the Network In...

Страница 4: ...ystem Requirements 100 Installing EpsonNet Config 100 Accessing the EpsonNet Config User s Guide 101 EpsonNet Config for Macintosh 102 About EpsonNet Config 102 System Requirements 102 Installing EpsonNet Config 102 Accessing the EpsonNet Config User s Guide 103 EpsonNet Config with Web Browser 104 About EpsonNet Config 104 Configuring the Network Interface Using Web Based EpsonNet Config 105 Open...

Страница 5: ...0 Cannot configure the network interface or cannot print from the network 160 Cannot print even if you have assigned the IP address to the computer and the printer 160 Unable to start EpsonNet Config 160 The message EpsonNet Config cannot be used because no network is installed appears when you start EpsonNet Config 161 The message Could not complete communicating configuration data appears when y...

Страница 6: ...u 172 Setting an IP Address Using the arp ping Command 173 Checking the LAN 173 Setting and checking the new IP address 174 Distributing the Printer Driver Automatically 175 EpsonNet SetupManager 175 EpsonNet NDPS Gateway 175 Instructions on Using a Dial Up Router 175 Function of Universal Plug and Play 176 Uninstalling Software 176 Windows Me 98 95 2000 NT 4 0 176 Windows XP Server 2003 177 Macin...

Страница 7: ...at once If you want to configure the network interface for protocols such as TCP IP NetWare NetBEUI AppleTalk IPP and SNMP use EpsonNet Config the configuration utility provided with your product to quickly and easily configure the network interface to use those protocols Note The EpsonNet Config utility configures the network interface to work only with protocols that exist on your network This d...

Страница 8: ...de Some screen shots in this guide may list a printer name other than your printer This difference does not alter the instructions The supported operating systems are different depending on the printer See your printer s User s Guide for the supported operating systems Operating Environment The network interface supports the following environments For users of printers supporting NetWare queue bas...

Страница 9: ...sonNet Print IPP using EpsonNet Internet Print NetBEUI Macintosh Mac OS X 10 4 or later Bonjour TCP IP AppleTalk Mac OS X 10 2 4 or later Rendezvous TCP IP AppleTalk Mac OS X 10 2 or later TCP IP AppleTalk Mac 9 1 or later AppleTalk NetWare 3 x Bindery mode 4 x IntranetWare NDS mode Bindery emulation mode 5 x 6 x NDS Queue based print system NDPS OS 2 OS 2 Warp Connect OS 2 Warp Server V3 V4 TCP I...

Страница 10: ... Server 2003 x64 Edition Windows 2000 Professional Server TCP IP using LPR Standard TCP IP Port or EpsonNet Print IPP Windows NT 4 0 with Service Pack 5 or higher TCP IP using LPR or EpsonNet Print IPP using EpsonNet Internet Print NetBEUI Macintosh Mac OS X 10 4 or later Bonjour TCP IP AppleTalk Mac OS X 10 2 4 or later Rendezvous TCP IP AppleTalk Mac OS X 10 2 or later TCP IP AppleTalk Mac 9 1 o...

Страница 11: ...enerate unexpected dial up Large format inkjet printers UNIX Sun OS 4 1 4 or later SPARC lpr ftp SunSoft Solaris 2 4 or later SPARC and x86SCO UNIX 4 2 or later SCO UnixWare 2 01 or later HP UX 9 05 or later IBM AIX 3 2 5 or later and 4 1 3 or later OS Version Protocol Windows XP Home Professional Professional x64 Windows 2000 Professional Server TCP IP using LPR Standard TCP IP Port or EpsonNet P...

Страница 12: ... server on the network Supports the Dynamic DNS function Supports SNMP and MIB Supports SNTP Simple Network Time Protocol Supports Rendezvous on Mac OS X 10 2 4 or later Supports Bonjour on Mac OS X 10 4 or later Network Interface Operation Status lights The indicator lights one green and one orange provide you with important information on the operations of the network interface The green light i...

Страница 13: ...OM provided with your printer includes the following network software Note The software provided varies depending on your printer model EpsonNet Config for Windows is a Windows based configuration utility for administrators that allows you to configure the network interface for various protocols such as TCP IP NetWare MS Network AppleTalk IPP and SNMP See EpsonNet Config for Windows on page 99 Eps...

Страница 14: ...orting NetWare Queue Based Printing Using the EpsonNet NDPS Gateway on page 88 Terms and Concepts Configuration a prepared set of conditions for proper operation of a device Configuring the network interface is to prepare it to work with protocols available on a network DHCP a dynamic host configuration protocol It is a protocol that assigns dynamic IP addresses to devices on a network EtherTalk t...

Страница 15: ...P IP NetBEUI etc are installed on the computer and network settings such as IP address subnet mask etc of the computer is set See About Installing Components on Your Computer on page 19 for details 4 Connect the network interface to the network Connect the network interface to the network See Connecting the Network Interface to the Network on page 31 for details 5 Configure the network interface a...

Страница 16: ...ing method appropriate to your operating system For Windows Me 98 We recommend TCP IP printing via EpsonNet Print See About EpsonNet Print on page 130 For Windows XP Server 2003 2000 NT We recommend TCP IP printing via LPR See Windows XP on page 40 Windows Server 2003 on page 48 Windows 2000 on page 53 or Windows NT 4 0 on page 57 If a Windows XP Server 2003 2000 NT print server exists On the serv...

Страница 17: ... for you to choose LPR TCP IP printing Advantages No computer as a network interface is required No special utility for Windows XP Server 2003 2000 NT is required You can see the printer status using EPSON Status Monitor For Windows XP Server 2003 2000 NT you can create a print log using the event viewer You can print via a router Disadvantages You need to set up TCP IP For Windows Me 98 EpsonNet ...

Страница 18: ...all computers used for printing For Windows XP Server 2003 2000 you cannot share the Internet printer Microsoft Network Shared printing Advantages Easy to set up IP address is not required if NetBEUI protocol is installed No computer as a network interface is required No special print utility is required Disadvantages EPSON Status Monitor cannot be used You cannot print via a router It takes a lon...

Страница 19: ...this chapter appropriate for your operating system Windows XP For Windows XP use the following procedure to install the necessary components Note The Windows XP CD ROM may be required during the installation When using TCP IP or IPP for printing you need to set the IP address the subnet mask and the default gateway of the computer 1 Click Start highlight Control Panel and then click Network and In...

Страница 20: ...printer that does not support NetWare queue based printing print via the NetWare server using EpsonNet NDPS Gateway EpsonNet Config s setting screens Necessary components TCP IP AppleTalk IPP SNMP IP trap Internet Protocol TCP IP MS Network Internet Protocol TCP IP NetWare SNMP IPX trap Latest Novell Client downloaded from the Novell Web site Printing method Necessary components LPR or Internet pr...

Страница 21: ...mation 6 For LPR Internet Microsoft Network Shared printing Double click Internet Protocol TCP IP on the Local Area Connection Properties dialog box to open the Internet Protocols TCP IP Properties dialog box Set the IP address the subnet mask etc and then click OK 7 Restart the computer The necessary components are now installed Go to the section Connecting the Network Interface to the Network on...

Страница 22: ...printers supporting NetWare queue based printing Do not run Novell Client for Windows 95 98 version 3 00 and Novell Client for Windows NT version 4 50 when using the following modes NetWare 3 x 4 x Bindery Print Server mode NetWare 3 x Remote Printer mode NetWare 4 x Bindery Remote Printer mode and NetWare 4 x 5 x NDS Remote Printer mode The following table lists the components required for networ...

Страница 23: ...dd Select Microsoft from the Manufacturers list and Client for Microsoft Networks from the Network Clients list Then click OK For printing via NetWare server Download the latest Novell Client from the Novell Web site and install it on the computer Also be sure to install either IP or IPX See the Novell Web site for detailed information 4 For LPR Internet Microsoft Network Shared printing Double cl...

Страница 24: ...etwork Connections Click Local Area Connections 2 Click the Properties button 3 Check if the following necessary components are in the list If they are already installed go to the next chapter The following table lists the components required for configuring the network interface with EpsonNet Config Only for printers supporting NetWare queue based printing EpsonNet Config s setting screens Necess...

Страница 25: ...Novell Client from the Novell Web site and install it on the computer Also be sure to install either IP or IPX See the Novell Web site for detailed information 5 For LPR Internet Microsoft Network Shared printing Double click Internet Protocol TCP IP on the Local Area Connection Properties dialog box to open the Internet Protocols TCP IP Properties dialog box Set the IP address the subnet mask etc...

Страница 26: ...onnections screen appears 2 Right click the desired network connection and then select Properties 3 Check if the following necessary components are in the list If they are already installed go to the next chapter The following table lists the components required for configuring the network interface with EpsonNet Config Only for printers supporting NetWare queue based printing EpsonNet Config s se...

Страница 27: ...tocol see the description described earlier to install Internet Protocol TCP IP To use NetBEUI select Protocol and then click Add Select NetBEUI Protocol and then click OK Select Client and then click Add Select Client for Microsoft Networks and then click OK For printing via NetWare server Download the latest Novell Client from the Novell Web site and install it on the computer Also be sure to in...

Страница 28: ... select Control Panel 2 Double click the Network icon in the Control Panel 3 Check if the following necessary components are in the list If they are already installed go to the next chapter The following table lists the components required for configuring the network interface with EpsonNet Config Only for printers supporting NetWare queue based printing EpsonNet Config s setting screens Necessary...

Страница 29: ...LPR or Internet printing Select the Protocols tab and then click Add Select TCP IP from the list and then click OK Set the IP address the subnet mask etc and then click OK Select the Services tab and then click Add Select Microsoft TCP IP Printing from the list and then click OK For Microsoft Network Shared printing To use TCP IP see the description described earlier to install TCP IP To use NetBE...

Страница 30: ...intosh To assign an IP address subnet mask etc to your Macintosh follow the steps below Note To print using the AppleTalk protocol and configure the network interface with EpsonNet Config for Macintosh select Ethernet or Built in Ethernet on the AppleTalk Control Panel or the AppleTalk tab Then configure the network interface with EpsonNet Config for Macintosh Mac OS X 1 From the Apple menu select...

Страница 31: ...he instructions below to connect the network interface to the network 1 Make sure that your printer is turned off 2 Connect one end of the network cable to the RJ 45 connector on the network interface and the other end to the network cCaution You must use a Category 5 shielded twisted pair cable to connect the network interface to prevent malfunction Do not connect or disconnect the network cable ...

Страница 32: ...etwork and also install the printer driver If you are using Windows see Configuring the Network Interface For Windows Users on page 32 If you are using Macintosh see Configuring the Network Interface For Macintosh Users on page 36 Configuring the Network Interface For Windows Users Configure the network interface for use on the TCP IP network and install the printer driver on your computer 1 Inser...

Страница 33: ...e on screen instructions Note If the Custom button appears on the screen click it first then select the software you want to install Note If the following screen appears click the Unblock button otherwise the printer is not listed on the screen of EpsonNet EasyInstall 7 EpsonNet EasyInstall starts Select the printer and then click the Next button ...

Страница 34: ...s automatically If you want to set the IP address manually select Manual and then enter the IP address subnet mask and default gateway Click the Next button 9 Confirm the settings you have made and then click the Next button 10 Select the printer with its IP address you have just set and then click the Next button to install the printer driver ...

Страница 35: ...you want to set the printer as the default printer select the Set as default printer check box Click the Next button Note If the following screen appears click the Unblock button 12 Select Yes to print a test page otherwise select No Click the Next button ...

Страница 36: ...s using Mac OS X The instructions are almost the same for Mac OS 9 1 Insert the Software CD ROM in the CD ROM drive The EPSON folder opens automatically If it does not open double click the EPSON CD ROM icon 2 Double click the appropriate OS icon in the EPSON folder 3 Make sure that all applications are closed and then click the Easy Install button 4 Select Network Note If your printer is connecte...

Страница 37: ...he Next button 7 Select a method for specifying the IP address If you select Automatic DHCP becomes available and assigns an IP address automatically If you want to set the IP address manually select Manual and then enter the IP address subnet mask and default gateway Click the Next button ...

Страница 38: ...e 8 Check the settings you have made and then click the Next button 9 Click the Finish button and then follow the on screen instructions to complete the installation Then you need to setup the printer Follow the steps below ...

Страница 39: ...m the list Note For Mac OS X 10 4 if your printer is not displayed with the desired connection click More Printers select the desired connection from the drop down list and then select the printer model 5 Click Add Now you can use the printer on the TCP IP network Note If your product supports the scanning function see the product s User s Guide to make the settings Mac OS 9 1 Open Chooser from th...

Страница 40: ... on page 131 LPR printing Note If you are using EpsonNet Print the setup procedure is different See About EpsonNet Print on page 130 for details 1 Click Start click Control Panel click Printers and Other Hardware and then click Printers and Faxes 2 Under Printer Tasks click Add a printer to start the Add Printer wizard and then click Next 3 Click Local printer attached to this computer clear the A...

Страница 41: ...How To 41 Network Guide 4 Select the Create a new port radio button and then select Standard TCP IP Port from the list Then click Next 5 Enter the IP address of the network interface and then click Next ...

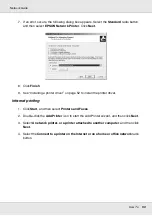
Страница 42: ... install the printer driver Internet printing 1 Click Start click Control Panel click Printers and Other Hardware and then click Printers and Faxes 2 Under Printer Tasks click Add a printer to start the Add Printer wizard and then click Next 3 Click A network printer or a printer attached to another computer and then click Next 4 Select the Connect to a printer on the Internet or on a home or offi...

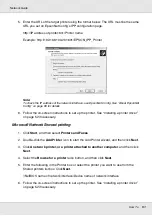
Страница 43: ...sary Microsoft Network Shared printing 1 Click Start click Control Panel click Printers and Other Hardware and then click Printers and Faxes 2 Under Printer Tasks click Add a printer to start the Add Printer wizard and then click Next 3 Click A network printer or a printer attached to another computer and then click Next 4 Select the Browse for a printer radio button and then click Next 5 Enter th...

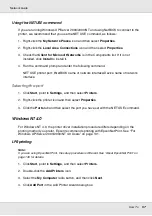
Страница 44: ...screen instructions to complete the setup When you print using Microsoft Network Shared printing in the Windows XP Server 2003 2000 NT environment see Using the NET USE command on page 44 for more details Using the NET USE command If you are running Windows XP Server 2003 2000 NT and using NetBIOS to connect to the printer we recommend that you use the NET USE command as follows 1 Click Start clic...

Страница 45: ... via TCP IP using the EpsonNet Print utility included on the Software CD ROM First install EpsonNet Print Then install the printer driver See About EpsonNet Print on page 130 for more details Internet printing Windows 98 Internet printing is possible by using the EpsonNet Internet Print utility included on the Software CD ROM First install EpsonNet Internet Print Then install the printer driver an...

Страница 46: ...inter Note To check the IP address of the network interface use EpsonNet Config See About EpsonNet Config on page 99 for details 5 See Installing a printer driver on page 47 to install the printer driver Microsoft Network Shared printing 1 Click Start point to Settings and then select Printers 2 Double click Add Printer and then click Next 3 Select the Network Printer radio button and then click N...

Страница 47: ...p existing driver or Replace existing driver be sure to select the Replace existing driver radio button 8 Click Finish and follow the on screen instructions to complete the setup When you print using Microsoft Network Shared printing in the Windows XP Server 2003 2000 NT environment see Using the NET USE command on page 47 for more details Using the NET USE command If you are running Windows XP Se...

Страница 48: ...ndows XP Server 2003 2000 NT 4 0 Users on page 131 LPR printing Note If you are using EpsonNet Print the setup procedure is different See About EpsonNet Print on page 130 for details 1 Click Start and then select Printers and Faxes 2 Double click the Add Printer icon to start the Add Printer wizard and then click Next 3 Click Local printer attached to this computer clear the Automatically detect a...

Страница 49: ... Create a new port radio button and then select Standard TCP IP Port from the list Click Next 5 When Add Standard TCP IP Printer Port Wizard dialog box appears click Next 6 Enter the IP address of the network interface and then click Next ...

Страница 50: ... printer driver on page 52 to install the printer driver Internet printing 1 Click Start and then select Printers and Faxes 2 Double click the Add Printer icon to start the Add Printer wizard and then click Next 3 Select A network printer or a printer attached to another computer and then click Next 4 Select the Connect to a printer on the Internet or on a home or office network radio button ...

Страница 51: ...ter driver on page 52 if necessary Microsoft Network Shared printing 1 Click Start and then select Printers and Faxes 2 Double click the Add Printer icon to start the Add Printer wizard and then click Next 3 Click A network printer or a printer attached to another computer and then click Next 4 Select the Browse for a printer radio button and then click Next 5 Enter the following in the Printer bo...

Страница 52: ...ng driver radio button 8 Click Finish and then follow the on screen instructions to complete the setup When you print using Microsoft Network Shared printing in the Windows XP Server 2003 2000 NT environment see Using the NET USE command on page 52 for more details Using the NET USE command If you are running Windows XP Server 2003 2000 NT and using NetBIOS to connect to the printer we recommend t...

Страница 53: ...ndows XP Server 2003 2000 NT 4 0 Users on page 131 LPR printing Note If you are using EpsonNet Print the setup procedure is different See About EpsonNet Print on page 130 for details 1 Click Start point to Settings and then select Printers 2 Double click Add Printer to start the Add Printer wizard and then click Next 3 Click Local printer clear the Automatically detect and install my Plug and Play...

Страница 54: ...How To 54 Network Guide 4 Select the Create a new port radio button and then select Standard TCP IP Port from the list Then click Next 5 Enter the IP address of the network interface and then click Next ...

Страница 55: ...e Network printer radio button and then click Next 4 Select the Connect to a printer on the Internet or on your intranet radio button 5 Enter the URL of the target printer using the format below The URL should be the same as the URL you set on EpsonNet Config s IPP configuration page http IP address of printer 631 Printer name Example http 192 168 100 201 631 EPSON_IPP_Printer Note To check the IP...

Страница 56: ...ng a printer driver 1 Insert the Software CD ROM shipped with the printer 2 Close the Software Installation screen if it appears 3 Click the Have Disk button The Install From Disk dialog box appears 4 Click Browse 5 Select the CD ROM drive for Drives and double click the WINXP_2K folder Click Open 6 Click OK in the Install From Disk dialog box 7 Select the model name of the printer and then click ...

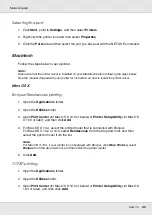
Страница 57: ...nterface Selecting the port 1 Click Start point to Settings and then select Printers 2 Right click the printer icon and then select Properties 3 Click the Ports tab and then select the port you have set with the NET USE command Windows NT 4 0 For Windows NT 4 0 the printer driver installation procedure differs depending on the printing method you prefer Epson recommends printing with EpsonNet Prin...

Страница 58: ...utility included on the Software CD ROM First install EpsonNet Internet Print Then install the printer driver and set the printer port See About EpsonNet Internet Print on page 144 for more details Microsoft Network Shared printing 1 Click Start point to Settings and then select Printers 2 Double click Add Printer 3 Select the Network printer server radio button and then click Next The Connect to ...

Страница 59: ...sure to select the Replace existing driver radio button 8 Click Finish and follow the on screen instructions to complete the setup When you print using Microsoft Network Shared printing in the Windows XP Server 2003 2000 NT environment see Using the NET USE command on page 59 for more details Using the NET USE command If you are running Windows XP Server 2003 2000 NT and using NetBIOS to connect t...

Страница 60: ...Open the Applications folder 2 Open the Utilities folder 3 Open Print Center for Mac OS X 10 2 or below or Printer Setup Utility for Mac OS X 10 3 or later and then click Add 4 For Mac OS X 10 4 select the printer model that is connected with Bonjour For Mac OS X 10 2 or 10 3 select Rendezvous from the drop down list and then select the printer model from the list Note For Mac OS X 10 4 if your pr...

Страница 61: ... Utility for Mac OS X 10 3 or later and then click Add 4 For Mac OS X 10 4 select the printer model that is connected with Apple Talk For Mac OS X 10 2 or 10 3 select EPSON Apple Talk from the drop down list select the zone from the drop down list and then select the printer model from the list Note For Mac OS X 10 4 if your printer is not displayed with Apple Talk click More Printers select EPSON...

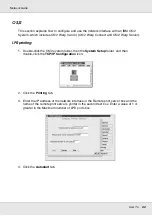
Страница 62: ...printing 1 Double click the OS 2 system folder then the System Setup folder and then double click the TCP IP Configuration icon 2 Click the Printing tab 3 Enter the IP address of the network interface in the Remote print server box and the name of the remote print server s printer in the second text box Enter a value of 1 or greater in the Maximum number of LPD ports box 4 Click the Autostart tab ...

Страница 63: ...d radio button 6 Save the settings you made in the TCP IP Configuration dialog box and restart your computer Setting up your printer 1 Double click Template from the OS 2 System folder 2 Drag Printer to your desktop to create a printer 3 Double click the Printer icon 4 Select Properties from the control menu then click the Output Port tab ...

Страница 64: ...se the Printer icon to exit printer configuration NetBEUI printing 1 Be sure that IBM OS 2 NetBIOS is installed on your computer 2 To create a printer double click the target printer icon to open the Properties dialog box Then click the Output Port tab 3 Select the port 4 Connect to the printer from the command line Example Connect the printer to LPT1 net use LPT1 NetBIOS name of network interface...

Страница 65: ... the User s Guide For Users of Printers Supporting NetWare Queue Based Printing This section explains how to configure the network interface for NetWare First you need to set up the printer in a NetWare environment and then configure the network interface using EpsonNet Config Introduction to NetWare settings Supported systems Server environment NetWare 3 1 3 11 3 12 3 2 Bindery NetWare 4 1 4 11 4...

Страница 66: ...es the NetWare user account Can connect up to 8 file servers simultaneously Can register up to 32 print queues Remote Printer mode A NetWare user account is not required A print server is needed to control the remote printer Can attach up to 16 printers for NetWare 3 x and up to 255 for NetWare 4 x or later Note When you turn on the printer the user account is temporarily accessed in the Remote Pr...

Страница 67: ...dery context path has not been set or if you want to use the printing environment of another context from a non NDS client you need to specify the context for the bindery context Use the SET BINDERY CONTEXT command to set the context in the AUTOEXEC NCF file You cannot use the bindery print server mode with EpsonNet Config if you are running Novell Client for Windows 95 98 version 3 00 or Novell C...

Страница 68: ...l with PCONSOLE 1 Turn on your printer 2 From any NetWare client log in to the target NetWare server with supervisor privileges You must log in with the bindery connection 3 Configure the network interface using EpsonNet Config See the EpsonNet Config User s Guide for details If NetWare objects are already created you can also use EpsonNet Config with Web Browser See NetWare on page 122 for detail...

Страница 69: ...ients need the print queue name you set here when they use the printer announce the print queue name to your clients 4 From the Print Queue list select the print queue name that you just entered and press Enter From the Print Queue Information list select Queue Users and press Enter Next select EVERYONE from the list If EVERYONE is not in the list press Insert and select EVERYONE from the queue us...

Страница 70: ... just typed and press Enter From the Print Server Information list select Print Server Configuration and press Enter 4 Select Printer Configuration from the Print Server Configuration Menu and press Enter 5 From the Configured Printers list select Not Installed port number 0 and press Enter ...

Страница 71: ...nt Server Configuration menu and press Enter 10 Select the printer that you want to use from the Defined Printers list and press Enter 11 Press the Insert key and assign a queue to the print server port from the Available Queues list 12 Specify a priority level between 1 to 10 One is top priority 13 Press Esc to exit PCONSOLE Configuring for NetWare using EpsonNet Config 1 Turn on your printer 2 L...

Страница 72: ...in with NDS mode press F4 key while PCONSOLE is starting to switch to the bindery mode 2 Run PCONSOLE From the Available Options screen select Print Queues and press Enter Press Insert and type the print queue name Press Enter Note Since your clients need the print queue name you set here when they use the printer announce the print queue name to your clients 3 From the Print Queue list select the...

Страница 73: ...he Print Server object icon created in step 4 The Print Server dialog box appears 16 Click Assignments and then click Add From the printer object list select the printer object created in step 8 and click OK 17 In the Print Server dialog box select the assigned printer from the printer object list and click the Printer Number button to set the printer number from 0 to 15 then click OK 18 To confir...

Страница 74: ...bjects 1 From any NetWare client log in to the target context of the NDS tree as an ADMIN 2 Run the Administrator tool NWAdmin 3 Create a printer Click the directory context icon and select Create from the Object menu then Printer Type the Printer name and click Create 4 Create a print server Click the directory context icon and select Create from the Object menu then Print Server Type the Print S...

Страница 75: ... the Print Queue name and select the Print Queue Volume then click Create Double click the print queue object and register the user Note Since your clients need the print queue name you set here when they use the printer announce the print queue name to your clients 6 Double click the Printer Object icon in the NetWare Administrator screen ...

Страница 76: ... Printer dialog box appears click Assignments and then click Add 8 From the print queue list select the queue you created in step 5 and click OK 9 Click Configuration and select Other Unknown for the Printer type list box and click OK ...

Страница 77: ...ck Add 12 From the printer object list select the printer object you want to assign and click OK 13 Go back to the screen in step 11 and click the Printer Number button to set the printer number from 0 to 254 14 To confirm the objects you have assigned double click the Print Server object icon Click Print Layout and check that the print server printer and print queue are connected ...

Страница 78: ...The Status Monitor utility cannot be used with NDPS Bind the IP or both IP or IPX protocols on the NetWare server that runs NDPSM NLM and EPSONGW NLM Check the following points before starting Install the appropriate client software such as Novell Client for Windows 95 98 version 3 4 Novell Client for Windows NT 2000 version 4 8 or Novell Client for Windows XP version 4 9 on client workstations Ma...

Страница 79: ...ation for more details Installing EpsonNet NDPS Gateway on your NetWare server You can install EpsonNet NDPS Gateway from the Software CD ROM Note If an older version of EpsonNet NDPS Gateway is already installed be sure to unload the NDPS Manager before installing a new version of EpsonNet NDPS Gateway 1 Open the NETUTIL folder 2 Open the ENGW folder 3 Double click EDPS2 EXE Note The last three c...

Страница 80: ...NDPS Manager database assigned 7 Click Create The NDPS Manager icon appears in the main browser window 8 Type LOAD NDPSM at the server console and then select the NDPS Manager you have created Creating a Printer Agent After creating an NDPS Manager you can create Printer Agents either public access printers or controlled access printers The following are the features of public access printers and ...

Страница 81: ...d You need to create one more LPR Printer Agent manually Be sure to select Remote LPR on IP for the port handler type and set a unique Printer Agent name so you can tell which Printer Agent is associated with the PostScript or the ESC Page printer driver If the NetWare server is bound with only IPX protocol only one IPX Printer Agent is created In this case you cannot create another IPX Printer Ag...

Страница 82: ...ote LPR on IP if you want to use the printer in IP network Select Remote rprinter on IPX if you want to use the printer on an IPX network Select Queue Based if you want to keep the NetWare NDS print server configuration of the network interface Then click Next Note on using the Adobe PostScript 3 Kit If you have selected Remote rprinter on IPX for the first Printer Agent be sure to select Remote L...

Страница 83: ... 0 Be sure to select the correct printer driver for your printer from the appropriate menus Windows 3 1 is not supported 8 Click Continue 9 Confirm the Printer Agent that you have just created In NetWare Administrator double click the NDPS Manager object and click Printer Agent List Check that the status of the Printer Agent you have just created is Idle Configuring for NetWare using EpsonNet Conf...

Страница 84: ...pre defined configuration 5 Click OK The printer driver for that printer model is installed automatically from the Resource Management Service 6 Click Close The printer appears in the main Printer Manager window and is available for print jobs Installing printers manually 1 Install the printer driver 2 Change the Ports on the printer s properties dialog box Specify the following objects for the po...

Страница 85: ...r an extra account might be generated when the primary server is down To avoid that it is recommend to use connections via a dedicated dial up line Follow the instructions for using a dial up line When there is a primary server at the dial up destination For local networks with file servers When the power is turned on A dial up is generated because access is made to a local file server first and t...

Страница 86: ...e automatic re connection function turn off the printer once When the file server on the local network is down When there is no file server on the local network NetWare cannot be used on the local network In this case the NetWare protocol for the network interface is also not available No dial up is generated under this condition When the file server on the local network is restored the network in...

Страница 87: ...ccess is made only to the primary server no dial up is generated When the primary server is down during operation Connection to the primary server is periodically attempted but no dial up is generated However if the router is set to pass SAP packets Find Nearest Server an unnecessary dial up might be generated To avoid this turn off the printer once or do not allow the router to pass SAP packets F...

Страница 88: ...0 For Windows XP Novell Client 4 9 or later for Windows XP Using the EpsonNet NDPS Gateway This section contains instructions on printing using Novell Distributed Print Services NDPS with Novell NetWare 5 x 6 0 Note Banners cannot be printed with NDPS The Status Monitor utility cannot be used with NDPS Bind the IP protocol on the NetWare server that runs NDPSM NLM and EPSONGW NLM Check the followi...

Страница 89: ...er Agent in NetWare Administrator or partially via the Server Console See the Novell online documentation for more details Installing EpsonNet NDPS Gateway on your NetWare server You can install EpsonNet NDPS Gateway from the Software CD ROM Note If an older version of EpsonNet NDPS Gateway is already installed be sure to unload the NDPS Manager before installing a new version of EpsonNet NDPS Gat...

Страница 90: ...NDPS Manager database assigned 7 Click Create The NDPS Manager icon appears in the main browser window 8 Type LOAD NDPSM at the server console and then select the NDPS Manager you have created Creating a Printer Agent After creating an NDPS Manager you can create Printer Agents either public access printers or controlled access printers The following are the features of public access printers and ...

Страница 91: ...pe Click OK Then go to step 4 3 Create a controlled access printer In NetWare Administrator select the Directory context icon Select Create from the Object menu and then select NDPS Printer Type the Printer Agent name and then select Create a new Printer Agent and then click Create Select the NDPS Manager you have created and then select EpsonNet NDPS Gateway Configuration for the Gateway Type Cli...

Страница 92: ...te printer on systems using TCP IP Ethernet transfer with lpr remote printing protocol or standard ftp file transfer protocol Note Because this printer does not convert data into the printer control language a printer driver and filter are necessary for each system lpr filters Filters for lpr are controlled by the name given to the remote printer When setting up an lpr printer entry a name is ente...

Страница 93: ...SunOS 4 1 4 or later IBM AIX 3 2 5 or later and 4 1 3 or later HP UX 9 05 or later SCO UNIX 4 2 or later Setting up for SunSoft Solaris 2 4 or later In the following steps substitute the name that your printer will be known by for HOSTNAME and the name by which you want your printer to be known for Rprinter 1 Add the IP address and printer host name to the etc hosts file For example 22 33 44 55 HO...

Страница 94: ...inter will be known by for HOSTNAME and the name by which you want your printer to be known for Rprinter 1 Add the IP address and printer host name to the etc hosts file For example 22 33 44 55 HOSTNAME 2 Create a spool directory For example mkdir var spool lpd PRIFx 3 Add the printer entry to the etc printcap file For example Rprinter ALCXXXX lp rm HOSTNAME rp aux sd var spool lpd PRIFx 4 To prin...

Страница 95: ...e Remote Printer Client Services Remote Printer Queues NAME of queue to add Set the host name for example HOSTNAME in DESTINATION HOST for remote jobs Set the port name for example aux in Name of QUEUE on remote printer 4 To print use the lpr command For example lpr PRPrinter Print File Name Setting up for HP UX 9 05 or later In the following steps substitute the name that your printer will be kno...

Страница 96: ...ater Open Server In the following steps substitute the name that your printer will be known by for HOSTNAME and the name by which you want your printer to be known for Rprinter 1 Add the IP address and host name to the etc hosts file For example 22 33 44 55 HOSTNAME 2 Execute rlpconf to register the printer For example rlpconf 3 Enter the name of the printer For example Please enter the printer na...

Страница 97: ...d function valid when the print server is SCO UNIX will not be used For example If HOSTNAME currently runs SCO OpenServer Release 5 or above it can support the extended remote line printer protocol Do you want to turn on the extended RLP protocol support flag If you are not sure answer n y n n n 8 Specify whether the created printer is to become the default printer For example Would you like this ...

Страница 98: ...an example of printing using the ftp command the entry operations are underlined ftp open 22 33 44 55 Connected to 22 33 44 55 220 PR Ifx 22 33 44 55 ftp server ready Name 331 Password Required for No Name Password 230 User logged in 200 Type set to I ftp put binary file 200 PORT command successful 150 Opening data connection for binary_file 226 Transfer complete ftp bye ...

Страница 99: ...as a search protocol because officially the NetBEUI protocol is not supported on Windows XP Server 2003 Note for users of printers supporting NetWare queue based printing If you are using the printer in a dial up environment without running NetWare clear the Use NetWare check box on the NetWare screen If this check box is selected the extra account may be charged when you use the dial up router Wh...

Страница 100: ...d then install it again 1 Insert the Network Utilities CD ROM in the CD ROM drive 2 The Software Installation screen opens automatically If the Software Installation screen does not appear double click EPSETUP EXE on the CD ROM 3 Make sure that all applications are closed and then click the icon located next to EpsonNet Config Operating systems Windows Me Windows 98 98 Second Edition Windows 95 OS...

Страница 101: ...er s Guide contains detailed information on EpsonNet Config Follow the steps below to access the EpsonNet Config User s Guide 1 Click Start point to Programs for Windows Me 98 95 2000 and NT 4 0 users or All Programs for Windows XP and Server 2003 users select EpsonNet and then select EpsonNet Config V1 Click EpsonNet Config to start it 2 From the Help menu select EpsonNet Config Help The EpsonNet...

Страница 102: ...f EpsonNet Config Installing EpsonNet Config Follow the steps below to install EpsonNet Config to configure the network interface 1 Insert the Network Utilities CD ROM in the CD ROM drive The EPSON folder opens automatically If it does not open double click the EPSON CD ROM icon 2 Select the appropriate OS icon in the EPSON folder and then double click it 3 Make sure that all applications are clos...

Страница 103: ...t Config User s Guide 1 Double click the Macintosh HD icon In the Applications folder double click the EpsonNet folder and then double click the EpsonNet Config folder Finally double click the EpsonNet Config icon 2 From the Help menu select EpsonNet Config Help The EpsonNet Config User s Guide appears By clicking the links on the left side of the screen you can get information on using EpsonNet C...

Страница 104: ... 0 users To use EpsonNet Config with WebBrowser Java Plug in must be installed on your computer To install Java Plug in insert the Software CD ROM in the CD ROM drive Double click the COMMON folder on the CD ROM and then double click the PLUGIN folder Finally double click the icon with the exe extension in the folder Also you can download Java Plug in from the following Web site http www java com ...

Страница 105: ...using EpsonNet EasyInstall EpsonNet Config for Windows or Macintosh or the arp ping command you can configure the network interface using Web based EpsonNet Config Note A Web browser must be installed on your computer TCP IP must be correctly set for the computer and the network interface Do not run both EpsonNet Config for Windows or Macintosh and Web based EpsonNet Config at the same time Your b...

Страница 106: ... Configuration menu to display the TCP IP setting screen Note If you want to configure a protocol other than TCP IP see Configuration Network Screens on page 122 4 Select a method for acquiring the IP address When you select Auto DHCP becomes available and assigns an IP address automatically If you want to set the IP address manually select Manual Note The network administrator must check any chan...

Страница 107: ...anager 8 Select Enable for Acquire DNS Server Address Automatically if you want to acquire the DNS server address using the DHCP server If you want to enter the DNS server address manually select Disable and then enter the IP address of the DNS server 9 Select Enable for Acquire Host Name and Domain Name Automatically if you want to acquire the host name and the domain name using the DHCP server I...

Страница 108: ...omplete Do not exit the Web browser and do not send a job to the printer until this message appears Follow the on screen instructions to reset the printer Note Since the new IP address becomes available after the printer is reset you need to restart EpsonNet Config by entering the new IP address Only changes on the page where you press the Submit button take effect Opening Screen Any user can acce...

Страница 109: ... information about AppleTalk MS Network Displays information about Microsoft Network IPP Displays information about IPP SNMP Displays information about SNMP Printing Control Displays information about Printing Control Timeout Displays information about Timeout Time Displays information about Time Configuration Printer Input Change the input settings Print Change the print settings Emulation Change...

Страница 110: ...ys the same information that is displayed on the printer s control panel Signal A signal shows the status level The green light is on when the printer is idle or printing The yellow light is on when the toner or oil roll is low The red light is on when the printer is out of paper or toner if paper is jammed the cover is open or an error has occurred LEDs The LEDs indicates the current operating pr...

Страница 111: ...yellow or black toner in each imaging cartridge Toner The amount of remaining toner in an imaging cartridge Photoconductor Unit The amount remaining in the photoconductor unit Transfer Unit The amount remaining in the transfer unit Waste Toner The amount of waste remaining Fuser Unit The amount remaining in the fuser unit Items Explanations Menu Selection Select Information Sheet Information Sheet...

Страница 112: ... 90 degrees to the left Rotate Right button Rotate the preview image 90 degrees to the right Delete button Delete the selected job Quantity Enter the number of copies Print button Print the selected job Refresh button Refresh the status Items Explanations Menu Selection Select Overlay Form Form List Select whether the list of the thumbnail image is used Form list box Lists the form overlay Prev Pa...

Страница 113: ...m MP Tray MP Tray Paper Size Select the paper size for MP Tray LC Paper Size Displays the currently loaded paper size in the lower paper cassette MP Tray Paper Type Select the paper type for MP Tray LC Paper Type Select the paper type for the lower paper cassette Set button Saves any changes Refresh button Clears any changes and reloads the previous settings Items Explanations Menu Selection Selec...

Страница 114: ...elect whether to skip a blank page Auto Eject Page Select whether to eject pages automatically Duplex Select whether to print on both sides of paper This setting is available only when the Duplex Unit is installed Binding Specify the binding direction of the printout This setting is available only when the Duplex Unit is installed Start Page Specify whether printing starts from the front or back s...

Страница 115: ...t whether to permit the printer to automatically continue printing after a certain period of time when one of the following error occurs paper set print overrun or insufficient memory error Page Protect Select whether to allocate additional printer memory for printing data as opposed to receiving it Image Optimum Reduces the amount of graphics data when the data reaches the memory limit allowing c...

Страница 116: ...en 7 and 7 The default is 0 Set button Saves any changes Refresh button Clears any changes and reloads the previous settings Items Explanations Emulation Select PS3 This menu appears only when PS3 is installed Error Sheets Select whether to print an error sheet when any error occurs while the printer is in PS3 emulation mode Coloration Specify the printing methods from Color Mono or True Color Ima...

Страница 117: ...int position exceeds the right margin LF Function Select LF line feed or CR LF carriage return line feed operation to add a line feed to each carriage return it receives Tray Assign Select the tray assigning from 4 4K or 5S When 4 4K and 5S are selected LaserJet 4 Compatible LaserJet 4000 5000 8000 Compatible and LaserJet 5 Si Compatible are available respectively Set button Saves any changes Refr...

Страница 118: ...table option to select the graphics character table or the italics table Country Use this option to select one of the international symbol sets Auto CR Use the automatic carriage return option to perform a carriage return line feed CR LF operation whenever the print position exceeds the right margin Auto LF When you set AutoLF to Off the printer does not send an automatic line feed LF command with...

Страница 119: ... the print position exceeds the right margin Auto LF When you set AutoLF to Off the printer does not send an automatic line feed LF command with each carriage return CR When on the printer adds a line feed to each carriage return it receives Alt Graphic Turns the Alternate Graphics option on or off Bit Image With Bit Image set to Dark or Light your printer can correctly emulate the graphics densit...

Страница 120: ...e is always on Buffer Size Select the amount of memory to be used for receiving and printing data Items Explanations AUX I F Not available unless an optional network interface is installed Buffer Size Select the amount of memory to be used for receiving and printing data Available only when an optional network interface is installed Items Explanations USB I F Allows you to activate or deactivate t...

Страница 121: ...oftware version of the network interface Model Name Product name of the printer attached to the network interface Network Status Displays the current Ethernet speed and duplex setting Printer Status The background color of the text box indicates the printer s status Green indicates that the printer is idle or printing Yellow indicates that either the paper or toner is low Red indicates that either...

Страница 122: ...acters Polling Interval Enter the polling interval in seconds NetWare Password Enter the password up to 20 characters you use when you log in to the print server NDS Tree Name Enter the NDS tree name up to 31 characters if the mode is NDS Print Server NDS Context Enter the NDS context up to 255 characters if the mode is NDS Print Server Primary File Server Name If the mode is Bindery Print Server ...

Страница 123: ...PIPA Select Enable to get a private address between 169 254 1 1 and 169 254 254 254 automatically when an IP address cannot be obtained by the DHCP server otherwise select Disable Set Using PING Enables or disables IP address setting using the ping command Items Explanations Acquire DNS Server Address Automatically Select either Enable or Disable to acquire the DNS server address from the DHCP ser...

Страница 124: ...send the host name and the domain name to the DNS server that supports Dynamic DNS update to request for DNS dynamic updates When Register the network interface s address to DNS server is Disable then this setting is the same as Disable Items Explanations Use Universal Plug and Play Enables or disables Universal Plug and Play Device Name Enter the device name between 2 and 63 characters Items Expl...

Страница 125: ... appears If epson appears enter an entity type to match your printer Network Number Set Select Auto or Manual Usually Auto is recommended Network Number for Manual Mode Enter the network number when you select to set the Network Number manually Items Explanations Use Microsoft Network Shared Printing Enable or Disable Microsoft network Print Server Name Enter the print server name which is the nam...

Страница 126: ...ttp 192 168 100 201 631 EPSON_IPP_Printer Printer Name Enter the name of a printer to use for Internet Printing up to 127 characters Example EPSON_IPP_Printer Location Enter the name of the printer s physical location up to 64 characters Items Explanations Community Displays the community name Read Only The word public always appears Read Write Enter the Read Write community name up to 32 characte...

Страница 127: ...ol Select Allow or Deny Selecting Allow permits the network access from the IP addresses registered on the printer access control list On the other hand selecting Deny blocks the network access from the IP addresses registered on the printer access control list Printer Access Control List Enter the IP address ranges by which the network access is restricted Items Explanations Change Timeout Value ...

Страница 128: ...econds Time Difference Enter the difference between time at the present location and Greenwich Mean Time GMT Apply button Applies the settings Items Explanations Time Server Select either Enable or Disable to time synchronize from the time server Time Server Address Enter the address of the time server Synchronize Interval Enter the time interval in minutes for automatic time synchronization Time ...

Страница 129: ...istrator Name Enter the name of the administrator up to 255 characters Location Enter the location of the network interface up to 255 characters Favorite Name Enter the link item name up to 20 characters which will be displayed in the Index menu Favorite URL Enter a URL up to 64 characters Description Enter any comments concerning the URL above up to 64 characters Items Explanations Reset button F...

Страница 130: ...ame segment or beyond a router You can select LPR standard printing LPR enhanced printing or High speed printing System Requirements The following table lists the system requirements of EpsonNet Print Operating systems Windows Me 98 98 Second Edition Windows 95 OSR2 with Internet Explorer version 5 0 or higher Windows XP Home Edition Professional with Service Pack 1 or higher Windows XP Profession...

Страница 131: ...work Utility button 4 Click the icon located next to EpsonNet Print 5 Follow the on screen instructions to complete the installation Your computer is now set up to print using LPR via EpsonNet Print See the next section to set up your printer For Windows XP Server 2003 2000 NT 4 0 Users Follow the steps below to add a port using the Add Printer Wizard If you want to add a port for a printer with i...

Страница 132: ...XP Server 2003 Click Local printer attached to this computer clear the Automatically detect and install my Plug and Play printer check box and then click Next Select the Create a new port radio button and then select EpsonNet Print Port from the list Click Next Note If the following screen appears click the Unblock button and then click the Search Again button to search the printers For Windows 20...

Страница 133: ...tton to search the printers using new parameters If you want to search printers in other segments click the N W Settings button Select the Specific Network Segments check box and then enter the network address and subnet mask of the network segment for the search Then click the Add button You can also specify the time before declaring communication error ...

Страница 134: ...in the same segment you can select this port type IP Address Manual Use the printer s IP Address for the port name HostName DNS Use the printer s host name registered in the DNS server for the port name MS Network Use the NetBIOS name registered in the printer for the port name The port Information The following items are displayed Port Name If the port type is changed the port name and the host n...

Страница 135: ... icon 2 Click Next 3 For Windows XP Server 2003 Click Local printer attached to this computer clear the Automatically detect and install my Plug and Play printer check box and then click Next Select the Create a new port radio button and then select EpsonNet Print Port from the list Click Next For Windows 2000 Click Local printer clear the Automatically detect and install my Plug and Play printer ...

Страница 136: ... then click Finish You need to install the printer driver See Installing the Printer Driver on page 137 Items Explanations The port Information The following items are displayed Port Name Host Name or IP Address Protocol Finish button Register the port information to the system and close the Add EpsonNet Print Port Wizard Back button Go back to the printer list window Cancel button Close the Add E...

Страница 137: ...existing driver radio button Click Next 8 Click Finish and follow the on screen instructions to complete the setup The printer is now ready for peer to peer printing To configure the printer port see Configuring the Printer Port on page 142 For Windows Me 98 95 Users Follow the steps below to add a port using the Add Printer Wizard If you want to add a port for the printer with its IP address assi...

Страница 138: ...he printer driver 1 Click Start point to Settings and then select Printers 2 Right click the target printer icon and then select Properties 3 Click the Details tab and then click the Add Port button Select the Other radio button and then select EpsonNet Print Port Click OK 4 Select the target printer and then click Next Note If the target printer is not in the list click the Search Again button to...

Страница 139: ...ct the Specific Network Segments check box and then enter the network address and subnet mask of the network segment for the search Then click the Add button You can also specify the time before declaring communication error 5 Confirm the information about the printer s port you want to configure and then click Finish ...

Страница 140: ... select this port type IP Address Manual Use the printer s IP Address for the port name HostName DNS Use the printer s host name registered in the DNS server for the port name MS Network Use the NetBIOS name registered in the printer for the port name The port Information The following items are displayed Port Name If the port type is changed the port name and the host name or IP address are also ...

Страница 141: ... printer driver 1 Click Start point to Settings and then select Printers 2 Right click the target printer icon and then select Properties 3 Click the Details tab and then click the Add Port button Select the Other radio button and then select EpsonNet Print Port Click OK 4 Select Manual Setting from the list and then click Next 5 Enter the printer s name and the port name is automatically entered ...

Страница 142: ... Click Start point to Settings and then select Printers For Windows XP Server 2003 Click Start and then Printers and Faxes 2 Right click the target printer and then click Properties Items Explanations The port Information The following items are displayed Port Name Host Name or IP Address Protocol Finish button Register the port information to the system and close the Add EpsonNet Print Port Wizar...

Страница 143: ... printing Select the Confirm file size check box and then specify the queue name up to 32 characters Print data is spooled by the computer before being sent to the target network printer Note When the print data size is 20 MB or more we recommend that you use LPR enhanced printing High speed printing Select the High Speed Printing RAW radio button The Epson high speed printing port sends a print j...

Страница 144: ...ram that monitors your printer and gives you information about its current status Because this utility does not support IPP printers connected to the Internet cannot be monitored with EPSON Status Monitor If you use EpsonNet Internet Print on a computer which has EPSON Status Monitor installed a communication error message may appear when you view printer properties To avoid this click the Optiona...

Страница 145: ...net Print supports printing across the Internet using Internet Printing Protocol Follow the steps below to set up the printer Note Before following the steps below you must make the appropriate IPP settings in EpsonNet Config See the EpsonNet Config User s Guide or IPP on page 126 for instructions on setting up IPP In the steps below you will be asked for the IPP URL you set in the IPP setting scr...

Страница 146: ...er Proxy Server Name Enter the proxy server name or the IP address of the proxy server You can enter up to 256 characters but only 127 characters are valid Do not use the following characters Port Number Enter the port number of the proxy server from 0 to 65535 Get Printer Attributes When you select this box and click OK EpsonNet Internet Print communicates with the printer and acquires informatio...

Страница 147: ...he printer is correctly connected on the network If the printer power is off or there is a problem on the network the Get status every 20 sec check box is automatically cleared If this happens make sure that the printer power is on and the printer is correctly connected on the network and then select the Get status every 20 sec check box again 5 Click OK to save settings 6 When a message appears s...

Страница 148: ... using EPSON Status Monitor and printing with EpsonNet Internet Print the message A communication error has occurred appears You can get rid of this message by clearing the Monitor the Printing Status check box in the Utility menu of the printer properties Windows NT 4 0 1 Be sure that TCP IP is correctly installed and setup in the computer and a valid IP address is set for the computer and printe...

Страница 149: ...e as the IPP URL you set for the IPP configuration in EpsonNet Config Do not use the following characters Format http IP address of printer 631 printer name Example http 192 168 100 201 631 EPSON_IPP_Printer Use Proxy When using a proxy server select this box and enter the Proxy Server Name and Port Number All communication is done via the proxy server Enter Proxy Server Name Enter the proxy serve...

Страница 150: ...to the Internet using a dial up router and select the Get status every 20 sec check box you may be charged for the extra line connection When you select the Get Printer Attributes check box and click OK an error message may appear Be sure that the printer power is on and the printer is connected to the network If the printer power is off or there is a problem in the network the Get status every 20...

Страница 151: ...k administrators to easily control network devices such as network printers interface cards and network adapters attached to a printer EpsonNet WebManager offers the following features It supports Windows Macintosh and UNIX platforms to give network administrators flexibility in managing network devices It allows you to search and monitor network devices and make settings for network devices It of...

Страница 152: ... following functions Device list function Searches for devices on the network and displays a device list with current status Device details function You can make or change the printer settings through EpsonNet WebManager The setting items in the Device details function will differ depending on the printer Operating system Windows Server 2003 Server 2003 x64 Edition Windows 2000 Server Advanced Ser...

Страница 153: ...S the Printer Layout window Error Notification window and Device Details window may not be available EpsonNet WebManager Operating Structure EpsonNet WebManager must be installed in the computer that functions as the network server You can select the either of the two methods described below to use EpsonNet WebManager EpsonNet WebManager and a Web browser running on the same PC No special server i...

Страница 154: ...rough the browser a EpsonNet WebManager server b Epson printer with built in network interface c Client computer running Windows d Client computer running Macintosh e Client computer running UNIX Installing EpsonNet WebManager Follow the steps below to install EpsonNet WebManager 1 Insert the Software CD ROM in the CD ROM drive 2 The Software Installation screen opens automatically If the Software...

Страница 155: ...s for Windows 2000 and NT 4 0 users or All Programs for Windows XP and Server 2003 users select EnsonNet and then select EpsonNet WebManager Click EpsonNet WebManager For Windows XP Service Pack 2 users If EpsonNet WebManager is installed on the computer running Windows XP Service Pack 2 make the following settings otherwise the client computers cannot access EpsonNet WebManager 1 Click Start poin...

Страница 156: ...r s online reference guide It provides important information and instructions on using EpsonNet WebManager You can access the online guide by using any of the following methods Run EpsonNet WebManager From the Help menu select Online Guide Click the question mark button on the current screen so that a help screen appears describing the functions on that page Click Start point to Programs for Windo...

Страница 157: ...rinters on Windows operating systems running TCP IP EpsonNet SetupManager provides the following functions Installs the printer driver easily Installs the port monitor EpsonNet Print automatically Creates a printer port Creates a shortcut an icon that executes the script file on the server or a package which contains all files needed for the installation for automatic printer driver installation O...

Страница 158: ... servers This file comes with EpsonNet SetupManager You cannot use EpsonNet SetupManager if more than one network adapter are installed on the computer and connected to different network segments Print service Operating system Windows XP Home Edition Professional Professional x64 Edition Windows Me Windows 98 Second Edition Windows 95 OSR2 with Internet Explorer version 5 0 or higher Windows Serve...

Страница 159: ...the CD ROM drive 2 The Software Installation screen opens automatically If the Software Installation screen does not appear double click EPSETUP EXE on the CD ROM 3 Make sure that all applications are closed and then click the Install Network Utility button 4 Click the icon located next to EpsonNet SetupManager 5 Follow the on screen instructions to complete the installation Accessing the User s G...

Страница 160: ...you can print a status sheet check the network settings otherwise set the interface mode of the printer s control panel to Auto or Option Cause What to do You have assigned an IP address to the computer manually but you assigned the IP address to the printer by Automatic Private IP Addressing APIPA Assign the printer s IP address so that it belongs to the same segment of the computer Use EpsonNet ...

Страница 161: ...ompt from the computer on which EpsonNet Config is installed and then enter the following command Format ROUTE_ADD_the IP address of the network interface_ the IP address of the computer the under bar represents one space Example ROUTE ADD 192 168 192 168 22 33 44 55 Cause What to do You have not set the IP address for the network interface Set the IP address for the network interface using EpsonN...

Страница 162: ...gth of time before a timeout To do this select Options from the Tool menu and then select Timeout Note that doing so can cause EpsonNet Config to run more slowly Cause What to do NetWare is set to Enable even though you are not using NetWare Set NetWare to Disable on the NetWare screen of EpsonNet Config with Web Browser How to acquire an IP address To acquire your IP address you need to apply to ...

Страница 163: ...the Printing Status check box Cause What to do You have selected a phone line or modem for Internet Explorer 4 0x for the Internet connection Printing ends normally after you cancel this dialog box but the message appears every time you print Connect to the Internet using a local area network or start a dial up network manually Cause What to do When you print with NetBEUI or IPP EPSON Status Monit...

Страница 164: ...re AppleTalk is active in Chooser Also check the network equipment including the hub cable Cause What to do The same printer is set up with AppleTalk after the printer is set up with Bonjour Rendezvous Change the AppleTalk printer name so that it does not conflict with the Bonjour Rendezvous printer name Cause What to do Clients may not be registered or the network interface may not be logged in t...

Страница 165: ...ed off Turn on the printer The printer is not in the same segment as the computer where you installed EpsonNet Config To search for network interfaces in other segments use Search options of EpsonNet Config You have not logged in to the target NetWare server with supervisor privileges From the computer on which EpsonNet Config is installed log in to the target NetWare server with supervisor privil...

Страница 166: ... panel displays Information Menu 2 Press the Enter button 3 Press the Down button until Network Status Sheet appears on the LCD panel 4 Finally press the Enter button to print a network status sheet Note You cannot print a status sheet in the following cases the printer has started printing it is offline or it is not ready to print See the User s Guide for more information on the printer s control...

Страница 167: ...urn on the printer 3 When you see the message Support Mode on the LCD panel select HDD Format in the support menu Note After reformatting the Hard Disk Drive the printer will automatically reboot When you want to erase only the fonts installed from the Adobe PostScript 3 PS3 follow steps 1 through 3 above Select PS3 HDD Init when the Adobe PostScript 3 ROM is installed When installing a Hard Disk ...

Страница 168: ...appears instead press the Enter button and then the Up or Down button to change to Network I F On Then press the Enter button turn off the printer for more than five seconds and turn it back on 5 Press the Up or Down button until Get IP Address Auto appears Press the Enter button and then the Up or Down button to change to Get IP Address Panel Then press the Enter button You can use the following ...

Страница 169: ...the control panel menus 9 Turn off your printer and then turn it back on Be sure to wait until the initialization is complete Print a network status sheet to confirm the new IP address Note You must first set the IP address before using EpsonNet Config with Web Browser See the User s Guide for more information about settings on the printer s control panel Network Menu These items are used to make ...

Страница 170: ... when an optional interface is installed Available only when On is selected as the AUX I F setting AUX I F Allows you to activate or deactivate the AUX interface when an optional interface card is installed Buffer Size Determines the amount of memory to be used for receiving data and printing data If Maximum is selected more memory is allocated for receiving data If Minimum is selected more memory...

Страница 171: ...t NETWORK SETUP then press the Right button 5 Select ENABLE then press the Enter button to enable the network settings menu 6 Press the Left button to display the NETWORK SETUP menu 7 Press the Down button to select IP ADDRESS SETTING then press the Right button You can use the following methods to get an IP address Choose Auto when getting the IP address from a DHCP server The IP address is autom...

Страница 172: ... Left button twice to exit the control panel menus 14 Turn off your printer and then turn it back on Be sure to wait until the initialization is complete Print a network status sheet to confirm the new IP address Note You must first set the IP address before using EpsonNet Config with Web Browser See the User s Guide for more information about settings on the printer s control panel Network Setup ...

Страница 173: ...twork If you are the network administrator choose an address within your subnet which does not conflict with any other device The MAC Ethernet hardware address of the network interface You can find out the MAC address on a status sheet Checking the LAN First you need to check that the computer can reach to other computer in the same segment as follows 1 Set the default gateway to the host on which...

Страница 174: ...e assume that the MAC address of your network interface is 00 00 48 93 00 00 hexadecimal and that the IP address which you will be assigning is 192 168 100 201 decimal Substitute your values for these addresses when you type in the commands 1 From the command line type Example arp s 192 168 100 201 00 00 48 93 00 00 2 Execute the ping command to set the IP address by pinging it Example ping 192 16...

Страница 175: ...Distributed Print Services environment of NetWare Use the Setup tool of EpsonNet NDPS Gateway to upload the printer driver to Resource Management Service RMS When the printer driver is installed in RMS it is automatically installed on the workstations Instructions on Using a Dial Up Router This section describes instructions on using a dial up router If DHCP is used to assign an IP address of the ...

Страница 176: ...check the brief information of the network interface To use this function the Universal Plug and Play must be installed on Windows Me or future operating systems For information on how to install Universal Plug and Play see the Windows Me online help Note Before using the Universal Plug and Play function you must enable the Universal Plug and Play function in EpsonNet Config See the EpsonNet Confi...

Страница 177: ...on 4 Follow the on screen instructions to complete uninstallation Macintosh 1 Double click the EpsonNet Config Installer icon 2 Click the Continue button 3 In the License dialog box read the License Agreement and then click the Accept button 4 Select Uninstall from the pull down menu 5 Click the Uninstall button 6 Follow the on screen instructions to complete uninstallation Note You can also unins...

Страница 178: ...afety Instructions Warnings Cautions and Notes wWarnings must be followed carefully to avoid bodily injury cCautions must be observed to avoid damage to your equipment Notes contain important information and useful tips on the operation of your printer ...

Страница 179: ...llation EpsonNet Config Macintosh 102 EpsonNet Config Windows 100 EpsonNet Internet Print 145 EpsonNet NDPS Gateway 79 89 EpsonNet Print 131 EpsonNet SetupManager 159 EpsonNet WebManager 154 Internet printing 145 148 Internet Printing Protocol 144 IntranetWare 68 IP address 105 162 168 171 173 L LEDs 12 LPR filters 92 M MAC address 121 Microsoft network 125 N NDPS 78 88 NDPS Manager 80 90 NDPS Pri...

Страница 180: ...tton 129 RJ 45 connector 13 Router 107 S SAP Name 82 Setting the IP address 105 168 171 173 Subnet mask 107 T TCP IP 106 U Universal Plug and Play 107 UNIX configure for different OS 93 Using the printer with Macintosh 60 NetWare 65 87 OS 2 62 UNIX 92 Windows 2000 53 Windows Me 98 95 45 Windows NT 4 0 57 Windows Server 2003 48 Windows XP 40 ...

Отзывы: