Adjusting the Interactive Pen
86
Calibrating the Interactive Pen
Adjust the projector’s image before calibrating the pen.
There are two methods available for calibrating the pen;
Auto Calibration
and
Manual Calibration
.
When calibrating the pen for the first time, perform
Manual Calibration
for optimum calibration.
When calibrating the pen for the second time and after, perform
Auto Calibration
)
c
When the
Screen Type
is set to
16:6
, replace the soft pen tip with a hard pen tip.
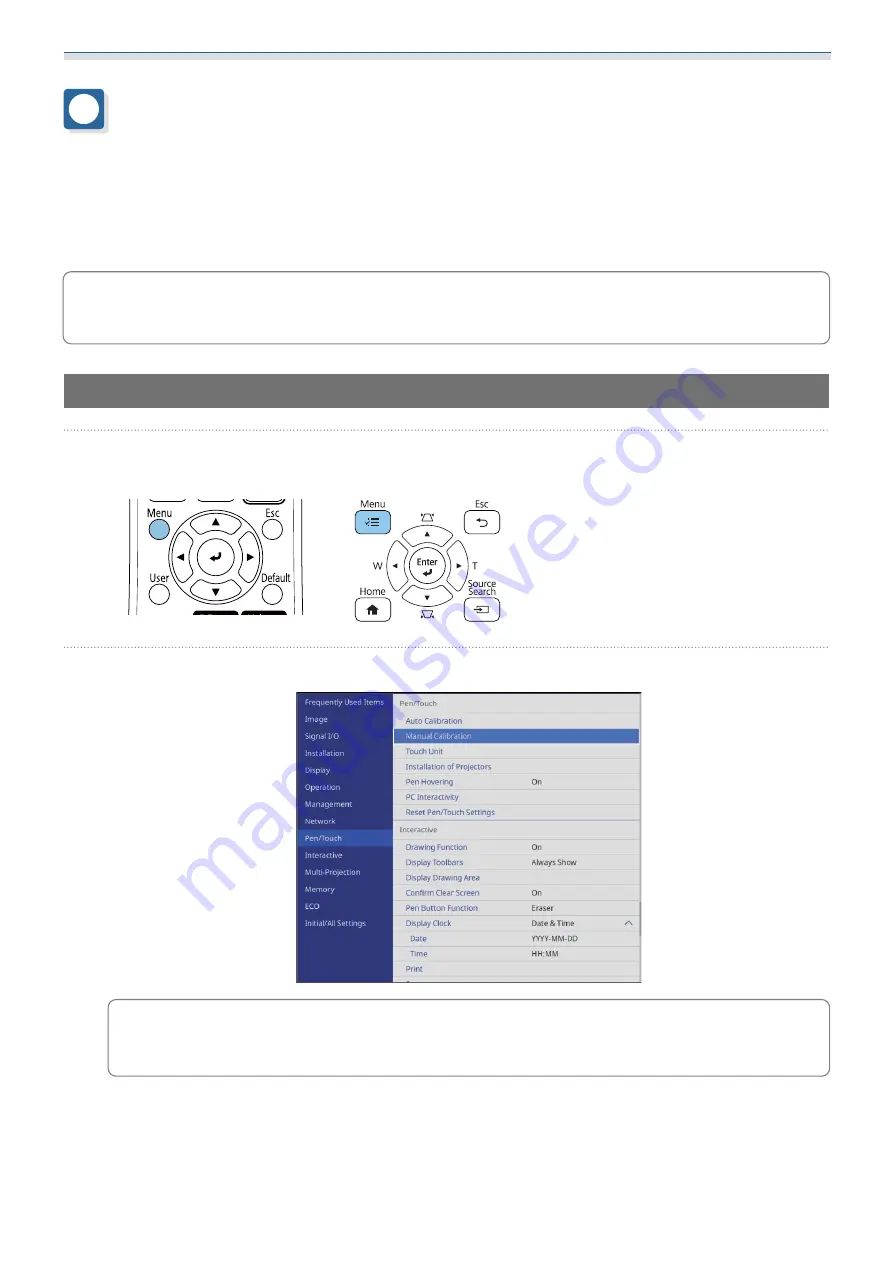
Manual Calibration
a
Turn on the projector, and then press the [Menu] button
Using the Remote Control
Using the Control Panel
b
Select
Manual Calibration
from the
Pen/Touch
menu.
c
When multiple projectors are installed in parallel, you see a message prompting you to
temporarily hide the image for the projector installed next to it. When you see this message,
press the [A/V Mute] button to hide the image from the next projector.
Содержание ELPHD02
Страница 1: ...Installation Guide ...
Страница 18: ...Introduction 17 Max 5m Max 5m ...
Страница 29: ...Installing the Wall mount 28 Horizontal slide 45 45 Forward backward slide 0 383 ...
Страница 68: ...Installing the Wall mount 67 b Select Geometry Correction from the Installation menu c Select Quick Corner ...
Страница 77: ...Installing the Control Pad 76 For Canadian Users ...
Страница 79: ...Installing the Control Pad 78 ...
Страница 96: ...Installing the Touch Unit 95 Wavelength 932 to 952 nm ...
Страница 99: ...Installing the Touch Unit 98 Adjustment range 79 5 140 5 15 76 ...
Страница 138: ...Setting the Projector 137 c Select EDID from the Signal I O menu d Select 3240x1080 60Hz ...


