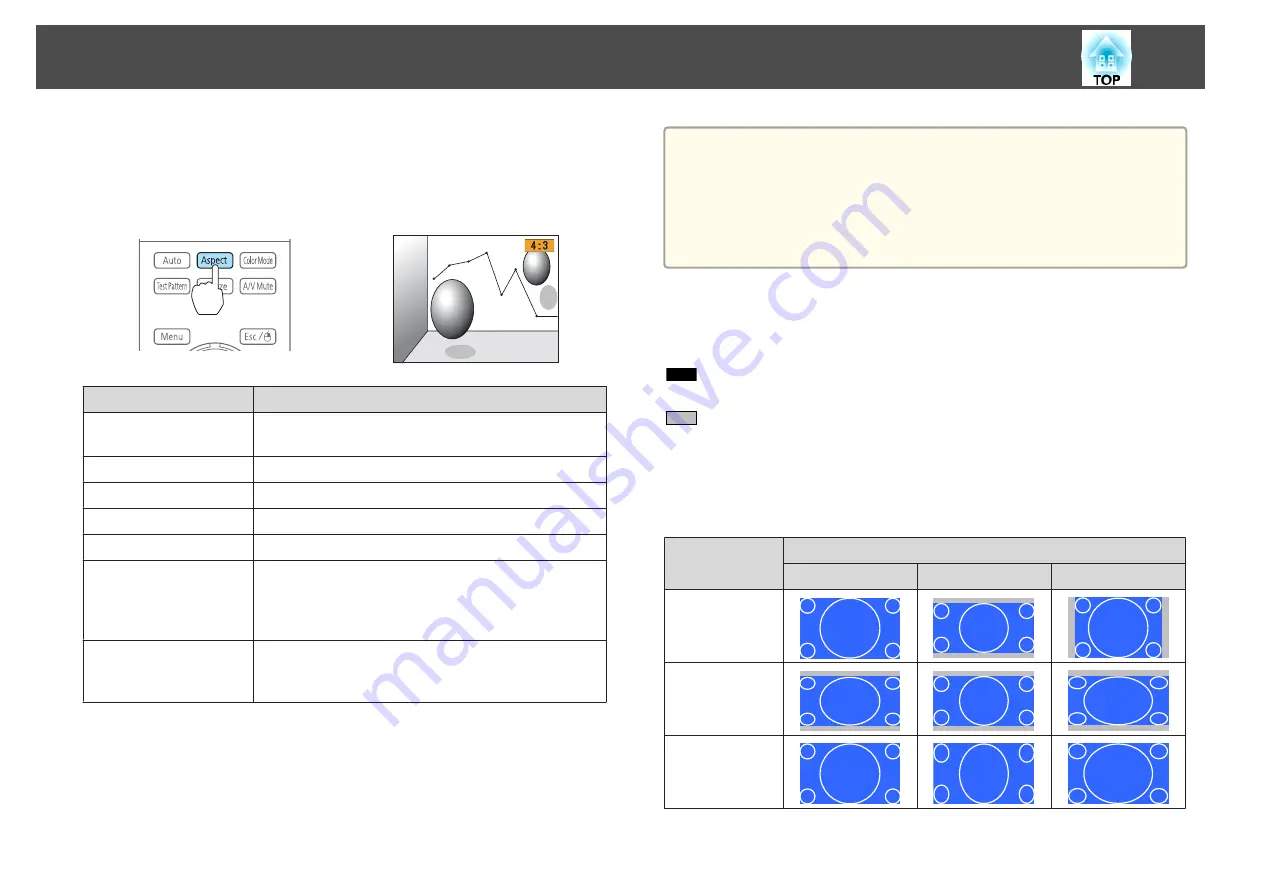
Changing methods
Each time you press the [Aspect] button on the remote control, the aspect
mode name is displayed on the screen and the aspect ratio changes.
Remote control
Aspect Mode
Explanation
Auto
Projects in an appropriate aspect ratio based on
information from the signal being input.
Normal
Projects while retaining the aspect ratio of the input image.
4:3
Projects at an aspect ratio of 4:3.
16:9
Projects at an aspect ratio of 16:9.
Full
Projects at the full size of the projected screen.
Zoom
Projects by enlarging the input image to the full width of
the projected screen while retaining the aspect ratio. Areas
that exceed the edges of the projected screen are not
projected.
Native
Projects to the center of the projected screen at the
resolution of the input image. Areas that exceed the edges
of the projected screen are not projected.
a
•
You can also set the aspect ratio from the Configuration menu.
s
Signal
-
Aspect
•
If parts of the computer image are missing, set the
Resolution
setting to
Wide
or
Normal
from the Configuration menu, according
to the resolution of the computer.
s
Signal
-
Resolution
The aspect mode changes as shown in the tables below.
The following colors in screen images in the tables indicate areas that are
not displayed.
: The area where the image is not displayed depending on the screen
type setting.
: The area where the image is not displayed depending on the aspect
mode setting.
EB-4955WU/EB-4950WU/EB-4855WU/EB-4850WU/EB-4750W
Screen type setting: 16:10
Aspect Ratio of Input Signal
16:10
16:9
4:3
Auto or Normal
16:9
Full
Adjusting Projected Images
46
Содержание EB-4550
Страница 1: ...User s Guide ...
Страница 7: ...Introduction This chapter explains the names for each part ...
Страница 17: ...Preparing the Projector This chapter explains how to install the projector and connect projection sources ...
Страница 36: ...Connecting Equipment 36 ...
Страница 37: ...Basic Usage This chapter explains how to project and adjust images ...
Страница 52: ...Useful Functions This chapter explains useful tips for giving presentations and the Security functions ...
Страница 70: ...Configuration Menu This chapter explains how to use the Configuration menu and its functions ...
Страница 93: ...Troubleshooting This chapter explains how to identify problems and what to do if a problem is found ...
Страница 124: ...j Return to step 4 and adjust each level k When you are done press the Menu button Image Maintenance 124 ...
Страница 125: ...Appendix ...
Страница 150: ...A Center of lens B Distance from center of lens to suspension bracket fixing point Units mm Appearance 150 ...


