background image

Installation Guide

21

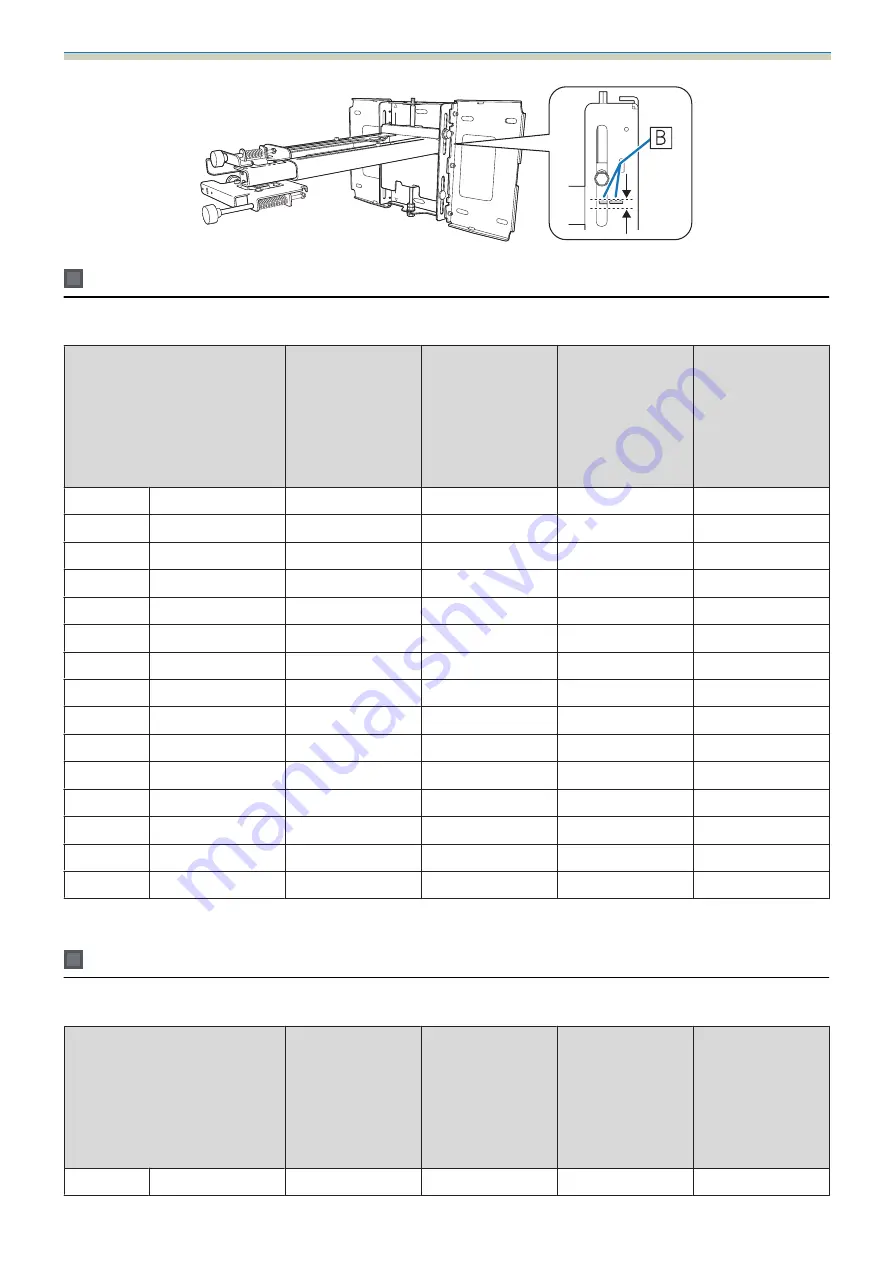
16:10 projected image

[Unit: cm]

S

Projected image size

a

Projection Dis‐

tance

Minimum (Wide)

to Maximum

(Tele)

b

Numbers on the

arm slide scale

c

Distance from

projected image

to wall plate

h

Height of projec‐

ted image

60"

129.2x80.8

6.2 - 19.3

14.9 - 28.0

17.4

80.8

61"

131.4x82.1

6.9 - 20.1

15.6 - 28.8

17.7

82.1

62"

133.5x83.5

7.5 - 20.9

16.2 - 29.6

17.9

83.5

63"

135.7x84.8

8.1 - 21.8

16.8 - 30.5

18.2

84.8

64"

137.9x86.2

8.7 - 22.6

17.4 - 31.3

18.5

86.2

65"

140.0x87.5

9.3 - 23.5

18.0 - 32.2

18.7

87.5

66"

142.2x88.8

10.0 - 24.3

18.7 - 33.0

19.0

88.8

67"

144.3x90.2

10.6 - 25.1

19.3 - 33.8

19.3

90.2

68"

146.5x91.5

11.2 - 26.0

19.9 - 34.7

19.5

91.5

69"

148.6x92.9

11.8 - 26.8

20.5 - 35.5

19.8

92.9

70"

150.8x94.2

12.4 - 27.6

21.1 - 36.3

20.1

94.2

71"

152.9x95.6

13.1 - 28.5

21.8 - 37.2

20.3

95.6

72"

155.1x96.9

13.7 - 29.3

22.4 - 38.0

20.6

96.9

73"

157.2x98.3

14.3 - 30.2

23.0 - 38.9

20.9

98.3

74"

159.4x99.6

14.9 - 31.0

23.6 - 39.7

21.1

99.6

Images smaller than 60 inches are not projected correctly.

16:9 projected image

[Unit: cm]

S

Projected image size

a

Projection Dis‐

tance

Minimum (Wide)

to Maximum

(Tele)

b

Numbers on the

arm slide scale

c

Distance from

projected image

to wall plate

h

Height of projec‐

ted image

59"

130.6x73.5

6.6 - 19.8

15.3 - 28.5

21.7

73.5

Содержание EB-1420Wi

Страница 1: ...Installation Guide ...

Страница 2: ...ling Caution This symbol indicates information that if ignored could possibly result in personal injury or physical damage due to incorrect handling Explanation of Symbols Symbols Explanation Symbol indicating an action that must not be done Symbol indicating an action that should be done c Symbol indicating related or useful information Safety Precautions for Installation Warning The setting plat...

Страница 3: ...he Control Pad is approximately 14 kg not including cables When the Touch Unit EB 1430Wi only is installed the maximum weight is approximately 14 5 kg not including cables Ensure the strength of the wall before mounting this product on the wall If the wall is not strong enough reinforce the wall before installation Inspect the setting plate on a regular basis to ensure there are no broken parts or...

Страница 4: ...uct immediately disconnect the cables from the product and then contact your local dealer or the nearest Epson service call center Continuing to use the product in an abnormal condition could cause a fire electric shock or visual impairment Caution Donotinstallthisproductinalocationwheretheoperatingtemperatureforyourprojector model may be exceeded Such an environment may damage the projector Insta...

Страница 5: ...ear the Touch Unit if you are using medical equipment such as a pace maker Furthermore when using the Touch Unit make sure there is no one using medical equip ment such as a pace maker in the surrounding area A powerful magnet within the unit generates electromagnetic interference which may cause med ical equipment to malfunction Caution Do not go near the Touch Unit with magnetic storage media su...

Страница 6: ... Control Pad on the same surface as the projection screen If the projection screen and the Control Pad installation point are uneven install the Control Pad approximately 20 cm from the edge of the screen Make sure there are no obstacles between the Control Pad and the projector not including the Touch Unit In the following situations use the optional Remote control cable set ELPKC28 to supply pow...

Страница 7: ...teboard Correct installation position Incorrect installation position When installing the Touch Unit make sure there are no obstacles such as cables or protruding items such as whiteboard trays holders or thick frames in the shaded areas in the following figure The Touch Unit will not operate correctly Unit mm ...

Страница 8: ...installing the Touch Unit EB 1430Wi only 17 When installing the Control Pad 19 WhenProjectedImageisSmallerthan75Inches 20 16 10 projected image 21 16 9 projected image 21 4 3 projected image 22 When Projected Image is Larger than 75 Inches 23 16 10 projected image 24 16 9 projected image 25 4 3 projected image 25 Installing the Setting Plate 27 Connecting Devices 27 Necessary cables 27 Installatio...

Страница 9: ...Contents 8 Using the Interactive Function when Multiple Projectors are Installed 79 Attaching a Security Cable 80 General Notice 81 ...

Страница 10: ...27 b Adjusting the Projected Image s p 40 c Calibrating the Interactive Pen s p 47 d Installing the Control Pad s p 53 When installing the Touch Unit finish installing the projector first and then follow the procedures below EB 1430Wi only a Installing the Touch Unit s p 56 b Adjusting the Angle of Laser Diffusion s p 60 c Performing Touch Calibration s p 71 ...

Страница 11: ...th washer spring washer 6 For wall plate assembly 4 For 3 axis adjustment unit arm installation 4 For slide plate projector installation 2 For slide plate 3 axis adjustment unit installa tion attached during shipping M6 x 20 mm hexagon shoulder head bolt with washer spring washer 1 For setting plate wall plate installation M6 x 20 mm cross recessed head shoulder screws with plastic washers 3 Use t...

Страница 12: ...ll and so on prepare commercially available M4 screws 20 mm x4 Touch Unit EB 1430Wi only The following supplied products are necessary when attaching the Touch Unit Confirm that you have all items before beginning Touch Unit Markers x2 attached to Touch Unit Touch Unit connection cable Spacerforscrewholex3 Label x4 Tape approx 6 cm for secur ing the marker x12 Infrared deflector approx 28 5 cm x8 ...

Страница 13: ... mm See the fig ure below Vertical slide adjustment range 38 mm See the fig ure below Horizontal roll adjustment range 3 Fine adjustments possible with adjustment dial s p 40 Horizontal rotation adjustment range 8 Fine adjustments possible with adjustment dial s p 40 Vertical tilt adjustment range 3 Fine adjustments possible with adjustment dial s p 40 Horizontal slide adjustment range 45 mm See t...

Страница 14: ...stoconnecttotheprojectorthroughawall usepositions and inthefollowing figure as the cable routing holes Vertical slide adjustment range Unit mm Horizontal slide adjustment range Unit mm Forward backward slide adjustment range Arm slide adjustment range Unit mm ...

Страница 15: ...eight approx 240 g not including batteries and rubber feet Operating temperature 0 to 50 C no condensation Operating temperature 20 to 60 C no condensation Cable routing holes When routing cables through a wall use the position in the following figure as the cable routing hole Otherwise remove the cable cover and route the cables from there Route the printer cable along the groove at the back of t...

Страница 16: ...ternal dimensions weight Unit mm The Touch Unit weighs 450 g Attached labels The Touch Unit is a Class 1 laser product that conforms to the JIS C 6802 2011 standard There are warning labels affixed to the Touch Unit to indicate that it is a Class 1 laser product ...

Страница 17: ... LASER PRODUCT WARNING Never open any covers on this unit Laser product inside Warning CAUTION CLASS 3B INVISIBLE LASER RADIATION WHEN OPEN AVOID EXPOSURE TO THE BEAM Laser diffusion port The laser beam is diffused from the laser diffusion ports at the back of the Touch Unit ...

Страница 18: ... image size S is 75 inches or more the scale on the arm slide b is equal to the projection distance a The numbers for a and b differ if the projected image size S is less than 75 inches Unit mm Projected image size Wall plate Minimum projection distance Wide maxi mum zoom to maximum Tele minimum zoom Screen Numbers on the arm slide scale Distance from projected image to wall plate Height of projec...

Страница 19: ...s of the screen At least 100 mm left and right From the bottom of the projected image to the bottom of the screen At least 20 mm If there are obstacles such as cables whiteboard trays holders or frames within the areas noted above the Touch Unit will not operate correctly Unit mm Projected image size Wall plate Minimum projection distance Wide maxi mum zoom to maximum Tele minimum zoom Screen Numb...

Страница 20: ...l Pad make sure there is enough space in the surrounding area as shown in the following figure Because the top cover opens from the left hand side you need space on the left hand side of the Control Pad Unit mm 㻡㻜 㻡㻜 㻝㻜㻜 㻡㻜 Whensupplyingpowerusingbatteries installtheControlPadwithintheshadedrangeshowninthefollowing figure ...

Страница 21: ...owing figure EB 1430Wi only The Touch Unit will not operate correctly Unit mm When Projected Image is Smaller than 75 Inches Mount the 3 axis adjustment unit at the position marked with a stamp The projection distance table provides the figures when mounting the 3 axis adjustment unit at the position marked with a stamp The numbers on the arm slide scale b differ from the projection distance a The...

Страница 22: ...2x88 8 10 0 24 3 18 7 33 0 19 0 88 8 67 144 3x90 2 10 6 25 1 19 3 33 8 19 3 90 2 68 146 5x91 5 11 2 26 0 19 9 34 7 19 5 91 5 69 148 6x92 9 11 8 26 8 20 5 35 5 19 8 92 9 70 150 8x94 2 12 4 27 6 21 1 36 3 20 1 94 2 71 152 9x95 6 13 1 28 5 21 8 37 2 20 3 95 6 72 155 1x96 9 13 7 29 3 22 4 38 0 20 6 96 9 73 157 2x98 3 14 3 30 2 23 0 38 9 20 9 98 3 74 159 4x99 6 14 9 31 0 23 6 39 7 21 1 99 6 Images smal...

Страница 23: ... 30 1 23 0 38 8 25 8 88 4 72 159 4x89 7 14 9 31 0 23 6 39 7 26 1 89 7 73 161 6x90 9 15 6 31 1 24 3 39 8 26 5 90 9 74 163 8x92 1 16 2 31 1 24 9 39 8 26 8 92 1 Images smaller than 59 inches are not projected correctly 4 3 projected image Unit cm S Projected image size a Projection Dis tance Minimum Wide to Maximum Tele b Numbers on the arm slide scale c Distance from projected image to wall plate h ...

Страница 24: ...8 Images smaller than 53 inches are not projected correctly c The values are only rough estimates The value may differ depending on the location where you place the projector When projecting in Tele the quality of the projected images may decrease When projecting images at 4 3 the images are resized automatically and the quality of the projected images may decrease When Projected Image is Larger t...

Страница 25: ...09 0 82 176 6x110 4 19 9 31 1 23 3 110 4 83 178 8x111 7 20 5 31 1 23 5 111 7 84 180 9x113 1 21 1 31 1 23 8 113 1 85 183 1x114 4 21 8 31 1 24 1 114 4 86 185 2x115 8 22 4 31 1 24 3 115 8 87 187 4x117 1 23 0 31 1 24 6 117 1 88 189 5x118 5 23 6 31 1 24 9 118 5 89 191 7x119 8 24 2 31 1 25 2 119 8 90 193 9x121 2 24 9 31 1 25 4 121 2 91 196 0x122 5 25 5 31 1 25 7 122 5 92 198 2x123 9 26 1 31 1 26 0 123 9...

Страница 26: ...31 1 28 9 99 6 81 179 3x100 9 20 7 31 1 29 2 100 9 82 181 5x10² 1 21 3 31 1 29 6 102 1 83 183 7x10³ 4 21 9 31 1 29 9 103 4 84 186 0x104 6 22 6 31 1 30 3 104 6 85 188 2x10⁵ 8 23 2 31 1 30 6 105 8 86 190 4x10⁷ 1 23 9 31 1 30 9 107 1 87 192 6x10⁸ 3 24 5 31 1 31 3 108 3 88 194 8x10⁹ 6 25 1 31 1 31 6 109 6 89 197 0x110 8 25 8 31 1 32 0 110 8 90 199 2x112 1 26 4 31 1 32 3 112 1 91 201 5x113 3 27 0 31 1 ...

Страница 27: ...25 9 31 1 25 9 123 4 82 166 6x125 0 26 6 31 1 26 2 125 0 83 168 7x126 5 27 3 31 1 26 5 126 5 84 170 7x128 0 28 0 31 1 26 8 128 0 85 172 7x129 5 28 7 31 1 27 1 129 5 86 174 8x131 1 29 4 31 1 27 4 131 1 87 176 8x132 6 30 1 31 1 27 7 132 6 88 178 8x134 1 30 8 31 1 28 0 134 1 Images larger than 88 inches are not projected correctly c The values are only rough estimates The value may differ depending o...

Страница 28: ...0Wi only Optional computer cables Remote control cable set and other cables prepare according to the connected devices For details see the projector s User s Guide on the Document CD ROM Necessary cables when using the Easy Interactive Function When performing mouse operations using the Easy Interactive Function you need a power cord and USB cable Even when projecting using a computer cable a USB ...

Страница 29: ...When printing the projected image you need the USB cable supplied To connect the Control Pad and the printer use the USB cable supplied with the printer c The following Epson projectors can be connected to the Control Pad Check the rating label on the projector H480x where x is one letter from A to Z H481x where x is one letter from A to Z H612x where x is one letter from A to Z H665x where x is o...

Страница 30: ... commercially available cable The shape of the plug that connects to the projector and the plug that connects to the Touch Unit differ See the following figure to connect to the correct ports Prepare cables for the connected devices example Document camera Dedicated USB cable supplied with document cam era Computer Computer cable optional accessory External speakers Audio cable commercially availa...

Страница 31: ...the setting plate If you use adhesives to prevent the screws from loosening or things such as lubricants or oils on the slide plate fixing part of the projector the case may crack and cause the projector to fall resulting in personal injury or property damage Disassemble the parts Remove the M4 bolts x2 and then remove the slide plate from the 3 axis adjustment unit Assemble the parts a Assemble t...

Страница 32: ...lt installation positions c Attach the 3 axis adjustment unit to the setting plate with the M4 bolts x4 supplied When a projected image is smaller than 75 inches Mount the unit at the stamp When a projected image is larger than 75 inches Mount the unit at the stamp Smaller than 75 inches Larger than 75 inches ...

Страница 33: ...ate the projected image size S and the distance c from the projected image to the wall plate s Projection Distance Table p 17 We recommend marking the following positions These willbe the basis for determining the mounting position of the wall plate Height of the distance c between the top edge of the projected image and the wall plate Center line of the projected image ...

Страница 34: ...or right from the center line of the projection surface up to a maximum of 45 mm Match the height checked in step 1 to the line on the template sheet Unit mm c Determine the positions for the mounting holes for the wall plate Secure the wall plate in at least three points If securing the wall plate in four places make the holes indicated by A or B in the figure If securing the wall plate in three ...

Страница 35: ...mercially available anchors into the holes Attach the nut and tap it with a hammer until the core touches the top of the an chor g Tighten the nut with a commercially available spanner to secure the wall plate to the wall Determine the projection distance and then pass the cables through the setting plate a Check the following values in the projection distance table Numbers on the arm slide scale ...

Страница 36: ...cables so that the ends of the cables that connect to the projector are on the projector s interface side Warning Do not hang the rest of the cable over the setting plate They could fall and cause an accident c Route the cables connected to the Control Pad through the setting plate Routethecables connectedtotheTouchUnitthroughthesettingplate EB 1430Wionly Route the cable so that the end that conne...

Страница 37: ...he wall plate Insert the top of the hexagonal axis into the wall plate and then insert the M8 bolt into the slot at the bottom Caution Do not wire the Touch Unit connection cable into the wall EB 1430Wi only If it is wired into the wall it cannot be connected to the Touch Unit Take care not to trap the cables between the setting plate and wall plate ...

Страница 38: ...er and then lightly tighten the supplied M6 bolt x1 with the spanner d Adjust the vertical slide with the open ended spanner and align it with the standard position Tightening the hexagonal axis at the top raises the setting plate and loosening the axis lowers it Tightening the M8 bolt at the bottom lowers the setting plate and loosening the bolt raises it ...

Страница 39: ...t x1 to fix the setting plate in position Securing the projector to the setting plate a Loosen the screws x2 and remove the cable cover from the projector b Insert the slide plate into the setting plate from the interface side of the projector ...

Страница 40: ...Installation Guide 39 c Align the 3 axis adjustment unit with the slide plate s standard position indicates the screw holes for the bolts d Tighten the supplied M4 bolts x2 ...

Страница 41: ...1 Audio Out and then Computer Adjusting the Projected Image Follow the procedures below to adjust the projected image a Adjusting the Projection Position s p 40 b Fine tuning the Focus s p 46 c Calibrating the Pen s p 47 Adjusting the Projection Position Donotmakeadjustmentsusingtheprojector sKeystonefunction Doingsomayresultinareductioninimagequality When setting up multiple projectors using the ...

Страница 42: ...r b Change the aspect ratio of the projected image only when necessary Project images from a connected device and then press the Aspect button on the remote control Each time you press the button the aspect name is displayed on the screen and the aspect ratio changes Using the Remote Control c For details on connecting to devices and projecting images see the Quick Start Guide The aspect ratio doe...

Страница 43: ...the Remote Control Press the Help and then press Using the Control Panel Press the Help and then press the Wide button The guidance screen is displayed d Open the air filter cover and then adjust the focus using the focus lever After you finish making adjustments close the air filter cover ...

Страница 44: ...adjustment dial c Repeat steps 5 to 10 as necessary After you finish making adjustments tighten the M4 screw that you loosened f Loosen the M4 screws x2 with the hexagon wrench and then adjust the horizontal rotation with the adjustment dial After you finish making adjustments tighten the M4 screws that you loosened ...

Страница 45: ...just the vertical tilt with the adjustment dial After you finish making adjustments tighten the M4 screw that you loosened h Loosen the M4 bolts x2 with the hexagon wrench and then adjust the horizontal slide After you finish making adjustments tighten the M4 bolts that you loosened ...

Страница 46: ...agonal axis at the top or the bottom Tightening the hexagonal axis at the top raises the setting plate and loosening the axis lowers it Tightening the M8 bolt at the bottom lowers the setting plate and loosening the bolt raises it After you finish making adjustments tighten the M6 bolt that you loosened k Make sure that all of the bolts that you loosened in steps 5 to 10 are securely tightened War...

Страница 47: ...ove the guidance screen Fine tuning the Focus a Turn on the projector and then press the Menu button Using the Remote Control Using the Control Panel b Select Pattern from Settings c Select Test Pattern When displaying on a 4 3 screen set Pattern Type to Pattern 5 and then select Pattern Display ...

Страница 48: ...trolpaneltoremovetheTestPattern Calibrating the pen Check that adjusting the projected image is complete before you start calibrating the interactive pen s Adjusting the Projected Image p 40 There are two methods available for calibrating the pen Auto Calibration and Manual Calibration When calibrating the pen for the first time after installing the projector perform Manual Calibration for optimum...

Страница 49: ...ion Guide 48 b Select Easy Interactive Function from Extended c Select Manual Calibration d Check that the screen is in focus and then select Yes A green dot is displayed at the top left of the projection screen ...

Страница 50: ...lation Guide 49 e Touch the center of the dot with the pen tip button The dot disappears and moves to the next position c Make sure you touch the center of the dot Otherwise it may not be positioned correctly ...

Страница 51: ...bottom right When all of the dots disappear calibration is complete c Check thattherearenoobstacles between the interactivepen and the EasyInteractive Function receiver If you touch the wrong position press the Esc button on the remote control to return to the previous dot To cancel calibration hold down the Esc button for two seconds ...

Страница 52: ...you may need to cut notches in the wall plate covers to route the cables Perform deburring on the cut sides to smooth off any sharp edges Make sure you do not damage the cables when routing them through the cut holes Also make sure you operate the cutter safely b Place the end cap with the concave portion facing up ...

Страница 53: ...tor s User s Guide for instructions on maintenance and repairs Warning Neverloosentheboltsandnutsafterinstallation Confirmthatthescrewshavenotbecomelooseonaregular basis If you find any loose screws tighten them firmly Otherwise the product may fall and cause personal injury or property damage Do not hang on this product or hang a heavy object on this product If this product falls it could cause d...

Страница 54: ...e 53 Installing the Control Pad Installation Procedure See the following for the Control Pad installation location s Control Pad installation location p 5 s When installing the Control Pad p 19 a Remove the cable cover ...

Страница 55: ...e so that the screws are not angled on the installation side Make sure the Control Pad is firmly secured Do not secure the Control Pad with double sided sticky tape or magnets c We recommend checking the Control Pad operations before securing it with the screws When installing the Control Pad on a table attach the rubber feet x4 supplied to the base of the Control Pad to prevent it from slipping ...

Страница 56: ...rojector connect the optional Remote control cable set ELPKC28 to the projector s Remote port and the Control Pad s Remote port When supplying power from the projector do not install batteries in the Control Pad d Connect the Control Pad ports to the cables connected to the projector as necessary See the following for the cable connection methods s Necessary cables when installing the Control Pad ...

Страница 57: ... use commercially available M4 screws x3 Attach the Touch Unit to the same level surface as the screen surface Attach the Touch Unit to a flat smooth unwarped surface If there is unevenness on the screen surface of more than 5 mm the position of your fingers is not detected and touch operations may not be performed correctly Installation Procedure Install the Touch Unit and then connect to the pro...

Страница 58: ... Select Touch Unit Setup d Select Installation Pattern The installation pattern is displayed on the projected image e Loosen the screw at the bottom of the dial cover using acommercially available No 2 cross head screwdriver ...

Страница 59: ...tforlaserdiffusionafterinstallingtheTouchUnit h Determine the installation position for the Touch Unit We recommend marking the following installation positions to make installation easier Center line of installation pattern Align with the center line of the Touch Unit 25mmfromthetopedgeoftheprojectedimage AlignwiththebottomedgeoftheTouchUnit Unit mm ...

Страница 60: ...en secure Caution When installing the Touch Unit on a magnetic surface be careful not to trap your fingers or any other part of your body between the magnets and the installation surface Powerful magnets are used which can cause injury if you trap your fingers Non magnetic screens Attach spacers and secure with M4 screws x3 ...

Страница 61: ...n j Connect the Touch Unit connection cable that is connected to the projector to the TCH port on the Touch Unit Angle Adjustment Adjust the angle of the laser light coming from the Touch Unit so that the Touch Unit can detect the position of your fingers ...

Страница 62: ...c Before adjusting the angle make sure that interactive pen calibration is complete s Calibrating the pen p 47 a Select Easy Interactive Function in Extended from the projector s Configuration menu b Select Touch Unit Setup ...

Страница 63: ...cator is lit blue Warning Do not look into the projector s projection window or the Touch Unit s laser diffusion ports This could cause damage to eyesight due to the powerful laser light emitted c WhenPowerissettoOn thenexttimetheprojectoristurnedon theTouchUnitautomatically turns on ...

Страница 64: ...Installation Guide 63 d Select Angle Adjustment The following screen is displayed ...

Страница 65: ...ustment dials on the Touch Unit counterclockwise until you hear a clicking sound When you hear a clicking sound coming from the adjustment dial stop turning and then press the button on the remote control The following screen is displayed ...

Страница 66: ...eft and right of the projection screen attach the markers to the projection screen Magnetic screens Place the bottom of the markers onto the screen Non magnetic screens Use the supplied tape to secure the markers Attach the tape so that the either end of marker does not come loose off the screen Correct Incorrect c Do not place anything other than the markers near the projected image during angle ...

Страница 67: ...lly up towards the center of the projected image When you turn the adjustment dial counterclockwise the pointer moves diagonally down away from the center of the projected image When the pointers overlap in the correct position the colors become solid c If you hear a clicking sound from the dial the pointer does not move any further When turning the dials make sure shadows from your arm or body do...

Страница 68: ...rs press the button on the remote control The following screen is displayed i Place the markers at the top marker positions 1 When angle adjustment is performed correctly the upper pointers become solid colors If the upper pointers do not become solid colors start again from step 4 ...

Страница 69: ...le adjustment is performed correctly the bottom pointers become solid colors If the bottom pointers do not become solid colors start again from step 4 k When you have finished checking remove the markers and then press the button on the remote control The following screen is displayed ...

Страница 70: ...to step 14 If some dots remain as shown in the following figure check the following points Removeanyobstaclesthatarearoundtheprojectionscreen Afterremovinganyobstacles pressthe or button on the remote control and then perform step 12 again If the dots still remain after removing obstacles turn the adjustment dials about a quarter turn counterclockwise Next press the or button on the remote control...

Страница 71: ...headhesive strength of the tape Do not stick tape or place anything on the infrared deflectors The infrared deflector will not function correctly Afterplacingtheinfrared deflectors pressthe or buttonontheremotecontrol andthen perform step 12 again If the dots do not disappear even after attaching the infrared deflectors turn the adjustment dials about a quarter turn counterclockwise Next press the...

Страница 72: ...ouch Unit moves out of position use the labels to reinstall it at the correct position p Attach the dial cover and then tighten the screw at the bottom of the dial cover Touch Calibration Perform touch calibration so that the projector can recognize touch operations precisely a Press the projector s Menu button Using the Remote Control Using the Control Panel ...

Страница 73: ...Installation Guide 72 b Select Easy Interactive Function from Extended c Select Touch Unit Setup d Select Touch Calibration The focus adjustment message is displayed ...

Страница 74: ...top left of the projection screen f Touch the center of the dot with your finger When the dot disappears and moves to the next position remove your finger c Make sure you touch the center of the dot Otherwise it may not be positioned correctly Do not touch with anything else except the tip of your finger ...

Страница 75: ...c If you touch the wrong position press the Esc button on the remote control or control panel This returns you to the previous dot You cannot go back by two dots To cancel touch calibration hold down the Esc button for two seconds It may take several seconds after all of the dots have disappeared until touch calibration is complete ...

Страница 76: ... responsible for any repair costs incurred Saving settings to the USB flash drive c Use a FAT format USB flash drive The batch setup function cannot be used by USB flash drives that incorporate security functions Use a USB flash drive that does not incorporate security functions The batch setup function cannot be used by USB card readers or USB hard disks a Disconnect the power cord from the proje...

Страница 77: ...ector turns off and only the power indicator is lit blue When the power turns off remove the USB flash drive Reflecting saved settings to other projectors a Disconnect the power cord from the projector and check that all of the projector s indicators have turned off b Connect the USB flash drive containing the saved batch setup file to the projector s USB A port c Do not connect a USB flash drive ...

Страница 78: ...ettings are being written If the power cord is disconnected the projector may not start correctly Do not disconnect the USB flash drive from the projector while the settings are being written If the USB flash drive is disconnected the projector may not start correctly When writing completes normally the projector turns off and only the power indicator is lit blue When the power turns off remove th...

Страница 79: ...ator and the temperature indicator flashing orange quickly Writingthesettingsmayhavefailedandanerrormayhaveoccurred in the projector s firmware Stop using the projector remove the power plug from the electrical outlet and contact your local dealer or the nearestaddress providedinthe Epson ProjectorContact List ...

Страница 80: ...e control cable set ELPKC28 you can connect the SYNC ports on the projectors in series After connecting the ports set Extended Easy Interactive Function Advanced Sync of Projectors to Wired from the Configuration menu For details see the projector s User s Guide on the Document CD ROM c The SYNC port has an IN and OUT socket When you connect one end of the cable to an IN socket connect the other e...

Страница 81: ...ecurity cable installation points on the projector and the setting plate See the user s guide supplied with the wire lock for locking instructions The security slot on this product is compatible with the Microsaver Security System manufactured by Kensington See the following for more details on the Microsaver Security System http www kensington com Projector Touch Unit EB 1430Wi only ...

Страница 82: ...General Notice OS X is a trademark of Apple Inc MicrosoftandWindowsaretrademarksorregisteredtrademarksofMicrosoftCorporationintheUnitedStates and or other countries SEIKO EPSON CORPORATION 2014 All rights reserved ...

Отзывы: