background image

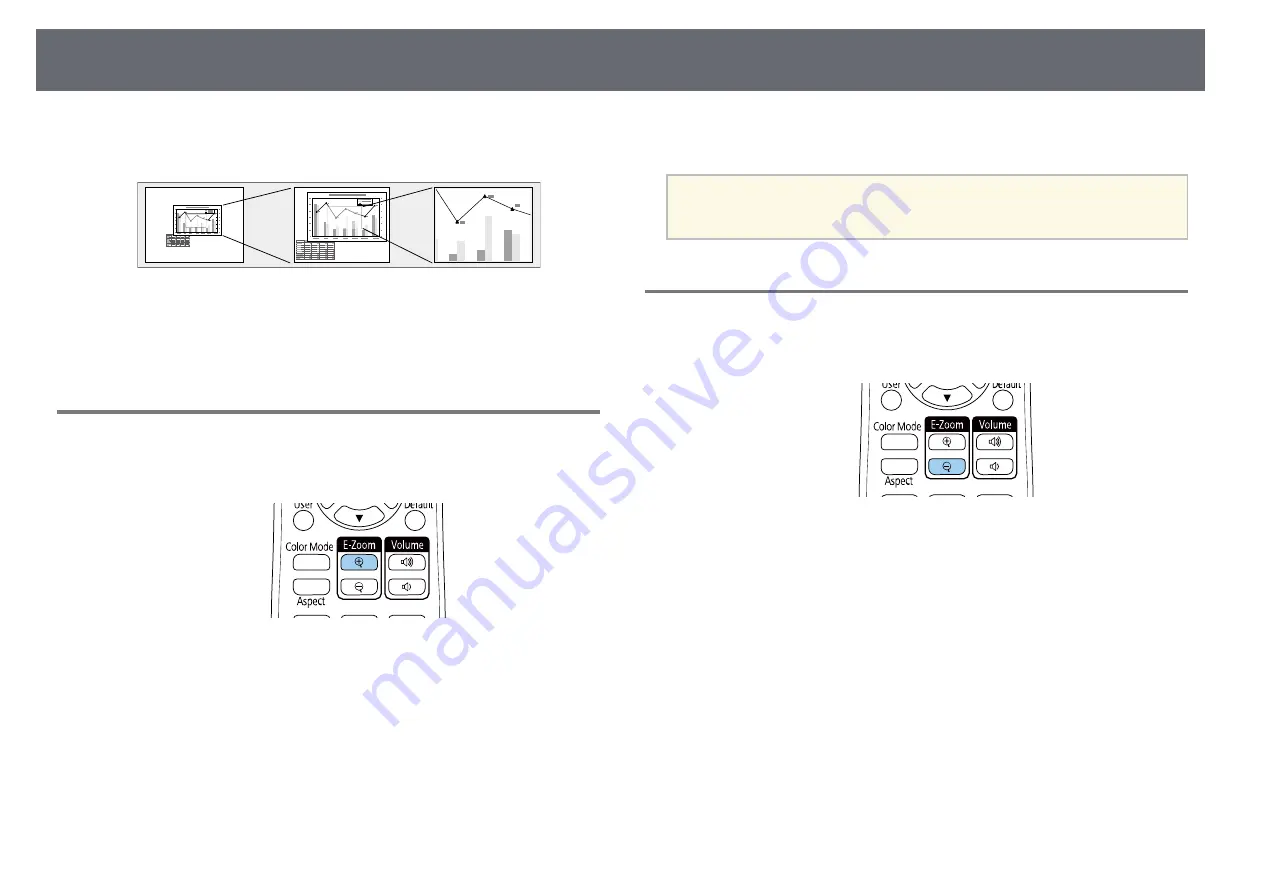
Zooming In/Zooming Out of Images (E-Zoom)

75

You can zoom in or zoom out of the projected image using the [E-Zoom]

button on the remote control.

g

g

Related Links

• "Zooming Into Images"

p.75

• "Zooming Out of Images"

p.75

Zooming Into Images

a

Press the [E-Zoom] + button on the remote control.

The projected image is enlarged focusing around the center of the

image. You can enlarge the image between one to four times in 25

incremental steps.

b

Use the following buttons on the remote control to adjust the zoomed

image:
• Press the [E-Zoom] + button repeatedly to zoom into the image.
• To pan around the zoomed image, use the arrow buttons.
• To zoom out of the image, press the [E-Zoom] – button.

• To return to the original image size, press the [Default] button.

a

When projecting images from an Epson document camera, you can

enlarge the image from one to eight times its size in 57 incremental

steps using the [E-Zoom] + button on the document camera.

Zooming Out of Images

a

Press the [E-Zoom] - button on the remote control.

The projected image is reduced. You can reduce the image between

100% to 50% in incremental steps.

b

Use the following buttons on the remote control to adjust the zoomed-

out image:
• Press the [E-Zoom] - button repeatedly to zoom out of the projected

image.

• To move the zoomed-out image in the projection area, use the arrow

buttons.

• To zoom into the image, press the [E-Zoom] + button.
• To return to the original image size, press the [Default] button.

Содержание EB-118

Страница 1: ...User s Guide ...

Страница 2: ...ing to a Computer for HDMI Video and Audio 29 Connecting to Video Sources 29 Connecting to an HDMI Video Source 30 Connecting to a Composite Video Source 30 Connecting to External USB Devices 31 USB Device Projection 31 Connecting to a USB Device 31 Disconnecting a USB Device 32 Connecting to a Document Camera 32 Connecting to External Devices 32 Connecting to a VGA Monitor 32 Connecting to Extern...

Страница 3: ...ly 74 Zooming In Zooming Out of Images E Zoom 75 Zooming Into Images 75 Zooming Out of Images 75 Saving a User s Logo Image 77 Saving a User Pattern 78 Color Difference Correction when Projecting from Multiple Projectors 79 Setting the Projector ID 79 Selecting the Projector You want to Operate 79 Matching Multiple Projector Display Quality 80 Projector Security Features 82 Password Security Types...

Страница 4: ...nected Tools Window 122 Setting Projector Event Schedules 124 Adjusting the Menu Settings 127 Using the Projector s Menus 128 Using the Displayed Keyboard 129 Available Text Using the Displayed Keyboard 129 Image Quality Settings Image Menu 130 Input Signal Settings Signal Menu 131 Projector Feature Settings Settings Menu 132 Projector Setup Settings Extended Menu 134 Projector Network Settings Ne...

Страница 5: ...oblems 178 Solutions to Problems with the Remote Control 178 Solutions to Password Problems 179 Solution When The Battery that Saves Your Clock Settings is Running Low Message Appears 179 Solving Network Problems 180 Solutions When Wireless Authentication Fails 180 Solutions When You Cannot Access the Projector Through the Web 180 Solutions When Network Alert E Mails are not Received 180 Solutions...

Страница 6: ...Contents 6 Copyright Notice 210 Copyright Attribution 210 ...

Страница 7: ... in personal injury or physical damage due to incorrect handling General Information Notations Attention This label indicates procedures that may result in damage or injury if sufficient care is not taken This label indicates additional information that may be useful to know Button name Indicates the name of the buttons on the remote control or the projector Example Esc button Menu Setting name In...

Страница 8: ... window and then click Search Hits are displayed as a list Click one of the displayed hits to jump to that page Jumping Directly from Bookmarks Click a title to jump to that page Click or to view the lower level titles in that section To return to the previous page perform the following operation on your keyboard Windows Hold down Alt and then press Mac OS Hold down the command key and then press ...

Страница 9: ...Getting the Latest Version of the Documents 9 You can get the latest version of the manuals and specifications on the Epson Web site Visit epson sn and enter your projector s name ...

Страница 10: ...ion Full HD WXGA WXGA Full HD WXGA WXGA Full HD WXGA 1920 1080 1280 800 1280 800 1920 1080 1280 800 1280 800 1920 1080 1280 800 Wired LAN Wireless LAN built in Wireless LAN optional Screen Mirroring HDMI1 HDMI2 ports HDMI port Computer1 Computer2 ports Computer port Video port USB A port USB B port L Audio R ports Audio 1 Audio 2 ports Mic port Monitor Out port Audio Out port RS 232C port Lens cov...

Страница 11: ... USB cable User s Logo Protection Network Protection Schedule Protection Screen Mirroring Protection Epson iProjection Epson Projector Management Epson Web Control Mail Notification SNMP Secure HTTP HTTPS ESC VP21 Commands PJLink Crestron Connected EB 972 EB 118 EB X49 EB E20 EB X51 EB E10 EB X06 EB E01 EB X500 EB E500 The following table lists the functions supported by each projector model Suppo...

Страница 12: ...1024 768 Wired LAN Wireless LAN built in Wireless LAN optional Screen Mirroring HDMI1 HDMI2 ports HDMI port Computer1 Computer2 ports Computer port Video port USB A port USB B port L Audio R ports Audio 1 Audio 2 ports Mic port Monitor Out port Audio Out port RS 232C port Lens cover Horizontal keystone slider Zoom ring Document camera optional Beep Power on Power off Date Time setting Schedule Set...

Страница 13: ...vels Power Consumption 2 levels Batch Setup USB flash drive Batch Setup USB cable User s Logo Protection Network Protection Schedule Protection Screen Mirroring Protection Epson iProjection Epson Projector Management Epson Web Control Mail Notification SNMP Secure HTTP HTTPS ESC VP21 Commands PJLink Crestron Connected ...

Страница 14: ...Introduction to Your Projector Refer to these sections to learn more about your projector s features and part names g g Related Links Projector Features p 15 Projector Parts and Functions p 17 ...

Страница 15: ...ays displays a rectangular screen Auto V Keystone Horizontal keystone slider allows you to quickly correct horizontal distortion in the projected image g g Related Links Auto V Keystone p 50 Projector Setup Settings Extended Menu p 134 List of Functions p 10 Turning On the Projector p 39 Correcting the Image Shape with the Horizontal Keystone Slider p 50 Easy Wireless Projection Screen Mirroring t...

Страница 16: ...re or Google Play a Any fees incurred when communicating with the App Store or Google Play are the responsibility of the customer Epson iProjection Chromebook to connect your projector and Chromebook device wirelessly using the app available on the Chrome Web Store a Any fees incurred when communicating with the Chrome Web Store are the responsibility of the customer g g Related Links List of Func...

Страница 17: ...While projecting do not put your face or hands near the air exhaust vent and do not place objects that may become warped or damaged by heat near the vent Hot air from the air exhaust vent could cause burns warping or accidents to occur B A V Mute slide lever Slide the knob to open and close the lens cover C Foot release lever Press the foot release lever to extend and retract the front adjustable ...

Страница 18: ... RS 232C port Connects an RS 232C cable to control the projector from a computer You do not need to use this port normally C Video port Inputs composite video signals from video sources D Mic port Inputs audio from the microphone E L Audio R ports Inputs audio from equipment connected to the Video port F Monitor Out port Outputs analog RGB signals input from the Computer1 port to an external monit...

Страница 19: ...ra Connects the wireless LAN module Q Wireless LAN module fixing screw Secures the wireless LAN module cover R Remote receiver Receives signals from the remote control g g Related Links List of Functions p 10 Projector Parts Base Name Function A Ceiling mount fixing points three points Attach the optional ceiling mount here when suspending the projector from a ceiling B Security cable attachment p...

Страница 20: ...500 Name Function A Source Search button Switches to the next input source B Enter button Enters the current selection and moves to the next level while displaying the projector s menu or help Optimizes Tracking Sync and Position in the projector s Signal menu while projecting an analog RGB signal from the Computer port C Keystone adjustment buttons and arrow buttons Displays the Keystone screen a...

Страница 21: ... while displaying the projector s menu or help F Menu button Displays and closes the projector s menu G Home button Displays and closes the Home screen H Power button Turns the projector on or off I Indicators Indicates the projector s status g g Related Links Input Signal Settings Signal Menu p 131 Home Screen p 40 Projector Indicator Status p 169 Correcting the Image Shape with the Keystone Butt...

Страница 22: ...r off temporarily O Split button Projects two images from different image sources simultaneously by splitting the projected screen P Home button Displays and closes the Home screen Q Freeze button Pauses or resumes images R Volume up down buttons Adjusts the speaker volume S Default button Returns the selected setting to its default value Name Function T Esc button Stops the current function Moves...

Страница 23: ...he instructions in these sections to set up your projector g g Related Links Projector Placement p 24 Projector Connections p 27 Installing Batteries in the Remote Control p 35 Remote Control Operation p 36 Opening the Lens Cover p 37 ...

Страница 24: ... use lubricants oils or similar substances on the projector the projector case may crack causing it to fall from its ceiling mount This could cause serious injury to anyone under the ceiling mount and could damage the projector Failure to install the ceiling mount and projector may cause the projector to fall After installing the specific Epson mount that supports your projector make sure you secu...

Страница 25: ...n could cause the projector to fall It could also cause the projector to malfunction Attention Do not operate the projector on its side This may cause the projector to malfunction If you are using the projector at altitudes above 1 500 m set the High Altitude Mode setting to On in the projector s menu to ensure the projector s internal temperature is regulated properly s Extended Operation High Al...

Страница 26: ...actor aspect ratio and other settings See the Appendix for details about how far to place the projector from the screen based on the size of the projected image a When correcting keystone distortion your image is slightly smaller g g Related Links Screen Size and Projection Distance p 186 ...

Страница 27: ...uter for VGA Video and Audio p 27 Connecting to a Computer for USB Video and Audio p 28 Connecting to a Computer for HDMI Video and Audio p 29 Connecting to a Computer for VGA Video and Audio You can connect the projector to your computer using a VGA computer cable You can play sound through the projector s speaker system by connecting a commercially available 3 5 mm stereo mini jack audio cable a...

Страница 28: ...ble USB port on your computer c Turn on the projector and your computer d Do one of the following to install the Epson USB Display software a You only need to install this software the first time you connect the projector to the computer Windows Select Run EMP_UDSE EXE in the dialog box that is displayed to install the Epson USB Display software Mac The Epson USB Display setup folder is displayed ...

Страница 29: ... an HDMI port you need an adapter that allows you to connect to the projector s HDMI port Contact Apple for compatible adapter options Older Mac computers 2009 and earlier may not support audio through the HDMI port a Connect the HDMI cable to your computer s HDMI output port b Connect the other end to the projector s HDMI port a If you have problems hearing audio through the HDMI connection conne...

Страница 30: ... HDMI output port b Connect the other end to the projector s HDMI port a If you have problems hearing audio through the HDMI connection connect one end of a commercially available 3 5 mm stereo mini jack audio cable to the projector s Audio port and the other end to your video source s audio out port Select the audio input port you connected to in the projector s Extended menu s Extended A V Setti...

Страница 31: ...rive Digital camera or smartphone USB hard drive a Digital cameras or smartphones must be USB mounted devices not TWAIN compliant devices and must be USB Mass Storage Class compliant USB hard drives must meet these requirements USB Mass Storage Class compliant not all USB Mass Storage Class devices are supported Formatted in FAT16 32 Self powered by their own AC power supplies bus powered hard dri...

Страница 32: ...r Epson document camera model See the document camera manual for details g g Related Links List of Functions p 10 Connecting to External Devices Follow the instructions in these sections to connect external devices to the projector g g Related Links Connecting to a VGA Monitor p 32 Connecting to External Speakers p 33 Connecting a Microphone p 34 Connecting to a VGA Monitor If you connected the pr...

Страница 33: ... from the external speakers when the projector is turned off select Always On as the A V Output setting in the projector s Extended menu s Extended A V Settings A V Output You can also connect the projector to an amplifier with speakers The projector s built in speaker system is disabled when you connect external speakers a Make sure your computer or video source is connected to the projector with...

Страница 34: ...ys On as the A V Output setting in the projector s Extended menu s Extended A V Settings A V Output Adjust Mic Input Level if the microphone audio is difficult to hear or if it is too loud resulting in a crackling sound s Settings Mic Input Level a Connect the microphone cable to the projector s Mic port b Turn on the microphone if necessary g g Related Links Projector Setup Settings Extended Menu...

Страница 35: ...old batteries if necessary a Dispose of used batteries according to local regulations c Insert the batteries with the and ends facing as shown Warning Check the positions of the and marks inside the battery holder to ensure the batteries are inserted the correct way If the batteries are not used correctly they could explode or leak causing a fire injury or damage to the product d Replace the batte...

Страница 36: ...mote control at the projector s receivers within the distance and angles listed here EB E20 EB E10 EB E01 EB E500 a Avoid using the remote control in conditions with bright fluorescent lights or in direct sunlight or the projector may not respond to commands If you are not going to use the remote control for a long time remove the batteries ...

Страница 37: ...ver until it clicks b To cover the lens or temporarily turn off the projected image and sound close the lens cover a The projector s power automatically turns off 30 minutes after A V Mute is enabled You can disable this feature s ECO Lens Cover Timer g g Related Links List of Functions p 10 ...

Страница 38: ...ate and Time p 43 Selecting the Language for the Projector Menus p 45 Projection Modes p 46 Displaying a Test Pattern p 48 Adjusting the Image Height p 49 Image Shape p 50 Resizing the Image with the Zoom Ring p 54 Focusing the Image Using the Focus Ring p 55 Selecting an Image Source p 56 Image Aspect Ratio p 58 Adjusting Image Quality Color Mode p 61 Controlling the Volume with the Volume Button...

Страница 39: ...tus indicator flashes blue as the projector warms up Once the projector is warmed up the status indicator stops flashing and turns blue c Open the projector s lens cover Try the following if you do not see a projected image Verify the lens cover is open all the way Turn on the connected computer or video device Change the screen output from the computer when using a laptop computer Insert a DVD or...

Страница 40: ...moved When cleaning the projector or replacing the lamp yourself be very careful not to allow such pieces of glass to get into the eyes or mouth If the lamp breaks ventilate the area immediately and contact a doctor if any fragments of broken glass are inhaled or get into the eyes or mouth a When the Direct Power On setting is set to On in the projector s Extended menu the projector turns on as so...

Страница 41: ...y by splitting the projected screen G Corrects the shape of an image that is an uneven rectangle a The Home screen disappears after 10 minutes of inactivity g g Related Links Image Shape p 50 Projector Setup Settings Extended Menu p 134 List of Functions p 10 Using the Projector s Menus p 128 Using the Projector Help Displays p 172 Projecting Two Images Simultaneously p 65 ...

Страница 42: ...ontrol panel or remote control The projector displays a shutdown confirmation screen b Press the power button again To leave it on press any other button The projected image disappears the projector beeps twice and the status indicator turns off a With Epson s Instant Off technology there is no cool down period so you can pack up the projector for transport right away c To transport or store the p...

Страница 43: ...he Date Time setting and press Enter You see this screen g Select Date press Enter and use the displayed keyboard to enter today s date h Select Time press Enter and use the displayed keyboard to enter the current time i Select Time Difference UTC press Enter and set the time difference from Coordinated Universal Time j When you are finished select Set and press Enter k To activate daylight saving...

Страница 44: ...me automatically through an Internet time server select the Internet Time setting and press Enter Then select settings n When you are finished select Set and press Enter o Press Menu or Esc to exit the menus g g Related Links List of Functions p 10 ...

Страница 45: ...er language you can change the Language setting a Turn on the projector b Press the Menu button on the control panel or remote control c Select the Extended menu and press Enter d Select the Language setting and press Enter e Select the language you want to use and press Enter f Press Menu or Esc to exit the menus ...

Страница 46: ...e Using the Menus p 46 Projector Setup and Installation Options p 25 Changing the Projection Mode Using the Remote Control You can change the projection mode to flip the image over top to bottom a Turn on the projector and display an image b Hold down the A V Mute button on the remote control for 5 seconds The image disappears briefly and reappears flipped top to bottom c To change projection back...

Страница 47: ...Projection Modes 47 e Select a projection mode and press Enter f Press Menu or Esc to exit the menus ...

Страница 48: ...test pattern is being displayed or to fine tune the projected image project an image from the connected device a Turn on the projector b Press the Menu button on the control panel or remote control c Select the Settings menu and press Enter d Select Pattern Test Pattern and press Enter The test pattern is displayed e Adjust the image as necessary f Press Esc to clear the test pattern ...

Страница 49: ...ll angle a Turn on the projector and display an image b To adjust the front foot pull up on the foot release lever and lift the front of the projector The foot extends from the projector You can adjust the position up to approximately 12 degrees c Release the lever to lock the foot d If the image is tilted rotate the rear feet to adjust their height A Extend the rear foot B Retract the rear foot I...

Страница 50: ... Auto V Keystone function set Auto V Keystone to Off in the projector s menu s Settings Keystone H V Keystone Auto V Keystone g g Related Links Projection Modes p 46 Projector Setup Settings Extended Menu p 134 Projector Feature Settings Settings Menu p 132 List of Functions p 10 Correcting the Image Shape with the Horizontal Keystone Slider You can use the projector s horizontal keystone slider t...

Страница 51: ...right left up or down a Turn on the projector and display an image b Press one of the keystone adjustment buttons on the control panel to display the Keystone adjustment screen c Press a keystone button to adjust the image shape a If the projector is installed out of your reach you can also correct the shape of the image using the remote control s Settings Keystone H V Keystone g g Related Links P...

Страница 52: ...u button on the control panel or remote control c Select the Settings menu and press Enter d Select Keystone and press Enter e Select Quick Corner and press Enter Then press Enter again if necessary You see the area selection screen f Use the arrow buttons to select the corner of the image you want to adjust Then press Enter g Press the arrow buttons to adjust the image shape as necessary To retur...

Страница 53: ...eset Quick Corner Select Switch to H V Keystone to switch the image shape correction method to H V Keystone h Repeat steps 6 and 7 as needed to adjust any remaining corners i When you are finished press Esc The Keystone setting is now set to Quick Corner in the projector s Settings menu The next time you press the keystone adjustment buttons on the control panel the area selection screen is displa...

Страница 54: ...u can resize the image using the projector s zoom ring Available only for models that have the zoom ring a Turn on the projector and display an image b Rotate the zoom ring to enlarge or reduce the image g g Related Links List of Functions p 10 ...

Страница 55: ...Focusing the Image Using the Focus Ring 55 You can correct the focus using the focus ring a Turn on the projector and display an image b Rotate the focus ring to adjust the focus ...

Страница 56: ...VD or other video media and press play c Do one of the following Press the Source Search button on the control panel or remote control until you see the image from the source you want a This screen is displayed when no image signal is detected Check the cable connections between the projector and image source Press the button for the source you want on the remote control If there is more than one ...

Страница 57: ...Selecting an Image Source 57 Then select the source you want to use from the screen displayed g g Related Links List of Functions p 10 ...

Страница 58: ... black bars set Resolution to Wide or Normal in the projector s Signal menu according to the computer s resolution g g Related Links Input Signal Settings Signal Menu p 131 Available Image Aspect Ratios You can select the following image aspect ratios depending on the input signal from your image source a The available aspect ratio setting varies depending on the input signal Note that using the a...

Страница 59: ...earance with Each Aspect Mode Black bands and cropped images may project in certain aspect ratios depending on the aspect ratio and resolution of your input signal See the following table to confirm the position of black bands and cropped images a The image for Native varies depending on the input signal For projectors with a resolution of Full HD 1920 1080 or WXGA 1280 800 Aspect mode Aspect rati...

Страница 60: ...Image Aspect Ratio 60 g g Related Links List of Functions p 10 ...

Страница 61: ...through all of the available color modes for your input signal press the Color Mode button repeatedly a You can also set the Color Mode setting in the projector s Image menu g g Related Links Image Quality Settings Image Menu p 130 Available Color Modes You can set the projector to use these color modes depending on the input source you are using Color mode Description Dynamic This is the brightes...

Страница 62: ...age menu and press Enter d Select Auto Iris and press Enter e Choose one of the following options and press Enter Normal for standard brightness adjustment High Speed to adjust brightness as soon as the scene changes f Press Menu or Esc to exit the menus ...

Страница 63: ... b To lower or raise the volume press the Volume buttons on the control panel or remote control as shown A volume gauge appears on the screen c To set the volume to a specific level for an input source select Volume in the projector s Settings menu Caution Do not start a presentation at a high volume setting Sudden loud noises may cause hearing loss Always lower the volume before powering off so t...

Страница 64: ...imultaneously p 65 Projecting a PC Free Presentation p 68 Shutting Off the Image and Sound Temporarily p 73 Stopping Video Action Temporarily p 74 Zooming In Zooming Out of Images E Zoom p 75 Saving a User s Logo Image p 77 Saving a User Pattern p 78 Color Difference Correction when Projecting from Multiple Projectors p 79 Projector Security Features p 82 ...

Страница 65: ...the projector menus a While using the split screen feature other projector features may not be available and some settings may be automatically applied to both images a Press the Split button on the remote control The currently selected input source moves to the left of the screen a You can perform the same operations from Split Screen in the projector s Settings menu b Press the Menu button You s...

Страница 66: ... select Screen Size press Enter select a size and press Enter To exit the menu press Menu a Depending on the video input signals the images may not appear at the same size even if you select Equal f To select the audio select Audio Source press Enter select an audio option and press Enter To exit the menu press Menu a Select Auto to hear audio from the largest screen or the left screen g To align ...

Страница 67: ...pness in the projector s Image menu you can apply them only to the image on the left Default adjustments are applied to the image on the right Adjustments that affect the entire projected image such as Color Mode and Color Temp are applied for both left and right images Even if you make adjustments for Noise Reduction and Deinterlacing in the projector s Image menu Noise Reduction is set to 0 and ...

Страница 68: ...ile systems try formatting the media for Windows instead File contents File type extension Details Image jpg Make sure the file is not CMYK format Progressive format Highly compressed Above 8192 8192 resolution bmp Make sure the file is not Above 1280 800 resolution gif Make sure the file is not Above 1280 800 resolution Animated Interlaced png Make sure the file is not Above 1280 800 resolution I...

Страница 69: ...ojector you can switch to the USB input source and start your slide show a You can change the PC Free operation options or add special effects by highlighting Option at the bottom of the screen and pressing Enter a Press the USB button on the remote control The PC Free file list screen is displayed a If the Select Drive screen is displayed press the arrow buttons to select the drive and press Ente...

Страница 70: ... button You return to the file list screen f Turn off the USB device if necessary and then disconnect the device from the projector g g Related Links PC Free Display Options p 71 Connecting to a USB Device p 31 Starting a PC Free Movie Presentation After connecting a USB device to the projector you can switch to the USB input source and start your movie a You can change the PC Free operation optio...

Страница 71: ...You return to the file list screen e Turn off the USB device if necessary and then disconnect the device from the projector g g Related Links PC Free Display Options p 71 Connecting to a USB Device p 31 PC Free Display Options You can select these display options when using PC Free To access this screen highlight Option at the bottom of the PC Free file list screen and press Enter Setting Options ...

Страница 72: ...on 72 Setting Options Description Effect No No effect Wipe Transitions between images using a wipe effect Dissolve Transitions between images using a dissolve effect Random Transitions between images using a random variety of effects ...

Страница 73: ...the A V Mute setting in the projector s Extended menu s Extended Display A V Mute a Press the A V Mute button on the remote control to temporarily stop projection and mute any sound b To turn the image and sound back on press A V Mute again a You can also stop projection using the A V Mute slide lever on the projector The projector s power automatically turns off 30 minutes after A V Mute is enabl...

Страница 74: ...sentation and keep the current image on the screen Any sound or video action continues to run however so you cannot resume projection at the point that you stopped it a Press the Freeze button on the remote control to stop the video action b To restart the video action in progress press Freeze again ...

Страница 75: ...ow buttons To zoom out of the image press the E Zoom button To return to the original image size press the Default button a When projecting images from an Epson document camera you can enlarge the image from one to eight times its size in 57 incremental steps using the E Zoom button on the document camera Zooming Out of Images a Press the E Zoom button on the remote control The projected image is ...

Страница 76: ...Zooming In Zooming Out of Images E Zoom 76 a When projecting image from an Epson document camera you can also reduce the image using the E Zoom button on the document camera ...

Страница 77: ...tting and press Enter You see a prompt asking if you want to use the displayed image as a user s logo a Adjustments such as Keystone E Zoom or Aspect are temporarily canceled when you select User s Logo d Select Yes and press Enter e Check the displayed image and then select Yes to save it as the user s logo The user s logo is overwritten and a completion message is displayed f Press Esc to exit t...

Страница 78: ...t to save as the User Pattern and then press the Menu button on the control panel or remote control b Select the Settings menu and press Enter c Select Pattern User Pattern and press Enter You see a prompt asking if you want to use the displayed image as a User Pattern a Adjustments such as Keystone E Zoom or Aspect are temporarily cancelled when you select User Pattern You cannot save digital ima...

Страница 79: ...tting the Projector ID p 79 Selecting the Projector You want to Operate p 79 Matching Multiple Projector Display Quality p 80 Setting the Projector ID To control multiple projectors from a remote control give each projector a unique ID a Press the Menu button select the Extended menu and press Enter b Select Projector ID and press Enter c Use the arrow buttons to select the identification number y...

Страница 80: ...ctor ID setting is saved in the remote control Even if the remote control batteries are removed to replace them and so on the saved ID setting is retained However if the batteries are left out of the remote control for an extended period the ID returns to its default setting 0 All When you use multiple remote controls at the same time you may not be able to operate projectors as intended due to in...

Страница 81: ...ltiple Projectors 81 e Press the Menu button select the Image menu and press Enter f Select settings as necessary g Select the remote control ID to match the next projector then repeat Image menu adjustments as necessary to match the projectors displays ...

Страница 82: ...password When plugging the power cord and turning on the projector at first time you must enter the correct password This also applies to Direct Power On and Auto Power On User s Logo Protection password prevents anyone from changing the custom screen displayed when the projector turns on when no signal is being input or when you use the A V Mute feature The custom screen discourages theft by iden...

Страница 83: ...g Make a note of the password and keep it in a safe place Selecting Password Security Types After setting a password you see this menu allowing you to select the password security types you want to use If you do not see this menu hold down the Freeze button on the remote control for 5 seconds until the menu appears To prevent unauthorized use of the projector select On as the Power On Protection s...

Страница 84: ...ly 5 minutes and the projector switches to standby mode If this happens disconnect the power plug from the electrical outlet reinsert it and turn the projector back on The projector displays the password entry screen again so that you can enter the correct password If you have forgotten the password make a note of the Request Code xxxxx number that appears on the screen and contact Epson for help ...

Страница 85: ... the following to unlock them Hold down the Enter button on the control panel for 7 seconds A message is displayed and the lock is released Select Off as the Control Panel Lock setting in the projector s Settings menu s Settings Lock Setting Control Panel Lock g g Related Links Projector Feature Settings Settings Menu p 132 Installing a Security Cable You can install the security cable on the proj...

Страница 86: ...Projector Security Features 86 a You can use a commercially available theft prevention wire lock See the documentation supplied with the wire lock for locking instructions ...

Страница 87: ...instructions in these sections to set up your projector for use on a network g g Related Links Wired Network Projection p 88 Wireless Network Projection p 91 Wireless Network Projection from a Mobile Device Screen Mirroring p 99 Secure HTTP p 104 ...

Страница 88: ...Guide Windows Mac for instructions g g Related Links Connecting to a Wired Network p 88 Selecting Wired Network Settings p 88 List of Functions p 10 Connecting to a Wired Network To connect the projector to a wired local area network LAN use a 100Base TX or 10Base T network cable To ensure proper data transmission use a Category 5 shielded cable or better a Connect one end of the network cable to ...

Страница 89: ...aracters long for accessing the projector over the Web User name is EPSONWEB default password is admin Moderator Password lets you enter a four digit number password for accessing the projector as a moderator using Epson iProjection No password is set by default Projector Keyword lets you turn on a security password to prevent access to the projector by anyone not in the room with it You must ente...

Страница 90: ...ngs to set the IPv6 setting to On and then set the Auto Configuration and Use Temporary Address settings as necessary a To highlight the numbers you want from the displayed keyboard press the arrow buttons on the remote control To select a highlighted number press Enter g To prevent the IP address from being displayed on the LAN standby screen and Home screen set the IP Address Display setting to ...

Страница 91: ...n iProjection from the App Store or Google Play Any fees incurred when communicating with the App Store or Google Play are the responsibility of the customer Epson iProjection Chromebook app allows you to project from Chromebook devices You can download Epson iProjection from the Chrome Web Store Any fees incurred when communicating with the Chrome Web Store are the responsibility of the customer ...

Страница 92: ...e screw g g Related Links List of Functions p 10 Selecting Wireless Network Settings Manually Before you can project from your wireless network you need to select network settings for the projector a Press the Menu button select the Network menu and press Enter b Select On as the Wireless LAN Power setting c Select Network Configuration and press Enter ...

Страница 93: ...t Projector Keyword lets you turn on a security password to prevent access to the projector by anyone not in the room with it You must enter a displayed randomized keyword from a computer using Epson iProjection to access the projector and share the current screen Display Keyword lets you select whether to display a projector keyword on the projected image when accessing the projector using Epson ...

Страница 94: ...nd Home screen set the SSID Display setting or the IP Address Display setting to Off k When you finish selecting settings select Complete and follow the on screen instructions to save your settings and exit the menus l Press the LAN button on the remote control The wireless network settings are complete when you see the correct IP address on the LAN standby screen When you have finished making wir...

Страница 95: ...atch the settings used on your network WPA2 PSK security WPA3 PSK security WPA2 WPA3 PSK security WPA3 EAP security WPA2 WPA3 EAP security Available only for the Advanced connection mode a Contact your network administrator for guidance on entering the correct information a If you want to set up the WPA3 EAP or WPA2 WPA3 EAP security make sure your digital certificate file is compatible with proje...

Страница 96: ...tions to connect a USB storage device to the projector s USB A port l Press Enter to display the certificate list m Select the certificate to import using the displayed list A message is displayed prompting you to enter the password for the certificate n Enter a password and press Enter The certificate is imported and a completion message appears o Select your EAP settings as necessary User name l...

Страница 97: ...n the screen and use it to connect a mobile device using the Epson iProjection iOS Android app a Make sure you have installed the latest version of Epson iProjection on your device You can download Epson iProjection for free from the App Store or Google Play Any fees incurred when communicating with the App Store or Google Play are the responsibility of the customer When using Epson iProjection in...

Страница 98: ...rojector and insert the USB key into the same port used for the wireless LAN module Models with the optional wireless LAN module installed You see a projected message that the network information update is complete f Remove the USB key If your projector needs the wireless LAN module reinsert the wireless LAN module into the projector Models with the optional wireless LAN module installed g Connect...

Страница 99: ...r device Do not change the projector s Screen Mirroring Settings during Screen Mirroring projection Doing so may cause the projector to disconnect and it may take a while to re connect s Network Screen Mirroring Settings Do not turn off the projector directly by the breaker during Screen Mirroring projection a Mobile devices with Android installed or Windows 8 1 or later installed mainly support M...

Страница 100: ...LAN system the projector is connecting to Adjust Image Quality lets you adjust the screen mirroring speed quality Select a small number to improve the quality and select large number to increase the speed Connection Mode lets you select the security type Available only for the Basic operation mode g For the Extended operation mode select the Extended setting Meeting Mode lets you select the type o...

Страница 101: ...g source You see the Screen Mirroring standby screen c On your mobile device use your Miracast function to search for the projector You see a list of available devices d Select the projector s Display Name from the list e If you see the PIN entry screen on your mobile device enter the PIN code displayed on the Screen Mirroring standby screen or at the bottom right of the projected image The projec...

Страница 102: ...time until the connection is established While connecting do not disconnect the projector s power cord Doing so may cause your device to freeze or malfunction Connecting Using Screen Mirroring in Windows 8 1 You can set up your computer for wireless projection from Charms in Windows 8 1 You can play audio through the projector s speaker system by connecting using Screen Mirroring a Select Screen M...

Страница 103: ... If you see the PIN entry screen on your computer enter the PIN code displayed on the Screen Mirroring standby screen or at the bottom right of the projected image The projector displays the image from your computer a It may take some time until the connection is established While connecting do not disconnect the projector s power cord Doing so may cause your device to freeze or malfunction ...

Страница 104: ...cate Using the Menus You can create your Web server certificate and import it using the projector menus and a USB flash drive a You can also register the digital certificates from your Web browser However be sure to register just once or the certificate may not install correctly a Make sure your digital certificate file is compatible with projector registration and directly placed on the USB stora...

Страница 105: ...HTTP Specification Description Format PKCS 12 Extension PFX P12 Encryption RSA Hashes MD5 SHA 1 SHA 256 SHA 384 SHA 512 Key length 512 1024 2048 4096 bit Common name Network host name Organization Optional Password Up to 64 alphanumeric characters required You can set a password using up to 64 alphanumeric characters However you need to use your Web browser to enter more than 32 characters ...

Страница 106: ...n Projector Management p 107 Controlling a Networked Projector Using a Web Browser p 108 Registering Digital Certificates from a Web Browser p 112 Setting Up Projector Network E Mail Alerts p 113 Setting Up Monitoring Using SNMP p 115 Using ESC VP21 Commands p 116 PJLink Support p 118 Crestron Connected Support p 119 Setting Projector Event Schedules p 124 ...

Страница 107: ... Windows only lets you monitor and control your projector through the network See the Epson Projector Management Operation Guide for instructions You can download Epson Projector Management from the following Web site epson sn g g Related Links List of Functions p 10 ...

Страница 108: ...y Mode to Communication On you can use a Web browser to select settings and control projection even if the projector is in standby mode when the power is off s ECO Standby Mode Standby Mode a Make sure the projector is turned on b Make sure your computer or device is connected to the same network as the projector c Start your Web browser on the computer or device d Go to the Epson Web Control scre...

Страница 109: ... the following settings from Advanced Monitor Password up to 16 alphanumeric characters IPv6 Settings manual HTTP port port number used for Web Control except for 80 default 843 3620 3621 3625 3629 4352 4649 5357 10000 10001 41794 g g Related Links Web Control Options p 109 Projector Setup Settings ECO Menu p 147 Network Menu Basic Menu p 139 List of Functions p 10 Web Control Options Basic Contro...

Страница 110: ...s OSD Control Pad A Returns to the Epson Web Control screen B Displays the projector s setting menus C Use your finger or mouse to navigate the menus D Resets the selected setting to its default value E Returns to the previous menu F Displays help topics Test Pattern A Returns to the Epson Web Control screen B Displays available test patterns select to project a test pattern C Turns off test patte...

Страница 111: ...creen Follow the on screen instructions to change the password A Opens the menus B Displays the menu name you selected C Specifies the projector settings D Lock unlock the projector settings E Updates the projector settings a You cannot change the following settings using Epson Web Control User Button User s Logo HDMI EQ Setting Language Reset Lamp Hours g g Related Links List of Functions p 10 ...

Страница 112: ...Start your Web browser on a computer or device connected to the network d Go to the Epson Web Control screen by entering the projector s IP address into the browser s address box You see the Epson Web Control screen e Select Advanced a You may need to log in before you see the Advanced screen If a login screen is displayed enter your user name and password The user name is EPSONWEB and the default...

Страница 113: ...hentication of SMTP server h Enter a User Name for the SMTP server i Enter a Password for the SMTP server authentication j Enter the e mail address to be indicated as the sender in From k Choose an address field enter the e mail address and select the alerts you want to receive Repeat for up to three addresses a Your e mail address can be up to 64 alphanumeric characters long To enter more than 32...

Страница 114: ...E Mail Alerts 114 The email address set in From as the mail sender Epson Projector in the subject line The name of the projector experiencing a problem The IP address of the affected projector Detailed information about the problem ...

Страница 115: ... c Select the Notifications menu and press Enter d Set the SNMP setting to On e Enter up to two IP addresses to receive SNMP notifications using 0 to 255 for each address field a Do not use these addresses 224 0 0 0 through 255 255 255 255 where x is a number from 0 to 255 This projector supports SNMP agent version 1 SNMPv1 f Enter the SNMP Community Name up to 32 alphanumeric characters long g Wh...

Страница 116: ... command being processed terminates abnormally an error message is output and a is returned The following commands are available Item Command Power On Off On PWR ON Off PWR OFF Item Command Signal selection Computer1 Auto SOURCE 1F RGB SOURCE 11 Computer2 Auto SOURCE 2F RGB SOURCE 21 HDMI1 SOURCE 30 HDMI2 SOURCE A0 Video SOURCE 41 USB Display SOURCE 51 USB SOURCE 52 LAN SOURCE 53 Screen Mirroring ...

Страница 117: ...jector side is shown on the left and the computer side on the right Signal name Function GND Signal wire ground TD Transmit data RD Receive data Communications protocol Default baud rate setting 9600 bps Data length 8 bit Parity None Stop bit 1 bit Flow control None ...

Страница 118: ... commands defined by PJLink Class2 and agreement was confirmed by the PJLink standard adaptability verification http pjlink jbmia or jp english Non compatible commands Function PJLink command Mute settings Image muting set AVMT 11 Audio muting set AVMT 21 Input ports and corresponding input source number Input port name Input source number Computer1 11 Computer2 12 Video 21 HDMI 32 HDMI1 32 HDMI2 ...

Страница 119: ... a Web browser g g Related Links Setting Up Crestron Connected Support p 119 Controlling a Networked Projector Using Crestron Connected p 119 Projector Setup Settings ECO Menu p 147 List of Functions p 10 Setting Up Crestron Connected Support To set up your projector for monitoring and control using a Crestron Connected system make sure your computer and projector are connected to the network If y...

Страница 120: ...s in the box e To control projection remotely click the on screen buttons that correspond to the projector s remote control buttons You can scroll through button options at the bottom of the screen a These on screen buttons do not directly correspond to the projector s remote control buttons OK acts as the Enter button Menu displays the projector s menu f To view information about the projector cl...

Страница 121: ... Adjusts the image brightness Color Adjusts the color saturation for the images Sharpness Adjusts the image sharpness Zoom Enlarges or reduces the image without changing the projection size Click the arrow buttons to change the position of an enlarged image D Arrow buttons Performs the same operations as the arrow buttons on the remote control OK Performs the same operation as Enter on the remote ...

Страница 122: ...meric characters and symbols DHCP Select to use DHCP You cannot enter an IP address if DHCP is enabled IP Address Enter the IP address to assign to the currently connected projector Subnet Mask Enter a subnet mask for the currently connected projector Default Gateway Enter the gateway address for the currently connected projector Send Click to confirm the changes made to the Projector C Enabled Ad...

Страница 123: ... the computer New Password Enter the new password when changing the password to open the operation window up to 26 alphanumeric characters Confirm Enter the same password as you entered in New Password If the passwords are not the same an error is displayed Send Click to confirm the changes made to the User Password ...

Страница 124: ... front of the lens If you schedule the projector to turn on automatically flammable objects in front of the lens could catch on a fire a If you set a Schedule Protection password turn off your Schedule Protection password first a Set the date and time in the Date Time menu s Extended Operation Date Time b Press the Menu button select the Extended menu and press Enter c Select Schedule Settings and...

Страница 125: ...ing the event status A valid schedule regular schedule invalid schedule B The date currently selected highlighted in yellow C one time schedule regular schedule standby schedule turns communication on or off during standby invalid schedule i To edit a scheduled event select the schedule and press Esc j Select an option from the menu displayed On or Off lets you enable or disable the selected event...

Страница 126: ...vent details or date and time Clear lets you remove the scheduled event from a list k Select Complete then select Yes To delete all scheduled events select Schedule Reset g g Related Links List of Functions p 10 Setting the Date and Time p 43 Setting a Password p 82 ...

Страница 127: ...oard p 129 Image Quality Settings Image Menu p 130 Input Signal Settings Signal Menu p 131 Projector Feature Settings Settings Menu p 132 Projector Setup Settings Extended Menu p 134 Projector Network Settings Network Menu p 137 Projector Setup Settings ECO Menu p 147 Projector Information Display Info Menu p 149 Projector Reset Options Reset Menu p 152 Copying Menu Settings Between Projectors Bat...

Страница 128: ...tons to move through the menus listed on the left The settings for each menu are displayed on the right a The available settings depend on the current input source c To change settings in the displayed menu press Enter d Press the up or down arrow button to move through the settings e Change the settings using the buttons listed on the bottom of the menu screens f To return all the menu settings t...

Страница 129: ... Finish on the keyboard to confirm your entries Select Cancel to cancel entering text a You can select projector settings and control projection over a network using a Web browser from your computer Some symbols cannot be entered using the displayed keyboard Use your Web browser to enter the text g g Related Links Available Text Using the Displayed Keyboard p 129 Controlling a Networked Projector ...

Страница 130: ...e Setting Options Description Color Temp Color Temp sets the color temperature according to the color mode you selected Higher values tint the image blue and lower values tint the image red Custom Custom adjusts the individual R red G green and B blue components of the offset and gain Image Enhancement Adjusts the perceived resolution of the image Noise Reduction Noise Reduction reduces flickering...

Страница 131: ...g Varying levels available Adjusts the signal to eliminate vertical stripes in computer images Sync Varying levels available Adjusts the signal to eliminate fuzziness or flickering in computer images Setting Options Description Position Adjusts the image location on the screen Auto Setup On Off Automatically optimizes computer image quality when On Overscan Auto Off 4 8 Changes the projected image...

Страница 132: ...de Exit Split Screen Divides the viewing area horizontally and displays two images side by side press Esc to cancel split screen display Volume Varying levels available Adjusts the volume of projector s speaker system You can also adjust the volume of external speakers Setting values are saved for each source Mic Input Level Varying levels available Adjusts the input level from a microphone When M...

Страница 133: ...e may be visible in projected images Pattern Display Pattern Display lets you display the selected pattern type on the screen to aid in presentation Pattern Type Pattern Type select from Patterns 1 to 4 or User Pattern Patterns 1 to 4 display patterns pre registered in the projector such as ruled lines or grid patterns User Pattern User Pattern captures a projected screen and saves it as a pattern...

Страница 134: ...nt to display messages Setting Options Description Display Background Display Background sets the screen color or logo to display when no signal is received Startup Screen Startup Screen set to On to display a logo when the projector starts up A V Mute A V Mute sets the screen color or logo to display when A V Mute is turned on User s Logo Creates a screen that the projector displays to identify i...

Страница 135: ...rk menu settings Setting Options Description Date Time Date Time adjusts the projector s system time and date settings Available only for models that support the Schedule function Daylight Saving Time set to On to activate daylight saving time Internet Time set to On to update the time automatically through an Internet time server A V Settings Selects various audio and video output settings A V Ou...

Страница 136: ...e Auto Source Search HDMI EQ Setting Date Time A V Output Projector ID Schedule Settings Language a When you set User s Logo Protection to On in the Password Protection screen you cannot change settings related to user s logo display Display Background Startup Screen A V Mute in the Display setting Set User s Logo Protection to Off first g g Related Links List of Functions p 10 Selecting Password ...

Страница 137: ...roring to On Screen Mirroring Settings To Screen Mirroring Settings menu Configures your Screen Mirroring settings Setting Options Description Wireless LAN Power On Off Configures your wireless LAN settings Select On to project images via a wireless LAN If you do not want to connect via wireless LAN turn it off to prevent unauthorized access by others Net Info Wireless LAN Connection Mode Wireless...

Страница 138: ...a Once you have connected your projector to your network you can select projector settings and control projection using a compatible Web browser This allows you to access the projector remotely g g Related Links Network Menu Screen Mirroring Settings p 138 Network Menu Basic Menu p 139 Network Menu Wireless LAN Menu p 140 Network Menu Wired LAN Menu p 143 Network Menu Notifications Menu p 144 Netw...

Страница 139: ... Operation Mode to Basic Extended Available when you have set Operation Mode to Extended Meeting Mode Selects the type of meeting Interruptions OK lets you connect to another mobile device during Screen Mirroring projection No Interruptions lets you exclusively connect to one device Channel Selects the wireless channel used by Screen Mirroring Display Display PIN Code Set to On to display the eigh...

Страница 140: ...lt Projector Keyword On Off Set to On to enable a security password to prevent access to the projector by anyone not in the same room as the projector You must enter a displayed randomized keyword from a computer using Epson iProjection to access the projector and share the current screen Display Keyword On Off Set to On to display a projector keyword on the projected image when accessing the proj...

Страница 141: ...encryption When establishing a connection from a computer to the projector enter the value set in the passphrase Setting Options Description WPA3 PSK Communication is performed using WPA3 security Uses AES method for encryption When establishing a connection from a computer to the projector enter the value set in the passphrase WPA2 WPA3 PSK Connects in WPA2 WPA3 personal mode Encryption method is...

Страница 142: ...er Cert Set to On to verify the server certificate when a CA certificate has been set Setting Options Description CA certificate CA certificate imports the CA certificate RADIUS Serv Name RADIUS Serv Name Enter the server name you want to verify You can enter up to 64 alphanumeric characters To enter more than 32 characters use your Web browser Channel Various channels available In Quick connectio...

Страница 143: ...ess using 0 to 255 for each address field Do not use these addresses 0 0 0 0 127 x x x 192 0 2 x or 224 0 0 0 through 255 255 255 255 where x is a number from 0 to 255 for IP Address 255 255 255 255 or 0 0 0 0 through 254 255 255 255 for Subnet Mask and 0 0 0 0 127 x x x or 224 0 0 0 through 255 255 255 255 for Gateway Address IP Address Display On Off Select whether to display the IP address on t...

Страница 144: ...ters Up to 64 alphanumeric characters from the Web browser do not use spaces Enter the email address of the sender Address 1 Setting Address 2 Setting Address 3 Setting Enter the e mail address and select the alerts you want to receive Repeat for up to three addresses SNMP On Off Set to On to monitor the projector using SNMP To monitor the projector you need to install the SNMP manager program on ...

Страница 145: ...recommended to set this to On Web Server Cert Imports the Web server certificate for secure HTTP Priority Gateway Wired LAN Wireless LAN You can set the priority gateway AMX Device Discovery On Off Set to On when you want to allow the projector to be detected by AMX Device Discovery Crestron Connected On Off Set to On only when monitoring or controlling the projector over the network using Crestro...

Страница 146: ...enu 146 Network Menu Reset Menu Settings on the Reset menu let you reset all of the network settings s Network Network Configuration Reset Setting Options Description Reset network settings Yes No Select Yes to reset all network settings ...

Страница 147: ...f When set to On the lamp brightness is adjusted according to the projected image This helps to reduce the power consumption by lowering the lamp brightness according to the scene being projected The setting is stored for each Color Mode This item is enabled when Power Consumption is set to High or Medium Auto Iris is set to Off s Image Auto Iris Sleep Mode On Off Automatically turns off the proje...

Страница 148: ...ons to occur when the projector is in standby mode Monitor and control the projector over a network Communication On is automatically selected when A V Output is set to Always On s Extended A V Settings A V Output ECO Display On Off Displays a leaf icon in the bottom left corner of the projected screen to indicate the power saving status when the lamp brightness changes when On Reset Resets all ad...

Страница 149: ...p 10 Info Menu Projector Info Menu You can display information about the projector and input sources by viewing the Projector Info menu in the projector s Info menu a The available settings depend on the current input source The lamp usage timer does not register any hours until you have used the lamp for at least 10 hours Information item Description Lamp Hours Displays the number of hours H the ...

Страница 150: ...status then turn the projector off and then on again 0484 Communication with computer was disconnected Restart the network software 0479 04FF A projector system error has occurred Turn the projector off and then on again 0891 Cannot find an access point with the same SSID Set your computer access point and projector to the same SSID 0892 The WPA WPA2 WPA3 authentication type does not match Make su...

Страница 151: ...splay Info Menu 151 Event ID code Cause and solution 089D Key exchange failed Check the wireless LAN security settings and make sure that the security certificate is installed correctly g g Related Links List of Functions p 10 ...

Страница 152: ...ero when you replace the lamp Reset All Config Resets most of the projector settings to their default values You cannot reset the following settings using the Reset All Config option E Zoom User s Logo Display Background Startup Screen A V Mute Schedule Settings Language Date Time Network menu items Lamp Hours Password Only when you set the User s Logo Protection setting to On in the Password Prot...

Страница 153: ...r the Notifications menu and the Others menu s Extended Operation Advanced Batch Setup Range Caution Epson takes no responsibility for batch setup failures and associated repair costs due to power outages communication errors or other problems that may cause such failures g g Related Links Transferring Settings From a USB Flash Drive p 153 Transferring Settings From a Computer p 154 List of Functi...

Страница 154: ... a Computer You can copy menu settings from one projector to another of the same model by connecting the computer and projector with a USB cable a You can use this batch setup method with the following operating system versions Windows 7 and later OS X 10 11 x and later a Disconnect the power cord from the projector and check that all of the projector s indicators have turned off b Connect a USB c...

Страница 155: ... cord from the projector while the file is being written If the power cord is disconnected the projector may not start correctly g g Related Links Batch Setup Error Notification p 155 Batch Setup Error Notification The projector s indicators notify you if an error occurs during a batch setup operation Check the status of the projector s indicators and follow the instructions described in the table...

Страница 156: ...he instructions in these sections to maintain your projector g g Related Links Projector Maintenance p 157 Cleaning the Lens p 158 Cleaning the Projector Case p 159 Air Filter and Vent Maintenance p 160 Projector Lamp Maintenance p 163 ...

Страница 157: ...arts you should replace are the lamp air filter and remote control batteries If any other part needs replacing contact Epson or an authorized Epson servicer Warning Before cleaning any part of the projector turn it off and unplug the power cord Never open any cover on the projector except as specifically explained in this manual Dangerous electrical voltages in the projector can injure you severel...

Страница 158: ...free cloth with lens cleaner and gently wipe the lens Do not spray any liquid directly on the lens Warning Do not use a lens cleaner that contains flammable gas The high heat generated by the projector lamp may cause a fire Attention Do not use glass cleaner or any harsh materials to clean the lens and do not subject the lens to any impacts otherwise it could be damaged Do not use canned air or th...

Страница 159: ...e a soft dry lint free cloth To remove stubborn dirt use a soft cloth moistened with water and mild soap Do not spray liquid directly on the projector Attention Do not use wax alcohol benzene paint thinner or other chemicals to clean the projector case These can damage the case Do not use canned air or the gases may leave a flammable residue ...

Страница 160: ... Vents p 160 Replacing the Air Filter p 160 List of Functions p 10 Cleaning the Air Filter and Vents Clean the projector s air filter or vents if they get dusty or if you see a message telling you to clean them a Turn off the projector and unplug the power cord b Gently remove the dust using a small vacuum designed for computers or a very soft brush such as a paintbrush a You can remove the air fi...

Страница 161: ...ce 161 a Turn off the projector and unplug the power cord b Open the air filter cover c Pull the air filter out of the projector a Dispose of used air filters according to local regulations Filter frame ABS Filter Polyurethane foam ...

Страница 162: ...Air Filter and Vent Maintenance 162 d Place the new air filter in the projector as shown and push gently until it clicks into place e Close the air filter cover g g Related Links Replacement Parts p 185 ...

Страница 163: ...fe Depending on the characteristics of the lamp and the way it has been used the lamp may become darker or stop working before the lamp warning message appears You should always have a spare lamp unit ready in case it is needed We recommend the use of genuine Epson replacement lamps The use of non genuine lamps may affect projection quality and safety Any damage or malfunction caused by the use of...

Страница 164: ...uld stand to the side of the lamp cover not underneath it Remove the lamp cover gently Be careful when removing the lamp cover as shards of glass may fall out and could cause an injury If any shards of glass get into your eyes or mouth contact a doctor immediately d Slide the lamp cover out and lift it off e Loosen the screws securing the lamp to the projector The screws do not come all the way ou...

Страница 165: ...regulations regarding disposal or recycling Do not put in the trash g Gently insert the new lamp into the projector If it does not fit easily make sure it is facing the right way Attention Do not touch any glass on the lamp assembly to avoid premature lamp failure h Push in the lamp firmly and tighten the screws to secure it i Replace the lamp cover and tighten the screw to secure it ...

Страница 166: ... the Lamp Timer You must reset the lamp timer after replacing the projector s lamp to clear the lamp replacement message and to monitor lamp usage correctly a Do not reset the lamp timer if you have not replaced the lamp to avoid inaccurate lamp usage information a Turn on the projector b Press the Menu button select the Reset menu and press Enter c Select Reset Lamp Hours and press Enter You see ...

Страница 167: ...roblems using the projector g g Related Links Projection Problems p 168 Projector Indicator Status p 169 Using the Projector Help Displays p 172 Solving Image or Sound Problems p 173 Solving Projector or Remote Control Operation Problems p 178 Solving Network Problems p 180 ...

Страница 168: ... it on If this does not solve the problem check the following The indicators on the projector may indicate the problem The projector s Help system can display information about common problems The solutions in this manual can help you solve many problems If none of these solutions help contact Epson for technical support ...

Страница 169: ...emp Off Normal operation Power Lit blue Status Flashing blue Lamp Off Temp Off Warming up shutting down or cooling down When warming up wait about 30 seconds for an image to appear All buttons are disabled during warm up shutting down and cooling down Power Lit blue Status Off Lamp Off Temp Off Standby sleep mode or monitoring When you press the power button projection starts Power Flashing blue S...

Страница 170: ... installed The lamp does not turn on if the lamp and the lamp cover are not installed correctly Power Flashing blue Status Indicator status varies Lamp Flashing orange Temp Indicator status varies Replace the lamp soon to avoid damage Do not continue using the projector Indicator and status Problem and solutions Power Off Status Flashing blue Lamp Off Temp Flashing orange A fan or sensor has a pro...

Страница 171: ...Projector Indicator Status 171 Replacing the Lamp p 163 ...

Страница 172: ...he Home button on the control panel or remote control c Select Help on the Home screen The Help menu is displayed d Use the up and down arrow buttons to highlight the problem you want to solve e Press Enter to view the solutions f Perform one of the following actions when you are finished To select another problem to solve press Esc To exit the help system press Menu ...

Страница 173: ...in the Control Panel Lock setting or use the remote control to turn on the projector s Settings Lock Setting Control Panel Lock Adjust the Brightness setting in the projector s Image menu Select High or Medium as the Power Consumption setting s ECO Power Consumption Check the Display setting in the projector s Extended menu to make sure Messages is set to On The projector may not be able to projec...

Страница 174: ...ected computer or video source and then turn them back on If you are projecting from an HDMI source replace the HDMI cable with the shorter one g g Related Links Displaying From a Laptop p 174 Displaying From a Mac Laptop p 174 Displaying From a Laptop If the message No Signal is displayed when projecting from a laptop you need to set up the laptop to display on an external monitor a Hold down the...

Страница 175: ...tor s Extended menu g g Related Links Input Signal Settings Signal Menu p 131 Projector Setup Settings Extended Menu p 134 Supported Monitor Display Resolutions p 192 Solutions When the Image is not Rectangular If the projected image is not evenly rectangular try the following solutions Place the projector directly in front of the center of the screen facing it squarely if possible Set Auto V Keys...

Страница 176: ...ion the projector so the keystone adjustment angle is not so wide that it distorts the image Clean the projector lens a To avoid condensation on the lens after bringing the projector in from a cold environment let the projector warm up to room temperature before using it Adjust the Sharpness setting in the projector s Image menu to improve image quality If you are projecting from a computer using ...

Страница 177: ...isplay function turn on the Output audio from the projector setting in the Epson USB Display Settings program on your computer Select the correct audio input in the A V Settings setting in the projector s Extended menu If you want to use a connected audio source when the projector is off set the Standby Mode option to Communication On and make sure the A V Settings options are set correctly in the...

Страница 178: ... the lens cover timer may be enabled To turn off the lens cover timer select Off as the Lens Cover Timer setting in the projector s ECO menu If the projector s lamp turns off the status indicator is flashing and the temp temperature indicator is lit the projector has overheated and turned off The cooling fans may run in standby status depending on the projector settings Also when the projector wak...

Страница 179: ...ing solutions You may have turned on password protection without first setting a password Try entering 0000 using the remote control If you have entered an incorrect password too many times and see a message displaying a request code write down the code and contact Epson for help Provide the request code and proof of ownership for assistance in unlocking the projector If you set a Epson Web Contro...

Страница 180: ... you are using the correct ID and password For the user ID enter EPSONWEB You cannot change the user ID For the password enter the password set in the projector s Network menu The default password is admin Make sure you have access to the network the projector is on If your Web browser is set up to connect via a proxy server the Epson Web Control screen cannot be displayed Make settings for a conn...

Страница 181: ...or s Network menu and select On again Change the Operation Mode setting and connect again s Network Screen Mirroring Settings Operation Mode Make sure that the no other devices are connected to the projector with No Interruptions settings s Network Screen Mirroring Settings Extended Meeting Mode Change the Channel setting according to the wireless LAN environment s Network Screen Mirroring Setting...

Страница 182: ...s of the mobile device the connection may be lost when the device enters power saving mode Check the electrical power saving settings on the mobile device Update to the latest version of the wireless driver or firmware on the mobile device g g Related Links Wireless Network Projection from a Mobile Device Screen Mirroring p 99 ...

Страница 183: ...ated Links Optional Accessories and Replacement Parts p 184 Screen Size and Projection Distance p 186 Supported Monitor Display Resolutions p 192 Projector Specifications p 194 External Dimensions p 199 USB Display System Requirements p 203 List of Safety Symbols and Instructions p 204 Glossary p 206 Notices p 208 ...

Страница 184: ... ELPSC21 Portable X type screens aspect ratio 16 9 Multi Aspect Screen ELPSC26 Portable multi aspect screen Cables Computer cable ELPKC02 1 8 m for mini D sub 15 pin mini D Sub 15pin Computer cable ELPKC09 3 m for mini D sub 15 pin mini D Sub 15pin Computer cable ELPKC10 20 m for mini D sub 15 pin mini D Sub 15pin Use when connecting to the Computer port Mounts Ceiling mount ELPMB23 Use when insta...

Страница 185: ... carry the projector by hand Soft carrying case ELPKS70 EB 992F EB 982W EB 972 EB 118 EB W49 EB X49 EB E20 EB FH52 Use this to carry the projector by hand Replacement Parts Lamp unit ELPLP97 Use as a replacement for used lamps Air filter ELPAF54 EB 992F EB 982W EB 972 EB FH52 Use as a replacement for used air filters Air filter ELPAF32 EB 118 EB W49 EB X49 EB E20 EB W52 EB W51 EB X51 EB E10 EB F H...

Страница 186: ... size A B Minimum Wide to Maximum Tele 30 61 46 87 118 5 50 102 76 146 198 8 4 3 screen size A B Minimum Wide to Maximum Tele 60 122 91 176 238 10 70 142 107 205 278 12 80 163 122 235 318 14 100 203 152 294 398 17 150 305 229 442 598 25 200 406 305 590 797 34 300 610 457 886 51 350 711 533 1034 59 16 9 screen size A B Minimum Wide to Maximum Tele 28 62 35 88 120 1 30 66 37 95 129 1 50 111 62 159 2...

Страница 187: ...22 241 290 14 100 203 152 302 363 17 150 305 229 454 546 25 200 406 305 607 729 34 250 508 381 759 912 42 300 610 457 912 1095 51 16 9 screen size A B Minimum Wide to Maximum Tele 28 62 35 90 109 1 30 66 37 97 117 1 40 89 50 130 156 1 50 111 62 163 196 1 60 133 75 196 236 1 80 177 100 263 316 2 100 221 125 329 396 2 150 332 187 495 595 3 200 443 249 661 794 5 250 553 311 827 994 6 275 609 342 910 ...

Страница 188: ...2 107 222 267 10 80 163 122 255 306 11 100 203 152 319 383 14 150 305 229 480 577 20 200 406 305 641 770 27 280 569 427 898 1079 38 16 9 screen size A B Minimum Wide to Maximum Tele 32 71 40 91 109 2 35 77 44 99 120 2 40 89 50 114 137 2 50 111 62 143 172 3 60 133 75 172 208 3 70 155 87 202 243 4 80 177 100 231 278 4 100 221 125 289 348 5 150 332 187 435 523 8 200 443 249 582 699 11 310 686 386 903...

Страница 189: ...35 294 354 9 150 323 202 443 533 13 200 431 269 592 711 18 250 538 337 741 890 22 280 603 377 830 997 25 EB 972 4 3 screen size A B Minimum Wide to Maximum Tele 27 55 41 85 140 2 40 81 61 128 208 3 50 102 76 160 261 4 60 122 91 193 314 4 80 163 122 258 420 6 100 203 152 323 525 7 150 305 229 486 789 11 200 406 305 649 1054 15 250 508 381 812 1318 19 262 532 399 852 1381 20 16 9 screen size A B Min...

Страница 190: ...9 292 2 80 172 108 239 390 3 100 215 135 300 488 3 150 323 202 451 733 5 200 431 269 603 979 7 280 603 377 845 1371 9 4 3 screen size A B Minimum Wide to Maximum Tele 26 53 40 86 142 1 30 61 46 100 164 1 40 81 61 134 219 2 50 102 76 169 275 2 60 122 91 203 331 2 70 142 107 237 386 3 80 163 122 271 442 3 100 203 152 340 553 4 150 305 229 511 831 6 200 406 305 682 1108 8 240 488 366 820 1330 9 16 9 ...

Страница 191: ...nimum Wide to Maximum Tele 25 51 38 88 145 0 30 61 46 107 174 0 40 81 61 143 233 0 60 122 91 216 351 0 80 163 122 288 468 0 100 203 152 361 586 0 120 244 183 434 704 0 150 305 229 543 880 1 200 406 305 724 1175 1 220 447 335 797 1293 1 245 498 373 888 1440 1 16 10 screen size A B Minimum Wide to Maximum Tele 28 60 38 87 143 0 30 65 40 94 153 0 40 86 54 126 205 0 60 129 81 190 309 0 80 172 108 254 ...

Страница 192: ...on setting in the projector s Signal menu Available only for projectors with a resolution of Full HD 1 920 1 080 Even when signals other than those mentioned above are input it is likely that the image can be projected However not all functions may be supported Composite Video Signal Refresh rate Hz Resolution dots TV NTSC 60 720 480 TV SECAM 50 720 576 TV PAL 50 60 720 576 HDMI Port Input Signals...

Страница 193: ...Supported Monitor Display Resolutions 193 Available only for projectors with a resolution of Full HD 1 920 1 080 or WXGA 1 280 800 Available only for projectors with a resolution of Full HD 1 920 1 080 ...

Страница 194: ...EB X500 EB E500 UHE lamp 210 W Model No ELPLP97 Lamp life EB 972 High Power Consumption mode Up to 6 500 hours Medium Power Consumption mode Up to 10 000 hours ECO Power Consumption mode Up to 17 000 hours EB 118 High Power Consumption mode Up to 8 000 hours Medium Power Consumption mode Up to 10 000 hours ECO Power Consumption mode Up to 17 000 hours EB X49 EB E20 EB X51 EB E10 EB X06 EB E01 EB X...

Страница 195: ...pending on the surrounding environment This product is also designed for IT power distribution system with phase to phase voltage 230V EB 982W EB W49 EB W52 EB W51 EB W06 Product name EB 982W EB W49 EB W52 EB W51 EB W06 Dimensions EB 982W 309 W 90 H 282 D mm not including raised section EB W49 302 W 87 H 249 D mm not including raised section EB W52 302 W 87 H 234 D mm not including raised section ...

Страница 196: ...erating altitude Altitude 0 to 3 048 m Operating temperature Altitude of 0 to 2 286 m 5 to 40 C No condensation Altitude of 2 287 to 3 048 m 5 to 35 C Humidity of 20 to 80 No condensation Storage temperature 10 to 60 C Humidity of 10 to 90 No condensation Mass EB 982W Approx 3 1 kg EB W52 Approx 2 6 kg EB W49 Approx 2 7 kg EB W51 EB W06 Approx 2 5 kg Lamp brightness automatically dims if the surro...

Страница 197: ...20 V area Operating 345 W Power consumption 220 to 240 V area Operating 327 W Standby power consumption Communication On 2 0 W Communication Off 0 3 W Operating altitude Altitude 0 to 3 048 m Operating temperature Altitude of 0 to 2 286 m 5 to 40 C No condensation Altitude of 2 287 to 3 048 m 5 to 35 C Humidity of 20 to 80 No condensation Storage temperature 10 to 60 C Humidity of 10 to 90 No cond...

Страница 198: ...ini pin jack L Audio R ports RCA pin jack 2 L R Mic port Stereo mini pin jack Audio Out port Stereo mini pin jack HDMI port HDMI Audio is only supported by PCM HDMI1 port HDMI Audio is only supported by PCM HDMI2 port HDMI Audio is only supported by PCM USB A port USB connector Type A USB B port USB connector Type B LAN port RJ 45 RS 232C port Mini D Sub 9 pin male a USB A and USB B port supports ...

Страница 199: ... W06 EB X06 EB E01 EB X500 EB E500 EB 118 EB W49 EB X49 EB E20 EB W52 EB FH06 EB 992F EB 982W EB 972 EB FH52 A Center of lens B Distance from center of lens to suspension bracket fixing point EB W51 EB X51 EB E10 EB W06 EB X06 EB E01 EB X500 EB E500 ...

Страница 200: ...External Dimensions 200 EB W52 EB FH06 ...

Страница 201: ...External Dimensions 201 EB W49 EB X49 EB E20 EB 118 ...

Страница 202: ...External Dimensions 202 EB 992F EB 982W EB 972 EB FH52 The unit in these illustrations is mm ...

Страница 203: ...10 10 x 64 bit 10 11 x 64 bit Windows 8 1 Windows 8 1 32 and 64 bit Windows 8 1 Pro 32 and 64 bit Windows 8 1 Enterprise 32 and 64 bit macOS 10 12 x 64 bit 10 13 x 64 bit 10 14 x 64 bit Windows 10 Windows 10 Home 32 and 64 bit Windows 10 Pro 32 and 64 bit Windows 10 Enterprise 32 and 64 bit CPU Intel Core2Duo or faster Intel Core i3 or faster recommended Intel Core2Duo or faster Intel Core i5 or f...

Страница 204: ...ntify the positive and negative connections the polarity on a piece of equipment to which a d c power supply may be connected No Symbol mark Approved standards Description I The same as No 8 J IEC60417 No 5001B Battery general On battery powered equipment To identify a device for instance a cover for the battery compartment or the connector terminals K IEC60417 No 5002 Positioning of cell To ident...

Страница 205: ...njury such as electric shock if the equipment is disassembled X IEC60417 No 5266 Standby partial standby To indicate that part of the equipment is in the ready status Y ISO3864 IEC60417 No 5057 Caution movable parts To indicate that you must keep away from movable parts according to protection standards Z IEC60417 No 6056 Caution Moving Fan Blades As a safety precaution stay away from the moving f...

Страница 206: ... according to subnet mask HDCP HDCP is an abbreviation for High bandwidth Digital Content Protection It is used to prevent illegal copying and protect copyrights by encrypting digital signals sent over DVI and HDMI ports Because the HDMI port on this projector supports HDCP it can project digital images protected by HDCP technology However the projector may not be able to project images protected ...

Страница 207: ... address on a divided network subnet from the IP address SVGA A screen size standard with a resolution of 800 horizontal 600 vertical dots SXGA A screen size standard with a resolution of 1 280 horizontal 1 024 vertical dots Sync The signals output from computers have a specific frequency If the projector frequency does not match this frequency the resulting images are not of a good quality The pr...

Страница 208: ...2198635 xx x 0 9 FCC Compliance Statement For United States Users This device complies with part 15 of the FCC Rules Operation is subject to the following two conditions 1 This device may not cause harmful interference and 2 this device must accept any interference received including interference that may cause undesired operation This equipment has been tested and found to comply with the limits ...

Страница 209: ... total system reliability Because this product was not intended for use in applications requiring extremely high reliability safety such as aerospace equipment main communication equipment nuclear power control equipment or medical equipment related to direct medical care etc please make your own judgment on this product s suitability after a full evaluation Operating System References Microsoft W...

Страница 210: ...of this publication may be reproduced stored in a retrieval system or transmitted in any form or by any means electronic mechanical photocopying recording or otherwise without the prior written permission of Seiko Epson Corporation No patent liability is assumed with respect to the use of the information contained herein Neither is any liability assumed for damages resulting from the use of the in...

Отзывы: