background image

EPSON Stylus CX4300/CX4400/CX5500/CX5600/DX4400/DX4450

Revision A

DISASSEMBLY/ASSEMBLY

Scanner Section

99

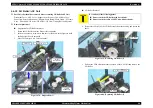
4.8.3  Scanner Motor Unit/Driven Pulley

†

Part/Unit that should be removed before removing Scanner Motor Unit/
Driven Holder

Document Cover / ASF Cover / Support Arm / Scanner Unit / Upper Scanner 
Housing

†

Removal procedure

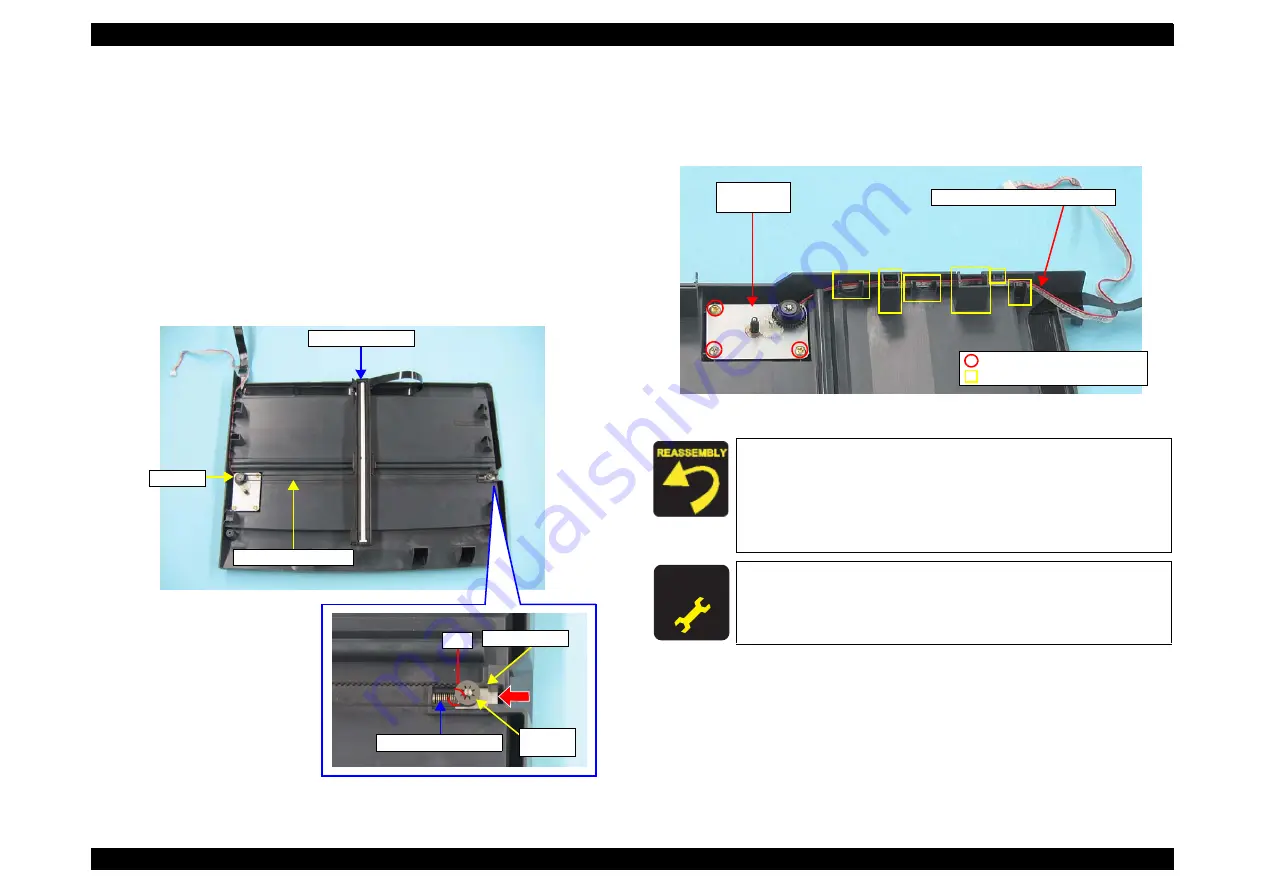
1.

Move the CIS Carrier Assy. to the center of the scanner.

2.

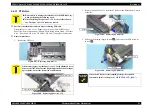
Remove the polyslider washer from the Driven Pulley.

3.

Push the Driven Pulley in the direction of the arrow to release the Timing 
Belt, and remove the Driven Pulley.

4.

Remove the Scanner Timing Belt from the Pulley.

Figure 4-101.  Removing Driven Pulley

5.

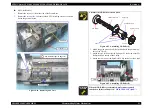
Release the Scanner Motor cable from the tabs (x6) of the Lower Scanner 
Housing.

6.

Remove the screws (x3) that secure the Scanner Motor Unit, and remove the 
Scanner Motor Unit.

Figure 4-102.  Removing Scanner Motor Unit

CIS Carrier Assy.

Timing Belt

Pulley

Rib

Driven Pulley Spring

Driven Pulley

Polyslider 

Washer

„

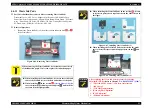
Route the Scanner Motor Connector Cable as shown in the 
figure. 

(refer to Figure 4-102)

„

Insert the Driven Pulley Spring into the rib of the Driven 
Pulley. 

(refer to Figure 4-101)

„

When installing the Scanner Timing Belt, make sure to face its 
jagged side inward.

A D J U S T M E N T

R E Q U I R E D

When the Scanner Motor Unit/Driven Pulley is reassembled, 
perform the required lubrication. (Refer to Chapter 6 

“ 

MAINTENANCE 

(p108)

)

C.B.P. 3x8 F/Zn (4.0±0.5kgfcm)
Tab

Scanner Motor Connector Cable

Scanner 

Motor Unit

Содержание CX4400 - Stylus Color Inkjet

Страница 1: ...EPSONSTYLUSCX4300 CX4400 CX5500 CX5600 DX4400 DX4450 Color Inkjet Printer SEMF07 004 SERVICE MANUAL ...

Страница 2: ...is manual However should any errors be detected SEIKO EPSON would greatly appreciate being informed of them The above not withstanding SEIKO EPSON CORPORATION can assume no responsibility for any errors in this manual or the consequences thereof EPSON is a registered trademark of SEIKO EPSON CORPORATION General Notice Other product names used herein are for identification purpose only and may be t...

Страница 3: ...NG ON POWER SUPPLY AND OTHER ELECTRONIC COMPONENTS 4 WHEN DISASSEMBLING OR ASSEMBLING A PRODUCT MAKE SURE TO WEAR GLOVES TO AVOID INJURY FROM METAL PARTS WITH SHARP EDGES WARNING 1 REPAIRS ON EPSON PRODUCT SHOULD BE PERFORMED ONLY BY AN EPSON CERTIFIED REPAIR TECHNICIAN 2 MAKE CERTAIN THAT THE SOURCE VOLTAGE IS THE SAME AS THE RATED VOLTAGE LISTED ON THE SERIAL NUMBER RATING PLATE IF THE EPSON PRO...

Страница 4: ...ce Connector Summary Electrical Circuits Symbols Used in this Manual Various symbols are used throughout this manual either to provide additional information on a specific topic or to warn of possible danger present during a procedure or an action Be aware of all symbols when they are used and always read NOTE CAUTION and WARNING messages Indicates an operating or maintenance procedure practice or...

Страница 5: ...Revision Status Revision Issued Date Description A April 23 2007 First Release ...

Страница 6: ...nism 28 2 3 1 Scanner Carriage Mechanism 28 2 4 Electrical Circuit Operating Principles 30 2 4 1 Power Supply Board 30 2 4 2 Main Board 30 Chapter 3 TROUBLESHOOTING 3 1 Overview 33 3 2 Error Indications and Fault Occurrence Causes 33 3 3 Troubleshooting 37 3 3 1 Superficial Phenomenon Based Troubleshooting 53 Chapter 4 DISASSEMBLY ASSEMBLY 4 1 Overview 61 4 1 1 Precautions 61 4 1 2 Tools 61 4 1 3 ...

Страница 7: ...ing Adjustment Item List T B D 101 5 1 2 Replacement Part Adjustment Items T B D 103 5 2 Adjustment by Using Adjustment Program T B D 105 5 2 1 Head angular adjustment 105 5 2 2 Top Margin Adjustment 106 5 2 3 Bi D Adjustment 106 5 2 4 First Dot Adjustment 107 5 2 5 PF Band Adjustment 107 Chapter 6 MAINTENANCE 6 1 Overview 109 6 1 1 Cleaning 109 6 1 2 Service Maintenance 109 6 1 3 Lubrication 111 ...

Страница 8: ...C H A P T E R 1 PRODUCTDESCRIPTION ...

Страница 9: ...ws for a more compact scanner Additional features include the following Maximum optical resolution 600 x 1200 dpi Scan gradations 16 bits input 1 or 8 bits output Stand alone copy functions Paper size can be selected from two or three options Enlarge Reduce factor can be selected from two options actual size 100 or Fit to page Copy margin is automatically selected from two options related to paper...

Страница 10: ...expanded graphics PC437 ASCII 20H to 7FH only Font EPSON original font Alphanumeric font Courier Input buffer size 32 Kbytes Paper feed method Friction feed using one ASF Auto Sheet Feeder Paper path Top feed front out Paper feed rates T B D High quality mode 19 05 mm feed 98 8 mm sec 3 89 inch sec High speed mode continuous feed 352 8 6 35 mm sec 13 89 0 25 inch sec PF interval Programmable in 0 ...

Страница 11: ...er Glossy Photo Paper OK Photo 720 720 x 720 Color 1440 x 720 Black VSD3 240 cps Plain paper 720 x 720 VSD2 240 cps Premium Glossy Photo Paper Glossy Photo Paper Matte Paper Heavyweight OK Best Photo 1440 1440 x 720 VSD3 240 cps Ultra Glossy Photo Paper Premium Glossy Photo Paper Premium SemiGloss Photo Paper Glossy Photo Paper Matte Paper Heavyweight OK Photo RPM 5760 5760 x 1440 VSD3 240 cps Ult...

Страница 12: ...6 mm 2 12 6 x 5 44 Y Y Y Premium Inkjet Plain Paper A4 210 x 297 mm 8 3 x11 7 0 11 80 g m2 21 lb Y Y Premium Bright White Paper EAI Bright White Inkjet Paper Euro Asia Letter 215 9 x 279 4 mm 8 5 x11 0 11 90 g m2 24 lb Y A4 210 x 297 mm 8 3 x11 7 0 13 92 5 g m2 25 lb Y Y Ultra Premium Glossy Photo Paper EAI Ultra Glossy Photo Paper Euro Asia Letter 215 9 x 279 4 mm 8 5 x11 0 30 290 g m2 77 lb Y Y ...

Страница 13: ... Y A4 210 x 297 mm 8 3 x11 7 Y Y Y Y Y Y 4 x 6 101 6 x 152 4 mm Y Y Y Y Y Y Premium Presentation Paper Matte EAI 1 Matte Paper Heavyweight Euro Asia 1 Letter 215 9 x 279 4 mm 8 5 x11 0 23 167 g m2 44 lb Y Y Y Y A4 210 x 297 mm 8 3 x11 7 Y Y Y Y Y Y 8 x 10 203 2 x 254 mm Envelopes 10 104 8 x 241 3 mm 4 125 x9 5 45 75 g m2 12 20 lb Y Y Y DL 110 x 220 mm Y Y C6 114 x 162 mm Y Y C A U T I O N Make sur...

Страница 14: ... Table 1 8 Printing Area Margins Print mode Paper size Margin Left Right Top Bottom Standard print Any size 3 mm 3 mm 3 mm 3 mm Envelope 5 mm 5 mm 3 mm 20 mm Borderless print A4 Letter to 2L 5 x 7 2 54 mm 2 54 mm 2 96 mm 4 02 mm 4 x 6 L 2 82 mm 3 60 mm Printing area Left margin Right margin Top margin Bottom margin Paper Feed Direction Printing area Left margin Right margin Top margin Bottom margi...

Страница 15: ...600 dpi Sub scan 1200 dpi with Micro Step Scanning resolution 50 to 4800 dpi selectable in 1 dpi steps 7200 dpi 9600 dpi Gradations pixel depth Each color pixel has 16 bit input and either 1 bit or 8 bit output Scanning speed 600 dpi Color Approx 15 msec line Monochrome Approx 5 msec line Light source RGB Three Color LED Control commands ESC I D7 Gamma correction Two user defined levels Table 1 10...

Страница 16: ...er Plain Paper A4 Letter Bright White Inkjet Paper Euro Asia Premium Bright White Paper EAI Premium Ink Jet Plain Paper Euro Asia Photo Paper Glossy Photo Paper Euro Asia Photo Paper Glossy EAI 4 x 6 10 x 15 cm Premium Glossy Photo Paper Euro Asia Premium Photo Paper Glossy EAI Premium Semigloss Photo Paper Euro Asia Premium Photo Paper Semi Gloss EAI Ultra Glossy Photo Paper Euro Asia Ultra Premi...

Страница 17: ...LM TM BM 3 mm 0 12 3 mm 0 12 3 mm 0 12 3 mm 0 12 a a Copy Print area Copy paper Print direction Scan direction Right side of original Original face down Scan area Scan bed BM TM PL RM LM PW Top left corner of the original OLM RW OTM RL Right side of copy Start point Table 1 17 Original scanner RW readable width OLM out of range left margin RL readable length OTM out of range top margin 216 mm 8 5 ...

Страница 18: ...rature Humidity Range Table 1 19 Primary Power Input Item 100 120 V model 220 240 V model Rated power supply voltage 100 to 120 VAC 220 to 240 VAC Input voltage range 90 to 132 VAC 198 to 264 VAC Rated current 0 6A max 0 7 0 3A max 0 4 Rated frequency 50 to 60 Hz Input frequency range 49 5 to 60 5 Hz Dielectric strength 1500 ACVrms for one minute Energy conservation International Energy Star Progr...

Страница 19: ...60950 1 Australia AS NZS CISPR22 Class B 1 2 9 Interface The printer has a USB interface of the following specification Standards Universal Serial Bus Specifications Revision 2 0 Universal Serial Bus Device Class Definition for Printing Devices Version 1 1 printer unit Transfer rate 12 Mbps Full Speed Device Data format NRZI Compatible connector USB Series B Recommended cable length 2 m or less De...

Страница 20: ...l differ depending on the destination Table 1 22 Buttons Button Function Power Turns the power on or off Stop Job cancel Head cleaning Ink Cartridge replacement Color Photo Photo copy Recovery from an error state B W Text B W copy 100 scale with 3 mm margins or Fit to page Recovery from an error state Color Text Color copy 100 scale with 3 mm margins or Fit to page Recovery from an error state Tab...

Страница 21: ...kes a color copy on A4 or Letter sized Plain Paper Color copy Fit to page When pressed for three seconds or longer makes a color copy on A4 or Letter sized Plain Paper enlarging or reducing the original image to fit it to the paper size Recovery from an error state Executes the remaining job when pressed after the error cause is removed B W Text Stop Makes a B W copy on A4 or Letter sized Plain Pa...

Страница 22: ...d reset command remote RS command When printer is initialized the following actions are performed a Initializes printer mechanism b Clears input data buffer c Clears print buffer d Sets default values 2 Operator initialization This printer is initialized when turning the printer power on again within 10 seconds from last power off or printer recognized the INIT signal negative pulse of parallel in...

Страница 23: ...C H A P T E R 2 OPERATINGPRINCIPLES ...

Страница 24: ...case of conventional models Stylus CX4300 CX4400 CX5500 CX5600 DX4400 DX4450 has two motors one is a stepping motor for paper loading feeding mechanism and the other is a DC motor for carriage mechanism Papers are fed from the backside and ejected from the front side of the printer Paper feeding mechanism feeds papers using the LD roller and the retard roller Figure 2 1 Printer Mechanism Outline P...

Страница 25: ...2 2 2 Carriage Mechanism Main components of the carriage mechanism are carriage unit including printhead CR encoder sensor CR motor timing belt and CR scale 2 2 2 1 CR Motor Specifications K 90 K 89 K 3 K 2 K 1 C 29 C 1 M 29 M 1 Y 29 Y 3 Y 2 Y 1 2 822mm 40 360 inch 0 2117mm 1 120 inch Black Color Cyan 29nozzles Magenta 29nozzles Yellow 29nozzles Carriage Moving Direction Paper Loading Direction Ta...

Страница 26: ...tch is released by the CR lock lever 4 After the clutch is released the PF motor rotates clockwise Drive is transmitted to the LD roller and the paper loading operation begins 5 During paper loading operation papers are fed from the ASF unit to inside the printer by the rotating movement of the two cams of the LD roller Cam large releases hopper Cam small releases paper back lever 6 Once a sheet o...

Страница 27: ...otor turns power is always transmitted to the ink system Note The PF Motor rotational direction seen from the left side of the printer 2 2 4 2 Capping Mechanism The Capping mechanism covers the printhead with the cap to prevent the nozzle from increasing viscosity when the printer is in stand by state or when the printer is off Table 2 3 PF Motor Rotational Direction Ink System Mechanism Direction...

Страница 28: ... are arranged on the sensing elements are also placed across the entire width of an original These lenses read the light reflected from the original that is produced by the light source LEDs and pass the information to the sensing elements Compared to conventional CCD method this optical system allows the focal length distance between sensor and image scanned to be shallow Therefore an original to...

Страница 29: ... are processed consecutively Figure 2 5 Scanner Carriage Unit movement The table below shows the specifications for the stepping motor that controls the Scanner Carriage Mechanism Drive of the Scanner Motor is transferred to the Scanner Carriage Unit by the Scanner Timing Belt The Scanner Carriage Unit slides in the secondary scanning direction The Scanner Motor uses a stepping motor and drives us...

Страница 30: ...is then led to the switching circuit and FET QF1 preforms the switching operation By the switching operation of the primary circuit 42VDC is generated and stabilized at the secondary circuit 2 4 2 Main Board The logic circuit of the Main Board is composed of the following Logic line CPU ASIC 4 in 1 Flash ROM and so on Motor control drive circuit CR Motor PF Motor Scanner Motor Head control drive c...

Страница 31: ...ng Principles 31 Figure 2 8 Main Board Block Diagram Data Address Serial Flash U5 RTC U9 SDRAM U4 DAC U10 Motor Driver U7 Motor Driver U6 CPU ASIC U3 Q12 Q13 CN2 CN1 J9 J6 J8 J7 CSIC Board J5 J3 USB J2 J1 Panel Board Power Supply Board CR Motor PF Motor PE Sensor Printhead CR Encoder Sensor CIS Assy Scanner Motor ...

Страница 32: ...C H A P T E R 3 TROUBLESHOOTING ...

Страница 33: ... section describes the LED indications STM3 messages and fault occurrence causes at occurrence of the following errors during any sequence operation e g power on sequence paper feeding loading sequence ink sucking sequence NOTE The STM3 windows shown in the table in the following pages are the ones of Stylus CX4300 CX4400 CX5500 CX5600 DX4400 DX4450 however other models show almost the same displa...

Страница 34: ... error is indicated on the STM3 you can continue printing until I C becomes Replace Ink Cartridge condition However the Head Cleaning operation cannot be done so that the remaining ink is low condition This error is detected at resending of paper for double sided printing when paper length is determined to be other than default value This error is detected when the top of a paper is not detected w...

Страница 35: ...ng operation without firing the ink This error is detected when data from CSIC cannot be read normally or when data cannot be written to CSIC This error is detected when An unsupported ink cartridge has been installed An ink cartridge with a different destination has been installed This error is detected when the PE Sensor cannot properly detect the paper bottom edge during feeding of paper Refere...

Страница 36: ...echanism Indications Power On Blink Ink On Blink Paper On Blink Status monitor 3 message Fault Occurrence Cause This error is detected when the Waste Ink Counter exceeds the preset counter value This error is detected when it is determined that the printer cannot operate properly CR error PF error etc Reference Page 5 2 3 Waste Ink Pad Counter p XXX T B D Table 3 12 Check point for fatal error acc...

Страница 37: ...r according to each phenomenon Occurrence timing CR position Detailed phenomenon Defective unit part name Check point Remedy Power on Anywhere When turning on the power the SPC does not operate at all Panel Unit 1 Check if the Panel Board is not damaged 1 Replace the Panel Board with new one Power on Anywhere When turning on the power the SPC does not operate at all PS Board Unit 1 Check if the PS...

Страница 38: ...m the initial ink charge and an error is indicated with LEDs and STM3 Ink Cartridge 1 Check if the Ink Cartridge can be used by installing it to other SPC 1 Replace the Ink Cartridge with a brand new one Main Board 1 Check if an incorrect data is not stored into the address of the EEPROM on the Main Board 1 Set the proper destination by using Adjustment Program Power on Anywhere The SPC does not p...

Страница 39: ...re printed the paper was ejected but an error is displayed ASF Unit 1 Check if the Extension Spring Retard operates correctly in the paper loading sequence 1 Set the Extension Spring Retard between the Retard Roller Unit and the ASF Frame 2 Check if the Paper Back Lever operates correctly in the paper loading sequence 2 Set the Torsion Spring 6 45 between the ASF Frame and the Paper Back Lever Ext...

Страница 40: ...load the paper from the Printer driver The micro pearl on the LD Roller surface is removed To remove severe smear staple a cloth moistened with alcohol to a post card and clean the roller in the same manner If the problem is not solved replace the LD Roller with new one Operation The Hopper does not operate during the paper loading sequence although the LD Roller rotates to load paper from the ASF...

Страница 41: ...e of the Clutch does not come off from the guide pin of the LD Roller Shaft 2 Reassemble the positioning hole of the Clutch on the guide pin of the LD Roller Shaft 3 Check if the Clutch tooth is not damaged 3 Replace the ASF Unit with a new one 4 Check if the Clutch is not damaged 4 Replace the ASF Unit with a new one Table 3 9 Check point for paper out error according to each phenomenon Occurrenc...

Страница 42: ...ace the ASF Unit with a new one Operation The LD Roller is not set to the ASF home position and paper is always loaded from the ASF Unit during the paper loading sequence ASF Unit 1 Check if the tip of the Change Lever is not damaged 1 Replace the ASF Unit with a new one Table 3 9 Check point for paper out error according to each phenomenon Occurrence timing CR position Detailed phenomenon Defecti...

Страница 43: ...d Ink Cartridge 1 Check if Ink Cartridge is properly installed 1 Install the Ink Cartridge properly 2 Check if the Memory Chip is not disconnected or not chipped 2 Replace the Ink Cartridge with a new one CSIC Board 1 Check if the Head FFC is connected to connector on the CSIC Board 1 Connect the Head FFC to connector on the CSIC Board 2 Check if the CSIC Board is not damaged 2 Replace the Carriag...

Страница 44: ...ading paper in the paper loading sequence ASF Unit 1 Check if the ASF Unit is properly installed 1 Install the ASF Unit properly 2 Check if the Paper Back Lever operates correctly in the paper loading sequence 2 Set the Torsion Spring 6 45 between the ASF Frame and the Paper Back Lever Paper Guide Upper Unit 1 Check if the Torsion Spring 0 22 is properly installed 1 Set the Torsion Spring 0 22 bet...

Страница 45: ...ween the Holder Shaft and the PE Sensor Lever Operation The leading edge of paper does not go through between the EJ Roller Unit and the Star Wheel EJ Frame Assy 1 Check if the EJ Frame Assy is correctly assembled 1 Reassemble the EJ Frame Assy correctly The Carriage Unit can move to home position even if the Torsion Spring 0 22 comes off However the PE Sensor Lever keeps the high signal condition...

Страница 46: ...th a new one The leading edge of paper is not loaded to the PF Roller Unit Paper Guide Upper Unit 1 Check if the Paper Guide Upper Unit is correctly assembled 1 Reassemble the Paper Guide Upper Unit to the Main Frame correctly In case that the paper jam error occurs in each operation the jammed paper contacts the nozzle surface of the Print Head and the Print Head may be damaged Table 3 11 Check p...

Страница 47: ...t initialize when the power is turned on Scanner Motor 1 Check if the Scanner Motor Connector Cable is connected to J6 on the Main Board 1 Connect the Scanner Motor Connector Cable to J6 on the Main Board 2 Check if the coil resistance of the Scanner Motor is about 37Ω T B D by using the tester refer to Table 3 1 2 Replace the Scanner Motor with a new one 3 Check if the Scanner Motor Connector Cab...

Страница 48: ... Scanner FFC to J5 on the Main Board 2 Check if the Scanner FFC is not damaged 2 Replace the Scanner FFC with a new one Power on Anywhere The Scanner Unit does not initialize when the power is turned on CIS Assy 1 Check if the CIS Assy is not damaged 1 Replace the CIS Assy with a new one Table 3 12 Check point for fatal error according to each phenomenon Occurrence timing CR position Detailed phen...

Страница 49: ...wer the PF Motor does not operate at all PF Motor 1 Check if the PF Motor Connector Cable is connected to J8 on the Main Board 1 Connect the PF Motor Connector Cable to J8 on the Main Board 2 Check if the coil resistance of the PF Motor is about 4 3Ω by using the tester refer to Table 3 1 2 Replace the PF Motor with a new one 3 Check if the PF Motor Connector Cable is not damaged 3 Replace the PF ...

Страница 50: ... Motor Connector Cable is not damaged 3 Replace the PF Motor with a new one 4 Check if the PF Motor operates 4 Replace the PF Motor with a new one ASF Unit 1 Check if the Compression Spring 2 36 does not come off in the Change Lever 1 Replace the ASF Unit with a new one Power on Anywhere The Carriage Unit collides with the Guide Upper Unit when power is turned on Paper Guide Upper Unit 1 Check if ...

Страница 51: ...he CR Scale is not damaged or contaminated 2 Replace the CR Scale with a new one or clean it completely CR Encoder Board 1 Check if the Encoder FFC is connected to the CR Encoder Board 1 Connect the Encoder FFC to the CR Encoder Board 2 Check if the Encoder FFC is not damaged 2 Replace the Encoder FFC with a new one 3 Check if the CR Encoder Board is not damaged 3 Replace the CR Encoder Board with...

Страница 52: ...able to J9 on the Main Board 2 Check if the PE Sensor Connector Cable is not damaged 2 Replace the PE Sensor with a new one 3 Check if the PE Sensor is not damaged 3 Replace the PE Sensor with a new one Operation Anywhere The Carriage Unit climbs over the Slider Lock Lever set to the wiping position and the Carriage Unit collides to its lever Cap Assy Ink System 1 Check if the Cap Assy is installe...

Страница 53: ...R position Detailed phenomenon Defective unit part name Check point Remedy Operation The LEDs and STM3 are not indicating error conditions But multiple sheets of paper are always loaded from the ASF Unit ASF Unit 1 Check if the Extension Spring Retard operates correctly in the paper loading sequence 1 Set the Extension Spring Retard between the Retard Roller Unit and the ASF Frame 2 Check if the P...

Страница 54: ...arriage Unit collides to the Paper Guide Upper Unit during each operation Paper Guide Upper Unit 1 Check if the Paper Guide Upper Unit is attached securely check if it interferes with the Carriage Unit 1 Reassemble the Paper Guide Upper to the Main Frame Table 3 15 Check point for poor scanned image quality Scanned image Quality State Detailed phenomenon Defective unit part name Check point Remedy...

Страница 55: ...rectly mounted on the Cap Unit 2 Replace the Ink System Unit with a new one Ink is ejected to the Cap from the Print Head but the SPC does not recover from the error after cleaning or ink change Print Head 1 Check if it returns to normal by performing CL operation or replacing the Ink Cartridge 1 Perform CL operation and the Ink Cartridge replacement specified times If it doesn t work change the P...

Страница 56: ...ved replace the CR Motor with a new one Adjustment 1 For printing in the Bi D mode check if Bi D Adjustment has been performed properly 1 Perform Bi D Adjustment to eliminate displacements between the upper and lower rules Refer to Chapter 5 ADJUSTMENT p 106 Print Head 1 Check if each segment is printed correctly in the Nozzle Check Pattern 1 Perform Head Cleaning and check the Nozzle Check Patter...

Страница 57: ...he surface of the PF Roller Unit 1 Clean the surface of the PF Roller Unit carefully with the soft cloth 2 Check if the PF Roller Unit is not damaged 2 Replace the PF Roller Unit with a new one The Star wheel mark against the CR movement direction EJ Frame Assy 1 Check if the Star Wheel Holder does not come off 1 Reassemble the Star Wheel Holder correctly 2 Check if the surface of the EJ Frame Ass...

Страница 58: ... the problem is not solved replace the LD Roller with a new one Ink stain of paper Ink stain occurs at the back top end or bottom end of the print paper Base Frame 1 Check if the Base Frame is free of ink stain especially its ribs near the Porous Pad Paper Guide Front 1 Clean the Base Frame with a soft cloth 2 Check if heaps of ink are not formed on Porous Pad Paper Guide Front on the Base Frame 2...

Страница 59: ...ean the Print Head Cover carefully with a soft cloth Paper Guide Upper Unit 1 Check if the Paper Guide Upper Unit does not have the ink stain 1 Clean the Paper Guide Upper Unit with a soft cloth EJ Frame Assy 1 Check if the Star Wheel Rollers does not have the ink stain 1 Clean the Star Wheel Rollers with a soft cloth Table 3 16 Check point for the poor printing quality Print Quality State Detaile...

Страница 60: ...C H A P T E R 4 DISASSEMBLY ASSEMBLY ...

Страница 61: ...600 DX4400 DX4450 4 1 2 Tools Use only specified tools to avoid damaging the printer W A R N I N G Disconnect the power cable before disassembling or assembling the printer If you need to work on the printer with power applied strictly follow the instructions in this manual Always wear gloves for disassembly and reassembly to avoid injury from sharp metal edges To protect sensitive microprocessors...

Страница 62: ...any obstructions Checked Not necessary Scanner unit Mechanism Is the glass surface free of dirt Checked Not necessary Is the carriage path free of any obstructions Checked Not necessary Checked Not necessary Scanner unit Carriage mechanism Does it move smoothly Checked Not necessary Does it move together with the scanner unit Checked Not necessary Is there any abnormal noise during its operation C...

Страница 63: ... p75 3 Move the CR Unit to the center slightly until it comes in contact with the Carriage Lock 4 Attach the center portion of a strong tape to the Cartridge Cover located on the carriage 5 Attach the right portion of the strong tape to the Upper Housing 6 Attach the left portion of the strong tape to the left side of the carriage 7 Check to see that the CR Unit can move slightly between the Home ...

Страница 64: ...R Motor p80 4 6 9 Main Frame p87 Ink System Cap Assy p83 4 6 7 Power Supply Board p85 4 6 8 EJ Frame Assy EJ Roller p86 START 4 6 12 PF Roller p93 4 6 13 PF Motor p94 4 6 11 Waste Ink Pads p92 Ink System Pump Assy p83 4 6 6 Ink System removal p83 The Shortest Way to Remove the Main Frame The parts units shown in yellow shaded box can be removed faster than following the flowchart See the section b...

Страница 65: ...upport Assy from the Lower Case Figure 4 3 Removing Paper Support Assy 4 3 2 Stacker Assy Part Unit that should be removed before removing Stacker Assy None Removal Procedure 1 Open the Stacker Assy 2 Press in the white pin on the left with a precision screwdriver or a similar tool to release the left side of the Stacker Assy Then remove the Stacker Assy pulling out its pin on the right from the L...

Страница 66: ...nit 4 Press the upper left and right sides of the Support Arm inward to release its upper left and right guide pins from the Scanner Unit 5 Remove the Support Arm releasing its lower left and right guide pins from the guide rails on the Middle Case Figure 4 7 Removing Support Arm C A U T I O N When disassembling assembling the Scanner Unit after removing the Document Cover make sure to protect the...

Страница 67: ...Removing Screws securing Middle Case rear side 2 While pushing the Lower Case with your thumb in the direction of the arrow pull the Scanner Unit toward you to release it from the following pin and hook The left guide pin x1 on the Lower Case The hook x1 on the Middle Case Figure 4 11 Removing Scanner Unit Middle Case Panel Unit 1 3 Push the Scanner in the direction of the arrow to release it from...

Страница 68: ...it as shown and slightly move them frontward to disengage the left front tab of the Middle Case Figure 4 15 Removing Scanner Unit Middle Case Panel Unit 5 7 Disconnect the following cables x2 and FFC x1 from the Main Board Assy and remove the Middle Case the Scanner Unit and the Panel Unit as a set from the Lower Case J6 Scanner Motor cable J5 Scanner FFC a ferrite core for the FFC is attached to ...

Страница 69: ...o remove it releasing the other tabs x5 and the hook Figure 4 18 Removing Panel Unit 1 2 Release the Panel Unit cable from the tabs x4 on the backside of the Middle Case 3 Pull out the Panel Unit cable through the cutout of the Middle Case to remove the Panel Unit from the Middle Case Figure 4 19 Removing Panel Unit 2 Scanner Unit Cutout Middle Case C A U T I O N The Panel Unit cable is fixed bein...

Страница 70: ...re 4 27 for the connector layout on the Main Board Scanner Motor cable J6 connector on the Main Board Route through the hooks x2 as shown Scanner FFC J5 connector on the Main Board Put it through the ferrite core and attach the core to the shield plate with double sided tape Make sure to put the core under the hooks x2 and on top of the rib x1 Panel Board J3 connector on the Main Board Figure 4 22...

Страница 71: ...3 Release the Grounding Spring from the hooks x2 and remove it 4 Remove the screws x2 that secure the Shield Plate and remove it from the Lower Case Figure 4 24 Tab Position on Lower Case 5 The tabs x6 on the Lower Case shown below are securing the Printer Mechanism Push outward on the left right and front sides of the Lower Case to widen it and release the Printer Mechanism from the tabs x6 Figur...

Страница 72: ...emoving Printer Mechanism 72 6 Carefully lift up the front end of the Printer Mechanism to pull the ASF Unit sections out from the Lower Case and remove the Printer Mechanism Figure 4 26 Removing Printer Mechanism 2 Lower Case ASF Unit section left ASF Unit section right Printer Mechanism ...

Страница 73: ...1 Head FFC CN2 Head FFC Backside J1 Power Supply Board cable J7 CR Motor cable J8 PF Motor cable J9 PE Sensor cable Figure 4 27 Connector Layout of Main Board 2 Remove the screws x4 and remove the Main Board Assy Figure 4 28 Removing Main Board 1 3 Remove the Grounding Plate Clip from the Main Board Assy 4 Remove the Shield Plate from the Main Board Figure 4 29 Removing Main Board 2 J9 J7 CN1 CN2 ...

Страница 74: ...lacement 2 Destination Setting only after replacement 3 USB ID Input only after replacement 4 Waste Ink Pad Counter Ink Pads must be replaced 5 Head ID Input only after replacement 6 TOP Margin Adjustment only after replacement 7 First Dot Adjustment only after replacement 8 Head Angular Adjustment only after replacement 9 Bi D Adjustment only after replacement 10 PF Band Adjustment only after rep...

Страница 75: ...nlock the Carriage Lock with a flathead screwdriver or a similar tool and move the CR Unit to the center of the printer Figure 4 30 Unlocking Carriage Lock and Moving CR Unit to the Center 2 Open the Cartridge Cover and remove all the Ink Cartridges from the CR Unit 3 Release the FFCs from the tabs Figure 4 31 Releasing FFCs 4 Disconnect the Head FFCs x2 that are connected to the CSIC Board and th...

Страница 76: ...de of the Sub FFC Guide from the slit and remove the Sub FFC Guide pulling out the guide pin x1 from the notch Figure 4 34 Removing Sub FFC Guide 7 Remove the screw x3 and lift up the Printhead with a longnose pliers Figure 4 35 Removing Printhead 1 Tab 1 Tab 2 Holder Board Assy Tab 1 Holder Board Assy Tab 2 Tab 1 CR Unit Tab 2 CR Unit C A U T I O N Do not touch or damage the nozzles or the ink su...

Страница 77: ...ssy is properly installed in the right position The assy is likely to be installed in the wrong position The Ink Position Label is not included in the Cartridge Cover When replacing the Cartridge Cover order the Ink Position Label separately and attach the label as shown below Figure 4 38 Installing Ink Position Label A D J U S T M E N T R E Q U I R E D After removing replacing the Printhead perfo...

Страница 78: ... Compression Spring 1 94 Hopper Bearing Guide Pin B Guide Pin A Before installing the Hopper be sure to adjust the position of the LD Roller following the steps below 1 Unlock the Carriage Lock See 4 6 1 Printhead p75 2 Move the CR Unit to the center of the printer 3 Adjust the position of LD Roller turning the EJ Roller clockwise LD Roller position the flat part facing inward Paper Back Lever pos...

Страница 79: ...ees as shown in the figure and remove the scale from the Main Frame Figure 4 42 Removing CR Scale 3 C A U T I O N Pay attention to the following instructions Do not touch the CR Scale with bare hands Do not damage the CR Scale Do not stretch Extension Spring 3 289 too much CR Scale Tab CR Scale Slit of CR Encoder Sensor When installing the CR Scale pay attention to the following instructions The C...

Страница 80: ... figure and release the Timing Belt from the pinion gear of the CR Motor 4 Remove the screws x2 and remove the CR Motor from the Main Frame Figure 4 44 Releasing Timing Belt and Removing CR Motor C A U T I O N After releasing the Timing Belt temporarily secure the belt to the Cartridge Cover with a tape or the like so as not to allow the grease to come in contact with the Timing Belt Contaminating...

Страница 81: ... Belt from the groove of the CR Unit Figure 4 46 Removing Timing Belt C A U T I O N After releasing the Timing Belt temporarily secure the belt to the Cartridge Cover with a tape or the like so as not to allow the grease to come in contact with the Timing Belt Contaminating the belt with grease can result in malfunction of the printer CR Scale Holder CR Unit C B S 3X6 Torque 8 1Kgf cm Groove of CR...

Страница 82: ... Printer Mechanism 82 From the previous page 3 Fold back the Head FFC and secure it with Rib A again Figure 4 49 Installing Head FFC 3 4 Connect the Head FFC to CN1 CN2 of the Main Board see 4 5 1 Main Board p73 5 Arrange FFC1 on top of FFC2 Figure 4 50 Installing Head FFC 4 Head FFC FFC1 FFC2 CN1 CN2 ...

Страница 83: ... the CR Unit Timing Belt p81 6 Remove the Ink System Cap Assy p83 7 Remove the Main Frame p87 8 Insert a flathead screwdriver between the tab 1 and the rib and release the tab 1 while pushing it in the direction of the arrow 9 Release the tab 2 in the direction of the arrow Figure 4 53 Removing Ink System 2 C A U T I O N Do not touch or damage the Sealing Rubber or the Head Cleaner when performing...

Страница 84: ...or of Waste Ink Pad Ink Tube Passage Ink Tube Ink Tube Paper Back Lever When installing the Cap Assy follow the steps described below 1 Arrange the tube between the ribs as shown in the figure below 2 Place the Cap Assy and match the tabs x2 and lock them refer to Figure 4 51 3 Attach the Ink Tube refer to Figure 4 52 Figure 4 57 Installing Ink System When installing the Pump Assy follow the steps...

Страница 85: ...x1 and remove the Power Supply Board in the direction of the arrow Figure 4 60 Removing Power Supply Board 2 3 Pull out the connector cable through the hole of the Frame Base Figure 4 61 Removing Power Supply Board 3 J1 Power Supply Board C B P 3X6 Torque 6 1Kgf cm C A U T I O N Do not turn the Power Supply Board upside down as shown in the figure below This figure is only used to show the locatio...

Страница 86: ...6 and push the gear in the direction of the arrow and remove the Spur Gear 59 6 Figure 4 64 Removing EJ Roller 1 4 Pull the bearing slightly Arrow and remove the EJ Roller Arrow Figure 4 65 Removing EJ Roller 2 C H E C K P O I N T When installing Spur Gear 59 6 and the EJ Roller be sure to install new ones These parts cannot be reused EJ Frame Assy Grounding Spring C B P 3X8 Torque 6 1Kgf cm A D J...

Страница 87: ...ing holes Figure 4 66 Removing Shield Plate L 2 Remove the PF Roller Grounding Spring 3 Remove the Driven Pulley Holder from the notch of the Main Frame Figure 4 67 Removing Grounding Spring and Driven Pulley Holder 4 Remove the Extension Springs x3 from the hooks of the Main Frame and the guide pins of the Upper Paper Guide Figure 4 68 Removing Extension Springs 5 Remove the screws x4 that secure...

Страница 88: ...ector from the tabs x4 Figure 4 71 Disconnecting Cable 8 Remove the screw x1 and remove LD Shaft Holder Assy Figure 4 72 Removing LD Shaft Holder Assy 9 Release the tab x1 and remove the PE Detector Assy Figure 4 73 Removing PE Detector Assy 10 Release the tabs x6 and remove the Upper Paper Guide Figure 4 74 Removing Upper Paper Guide LD Holder Shaft Assy Upper Paper Guide Main Frame LD Roller Tab...

Страница 89: ...n Frame to the Frame Base with screws be sure to perform the tightening in the order of the numbers indicated in Figure 4 69 p 87 When installing the Shield Plate L be cautious not to damage the Spur Gears of the PF Roller and the EJ Roller Install the Grounding Spring attaching the ends to the parts as shown in the figure below Figure 4 77 Installing Grounding Spring A D J U S T M E N T R E Q U I...

Страница 90: ... upwards 2 Insert a tweezer or a screwdriver into the slot as shown in the figure to hold the Paper Back Lever outwards 3 Move the Carriage Lock Lever outwards Figure 4 78 Preparation 1 LD Roller Removal 4 Release the tabs x2 of the LD Roller shaft from the bearing and loosen the shaft Figure 4 79 Removing LD Roller 1 5 Pull out the LD Roller shaft from the frame of the ASF Unit and remove the LD ...

Страница 91: ... Roller as shown below Figure 4 82 Assembling LD Roller 1 1 Match the guide pin of the LD Roller Shaft with the positioning hole of the Clutch 2 Attach the tips of the Extension Spring 0 143 to the tab of the LD Roller shaft and the tab of the Clutch 3 Attach the cam side of the Spur Gear 36 8 to the hole of the Clutch Figure 4 83 Assembling LD Roller 2 A D J U S T M E N T R E Q U I R E D When the...

Страница 92: ...r When installing the Waste Ink Pads be sure to insert ribs and tabs of the Frame Base into the slots and notches of the pads When installing in the section refer to Figure 4 84 be sure to match the positioning tabs and press until it clicks to secure it in the right position When installing the Waste Ink Pads on the section be sure to lay the six parts one on top of another in the order shown in ...

Страница 93: ...bearing slightly Arrow and remove the PF Roller Assy Arrow Figure 4 90 Removing PF Roller 3 C A U T I O N Do not touch or damage the coated area of the PF Roller Assy when performing the following work When installing the Spur Gear 13 5 be sure to install a new one The Spur Gear 13 5 cannot be reused C A U T I O N When removing prying the Spur Gear 13 5 with a flathead screw driver or the like do ...

Страница 94: ... Frame Assy Print Head CR Scale CR Motor CR Unit Timing Belt Ink System PF Roller Removal procedure 1 Detach the ferrite core from the Frame Base Figure 4 91 Removing PF Motor 1 2 Remove the screws x3 and remove the PF Motor Figure 4 92 Removing PF Motor 2 Ferrite Core Frame Base PF Motor C B S 3X8 Torque 6 1Kgf cm When installing the PF Motor arrange the cable into the slit and the hook then plac...

Страница 95: ...er removing the Main Frame treat and place the Main Frame with great care while following the next instructions Be careful not to deform the Main Frame Do not touch or damage the nozzles or the ink supply needles of the Printhead when placing the Main Frame Be careful not to stick the grease around the area especially not to allow the grease to come in contact with the Timing Belt which can result...

Страница 96: ...and remove the Upper Scanner Housing Figure 4 96 Removing Upper Scanner Housing C A U T I O N Following work should be performed in a room where there is a little dust A clean room or a clean bench would be preferable Do not damage the document glass on the Upper Scanner Housing Match the notch of the Upper Scanner Housing with the tab x1 of the Lower Scanner Housing C B P 3x10 F Zn 4 0 5kgfcm Upp...

Страница 97: ...IS Carrier Assy from the Timing Belt and the Guide Rail of the Lower Scanner Housing Figure 4 98 Removing CIS Carrier Assy 4 Shift the Ferrite Core in the direction of the arrow to release it from the tabs x2 and remove the Scanner FFC from the Lower Scanner Housing Figure 4 99 Removing Scanner FFC C A U T I O N Do not scratch the Rod Lens Array when removing the CIS Assy Rod Lens Array CIS Carrie...

Страница 98: ...CIS Carrier Assy refer to Figure 4 98 When installing the CIS Assy to the CIS Carrier Assy connect the Scanner FFC and route the FFC under the tab of the CIS Assy refer to Figure 4 97 When installing the CIS Assy to the CIS Carrier Assy match the tab and the notch as shown below Figure 4 100 Installing CIS Assy to CIS Carrier Assy A D J U S T M E N T R E Q U I R E D When the CIS Carrier Assy is re...

Страница 99: ...iven Pulley 5 Release the Scanner Motor cable from the tabs x6 of the Lower Scanner Housing 6 Remove the screws x3 that secure the Scanner Motor Unit and remove the Scanner Motor Unit Figure 4 102 Removing Scanner Motor Unit CIS Carrier Assy Timing Belt Pulley Rib Driven Pulley Spring Driven Pulley Polyslider Washer Route the Scanner Motor Connector Cable as shown in the figure refer to Figure 4 1...

Страница 100: ...C H A P T E R 5 ADJUSTMENT ...

Страница 101: ...e the adjustment program to print the Top margin adjustment pattern measure the distance from Paper top edge to the TOP line and adjust so that it becomes within 3 1mm Adjustment Program Rule First dot adjustment Correct the print timing by the software to make the start printing position of the main scan direction to the value you wish Use the adjustment program to print the adjustment pattern an...

Страница 102: ...Waste ink pad counter for replaced parts after maintenance error occurred Also when counter full is close pad exchange counter initialization may be executed to prevent re fixing After exchanging the Waste ink pad initialize the counter by the adjustment program Adjustment Program Table 5 3 Additional Functions T B D Function Item Purpose Method Outline Tool Additional Functions Print check patter...

Страница 103: ...justment Head Angular adjustment Bi D adjustment PF band adjustment CR heat protection control Hopper Removal Required Required Replacement Required Required Main Frame Removal Required Required Required Required Required Replacement Required Required Required Required Required Required Main Board Removal Replacement Required Replacement EEPROM Copy NG Required Ink Pads must be replaced Required R...

Страница 104: ...uired Required Required Required Replacement Required Required Required Required Required Power Supply Board Removal Replacement Required EJ Frame Assy Removal Required Required Required Required Replacement Required Required Required Required Table 5 4 Adjustment Items Priority 1 2 3 4 5 6 7 8 9 10 11 EEPROM data copy Initial setting Waste ink pad counter Ink charge Head ID input TOP margin adjus...

Страница 105: ...ustment methods 5 2 1 Head angular adjustment Patterns are printed as shown below Figure 5 1 Head angular adjustment Pattern Printing Judgment method Find the pattern with least vertical displacement between 3 and 3 and enter the value of that pattern Corrective action If the NG on both ends are the ones with least vertical displacement reassemble replace the Head and carry out the adjustment agai...

Страница 106: ... 1 2 and adjust the deviation Each adjustment value shifts the line by 0 85 mm 5 2 3 Bi D Adjustment 8 types of the pattern below each dot size ECO VSD1 VSD2 VSD3 x color Black Color are printed Figure 5 3 Bi D adjustment Pattern Printing Judgment method Find the pattern with no gaps or overleaps of the left and right pattern and enter the value of that pattern Corrective action If an appropriate ...

Страница 107: ...from the left edge Corrective action If the an appropriate pattern is not printed reassemble the parts that was removed replaced and carry out the adjustment again 5 2 5 PF Band Adjustment Patterns are printed as shown below Figure 5 5 PF Band Adjustment Pattern Judgment method Select the pattern with no gap or overleap Corrective action If the an appropriate pattern is not printed reassemble the ...

Страница 108: ...C H A P T E R 6 MAINTENANCE ...

Страница 109: ...r utility and the Adjustment program In case that the cleaning sequence is performed by the control panel operation confirm that the printer is in stand by state the Power LED is lighting and hold down the Stop button on the control panel for more than 3 seconds Then the printer starts the cleaning sequence the Power LED blinks during this sequence In case that you select and perform the manual cl...

Страница 110: ...nd the amount of the waste ink is stored as the waste ink counter into the EEPROM on the Main board Due to this when the waste ink max counter has reached the limit 9000 of the absorbing capability of the Waste drain ink pad the Maintenance call error is indicated on Status monitor 3 as following figure But waste ink max counter is changed by usage therefore waste ink max counter is not necessaril...

Страница 111: ...cified in this manual Use of different types of oil or grease may damage the component or give bad influence on the printer function Never apply larger amount of grease than specified in this manual Type Name EPSON code Supplier Grease TC 55E 1400725 EPSON Grease UD 321 1428216 EPSON Grease G 58 1432035 EPSON Grease G 71 1304682 EPSON Grease G 74 1409257 EPSON Lubrication Point Guide Rail of the L...

Страница 112: ...r gap if yes use wiper to clean Driven Pulley Glass Window Upper Scanner Housing Lubrication Point Blade A Blade B of LD Roller Lubrication Type G 71 Lubrication Amount φ1mm x along edges L Remarks Use an injector to apply G 71 G 71 must not be adhered to other parts Rub off excess G 71 with a cotton bud if necessary Lubrication Point Blade A Blade B of LD Roller Lubrication Type G 71 Lubrication ...

Страница 113: ...njector to apply G 71 G 71 must not be adhered to other parts Rub off excess G 71 with a cotton bud if necessary Lubrication Point Bearing A Lower Housing Bearing C Bearing B Lubrication Point Lubrication Point Lubrication Point Shaft and Groove of PF Roller Lubrication Type G 71 Lubrication Point φ1 mm x around shaft x 2 Remarks Use an injector to apply G 71 G 71 must not be adhered to other part...

Страница 114: ... to other parts Rotate EJ Roller when lubricate it with G 74 Lubrication Points x 19 355 mm 2 1 Main Frame Lubrication Point Upper rib x 1 Area 1 in Figure 6 15 Lubrication Point G 71 Lubrication Amount φ 1 mm x 355 mm along upper rib See Figure 6 15 Remarks Use an injector to apply G 71 G 71 must not be adhered to other parts Rub off excess G 71 with a cotton bud if necessary Lubrication Point Lo...

Страница 115: ...C H A P T E R 7 APPENDIX ...

Страница 116: ...ensor CSIC Board Table 7 1 Connector Summary for Main Board Connector Function Table to refer to CN1 For connection with the Printhead Table 7 2 p 117 CN2 For connection with the CR Encoder Sensor and the CSIC Board Table 7 3 p 117 J1 For connection with the Power Supply Board Table 7 4 p 117 J2 For connection with the USB interface The printer has a USB interface of the following specification p ...

Страница 117: ... supply for nozzle selector 20 COM O Head drive pulse trapezoid waveform 21 GND2 Ground Table 7 3 CN2 CR Encoder Sensor and CSIC Board Pin Signal Name I O Function 1 ENCA I Encoder feed back signal ch A 2 EVDD O Power for CR Encoder 3 ENCB I Encoder feed back signal ch B 4 GND Ground 5 NC Not connected 6 CSCK I O Clock signal for CSIC read write 7 CVDD O Power supply for CSIC 8 CGND Ground 9 CRST ...

Страница 118: ...er 3 3V 7 TR O Start pulse 8 LED CA LED Common Anode 9 LED B O LED cathode Blue 10 LED G O LED cathode Green 11 LED R O LED cathode Red 12 GND Ground For LED Shielding Table 7 7 J6 Scanner Motor Pin Signal Name I O Function 1 SMOUT1A O Phase drive signal 1A 2 SMOUT1B O Phase drive signal 1B 3 SMOUT2A O Phase drive signal 2A 4 SMOUT2B O Phase drive signal 2B Table 7 8 J7 CR Motor Pin Signal Name I ...

Страница 119: ... CX5500 CX5600 DX4400 DX4450 Revision A APPENDIX Exploded Diagram Parts List 119 7 2 Exploded Diagram Parts List This manual does not provide exploded diagrams or parts list For the information see SPI Service Parts Information ...

Страница 120: ...0 CX4400 CX5500 CX5600 DX4400 DX4450 Revision A APPENDIX Electrical Circuits 120 7 3 Electrical Circuits The electric circuit diagrams below are shown at the following pages Main control circuit board Panel circuit board ...

Страница 121: ......

Страница 122: ......

Страница 123: ......

Страница 124: ......

Страница 125: ......

Страница 126: ......

Страница 127: ......

Страница 128: ......

Страница 129: ......

Отзывы: